
After Larry Ellison performed his famous U-turn on all things cloud (he does make some great points but it’s still funny ?), Oracle Cloud became a thing. So let’s learn a little about how you use it. To do that you need to sign up for an Oracle Cloud account here. To sign up you will need a valid email address and an electronic form of payment. Don’t worry, Oracle won’t charge you anything unless you upgrade to a paid account at the end of the 30 day trial. If you don’t upgrade, you are not charged and you’re automatically switched to Oracle’s Always Free offering. Which is still decent and definitely worth having. Plus you get access to My Oracle Support in a query only capacity. Not bad!
There are many things you can do in Oracle Cloud. In this post we’ll focus on the things you’ll most likely want to do with Autonomous Database.
Quick links to all the tasks:
Task #1: Create An Autonomous Database.
Task #2: Connect To An Autonomous Database.
Task #2a: Configure Oracle Net.
Task #2b: Connect Via SQL*Plus.
Task #2c: Connect Via SQL Developer.
Task #3: Migrate Data To An Autonomous Database.
Task #3a: Data Pump Export (On Premises).
Task #3b: Create Object Storage & Upload Files (Oracle Cloud) .
Task #3c: Data Pump Import (Oracle Cloud) .
Task #4: Migrate An APEX Application To An Autonomous Database (coming soon).
Task #1: Create An Autonomous Database.
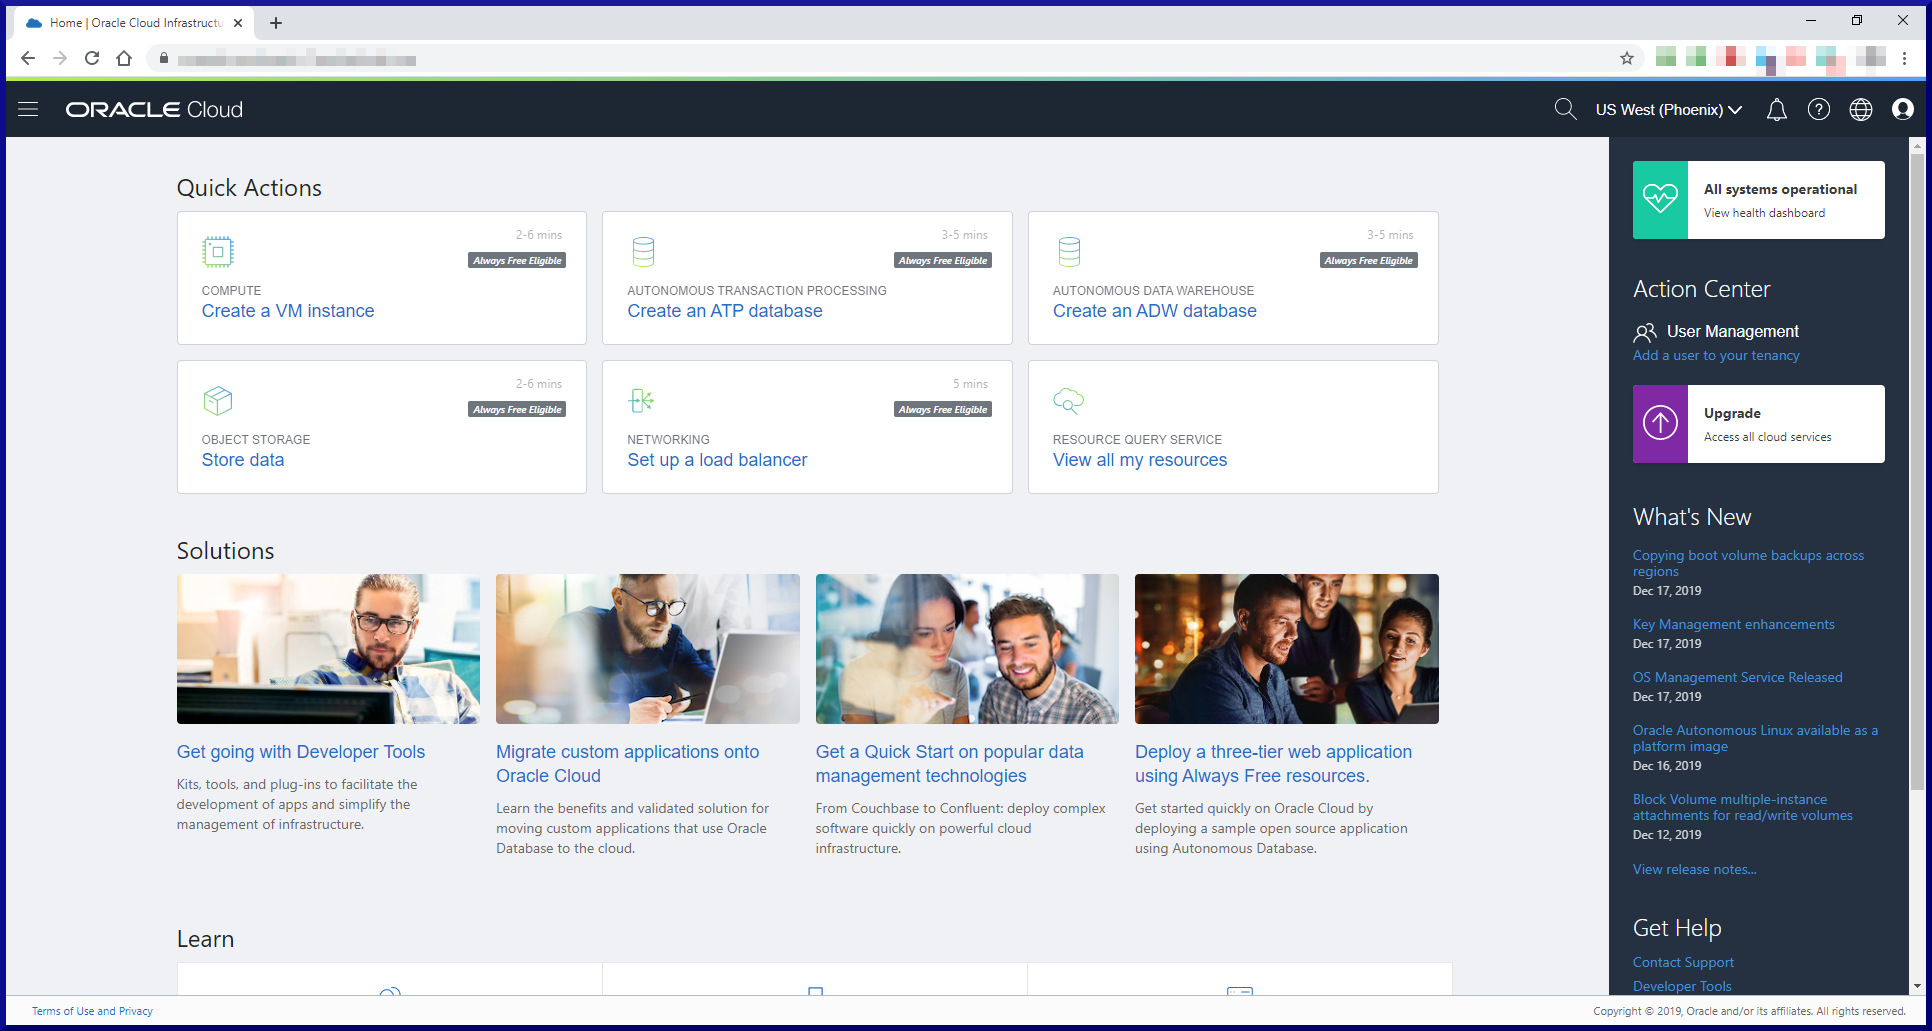
Once you’ve signed up and successfully logged into your Oracle Cloud account, you’ll see the Oracle Cloud console screen:
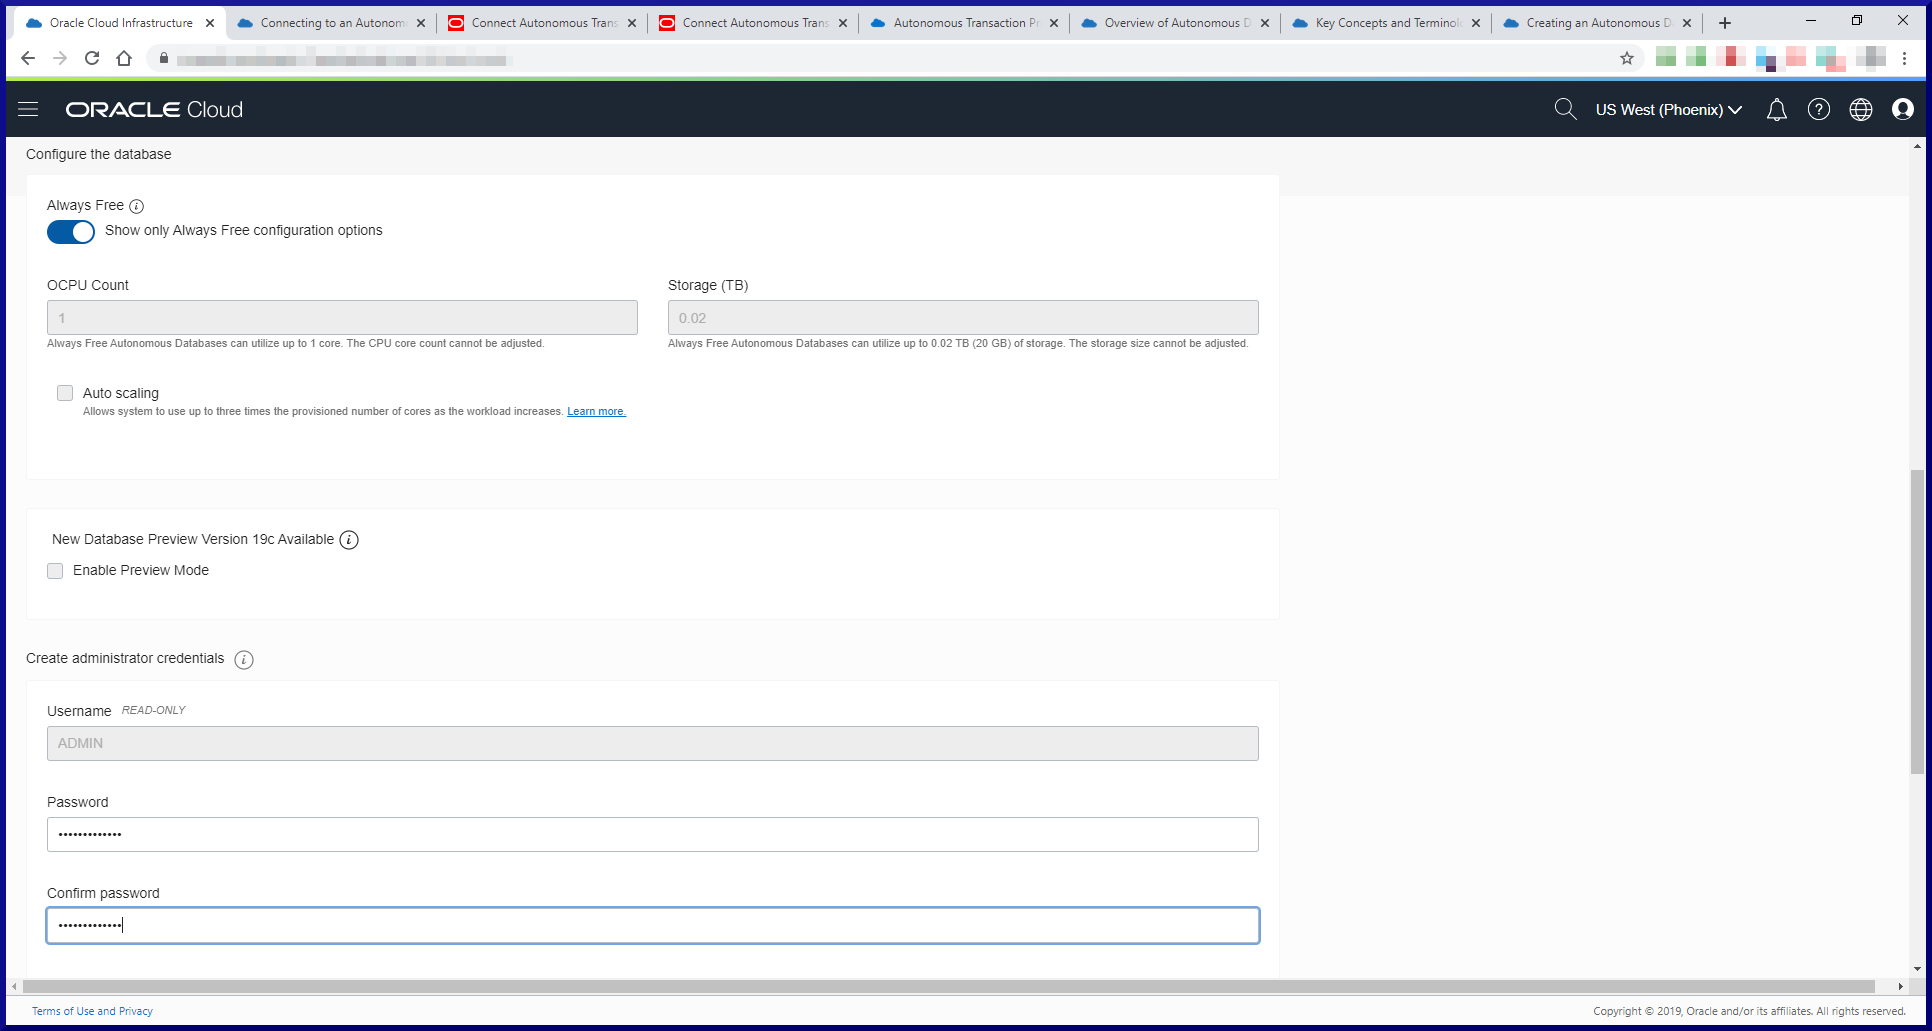
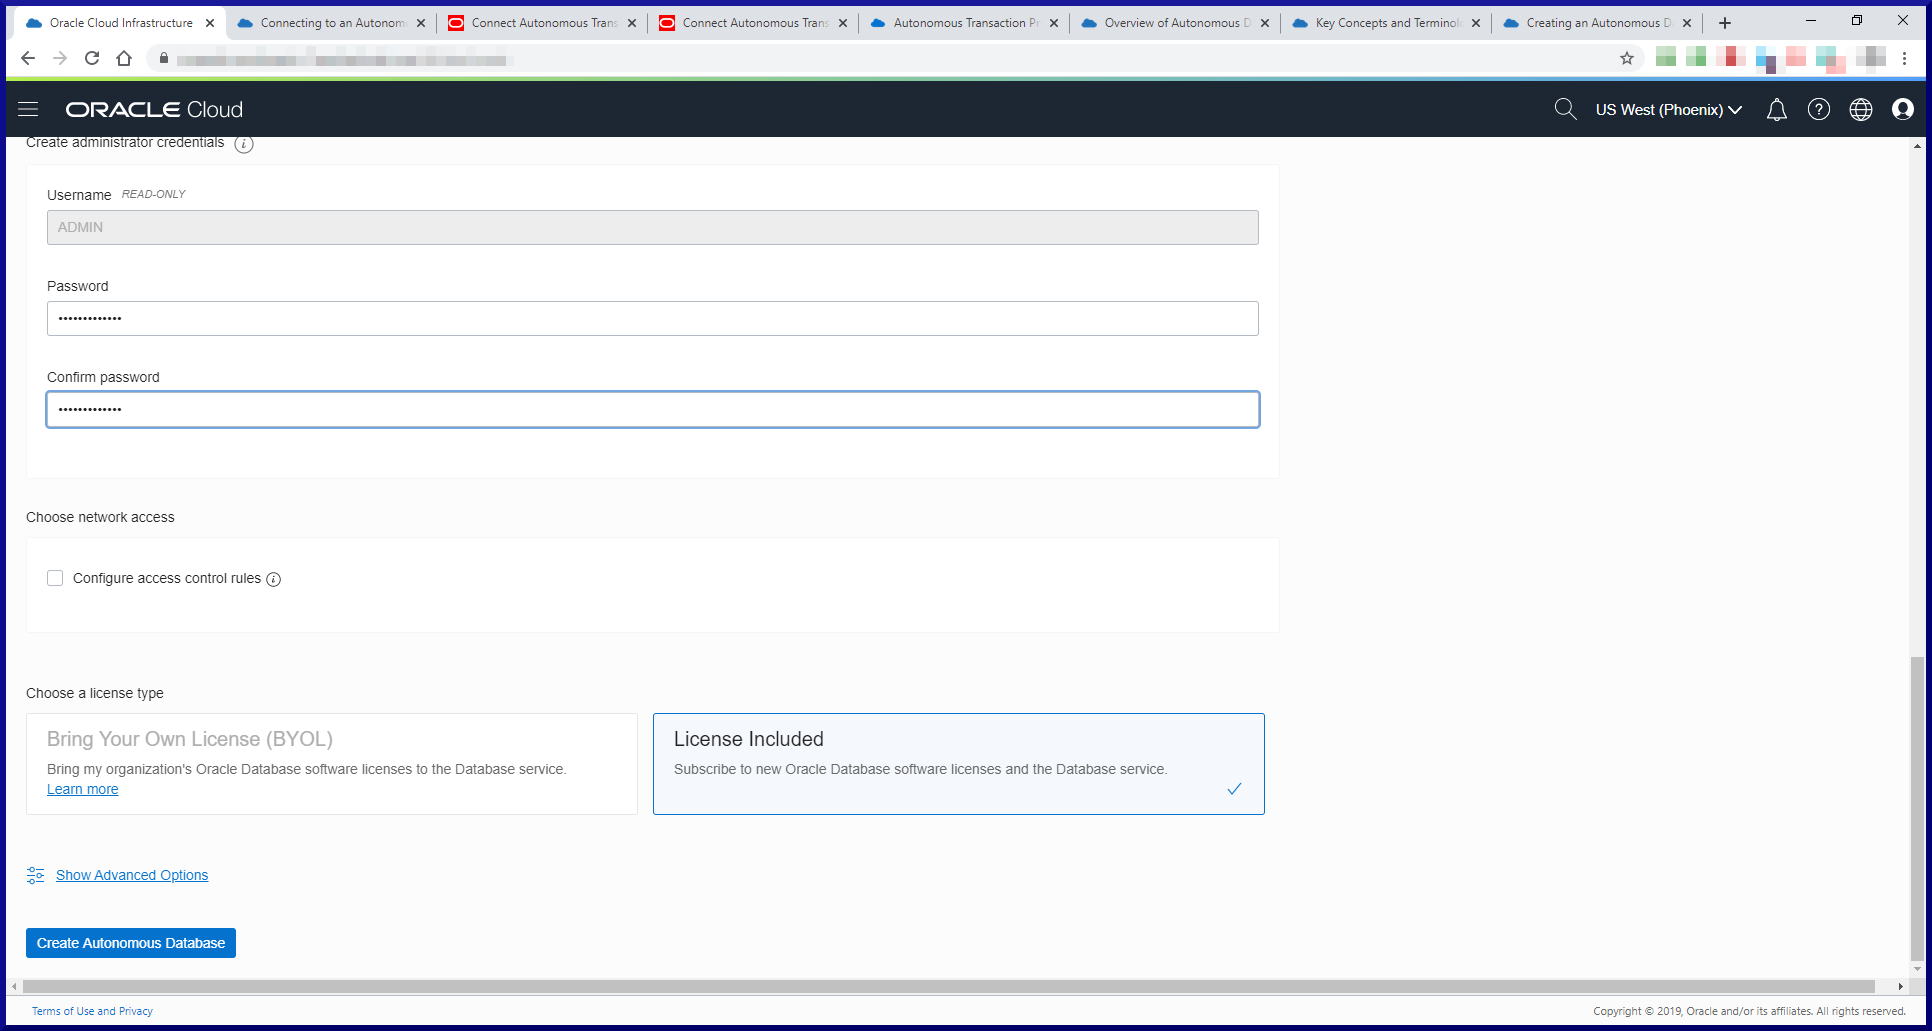
The Create Autonomous Database screen is a scrolling screen which will require you to enter a few pieces of information:
| Field | Value |
|---|---|
| Compartment | You will have created this when you initially signed up, so use that name whatever it was. |
| From the Oracle Cloud documentation: | |
| Compartments allow you to organize and control access to your cloud resources. A compartment is a collection of related resources (such as instances, virtual cloud networks, block volumes) that can be accessed only by certain groups that have been given permission by an administrator. A compartment should be thought of as a logical group and not a physical container. When you begin working with resources in the Console, the compartment acts as a filter for what you are viewing. When you sign up for Oracle Cloud Infrastructure, Oracle creates your tenancy, which is the root compartment that holds all your cloud resources. You then create additional compartments within the tenancy (root compartment) and corresponding policies to control access to the resources in each compartment. When you create a cloud resource such as an instance, block volume, or cloud network, you must specify to which compartment you want the resource to belong. Ultimately, the goal is to ensure that each person has access to only the resources they need. | |
| Display Name | DBCLOUD1 |
| Database Name | DBCLOUD1 |
| Workload Type | Transaction Processing (already checked by default) |
| Deployment Type | Shared Infrastructure (already checked by default) |
| Always Free | Move slider to the right |
| OCPU Count | 1 (default for Always Free) |
| Storage (TB) | 0.02 (default for Always Free) |
| Administrator Username | ADMIN (default) |
| Administrator Password | Choose a password. Do yourself a favor and don't include an @ sign in your password. You'll see why later on. |
| Configure access control rules | I didn't bother with this. |
| Choose a license type | License Included (already checked by default) |

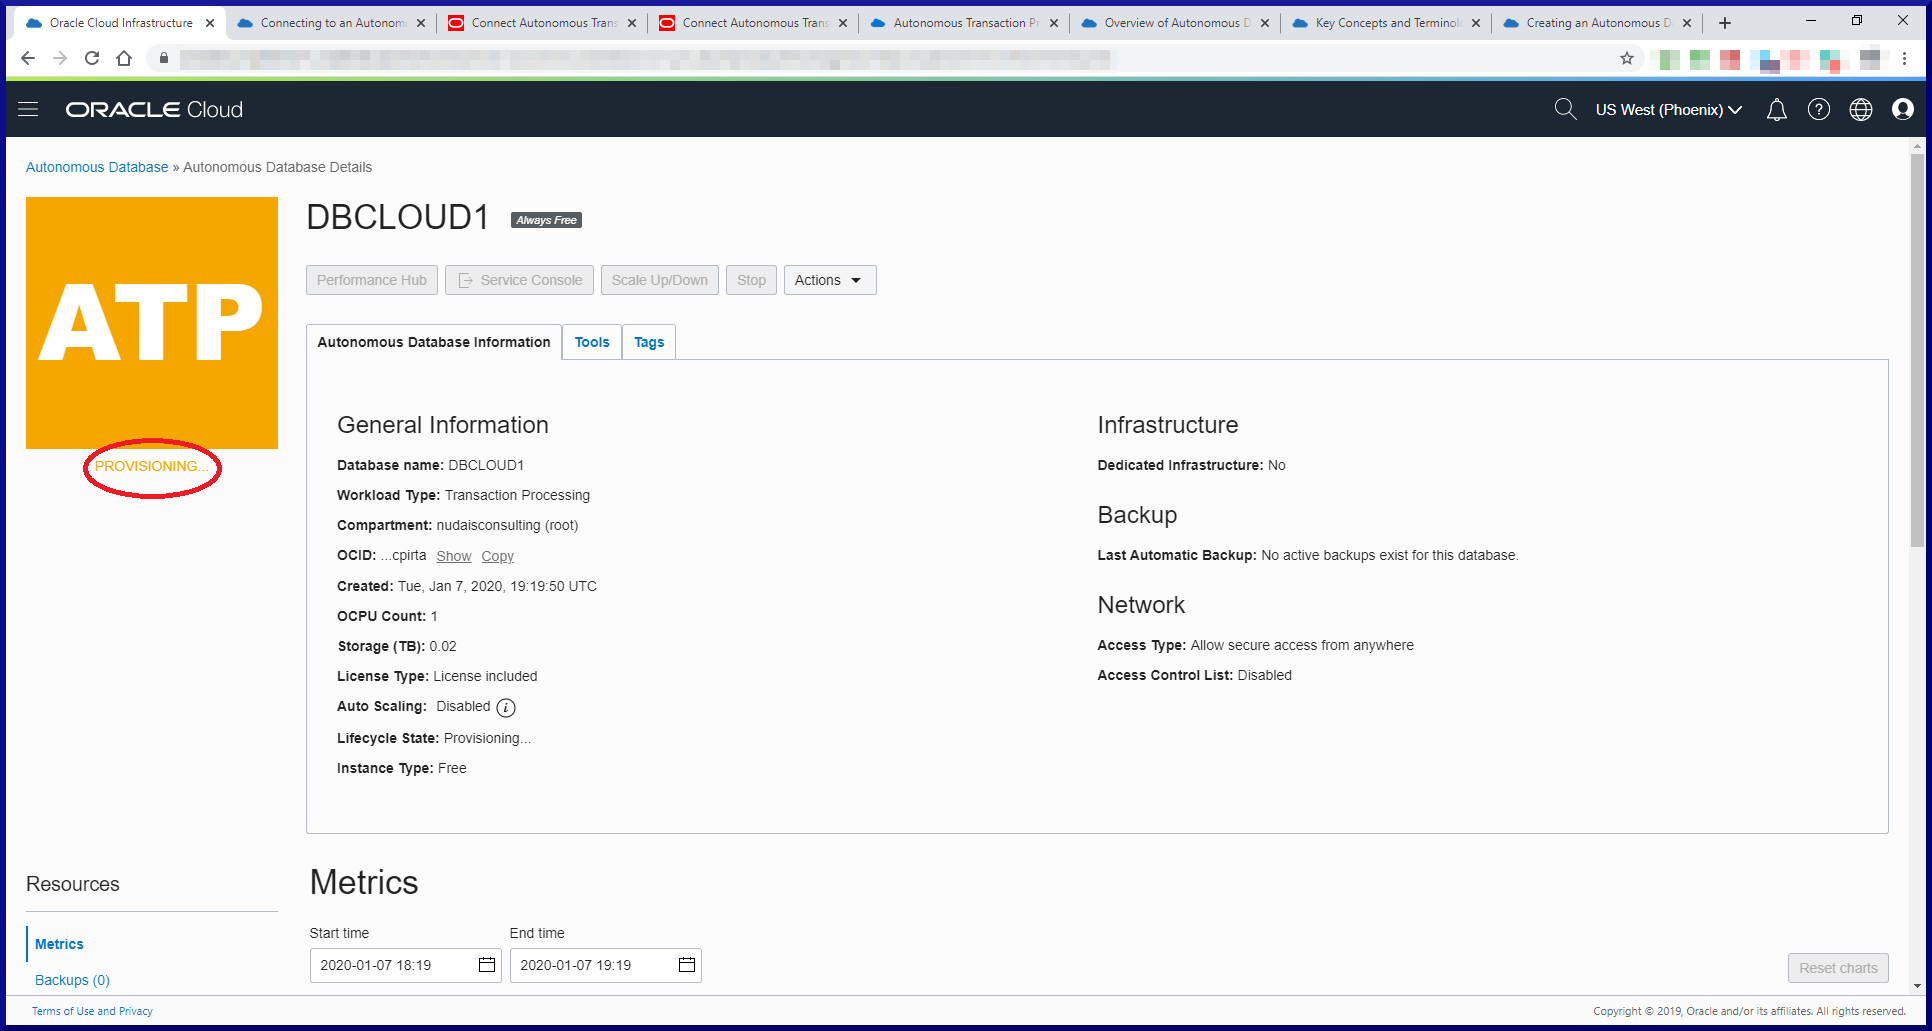
The provisioning process only takes a few minutes, then you’ll see this screen:
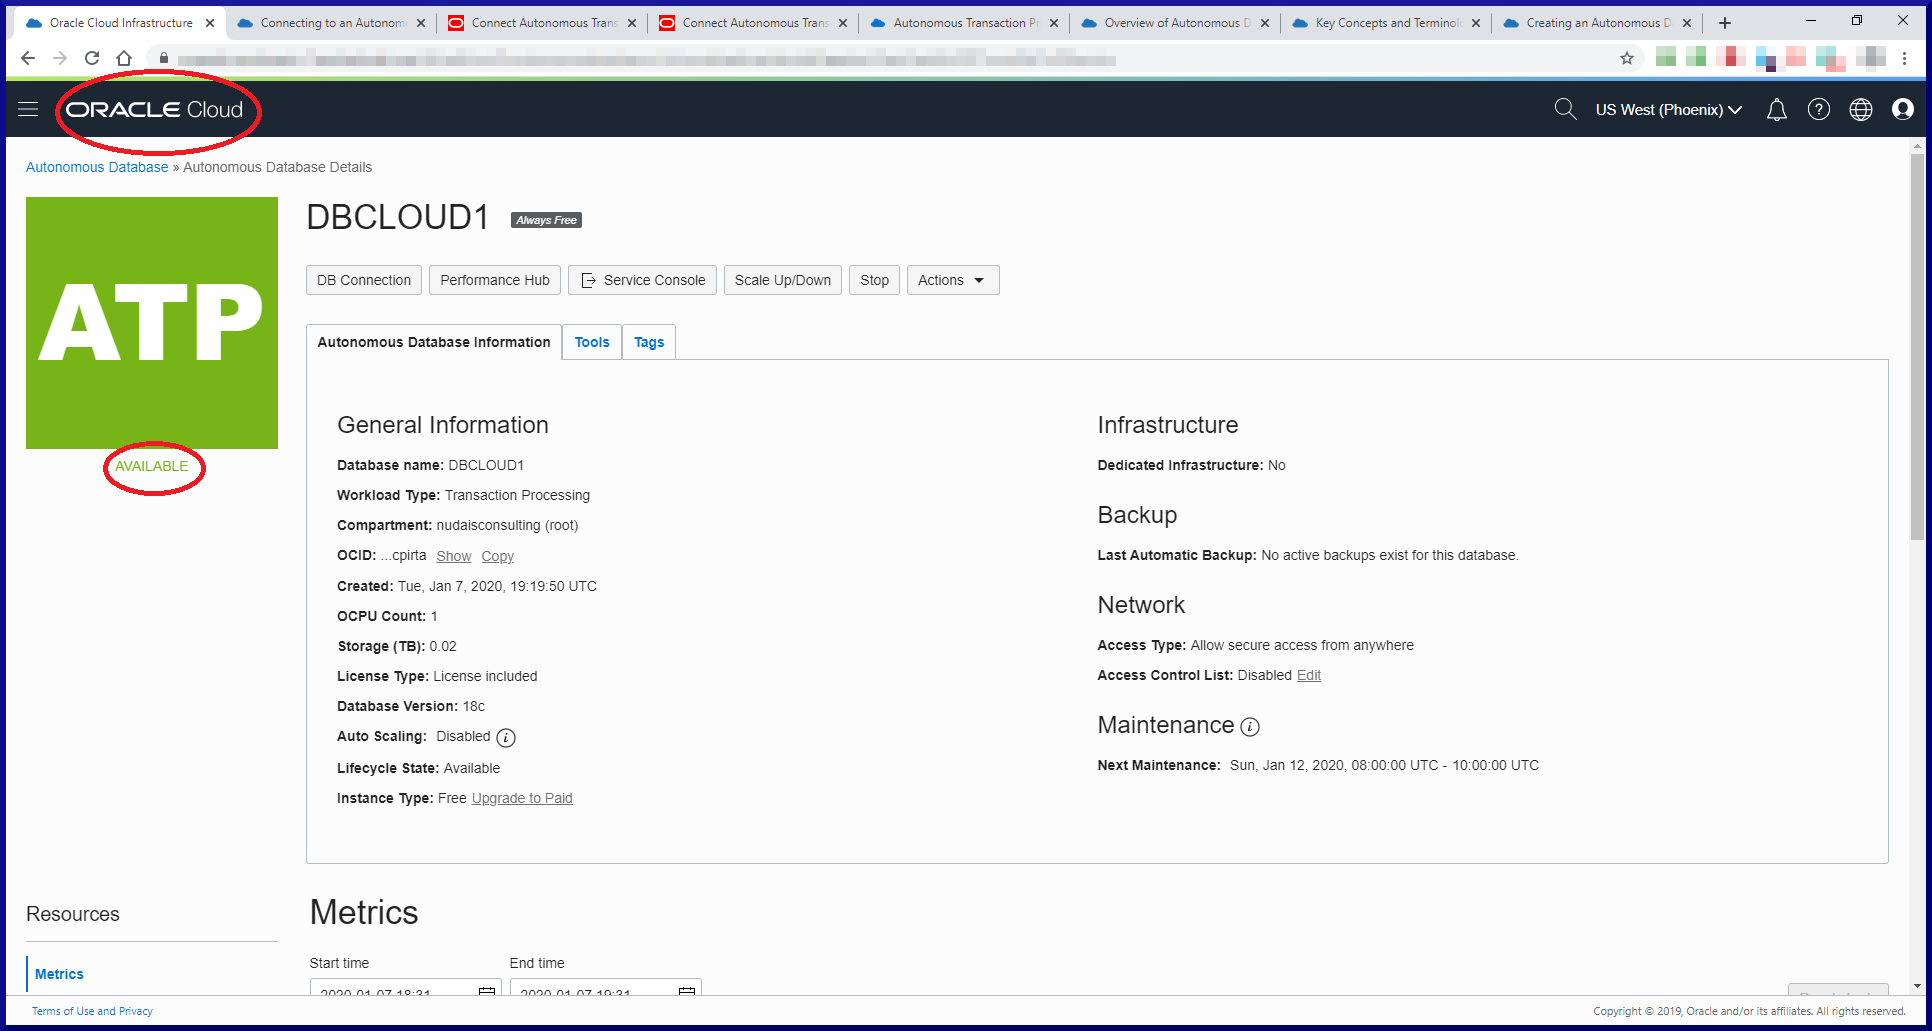
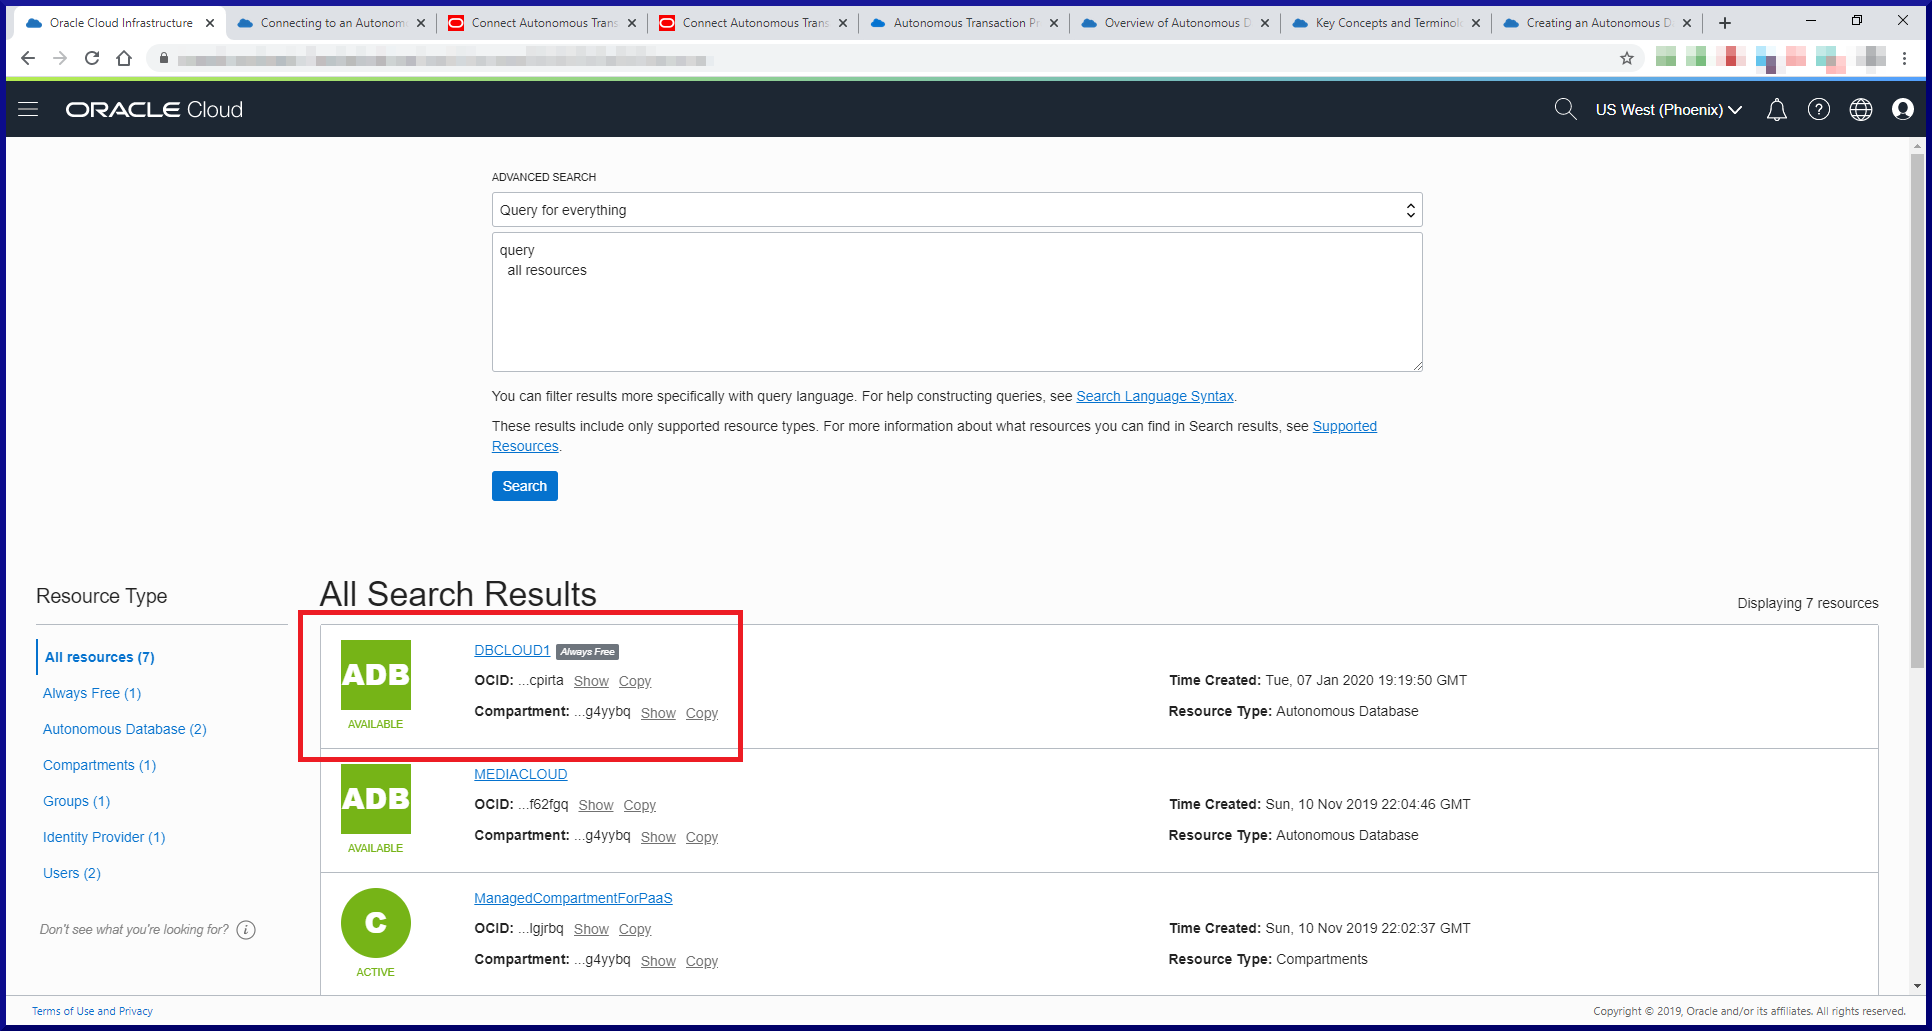
Click Oracle Cloud in the top left corner of the screen to return to the main Oracle Cloud Console screen. From there you can click View all my resources to see what resources you have created:
Now that we have a database created, how do we connect to it?
Task #2: Connect To An Autonomous Database.
Connecting to an autonomous database is similar to connecting to a local database. You need the correct entries for your local sqlnet.ora and tnsnames.ora files. You also have to use an Oracle Wallet. All the relevant files can be downloaded from the database page within your Oracle Cloud account.
As mentioned previously, avoid using an @ sign in your password for the ADMIN account. I had all kinds of problems trying to login using SQL*Plus (but not with SQL Developer). As we know, the @ sign is significant on the command line and no combination of quoting allowed SQL*Plus to login. There’s a MOS document which addresses client connection issues to Autonomous Database (MOS Doc ID 2436725.1), but none of the workarounds worked for me until I removed the @ sign from my ADMIN password. YMMV.
Task 2a: Configure Oracle Net.
Navigate to the database page for DBCLOUD1:
On the next screen you’ll need to choose which type of Wallet you want. The choices are Instance Wallet or Regional Wallet. An Instance Wallet contains the credentials for a single Autonomous Database (ADB). A Regional Wallet contains the credentials for all the ADBs within a region. I use a Regional Wallet.
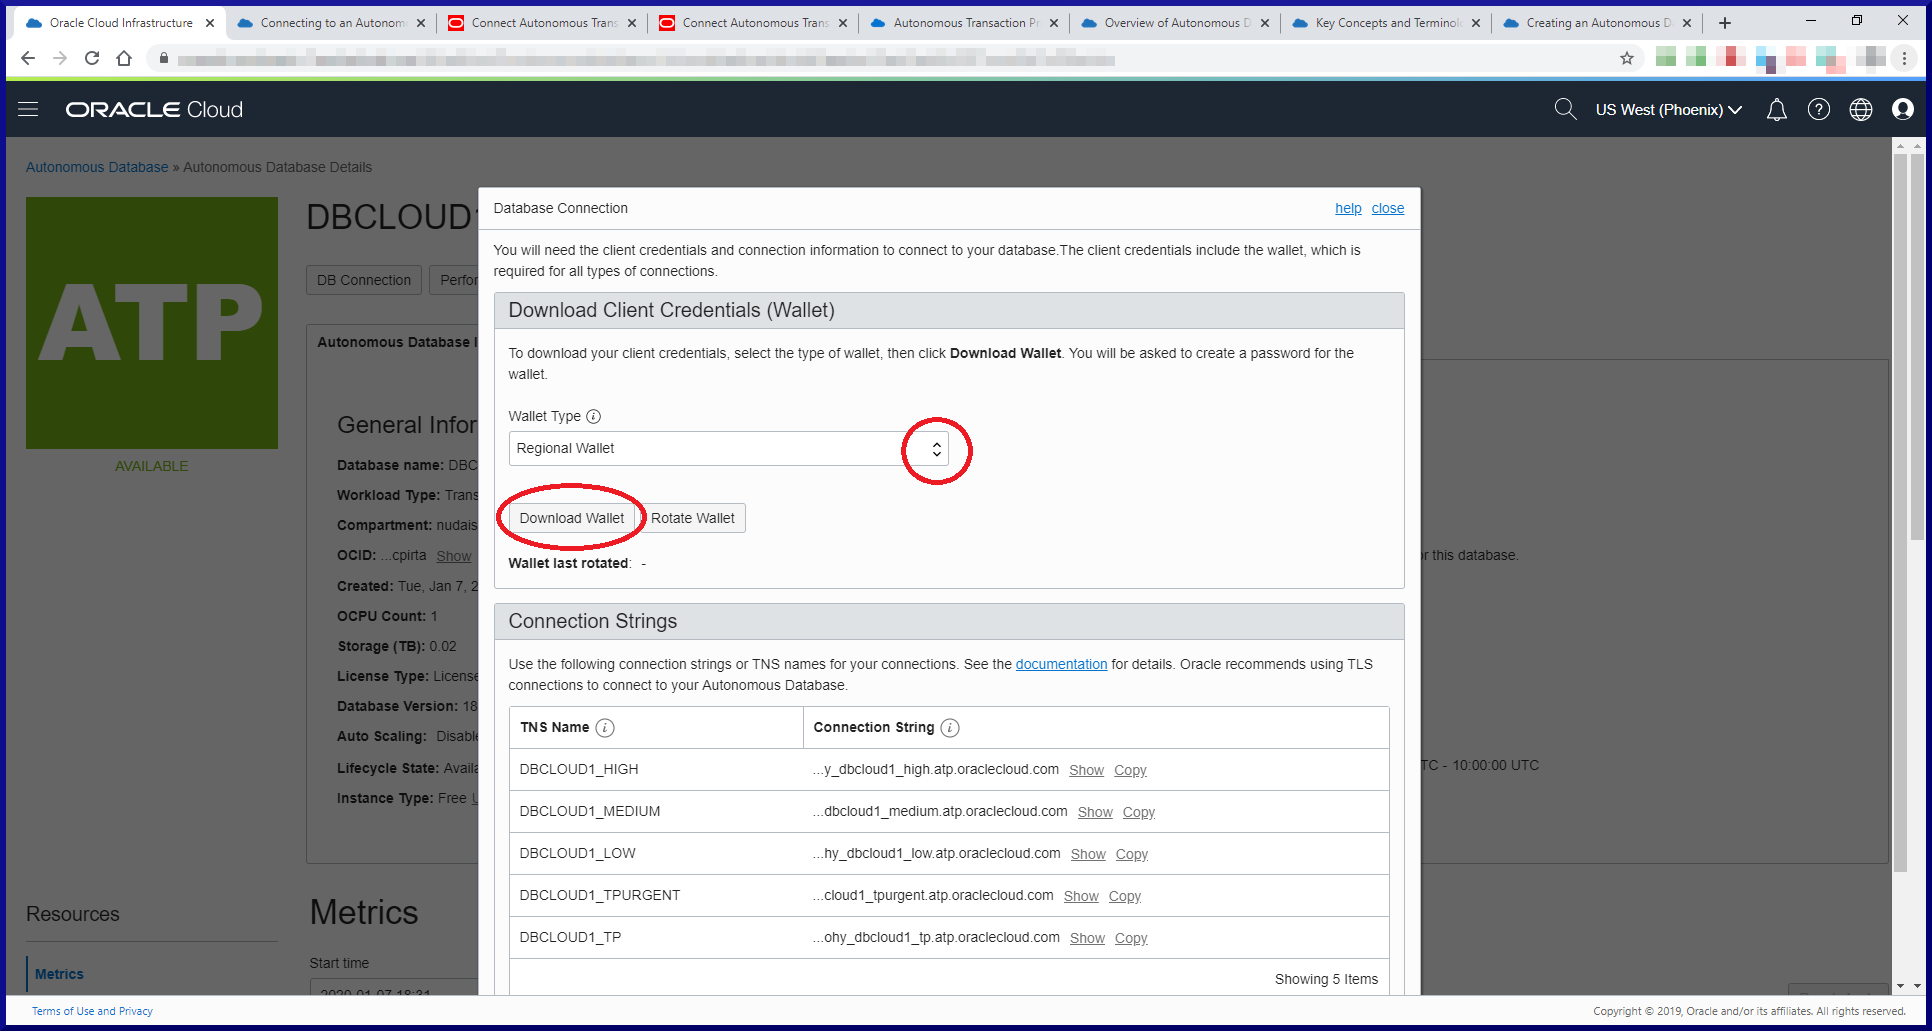
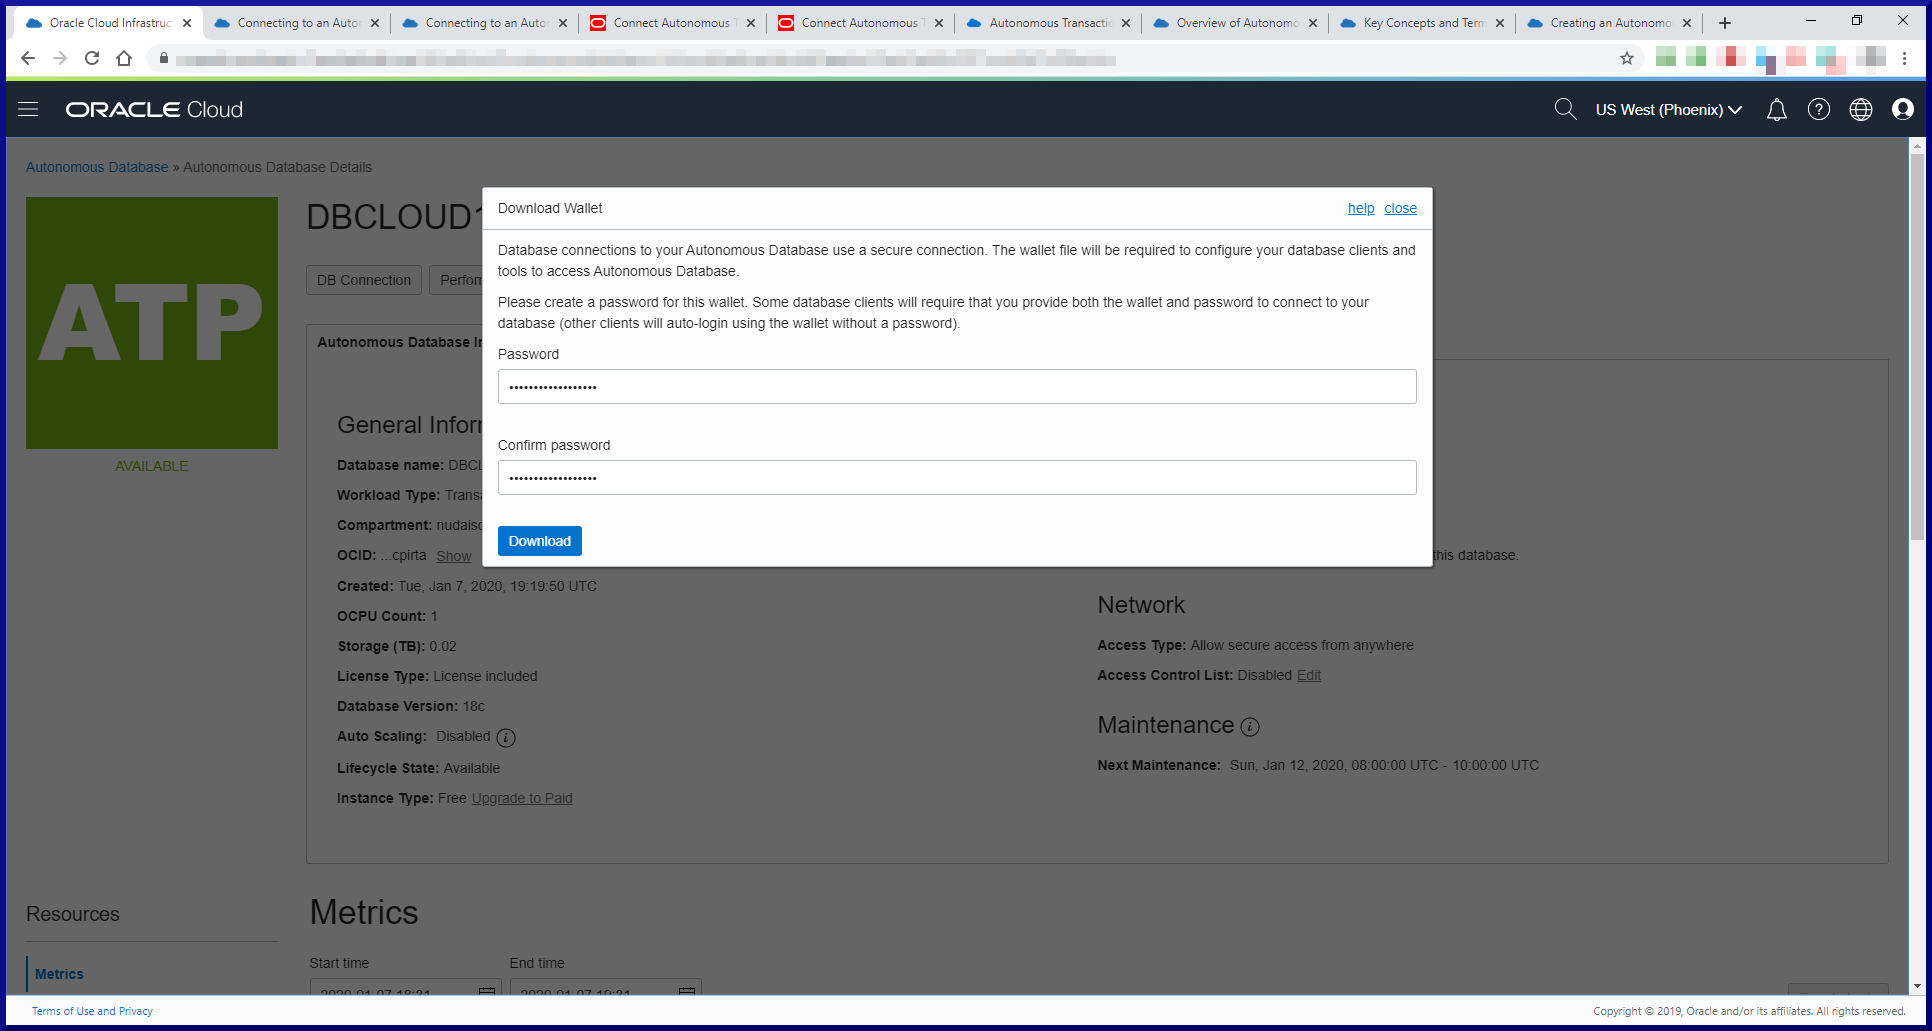
After clicking the Download button you’re prompted to save a .zip file. I saved mine here:
Directory of E:\ORACLE\REGIONAL_WALLET

01/08/2020  01:07 PM            19,922 Wallet_DBCLOUD1.zip
Unzip the file to the same directory:
Directory of E:\ORACLE\REGIONAL_WALLET

01/08/2020  07:07 PM             6,661 cwallet.sso
01/08/2020  07:07 PM             6,616 ewallet.p12
01/08/2020  07:07 PM             3,243 keystore.jks
01/08/2020  07:07 PM               301 ojdbc.properties
01/08/2020  07:07 PM               114 sqlnet.ora
01/08/2020  07:07 PM             3,662 tnsnames.ora
01/08/2020  07:07 PM             3,336 truststore.jks
01/08/2020  01:07 PM            19,922 Wallet_DBCLOUD1.zip
Once you can access the files within the .zip archive, you’re ready for a few simple edits. The sqlnet.ora file contains this:
WALLET_LOCATION = (SOURCE = (METHOD = file) (METHOD_DATA = (DIRECTORY="?/network/admin")))
SSL_SERVER_DN_MATCH=yes
Copy these 2 lines to your own sqlnet.ora file located in the directory usually pointed to by the TNS_ADMIN environment variable. Change the DIRECTORY value to the directory where you extracted the .zip file. This is what my sqlnet.ora file looks like with the appropriate edits:
SQLNET.AUTHENTICATION_SERVICES = (NTS)
SQLNET.WALLET_OVERRIDE = TRUE
WALLET_LOCATION = (SOURCE = (METHOD = file) (METHOD_DATA = (DIRECTORY="E:\ORACLE\REGIONAL_WALLET")))
SSL_SERVER_DN_MATCH=yes
Next, copy any relevant lines from the downloaded tnsnames.ora file to your own tnsnames.ora file. Note, the entries in the downloaded tnsnames.ora file are one long line, so you might want to re-format them for readability. My tnsnames.ora file looks like this (apart from the * obviously):
dbcloud1_tp =
   (description=
      (retry_count=20)(retry_delay=3)
      (address=(protocol=tcps)(port=****)(host=***.**********.oraclecloud.com))
      (connect_data=(service_name=***********_dbcloud1_tp.***.oraclecloud.com))
      (security=(ssl_server_cert_dn="CN=****.********.oraclecloud.com,
                 OU=Oracle BMCS US,O=Oracle Corporation,L=Redwood City,ST=California,C=US")
   )
 )
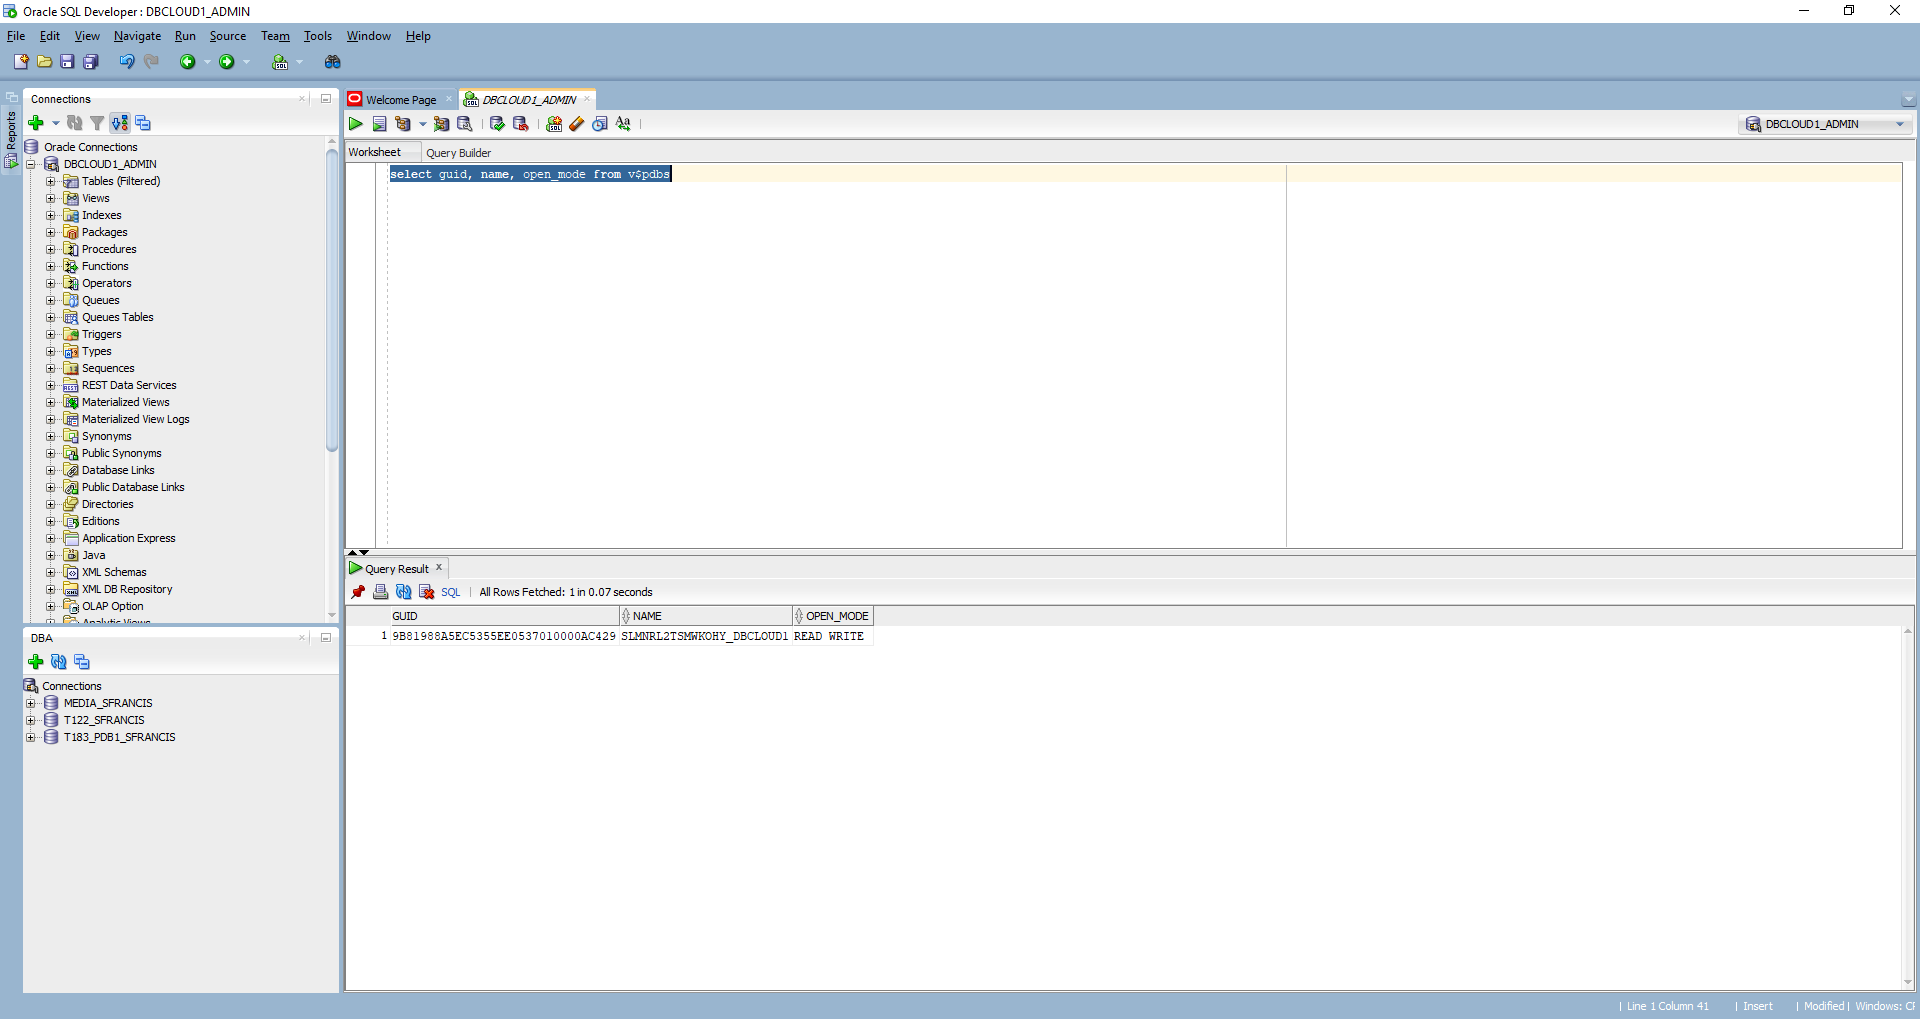
Task 2b: Connect Via SQL*Plus.
We’ll continue to use Windows by opening up a Command window and entering these commands:
C:\> set TNS_ADMIN=E:\app\oracle\product\client\network\admin

C:\> sqlplus admin@dbcloud1_tp

SQL*Plus: Release 19.0.0.0.0 - Production on Tue Jan 21 12:15:44 2020
Version 19.3.0.0.0

Copyright (c) 1982, 2019, Oracle.  All rights reserved.

Enter password: <your-ADMIN-password>
Last Successful login time: Tue Jan 21 2020 11:52:01 -06:00

Connected to:
Oracle Database 18c Enterprise Edition Release 18.0.0.0.0 - Production
Version 18.4.0.0.0

SQL> select name from v$database;

NAME
--------
FEB61POD

SQL> select instance_name from v$instance;

INSTANCE_NAME
-------------
feb61pod1

SQL> select banner_full from v$version;

BANNER_FULL
----------------------------------------------------------------------
Oracle Database 18c Enterprise Edition Release 18.0.0.0.0 - Production
Version 18.4.0.0.0

SQL> show parameter service

NAME                                 TYPE        VALUE
------------------------------------ -------     --------
service_names                        string      feb61pod

SQL> select guid, name, open_mode from v$pdbs;

GUID                             NAME                        OPEN_MODE
-------------------------------- --------------------------- ---------
9B81988A5EC5355EE0537010000AC429 SLMNRL2TSMWKOHY_DBCLOUD1    READ WRITE

SQL> select file_name,((bytes/1024)/1024) "MB" from dba_data_files;

FILE_NAME                                                                                     MB
--------------------------------------------------------------------------------------- --------
+DATA/FEB61POD/9B81988A5EC5355EE0537010000AC429/DATAFILE/system.571.1029020303               951
+DATA/FEB61POD/9B81988A5EC5355EE0537010000AC429/DATAFILE/sysaux.574.1029020303              2161
+DATA/FEB61POD/9B81988A5EC5355EE0537010000AC429/DATAFILE/undotbs1.741.1029020303             465
+DATA/FEB61POD/9B81988A5EC5355EE0537010000AC429/DATAFILE/data.575.1029020303                 100
+DATA/FEB61POD/9B81988A5EC5355EE0537010000AC429/DATAFILE/dbfs_data.569.1029020303            100
+DATA/sampleschema_dbf                                                                    204800
+DATA/FEB61POD/9B81988A5EC5355EE0537010000AC429/DATAFILE/undo_2.678.1029020371               465

7 rows selected.
Based upon these queries, we now know the database is called FEB61POD, the instance is called feb61pod1 and the service is called feb61pod. No reference to DBCLOUD1 at all! However, our database is actually a PDB called SLMNRL2TSMWKOHY_DBCLOUD1. We also know we’re running Oracle Database 18c Release 4. Not sure why the sampleschema_dbf file is where it is, but I’m not going to complain.
Task 2c: Connect Via SQL Developer.
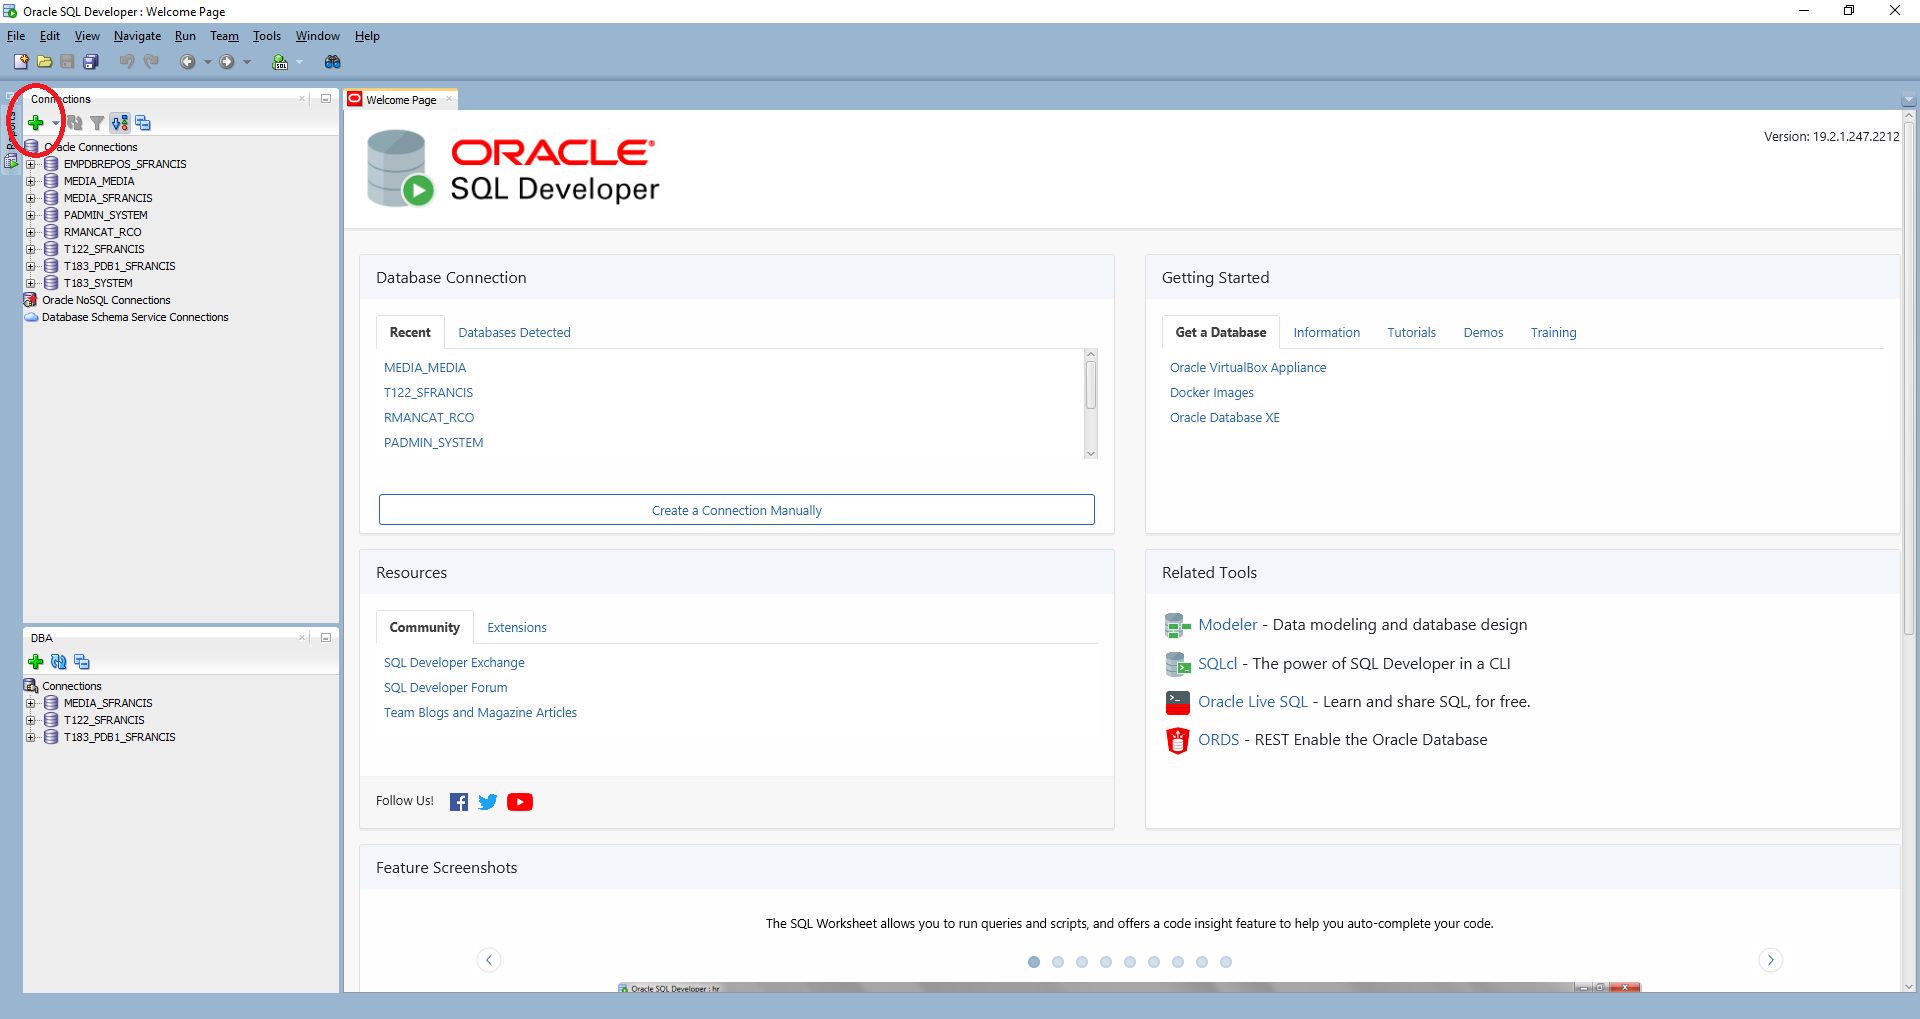
Fire up SQL Developer:
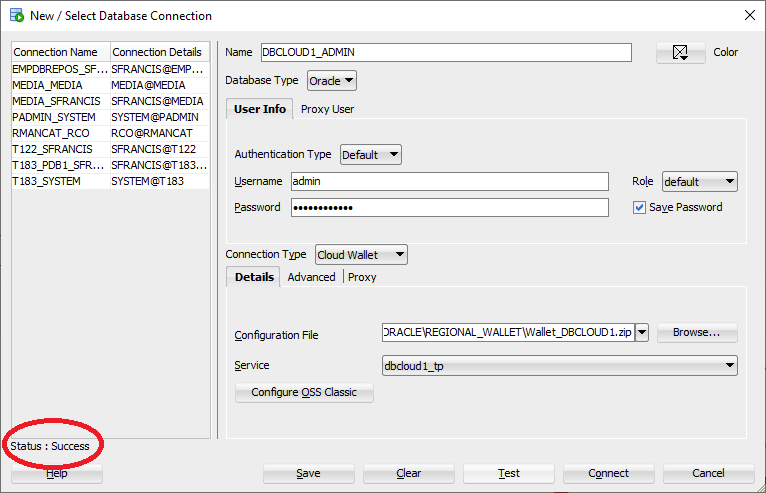
The next screen requires some input:
| Field | Value |
|---|---|
| Name | DBCLOUD1_ADMIN |
| Username | admin |
| Password | The ADMIN password you created |
| Save Password | Click the checkbox |
| Connection Type | Cloud Wallet |
| Configuration File | Browse to where you downloaded the Wallet .zip file and select it. |
| Mine was E:\ORACLE_REGIONAL_WALLET\DBCLOUD1.zip | |
| Service | Pick any of the listed connection strings displayed. I chose dbcloud1_tp. |
Save the connection, login and run a query:
Task #3: Migrate Data To An Autonomous Database.
Moving data into an Autonomous Database (ADB) can be done using Data Pump Import. For this section, I’ve moved my operations to a Linux server since that is where I had a compatible version of Data Pump Import installed. At the time of writing, the Oracle documentation which describes this process is both incomplete and inaccurate. Seems some changes Oracle has made to ADB are ahead of the documentation which supports it. The method described here has been verified by Oracle as being complete and correct.
Task #3a: Data Pump Export (On Premises).
So, let’s start off by exporting some data from an on premises database (T183_PDB1, Oracle Database 18c Release 3). These are the 6 tables which sit behind my APEX music catalog application. Here is my Data Pump Export parameter file:
directory=DATA_PUMP_DIR_PDB1
dumpfile=media_01242020.dmp
encryption_pwd_prompt=YES
tables=MEDIA.FORMATS,MEDIA.GENRES,MEDIA.MEDIA_TYPES,MEDIA.RECORDING_ARTISTS,MEDIA.RELEASES,MEDIA.TITLES
As we can see, the Data Pump Export should produce a dump file called media_01242020.dmp in the directory pointed to by DATA_PUMP_DIR_PDB1 (/u01/oradata/datapump/T183_PDB1). The dump file should contain 6 tables owned by the user MEDIA and the Data Pump Export process should prompt us for an encryption password (Oracle recommends this). Let’s run the export:
[oracle@orasvr02 dp]$ expdp sfrancis@T183_PDB1 parfile=expdp_parfile.txt

Export: Release 18.0.0.0.0 - Production on Fri Jan 24 15:36:09 2020
Version 18.3.0.0.0

Copyright (c) 1982, 2018, Oracle and/or its affiliates.  All rights reserved.
Password: <enter-password>

Connected to: Oracle Database 18c Enterprise Edition Release 18.0.0.0.0 - Production

Encryption Password: <your-encryption-password>
Starting "SFRANCIS"."SYS_EXPORT_TABLE_01":  sfrancis/@T183_PDB1 parfile=expdp_parfile.txt
Processing object type TABLE_EXPORT/TABLE/TABLE_DATA
Processing object type TABLE_EXPORT/TABLE/INDEX/STATISTICS/INDEX_STATISTICS
Processing object type TABLE_EXPORT/TABLE/STATISTICS/TABLE_STATISTICS
Processing object type TABLE_EXPORT/TABLE/STATISTICS/MARKER
Processing object type TABLE_EXPORT/TABLE/TABLE
Processing object type TABLE_EXPORT/TABLE/CONSTRAINT/CONSTRAINT
Processing object type TABLE_EXPORT/TABLE/CONSTRAINT/REF_CONSTRAINT
. . exported "MEDIA"."TITLES"                            227.8 KB    2347 rows
. . exported "MEDIA"."RECORDING_ARTISTS"                 21.80 KB     755 rows
. . exported "MEDIA"."FORMATS"                           7.625 KB      56 rows
. . exported "MEDIA"."MEDIA_TYPES"                        6.25 KB      14 rows
. . exported "MEDIA"."RELEASES"                          5.960 KB       3 rows
. . exported "MEDIA"."GENRES"                            5.531 KB       4 rows
Master table "SFRANCIS"."SYS_EXPORT_TABLE_01" successfully loaded/unloaded
******************************************************************************
Dump file set for SFRANCIS.SYS_EXPORT_TABLE_01 is:
  /u01/oradata/datapump/T183_PDB1/media_01242020.dmp
Job "SFRANCIS"."SYS_EXPORT_TABLE_01" successfully completed at Fri Jan 24 15:41:47 2020 elapsed 0 00:05:33
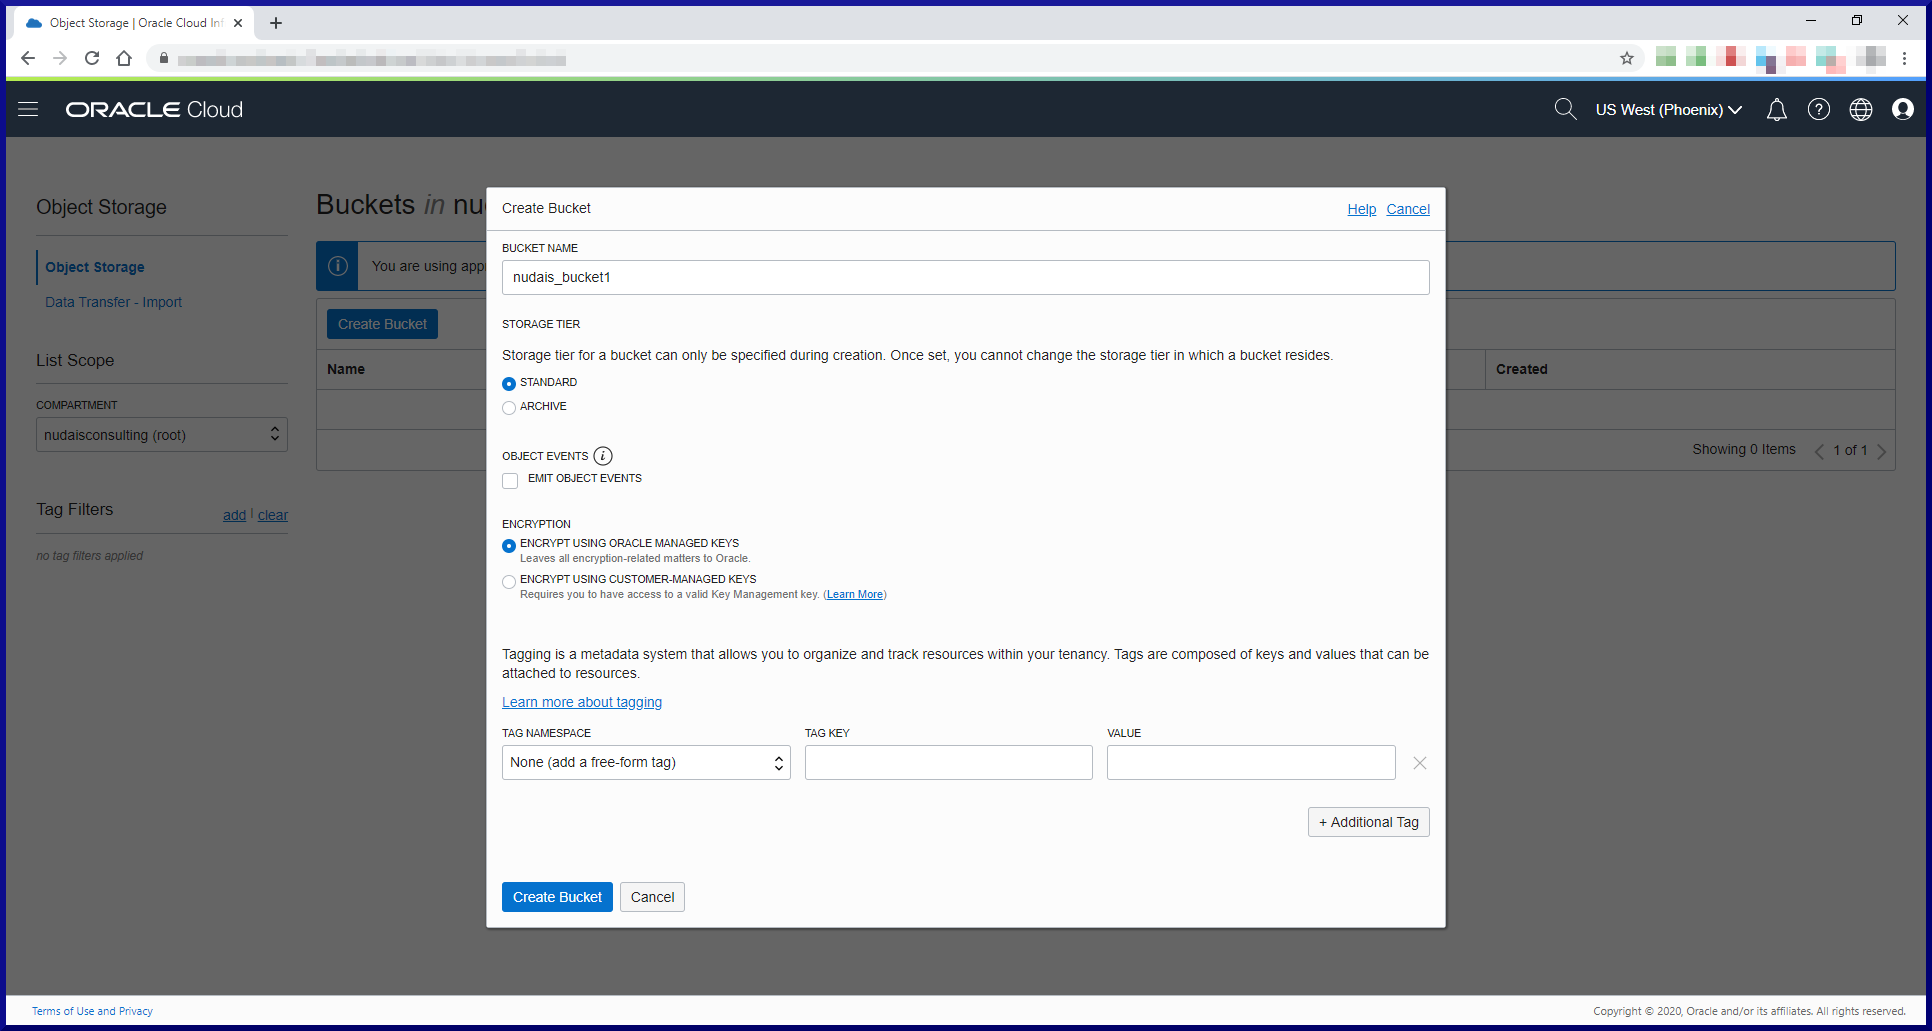
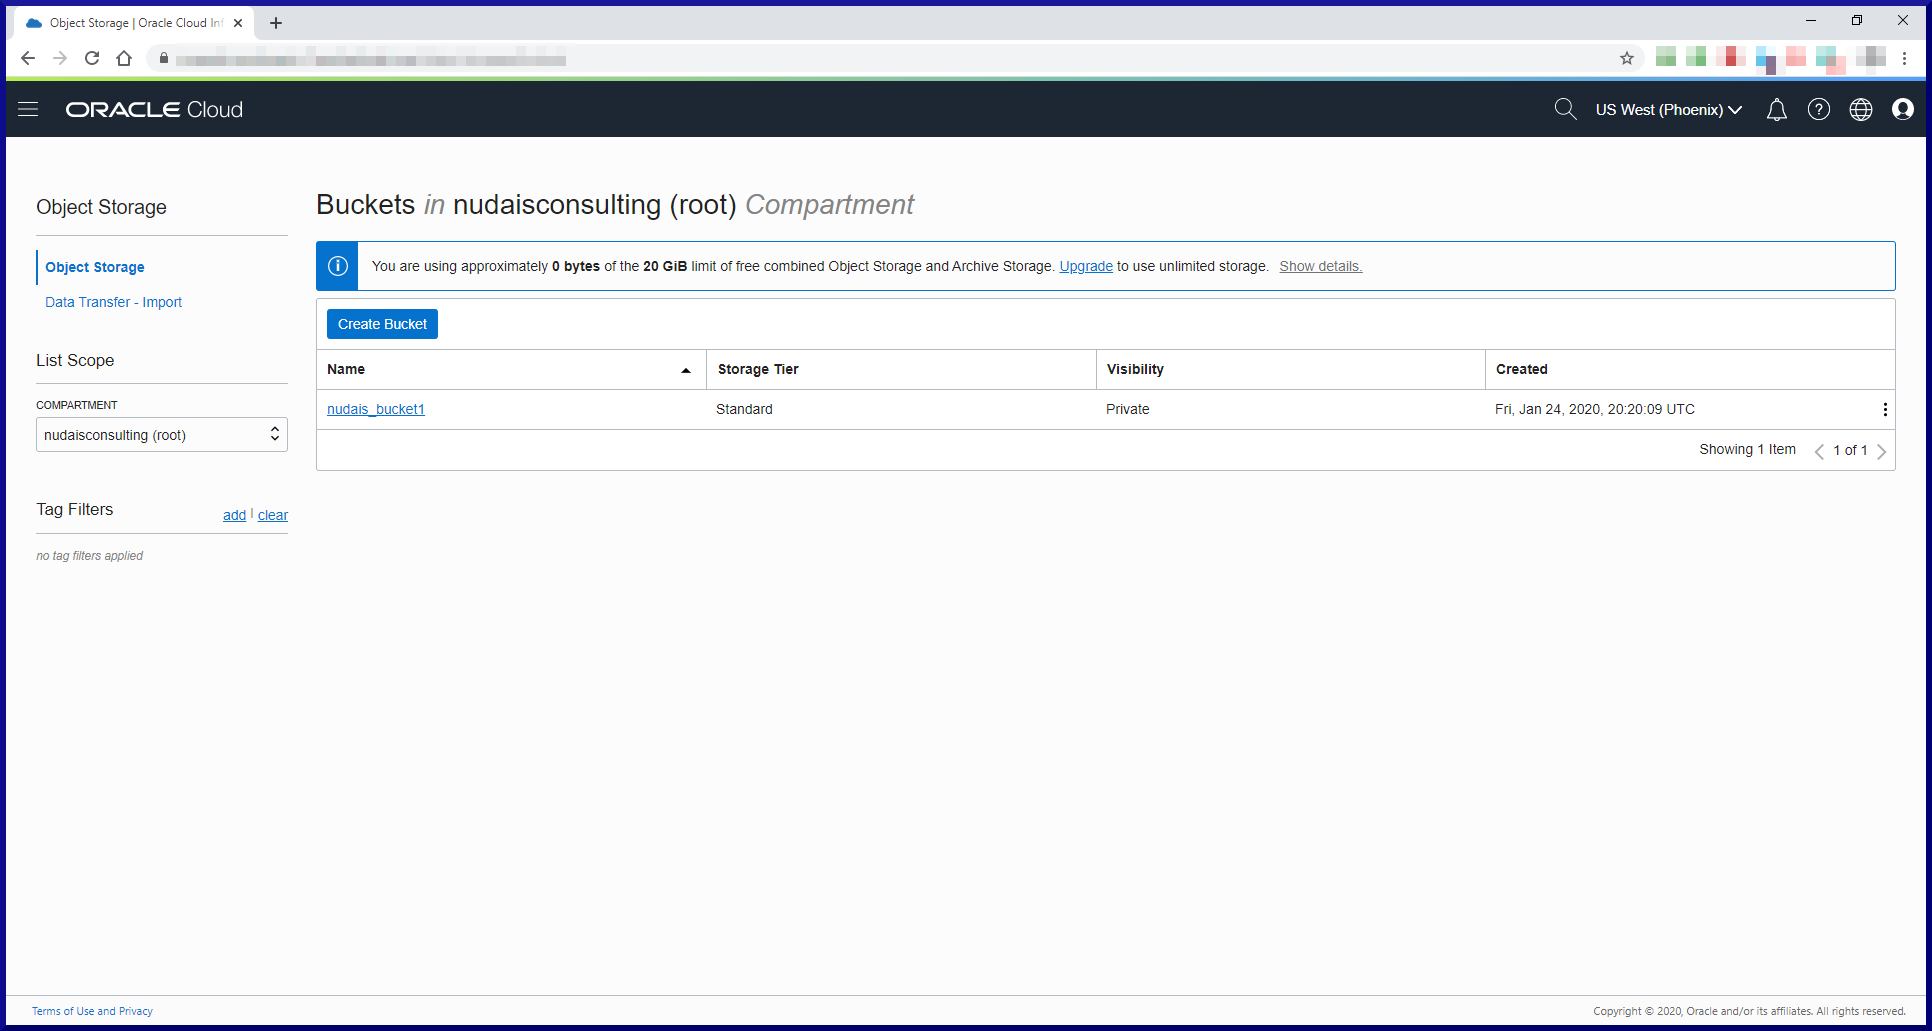
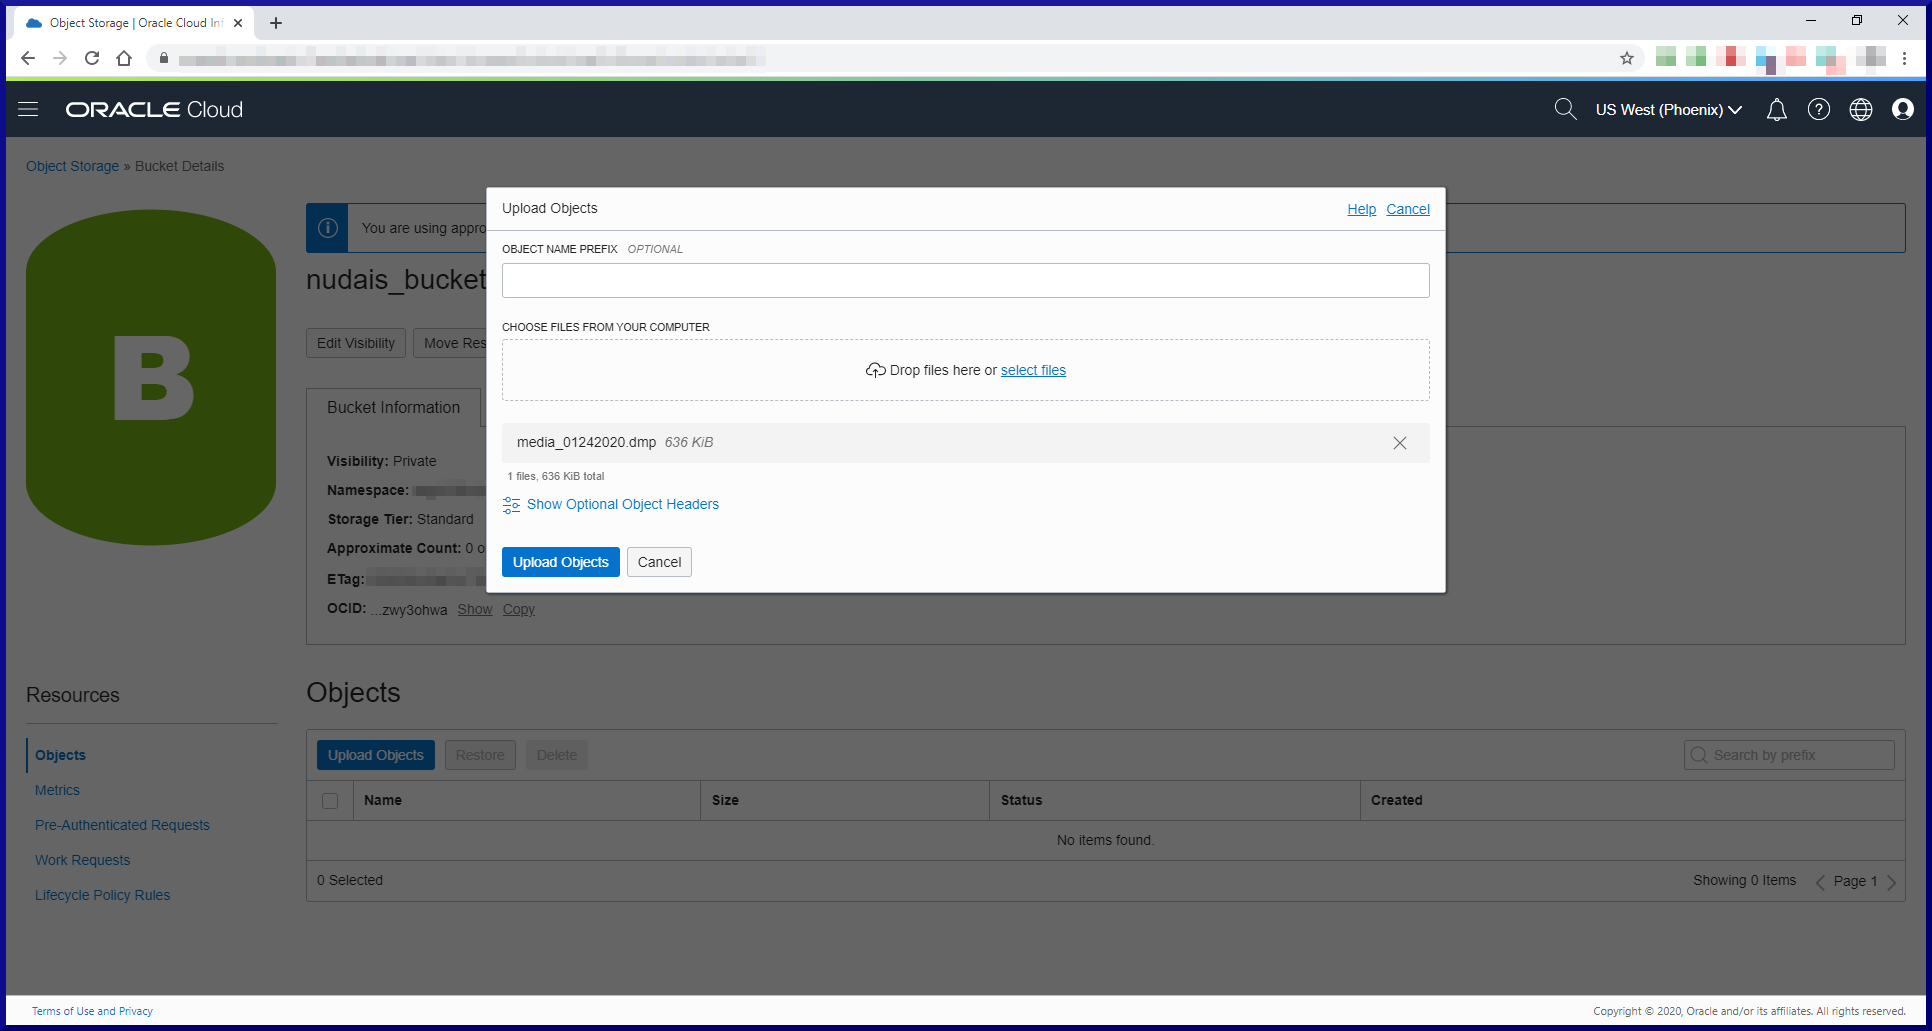
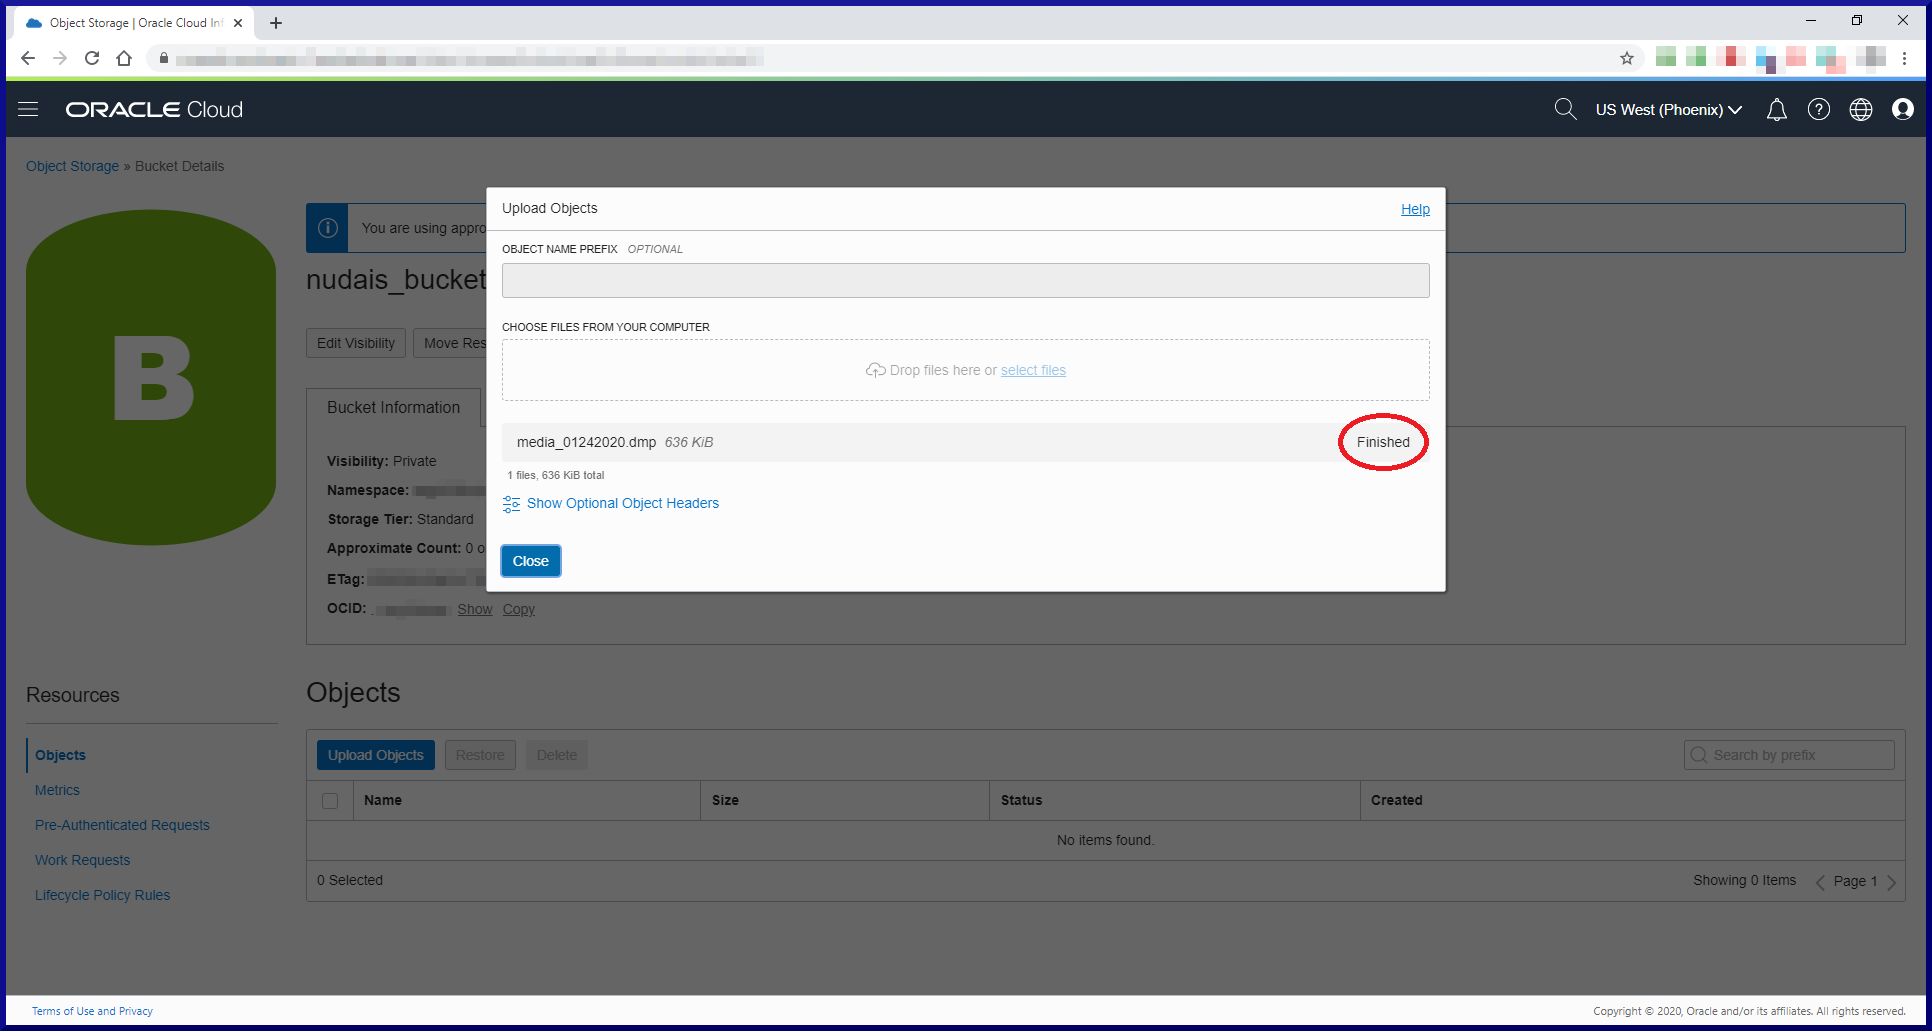
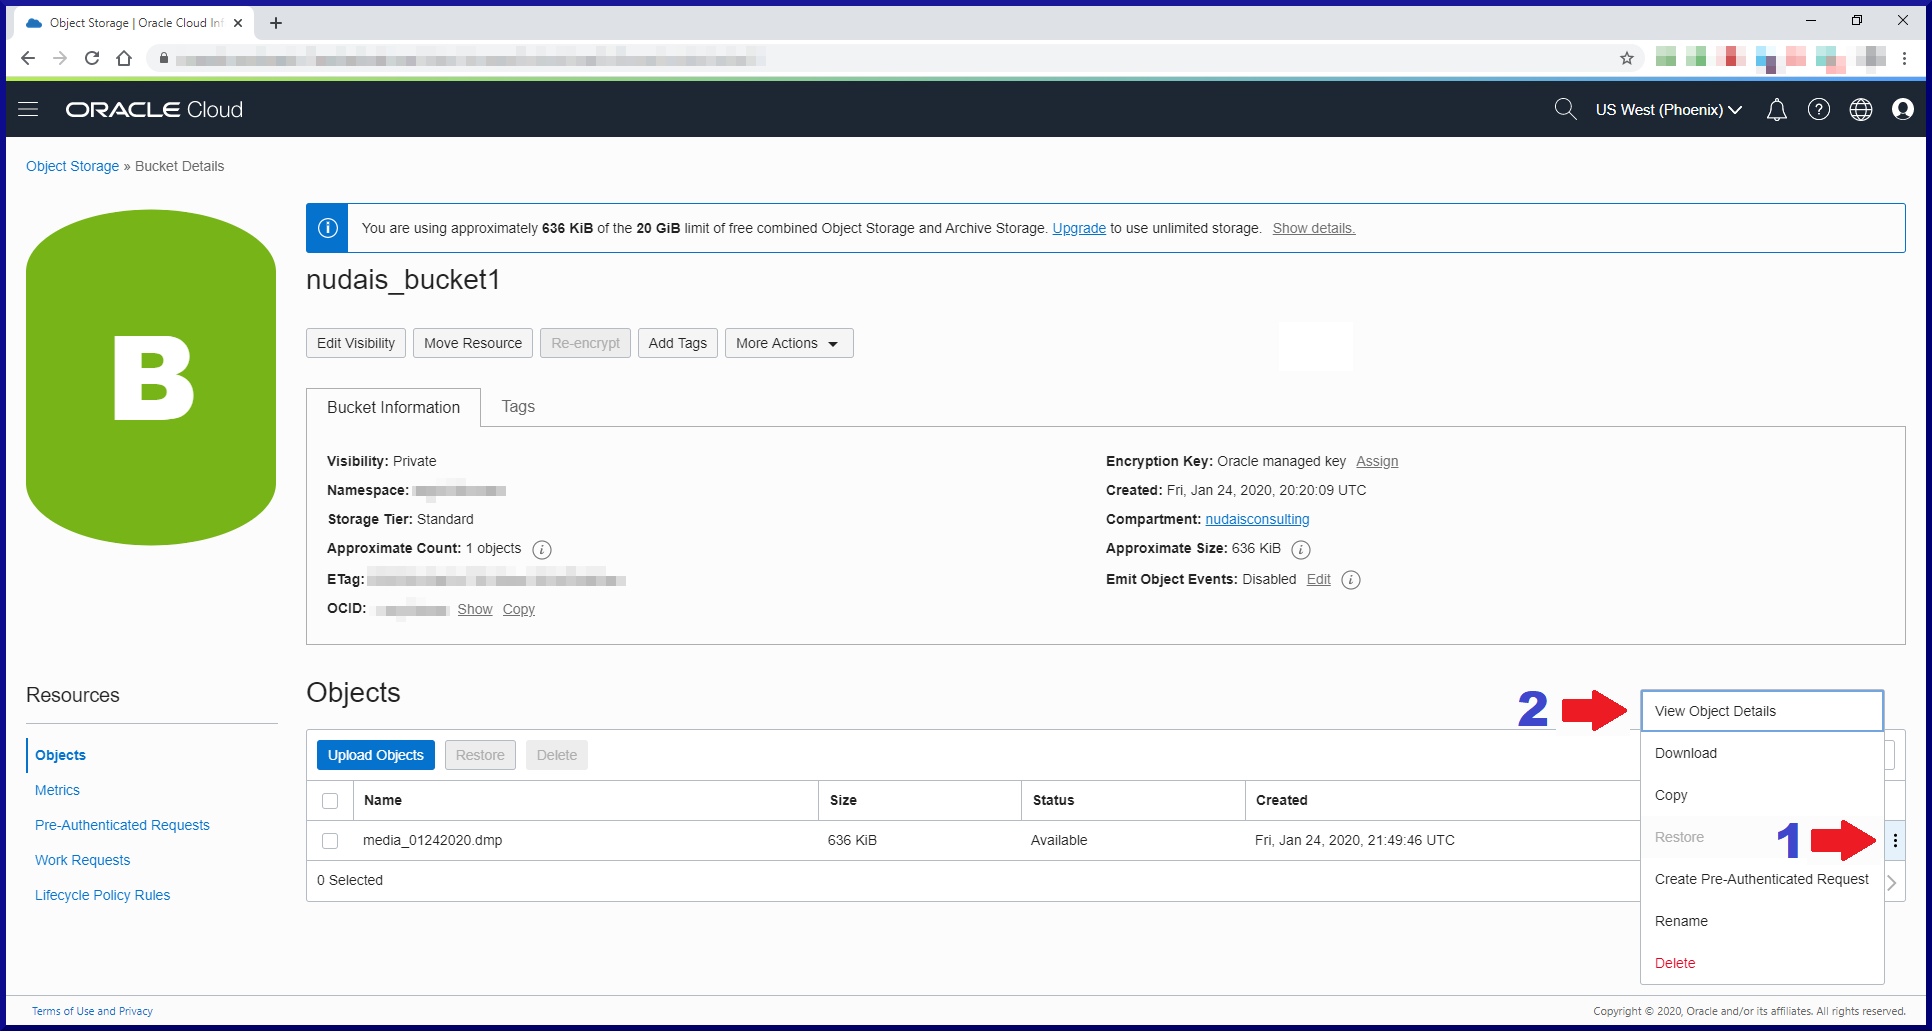
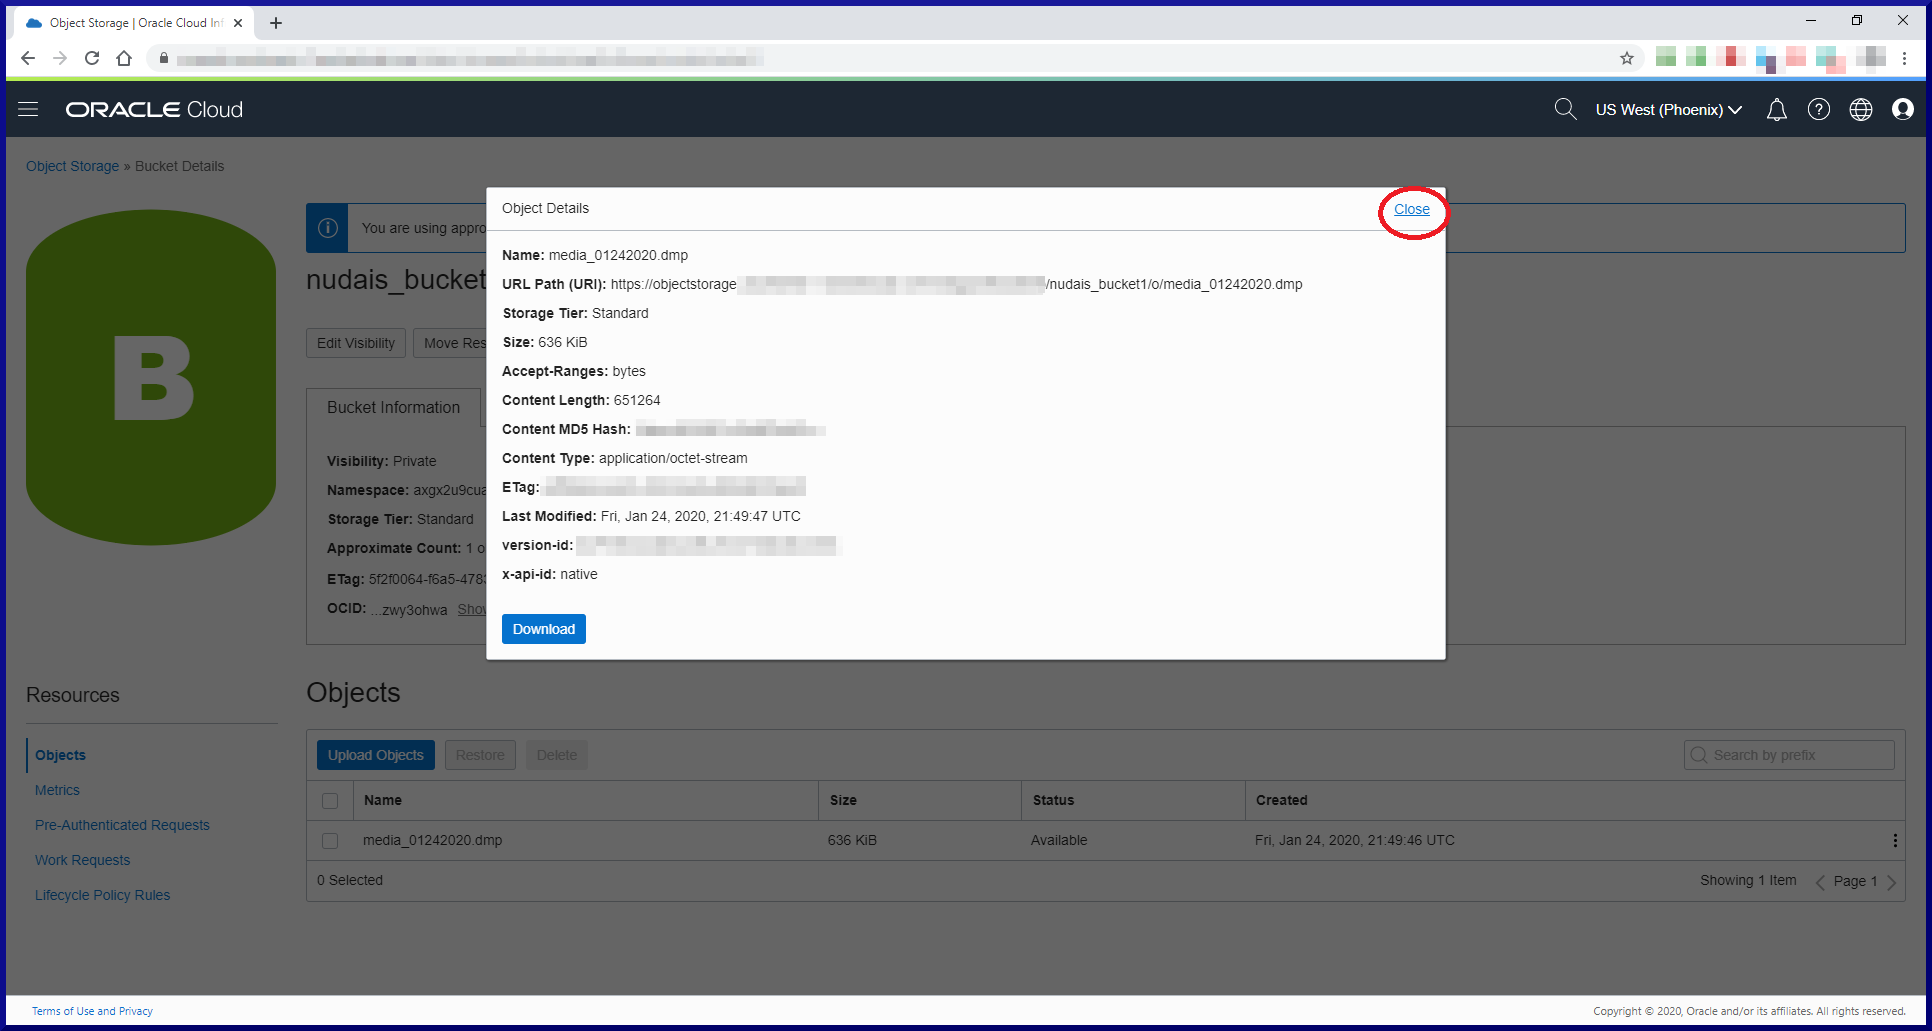
Task #3b: Create Object Storage & Upload Files (Oracle Cloud).
Now we have a local on premises dump file, it’s time to do some work in Oracle Cloud. Login to your account and navigate to the Oracle Cloud console:
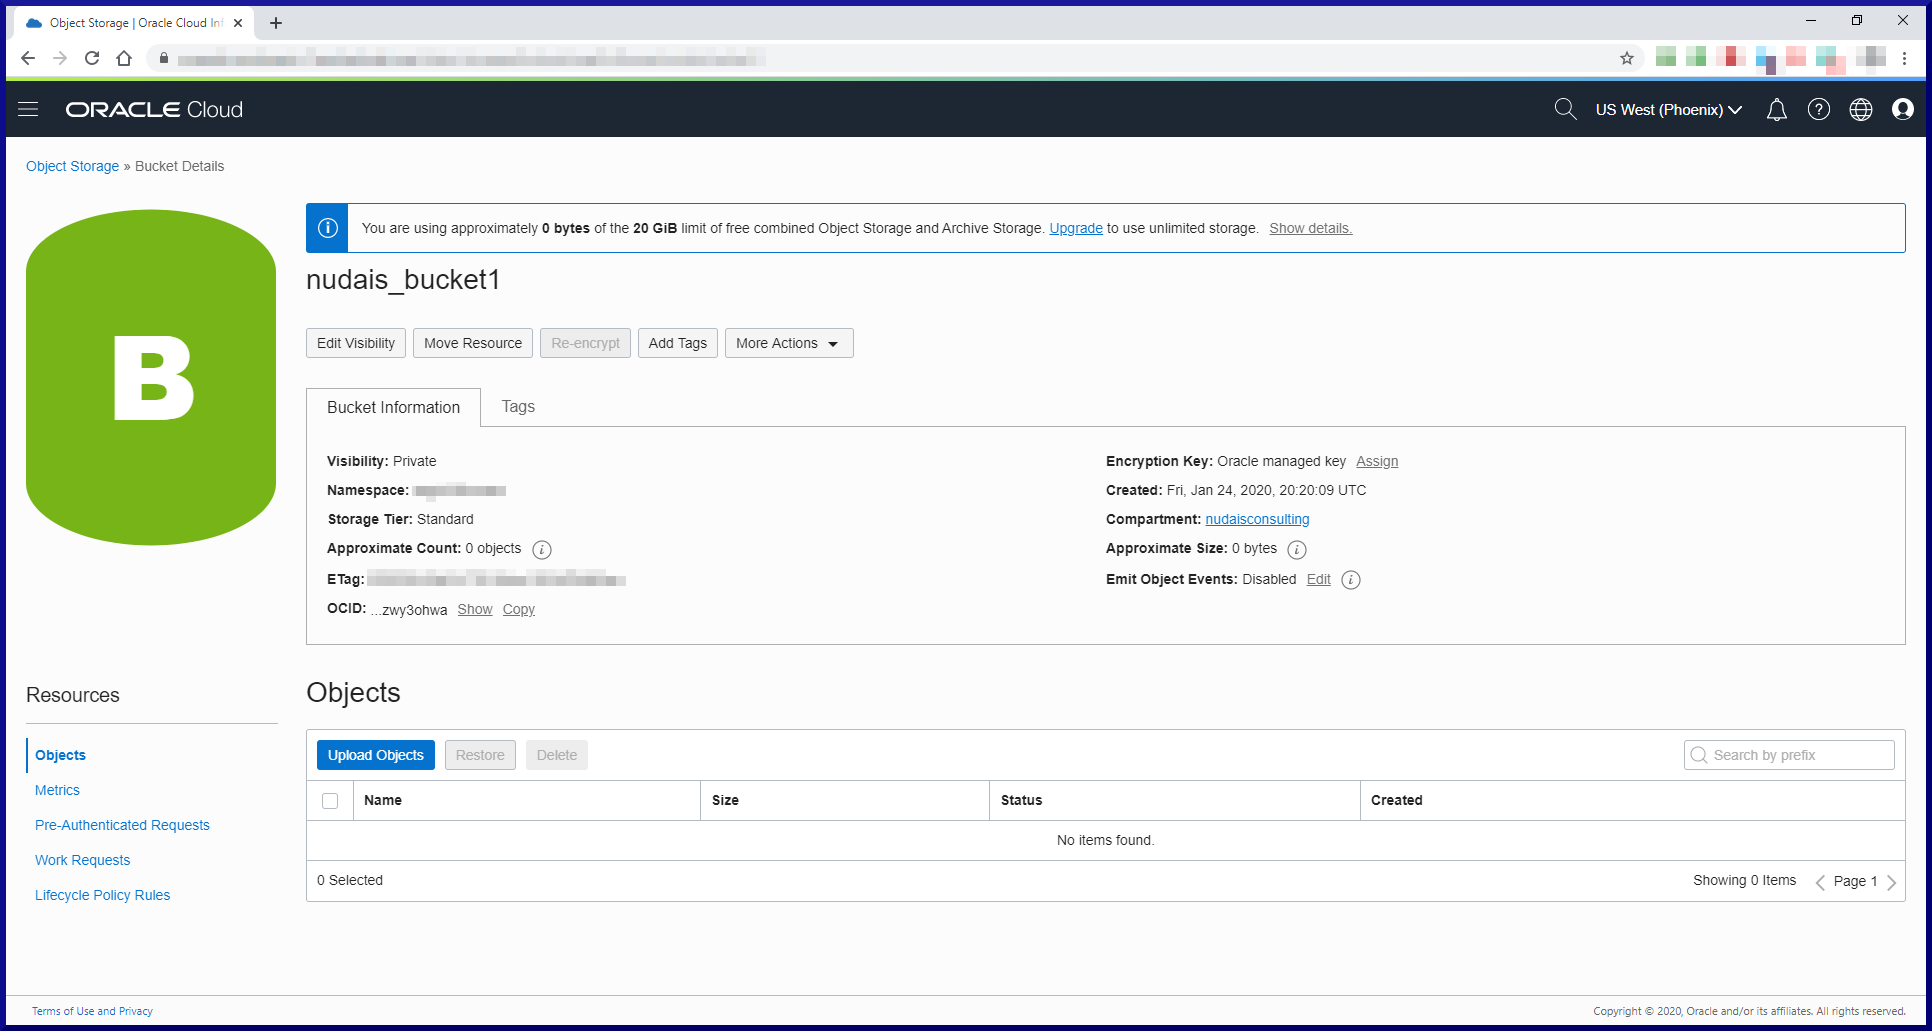

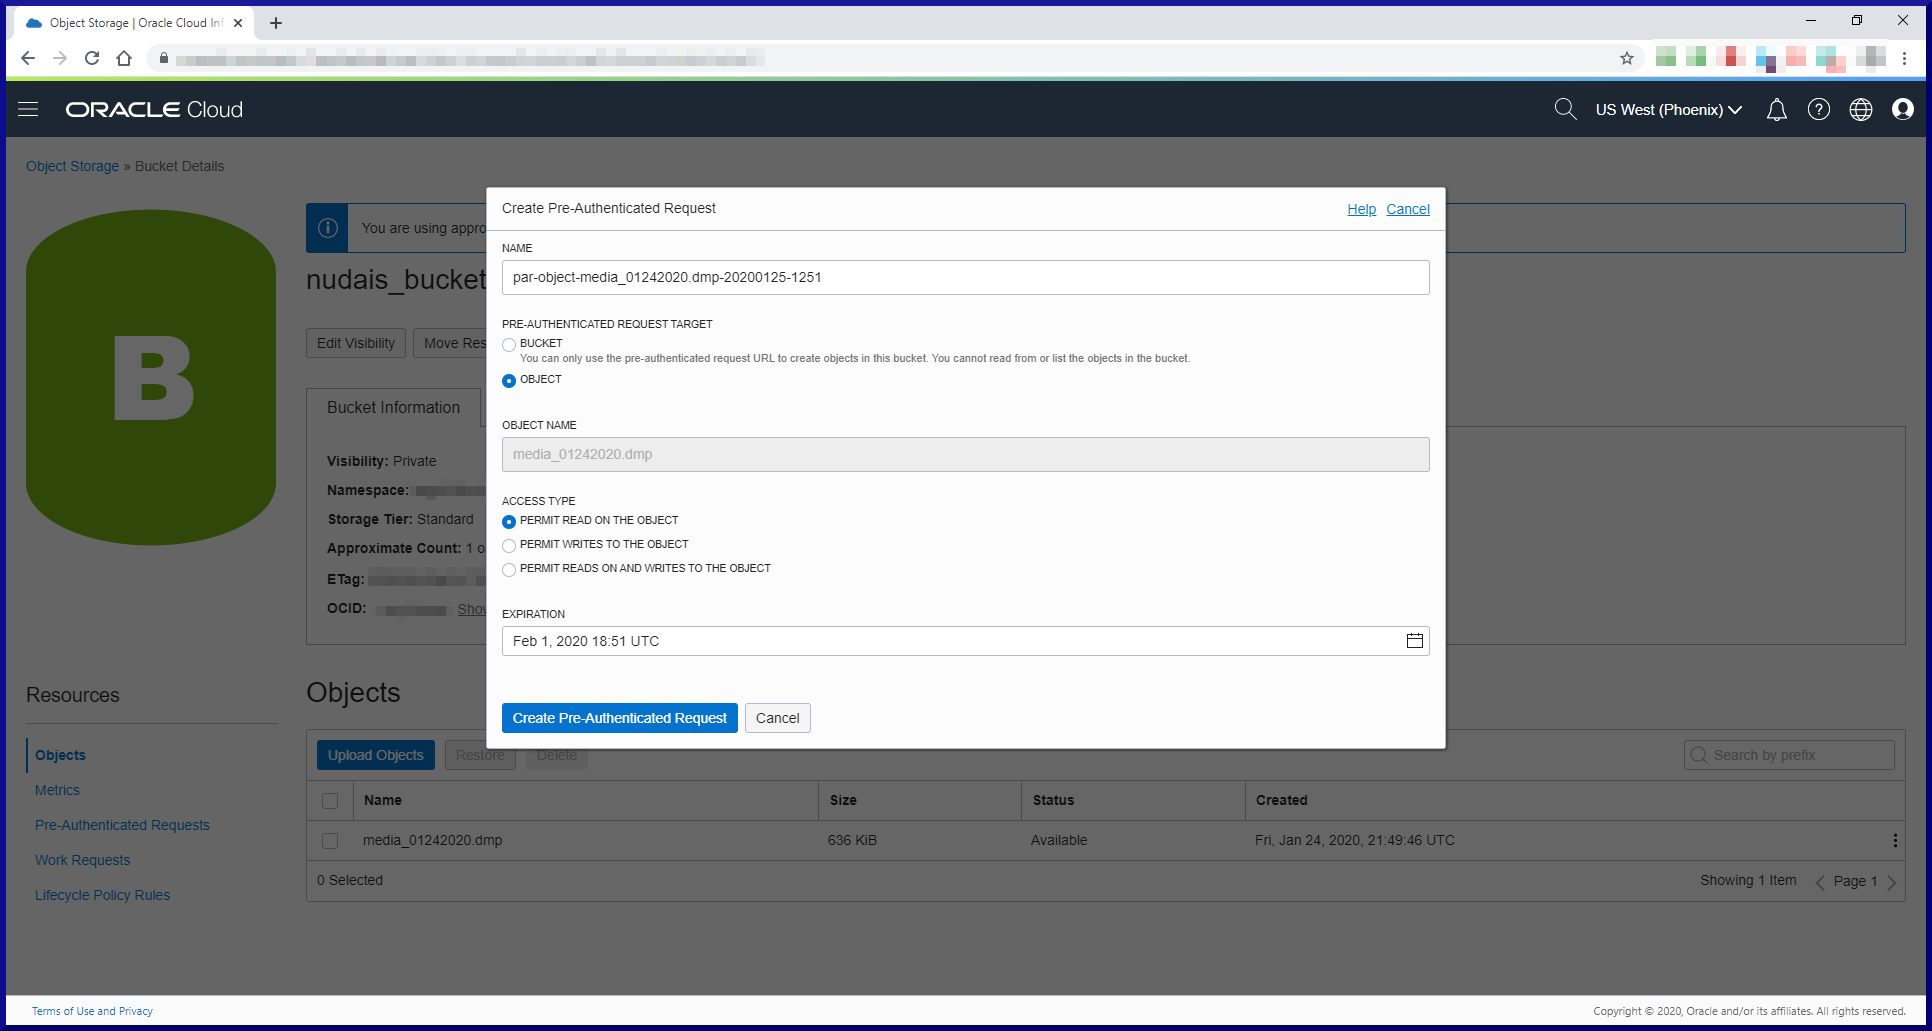
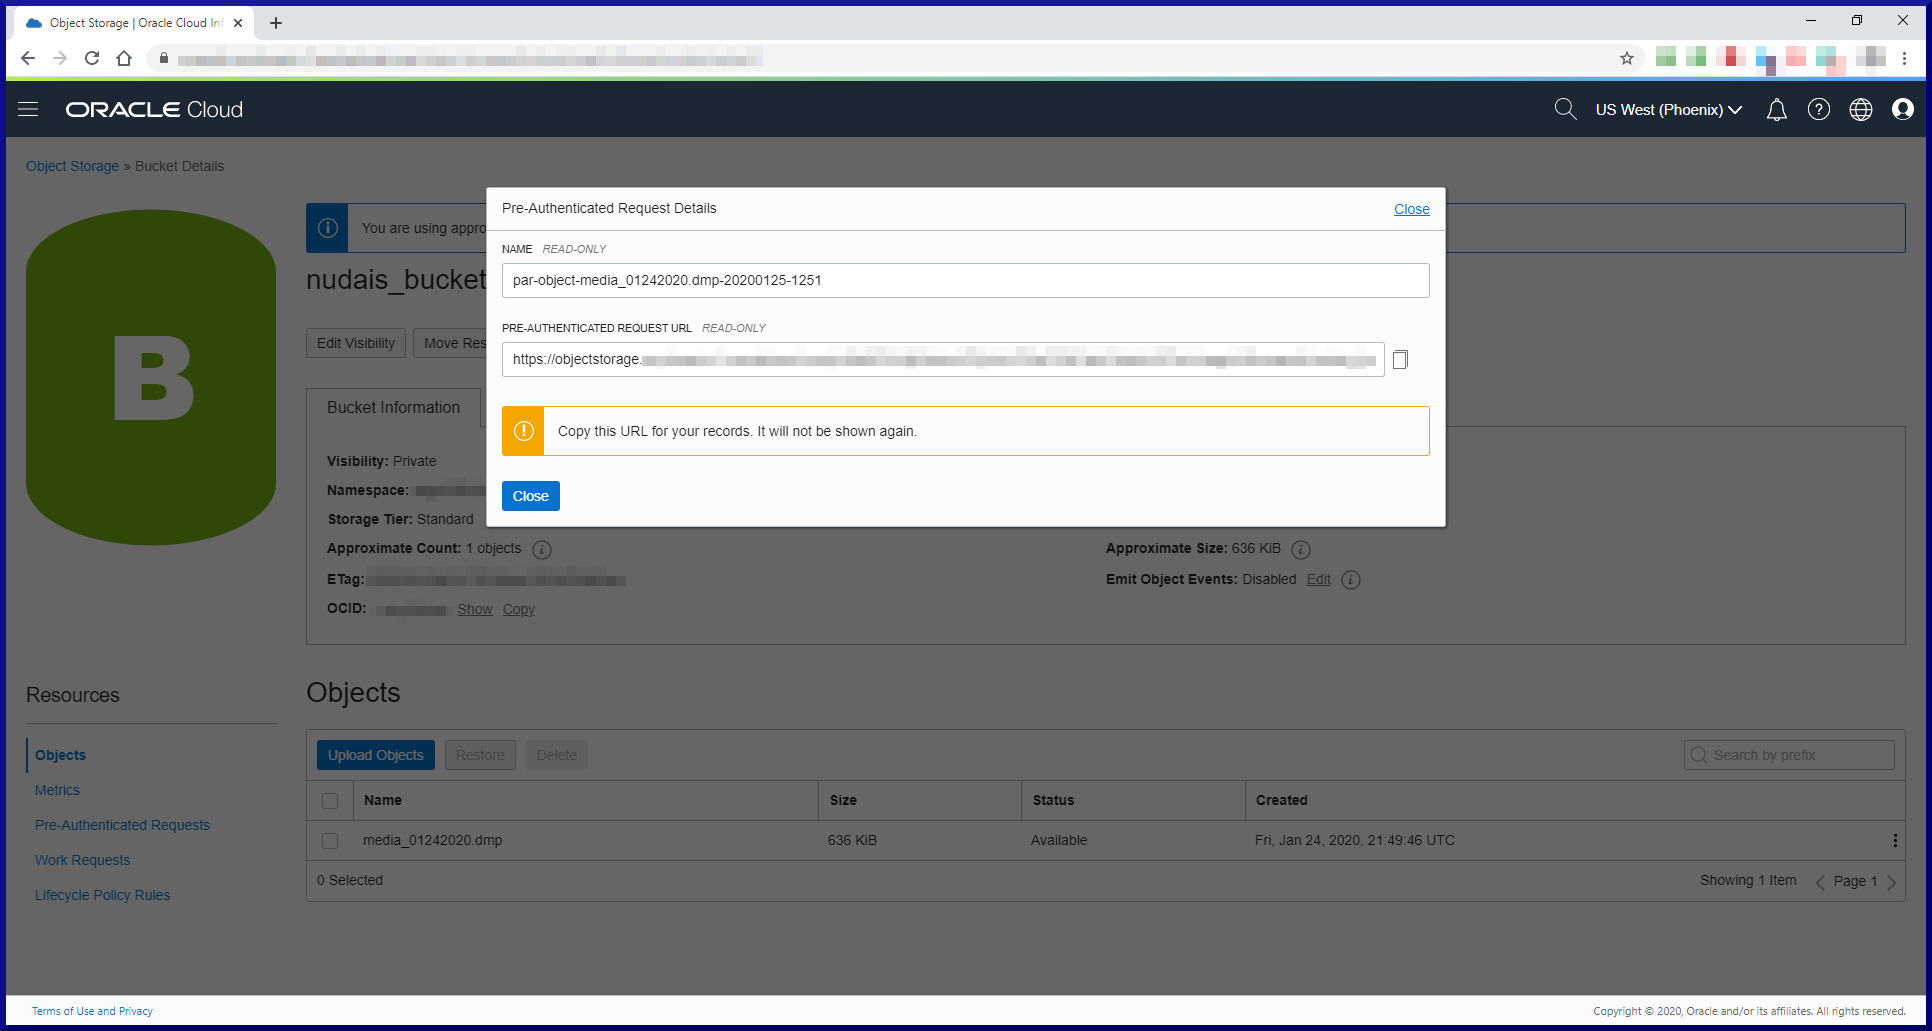
Creating a Pre-Authenticated Request grants permission(s) on the uploaded file for a period of time. Without this step the Data Pump Import process would not be able to read the dump file.
Task #3c: Data Pump Import (Oracle Cloud).
Now that the dump file is in Oracle Cloud with the necessary read permission set, we need to create a security credential in the ADB which Data Pump Import will also need to reference. Login as ADMIN and run this piece of PL/SQL:
BEGIN
  dbms_cloud.create_credential (
  credential_name => 'DEF_CRED_NAME',
  username => 'admin',
  password => 'your-ADMIN-password'
  );
END;
/
Next, edit your Data Pump Import parameter file so that it references the security credential and the dump file URI:
directory=data_pump_dir
credential=DEF_CRED_NAME
encryption_pwd_prompt=YES
dumpfile=<your-dumpfile-URI>
remap_tablespace=USERS:DATA
tables=MEDIA.FORMATS,MEDIA.GENRES,MEDIA.MEDIA_TYPES,MEDIA.RECORDING_ARTISTS,MEDIA.RELEASES,MEDIA.TITLES
logfile=impdp_media_01242020.log
The directory object (DATA_PUMP_DIR) is not where the dump file exists, so it’s really only used as the destination to write the log file (impdp_media_01242020.log). The dump file is accessed via its URI (https://objectstorage……/media_01242020.dmp). In my case I needed to remap where the tables owned by the MEDIA user reside since the ADB does not have a USERS tablespace. Before we launch the Data Pump Import process, we need to check access to the ADB using the Wallet credentials and create the MEDIA user:
[oracle@orasvr02 dp]$ export TNS_ADMIN=/u01/app/oracle/product/cloud_regional_wallet
[oracle@orasvr02 dp]$ echo $TNS_ADMIN
/u01/app/oracle/product/cloud_regional_wallet

[oracle@orasvr02 dp]$ ls -l $TNS_ADMIN
-rw-r--r-- 1 oracle oinstall  6661 Jan  8 19:07 cwallet.sso
-rw-r--r-- 1 oracle oinstall  6616 Jan  8 19:07 ewallet.p12
-rw-r--r-- 1 oracle oinstall  3243 Jan  8 19:07 keystore.jks
-rw-r--r-- 1 oracle oinstall   301 Jan  8 19:07 ojdbc.properties
-rw-r--r-- 1 oracle oinstall   197 Jan 23 17:09 sqlnet.ora
-rw-r--r-- 1 oracle oinstall  3662 Jan  8 19:07 tnsnames.ora
-rw-r--r-- 1 oracle oinstall  3336 Jan  8 19:07 truststore.jks
-rw-r--r-- 1 oracle oinstall 19922 Jan 23 16:58 Wallet_DBCLOUD1.zip

[oracle@orasvr02 dp]$ cat $TNS_ADMIN/sqlnet.ora
NAMES.DIRECTORY_PATH= (TNSNAMES, ONAMES, HOSTNAME)
WALLET_LOCATION = (SOURCE = (METHOD = file) (METHOD_DATA = (DIRECTORY="/u01/app/oracle/product/cloud_regional_wallet")))
SSL_SERVER_DN_MATCH=yes

[oracle@orasvr02 dp]$ cat $TNS_ADMIN/tnsnames.ora | cut -d'=' -f1 | grep dbcloud1
dbcloud1_high
dbcloud1_low
dbcloud1_medium
dbcloud1_tp
dbcloud1_tpurgent

[oracle@orasvr02 dp]$ which sqlplus
/u01/app/oracle/product/18.3.0/dbhome_1/bin/sqlplus

[oracle@orasvr02 dp]$ sqlplus admin@dbcloud1_tp

SQL*Plus: Release 18.0.0.0.0 - Production on Sat Jan 25 13:26:21 2020
Version 18.3.0.0.0

Copyright (c) 1982, 2018, Oracle.  All rights reserved.

Enter password: <your-ADMIN-password>
Last Successful login time: Thu Jan 23 2020 20:29:42 -06:00

Connected to:
Oracle Database 18c Enterprise Edition Release 18.0.0.0.0 - Production
Version 18.4.0.0.0

SQL> select name from v$database;
NAME
--------
FEB61POD

SQL> create user media identified by <your-new_password>
  2  default tablespace data temporary tablespace temp
  3  quota unlimited on data;

User created.

SQL> grant connect, resource to media;

Grant succeeded.
We’ve tested connectivity to the ADB and pre-created the MEDIA user ready for Data Pump Import:
[oracle@orasvr02 dp]$ impdp admin@dbcloud1_tp parfile=impdp_parfile.txt

Import: Release 18.0.0.0.0 - Production on Sat Jan 25 13:41:16 2020
Version 18.3.0.0.0

Copyright (c) 1982, 2018, Oracle and/or its affiliates.  All rights reserved.
Password: <your-ADMIN-password>

Connected to: Oracle Database 18c Enterprise Edition Release 18.0.0.0.0 - Production

Encryption Password: <your-encryption-password>
Master table "ADMIN"."SYS_IMPORT_TABLE_01" successfully loaded/unloaded
Starting "ADMIN"."SYS_IMPORT_TABLE_01":  admin/@dbcloud1_tp parfile=impdp_parfile.txt
Processing object type TABLE_EXPORT/TABLE/TABLE
Processing object type TABLE_EXPORT/TABLE/TABLE_DATA
. . imported "MEDIA"."TITLES"                            227.8 KB    2347 rows
. . imported "MEDIA"."RECORDING_ARTISTS"                 21.80 KB     755 rows
. . imported "MEDIA"."FORMATS"                           7.625 KB      56 rows
. . imported "MEDIA"."MEDIA_TYPES"                        6.25 KB      14 rows
. . imported "MEDIA"."RELEASES"                          5.960 KB       3 rows
. . imported "MEDIA"."GENRES"                            5.531 KB       4 rows
Processing object type TABLE_EXPORT/TABLE/CONSTRAINT/CONSTRAINT
Processing object type TABLE_EXPORT/TABLE/INDEX/STATISTICS/INDEX_STATISTICS
Processing object type TABLE_EXPORT/TABLE/CONSTRAINT/REF_CONSTRAINT
Processing object type TABLE_EXPORT/TABLE/STATISTICS/TABLE_STATISTICS
Processing object type TABLE_EXPORT/TABLE/STATISTICS/MARKER
Job "ADMIN"."SYS_IMPORT_TABLE_01" successfully completed at Sat Jan 25 19:42:29 2020 elapsed 0 00:01:04
Success! Let’s login as the MEDIA user and check to see if we really have those 6 tables:
[oracle@orasvr02 T183_PDB1]$ sqlplus media@dbcloud1_tp

SQL*Plus: Release 18.0.0.0.0 - Production on Sat Jan 25 15:09:19 2020
Version 18.3.0.0.0
Copyright (c) 1982, 2018, Oracle.  All rights reserved.

Enter password: <enter-MEDIA-password>
Last Successful login time: Sat Jan 25 2020 13:52:24 -06:00

Connected to:
Oracle Database 18c Enterprise Edition Release 18.0.0.0.0 - Production
Version 18.4.0.0.0

SQL> select table_name from user_tables;

TABLE_NAME
----------------------------------------
FORMATS
GENRES
RELEASES
RECORDING_ARTISTS
TITLES
MEDIA_TYPES

6 rows selected.
Much has been written recently about machine learning and artificial intelligence. Let’s put that to the test with a simple query:
SQL> SELECT t.title album_title,
            ra.first_name||' '||ra.last_or_group_name artist
     FROM   titles t,
            recording_artists ra
     WHERE  t.recording_artist_id = ra.recording_artist_id
     AND    title_id = 96;

The Best Album Ever Recorded   By The Patron Saint of Music
----------------------------   ----------------------------
The Pleasure Principle         Gary Numan
WOW! That’s amazing! Oracle Autonomous Database really is super intelligent and has great taste in music! ? ?