

In this post, we will cover my top 10 things you need to know about PostgreSQL in order to begin working with it effectively. We’ll approach these topics using Oracle as a reference point. Hopefully that way you will more readily understand something in PostgreSQL if you already know the Oracle equivalent. Should be fun! We will cover these topics:
- 01. PostgreSQL Installation
- 02. PostgreSQL Architecture
- 03. PostgreSQL Connectivity
- 04. Create Databases in PostgreSQL
- 05. PostgreSQL Security
- 06. Create Objects in PostgreSQL Databases
- 07. PostgreSQL Backup & Recovery
- 08. PostgreSQL Data Dictionary
- 09. PostgreSQL Troubleshooting & Support
- 10. Common PostgreSQL DBA Tasks
01. PostgreSQL Installation.
01.1 Installation Media.
All things PostgreSQL start at the main PostgreSQL website.
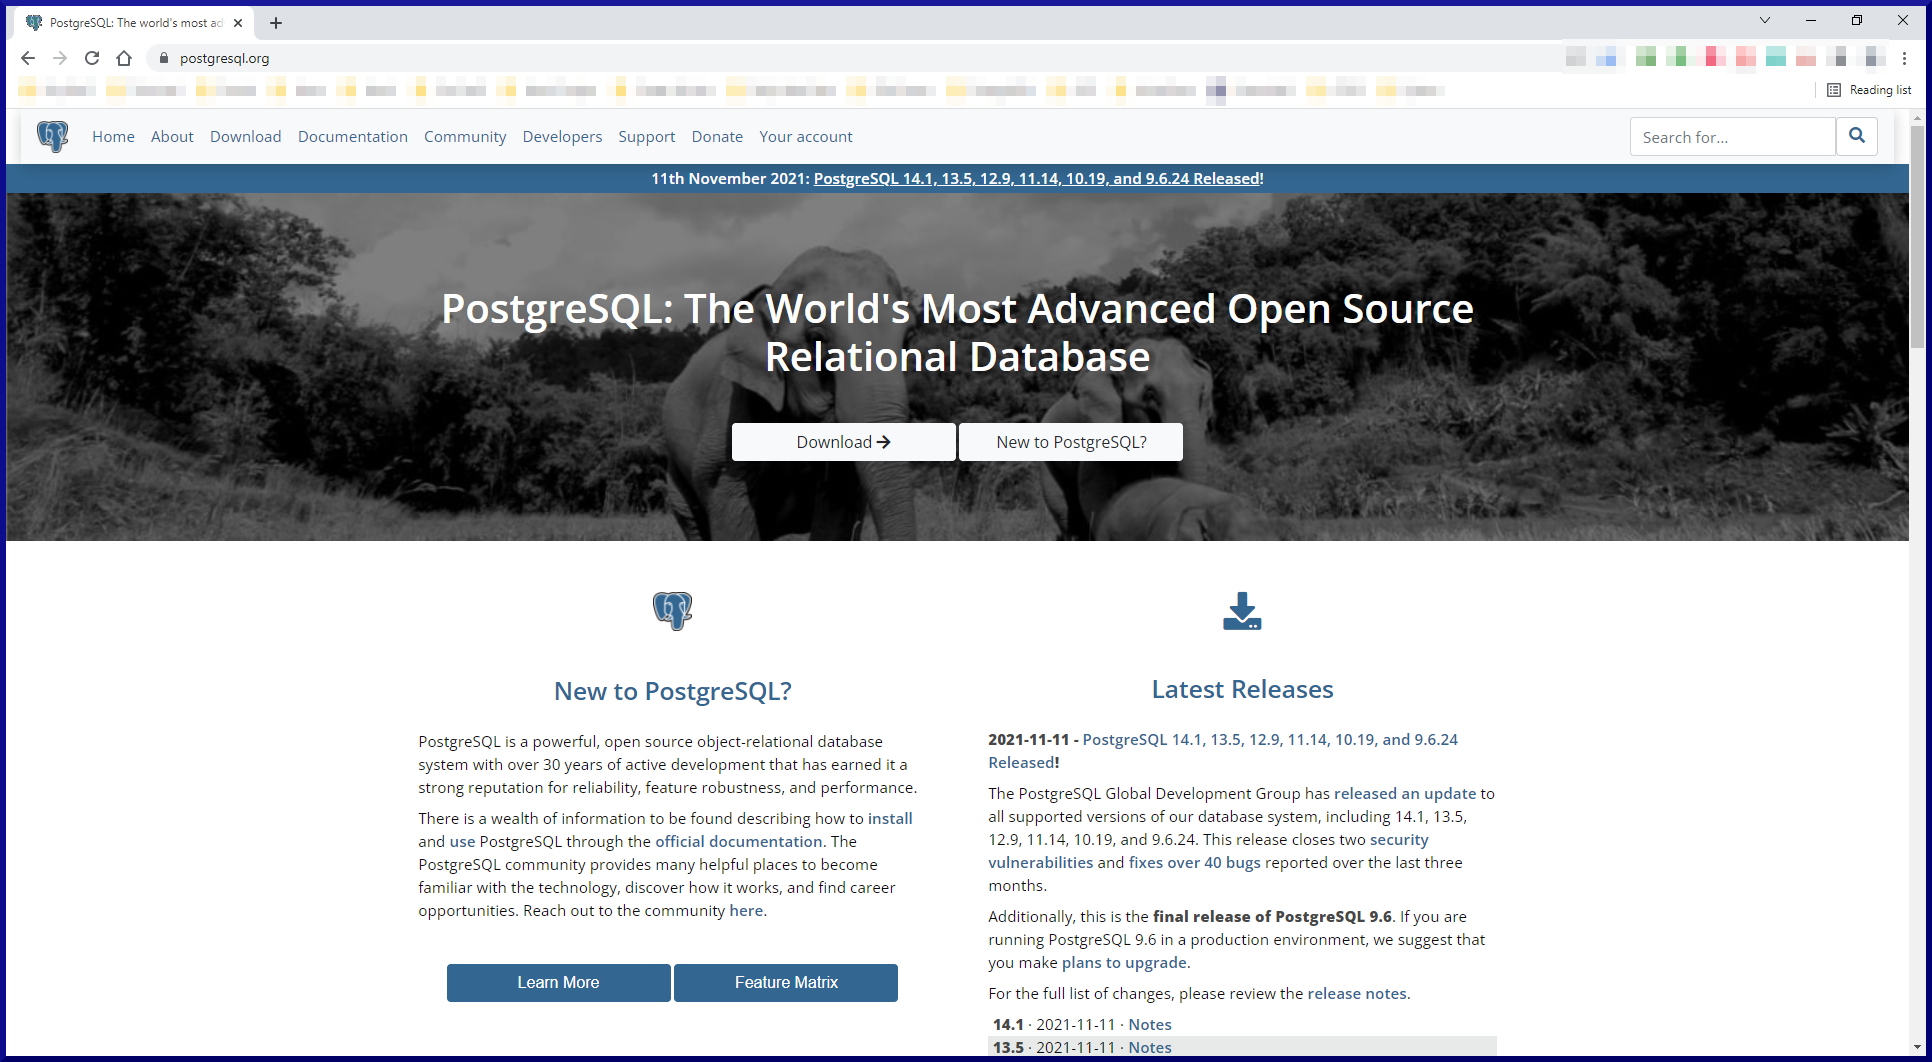
From here, click the Download button, then click the button corresponding to your OS family. For Linux, click the required distribution. From here, under the PostgreSQL Yum Repository section, select your version , platform and architecture and the website will respond with the yum commands you’ll need to download and install PostgreSQL server.
It really is that simple. No need to setup an account and login like you have to with Oracle Tech Net. Just repo and go!
01.2 PostgreSQL Already Installed?
I started off with a RHEL 7.9 system which already had a version of PostgreSQL installed (9.2). That version is no longer supported and is probably not what you want. The best way forward is to uninstall that version first, before installing a newer version. That way you avoid some interesting looking failure messages. To check if you have a version of PostgreSQL server already installed and to remove it, run these commands as root:
[root@orasvr04 root]# rpm -qa | grep postgres

postgresql-libs-9.2.24-4.el7_8.x86_64
postgresql-server-9.2.24-4.el7_8.x86_64
postgresql-9.2.24-4.el7_8.x86_64

[root@orasvr04 root]# yum remove postgres\*
01.3 Install PostgreSQL Version 14.
With a clean and PostgreSQL free system, let’s crack on and install version 14. As the root user, download the required rpm:
[root@orasvr04 root]# yum install -y https://download.postgresql.org/pub/repos/yum/reporpms/EL-7-x86_64/pgdg-redhat-repo-latest.noarch.rpm

Loaded plugins: langpacks, product-id, search-disabled-repos
pgdg-redhat-repo-latest.noarch.rpm                                        | 8.1 kB  00:00:00
Examining /var/tmp/yum-root-iTgiZB/pgdg-redhat-repo-latest.noarch.rpm: pgdg-redhat-repo-42.0-23.noarch
/var/tmp/yum-root-iTgiZB/pgdg-redhat-repo-latest.noarch.rpm: does not update installed package.
Error: Nothing to do
[root@orasvr04 root]#
Next, as the root user, install the PostgreSQL server:
[root@orasvr04 root]# yum install -y postgresql14-server

Loaded plugins: langpacks, product-id, search-disabled-repos
file:///cdrom/repodata/repomd.xml: [Errno 14] curl#37 - "Couldn't open file /cdrom/repodata/repomd.xml"
Trying other mirror.
Resolving Dependencies
--> Running transaction check
---> Package postgresql14-server.x86_64 0:14.1-1PGDG.rhel7 will be installed
--> Processing Dependency: postgresql14-libs(x86-64) = 14.1-1PGDG.rhel7 for package: postgresql14-server-14.1-1PGDG.rhel7.x86_64
--> Processing Dependency: postgresql14(x86-64) = 14.1-1PGDG.rhel7 for package: postgresql14-server-14.1-1PGDG.rhel7.x86_64
--> Processing Dependency: libpq.so.5()(64bit) for package: postgresql14-server-14.1-1PGDG.rhel7.x86_64
--> Running transaction check
---> Package postgresql14.x86_64 0:14.1-1PGDG.rhel7 will be installed
---> Package postgresql14-libs.x86_64 0:14.1-1PGDG.rhel7 will be installed
--> Finished Dependency Resolution

Dependencies Resolved

==================================================================================================
 Package                                     Arch                           Version                                    Repository                      Size
==================================================================================================
Installing:
 postgresql14-server                         x86_64                         14.1-1PGDG.rhel7                           pgdg14                         5.5 M
Installing for dependencies:
 postgresql14                                x86_64                         14.1-1PGDG.rhel7                           pgdg14                         1.5 M
 postgresql14-libs                           x86_64                         14.1-1PGDG.rhel7                           pgdg14                         265 k

Transaction Summary
==================================================================================================
Install  1 Package (+2 Dependent packages)

Total download size: 7.3 M
Installed size: 31 M
Downloading packages:
(1/3): postgresql14-libs-14.1-1PGDG.rhel7.x86_64.rpm                                                                                 | 265 kB  00:00:01
(2/3): postgresql14-14.1-1PGDG.rhel7.x86_64.rpm                                                                                      | 1.5 MB  00:00:01
(3/3): postgresql14-server-14.1-1PGDG.rhel7.x86_64.rpm                                                                               | 5.5 MB  00:00:00
--------------------------------------------------------------------------------------------------
Total                                                                                                                       3.7 MB/s | 7.3 MB  00:00:01
Running transaction check
Running transaction test
Transaction test succeeded
Running transaction
  Installing : postgresql14-libs-14.1-1PGDG.rhel7.x86_64             1/3
  Installing : postgresql14-14.1-1PGDG.rhel7.x86_64                  2/3
  Installing : postgresql14-server-14.1-1PGDG.rhel7.x86_64           3/3
  Verifying  : postgresql14-14.1-1PGDG.rhel7.x86_64                  1/3
  Verifying  : postgresql14-server-14.1-1PGDG.rhel7.x86_64           2/3
  Verifying  : postgresql14-libs-14.1-1PGDG.rhel7.x86_64             3/3

Installed:
  postgresql14-server.x86_64 0:14.1-1PGDG.rhel7

Dependency Installed:
  postgresql14.x86_64 0:14.1-1PGDG.rhel7 postgresql14-libs.x86_64 0:14.1-1PGDG.rhel7

Complete!
Next, as the root user, perform the initial setup and configuration, enable PostgreSQL and start the PosgreSQL server service:
[root@orasvr04 root]# /usr/pgsql-14/bin/postgresql-14-setup initdb

Initializing database ... OK

[root@orasvr04 root]# systemctl enable postgresql-14

Created symlink from /etc/systemd/system/multi-user.target.wants/postgresql-14.service to /usr/lib/systemd/system/postgresql-14.service.

[root@orasvr04 root]# systemctl start postgresql-14
(displays no output)
That’s it. PostgreSQL version 14 is up and running. How do we know it’s working?
01.4 PostgreSQL Server Status Check.
As the root user, run the standard Linux service status command for PostgreSQL. Note the minus lower case L option (-l) which gives you slightly more informative output:
[root@orasvr04 ~]# systemctl status -l postgresql-14

● postgresql-14.service - PostgreSQL 14 database server
   Loaded: loaded (/usr/lib/systemd/system/postgresql-14.service; enabled; vendor preset: disabled)
   Active: active (running) since Tue 2022-01-04 16:12:18 CST; 1h 35min ago
     Docs: https://www.postgresql.org/docs/14/static/
  Process: 1138 ExecStartPre=/usr/pgsql-14/bin/postgresql-14-check-db-dir ${PGDATA} (code=exited, status=0/SUCCESS)
 Main PID: 1164 (postmaster)
   CGroup: /system.slice/postgresql-14.service
           ├─1164 /usr/pgsql-14/bin/postmaster -D /var/lib/pgsql/14/data/
           ├─1203 postgres: logger
           ├─1333 postgres: checkpointer
           ├─1334 postgres: background writer
           ├─1335 postgres: walwriter
           ├─1336 postgres: autovacuum launcher
           ├─1339 postgres: stats collector
           └─1340 postgres: logical replication launcher

Jan 04 16:12:18 orasvr04.mynet.com systemd[1]: Starting PostgreSQL 14 database server...
Jan 04 16:12:18 orasvr04.mynet.com postmaster[1164]: 2022-01-04 16:12:18.341 CST [1164] LOG:  redirecting log output to logging collector process
Jan 04 16:12:18 orasvr04.mynet.com postmaster[1164]: 2022-01-04 16:12:18.341 CST [1164] HINT:  Future log output will appear in directory "log".
Jan 04 16:12:18 orasvr04.mynet.com systemd[1]: Started PostgreSQL 14 database server.
So we know the PostgreSQL server is up and running, but is it configured and operational? To find out we’ll need to login to the PostgreSQL server. To do that, we’ll need to use a client tool. The PostgreSQL equivalent of the SQL*Plus CLI is called psql. More information on psql can be found here. Let’s switch to the postgres OS user and log into the PostgreSQL server:
[root@orasvr04 ~]# su - postgres

Last login: Tue Jan  4 18:39:58 CST 2022 on pts/0
First, let’s check the version is correct. It should be version 14.1:
-bash-4.2$ psql -V

psql (PostgreSQL) 14.1
Next, let’s connect to the default ‘system’ database (postgres):
-bash-4.2$ psql

psql (14.1)
Type "help" for help.

postgres=#
It doesn’t tell you you’re connected, but you are. Your prompt defaults to the database you’re connected to. In this case, that’s the postgres database. Let’s generate some output by listing all the databases the PostgreSQL server knows about (\list command):
postgres=# \list
                                  List of databases
   Name    |  Owner   | Encoding |   Collate   |    Ctype    |   Access privileges
-----------+----------+----------+-------------+-------------+-----------------------
 postgres  | postgres | UTF8     | en_US.UTF-8 | en_US.UTF-8 |
 template0 | postgres | UTF8     | en_US.UTF-8 | en_US.UTF-8 | =c/postgres          +
           |          |          |             |             | postgres=CTc/postgres
 template1 | postgres | UTF8     | en_US.UTF-8 | en_US.UTF-8 | =c/postgres          +
           |          |          |             |             | postgres=CTc/postgres
(3 rows)

postgres=#
The output tells us there are currently 3 databases. The default system database (postgres) and two template databases (template0 and template1). To exit out of psql, type exit or backslash q (\q):
postgres=# \q
-bash-4.2$
PostgreSQL version 14 is installed, up and running and ready for action!
Before you get too excited, there are a couple of things you might want to take care of. Changing the password of the postgres OS user and the password of the PostgreSQL server postgres user. Changing the OS password is standard fare via the passwd command. Changing the PostgreSQL server postgres user password requires a SQL command. Here’s how to do both.
As the root user:
[root@orasvr04 ~]# passwd postgres

Changing password for user postgres.
New password: <enter a new password>
Retype new password: <enter a new password again>
passwd: all authentication tokens updated successfully.

[root@orasvr04 ~]#
-bash-4.2$ psql
psql (14.1)
Type "help" for help.

postgres=# alter user postgres with password 'postgres';
ALTER ROLE
postgres=# exit
-bash-4.2$
Remember these passwords. You’ll need them later!
03. PostgreSQL Connectivity.
Connecting to a PostgreSQL server can be achieved in a number of different ways. Two clients come packaged with PostgreSQL itself. A CLI called psql and a GUI called pgAdmin. We’ll also take a look at how to connect Oracle SQL Developer to a PostgreSQL server.
A fresh install of PostgreSQL onto a Linux server will, by default, allow local connections but not remote connections. Enabling remote client connections depends upon some parameters being set in two PostgreSQL configuration files. These parameter files are postgresql.conf (postgresql.auto.conf) and pg_hba.conf. By default, both are stored in the PostgreSQL data directory, /var/lib/pgsql/<version_number>/data. For example:
/var/lib/pgsql/14/data
postgresql.conf
The postgresql.conf file is the main configuration file for the PostgreSQL server. It’s the equivalent of Oracle’s text pfile (init.ora). Detailed documentation about the format and content of the postgresql.conf file can be found here.
It is a best practice to not directly edit the postgresql.conf file. Instead you should add your own customizations via its complementary file, postgresql.auto.conf. However, there is a comment in postgresql.auto.conf which says, “Do not edit this file manually! It will be overwritten by the ALTER SYSTEM command.”. It’s OK if you edit it, I won’t tell anyone. Or you could be the hyper disciplined DBA that you are and use ALTER SYSTEM commands to add the relevant entries. Let’s do that. There are two parameters you need to add to postgresql.auto.conf, listener_addresses and port.
The listen_addresses parameter specifies the IP addresses or host on which to listen for incoming connection requests. It defaults to ‘localhost’ (note the single quotes) which is obviously the server on which PostgreSQL is installed. It is common to change this to an asterisk symbol (‘*’) meaning any address (or NIC on the server). Conversely, it can be set explicitly to the hostname or exact IP address of the server. The listen_addresses parameter is kind of the equivalent of the HOSTS parameter in an Oracle listener.ora LISTENER configuration.
The port parameter specifies the port number on which incoming connection requests are listened for. Its default value is 5432.It is the equivalent of the PORT parameter in an Oracle listener.ora LISTENER configuration.
To set these parameters using SQL, use the psql CLI. As the postgres OS user:
-bash-4.2$ id
uid=26(postgres) gid=26(postgres) groups=26(postgres)

-bash-4.2$ psql
psql (14.1)
Type "help" for help.

postgres=# alter system set listen_addresses = 'orasvr04';
ALTER SYSTEM

postgres=# alter system set port='5432';
ALTER SYSTEM

postgres=# exit
-bash-4.2$

-bash-4.2$ cat postgresql.auto.conf
# Do not edit this file manually!
# It will be overwritten by the ALTER SYSTEM command.
listen_addresses = 'orasvr04'
port = '5432'
For changes to the postgresql.auto.conf to take effect, the PostgreSQL service must be restarted. As the root user:
[root@orasvr04 ~]# systemctl restart postgresql-14
[root@orasvr04 ~]#
pg_hba.conf
The pg_hba.conf file controls which IP addresses and users are allowed to connect to which databases on the PostgreSQL server and how those connections will be authenticated. It does this through a set of rules. Detailed documentation about the format and contents of the rules can be found here.
A rule has 5 values. They are:
| Rule Parameter | Meaning |
|---|---|
| TYPE | Specifies the type of client and is usually set to the value host. SSL hosts are also supported. |
| DATABASE | The name of the database the connection rule maps to. It can be the name of an individual database or all databases when the value "all" is specified. |
| USER | The name of the user the connection rule maps to. It can be the name of an individual user (login role) or all users when the value "all" is specified. |
| ADDRESS | This specifies the range of IP addresses which are allowed to connect to the PostgreSQL server. It uses CIDR notation and supports both IPv4 and IPv6. |
| METHOD | This specifies the authentication method the client connection will use when negotiating a connection with the PostgreSQL server. Detailed authentication methods are documented here. Or you could just use the password option to denote the remote user must provide a password. |
An interesting thing about the pg_hba.conf file is the contents are scanned top to bottom. As soon as a rule granting or rejecting a connection is found, it is acted upon and no further entries are processed. That means if a rule rejecting access appears before a rule granting access, you’ll never get connected. Order is important.
The pg_hba.conf file contains a ton of useful internal documentation before the actual access control rules. Here is the default pg_hba.conf file, including the rule I added for my system (in green):
# TYPE  DATABASE        USER            ADDRESS                 METHOD

# "local" is for Unix domain socket connections only
local   all             all                                     peer
# IPv4 local connections:
#host    all             all             127.0.0.1/32            scram-sha-256
host    all     	all     	200.200.10.1/24  	password
# IPv6 local connections:
host    all             all             ::1/128                 scram-sha-256
# Allow replication connections from localhost, by a user with the
# replication privilege.
local   replication     all                                     peer
host    replication     all             127.0.0.1/32            scram-sha-256
host    replication     all             ::1/128                 scram-sha-256
Let’s take a look at what my rule actually means:
| Rule Parameter | Value | Meaning |
|---|---|---|
| TYPE | host | Specifies a connection will be made using TCP/IP. |
| DATABASE | all | Rule applies to all databases within the PostgreSQL server. |
| USER | all | Rule applies to all users. |
| ADDRESS | 200.200.10.1/24 | Specifies the range of IP addresses the rule allows to connect. The /24 means the first 3 numbers identify the network (200.200.10) and the last number identifies the range of hosts within that network. The range will be 200.200.10.1 through 200.200.10.254. As long as the connecting client has an IP address within that range, the rule will allow it to connect. |
| METHOD | password | Take a wild guess. |
03.1 psql.
The psql CLI is equivalent to the SQL*Plus CLI. With SQL*Plus you can run SQL commands and SQL*Plus commands. Similarly with psql, you can run SQL commands and meta-commands.
03.1.1 psql Local Connection.
To make a local connection to the PostgreSQL server, as the postgres OS user, simply type psql and hit the <ENTER> key. This will connect you to the postgres system database as the postgres user (login role):
-bash-4.2$ id
uid=26(postgres) gid=26(postgres) groups=26(postgres)

-bash-4.2$ psql
psql (14.1)
Type "help" for help.

postgres=#
You can use a psql meta-command to show you details of your current connection:
postgres=# \conninfo
You are connected to database "postgres" as user "postgres" via socket in "/var/run/postgresql" at port "5432".

postgres=#
03.1.2 psql Remote Connection.
To use psql (and pgAdmin) to make remote connections to a PostgreSQL server, you need to install them on your client machine. To install these utilities, run the relevant PostgreSQL download (as Administrator if you are on Windows):

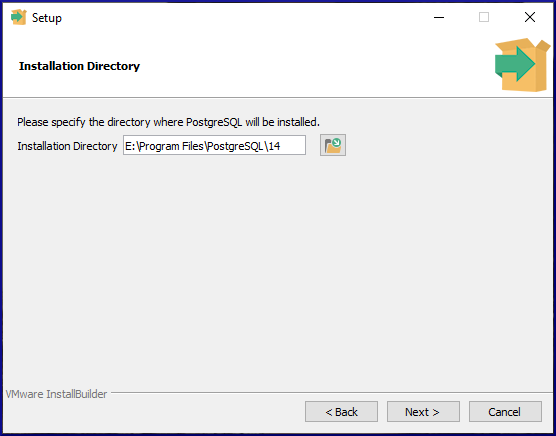
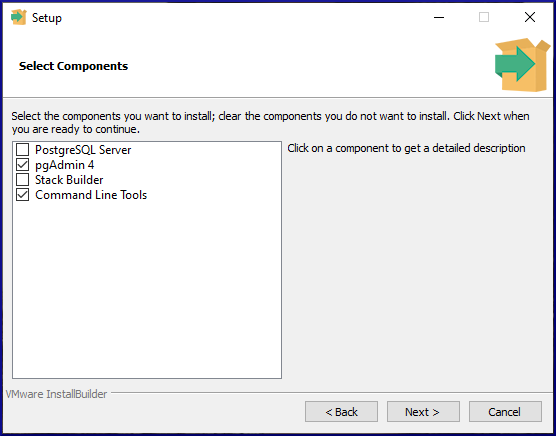
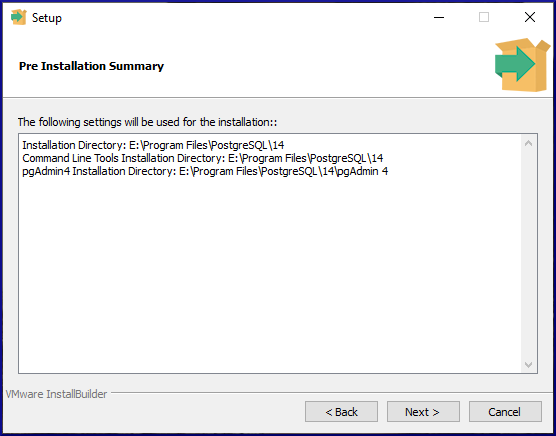

Once the installation is complete, it will have created a PostgreSQL program group containing links to psql, pgAdmin and pgAdmin documentation:

Clicking on SQL Shell (psql) opens up a command window which will prompt for 5 values:
| Parameter | Default Value | Entered Value |
|---|---|---|
| Server | localhost | orasvr04 |
| Database | postgres | Leave as default |
| Port | 5432 | Leave as default |
| Username | postgres | Leave as default |
| Password for user postgres: | None | Enter value defined in Section 01.4 |

03.2 pgAdmin.
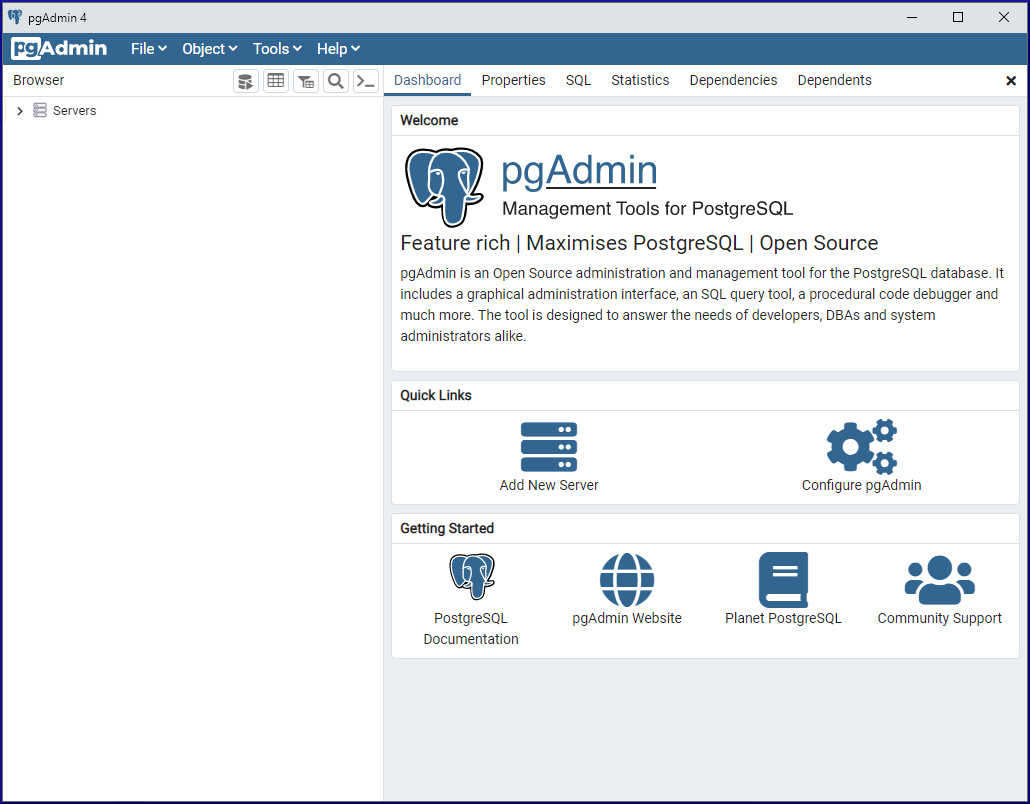
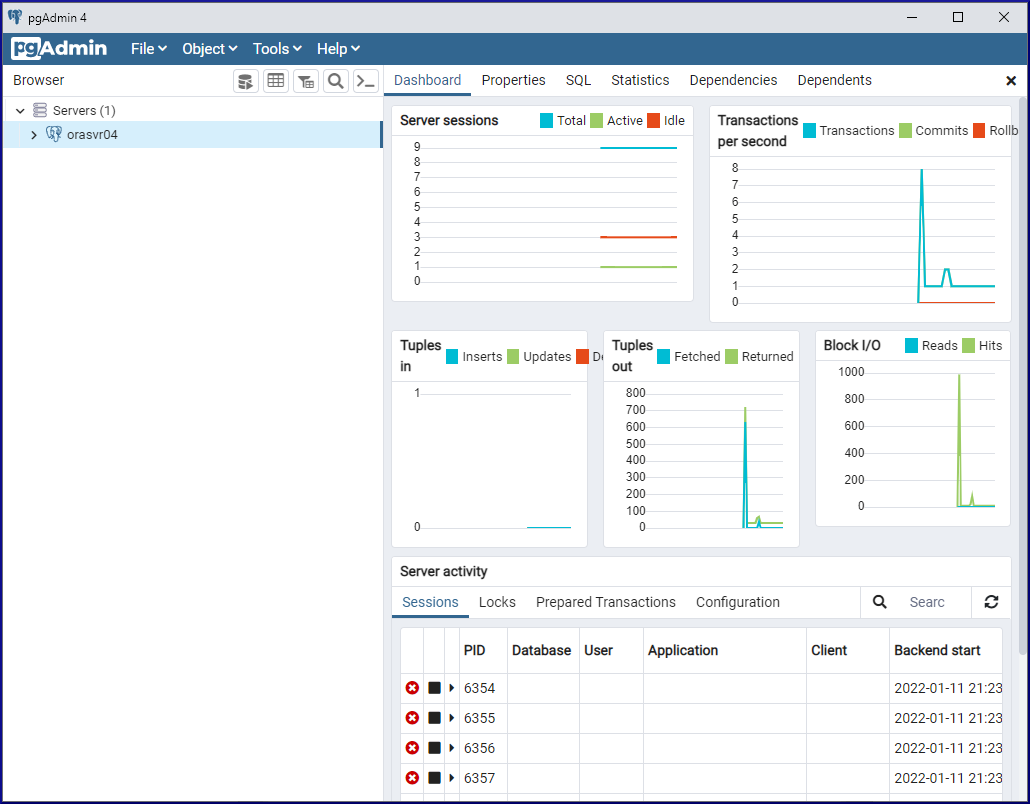
The pgAdmin GUI is similar to Oracle SQL Developer, including SQL Developer’s DBA connections, but is probably closer to SQL Server Management Studio (SSMS) in look, feel and functionality. Like SSMS, it’s a combination of query tool, IDE and DBA console. We saw in the previous section how to install it on Windows. Let’s fire it up and see what it looks like.
Click on pgAdmin4 in the PostgesSQL program group in Windows. The first thing you’ll see is a challenge for the master password. You’ll see this challenge the first time you fire up pgAdmin.Click the Reset Master Password button to initially set one, then remember it. You’ll need it each time you use pgAdmin from that point forward. It can of course, be reset at any time.
A master password is specific to a client installation of pgAdmin. Meaning the master password for pgAdmin on client A can be different from the master password for pgAdmin on client B, even though they might be connecting to the same PostgreSQL server.

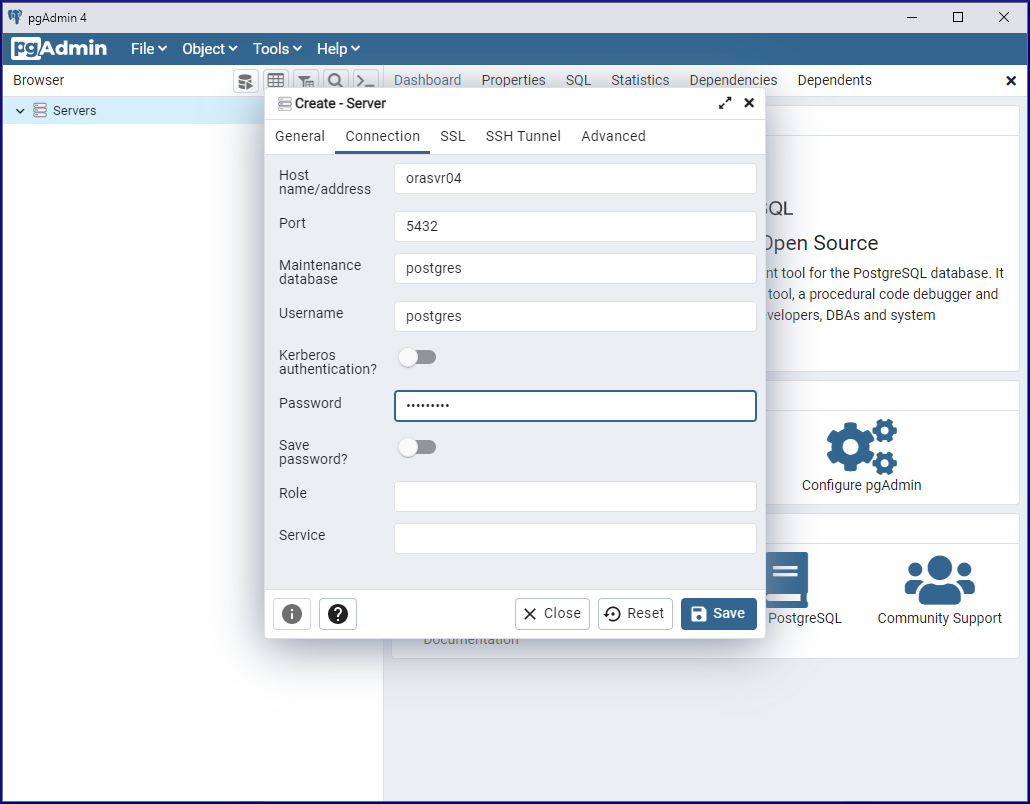
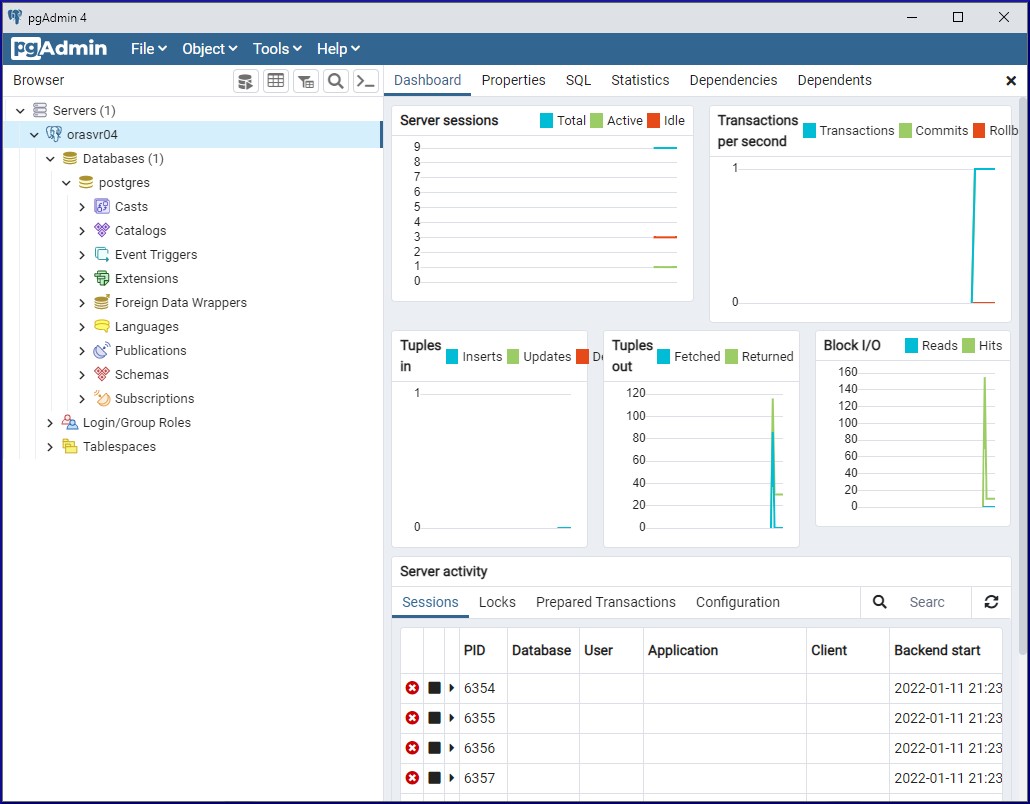
From here you can add the PostgreSQL server(s) you want to connect to. Right click on Servers, then select Create ➡️ Server… to add a new connection:


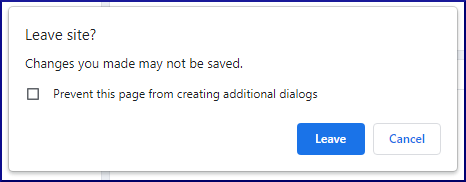
When you’re ready to exit out of pgAdmin, just click the X in the top right hand corner of the window. The system responds with:
Subsequent invocations of pgAdmin will again prompt you for the master password and the password of the postgres user (login role) in the postgres system database. pgAdmin does that because the entry in pg_hba.conf specifies that connection requests coming from this client IP are authenticated via a password:

03.3 Oracle SQL Developer.
You can also use Oracle’s SQL Developer to connect to PostgreSQL servers. Predictably, it’s a case of dealing with that awful virus the world knows as Java. Here’s what you do to make it work.
First, check which version of Java your copy of SQL Developer is using. To find that out, fire up SQL Developer, then click Help ➡️ About, then choose the Version tab:
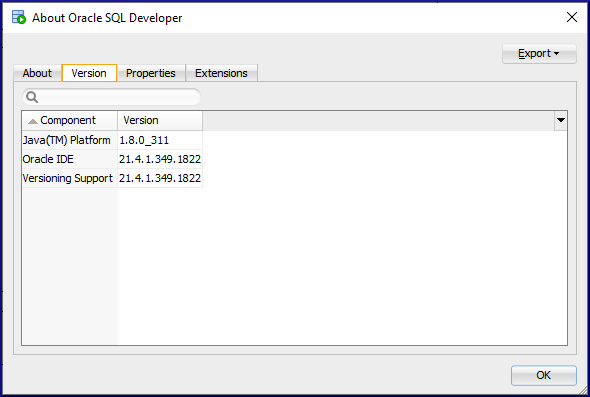
As you can see, I’m running Java 1.8.0_311, which basically means version 8 (the second number).
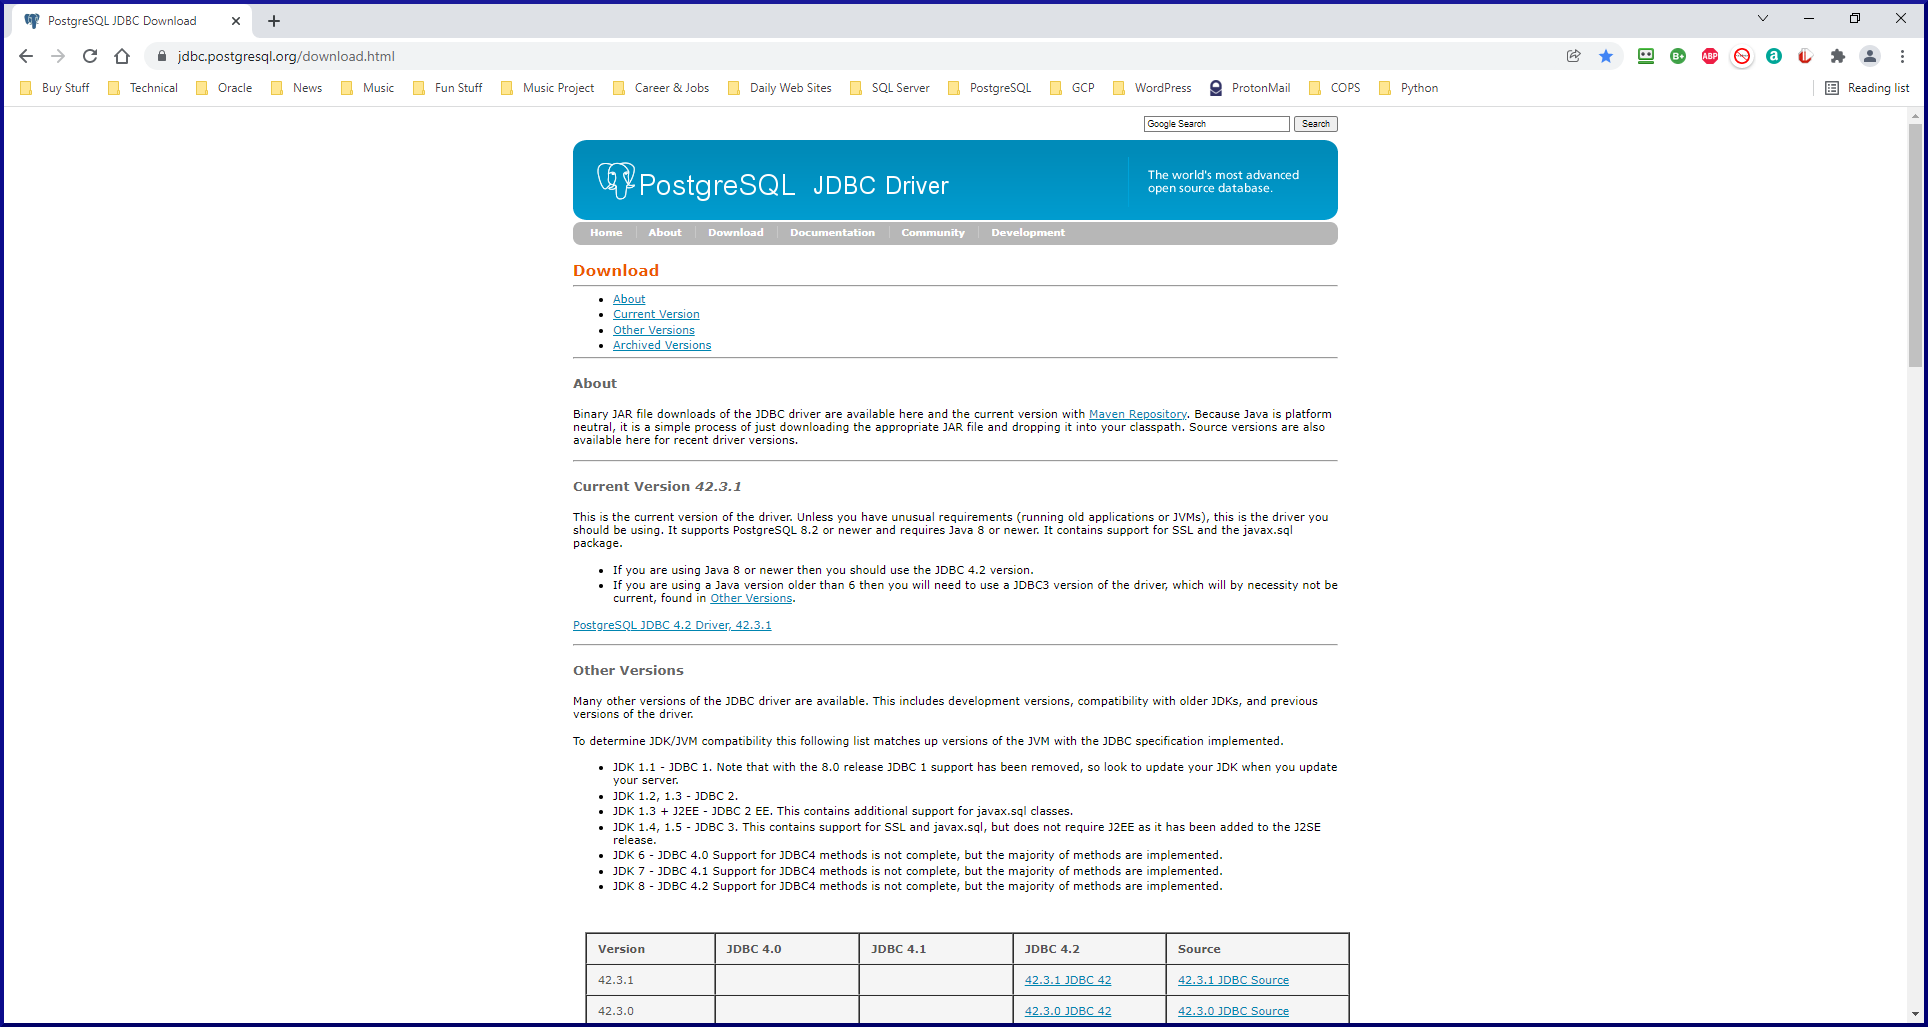
Next, go to the PostgreSQL JDBC Driver download website. From here, you should choose the most appropriate PostgreSQL JDBC driver for your needs. Fortunately by using plain English, this website makes it super easy, barely an inconvenience:
Download the PostgreSQL JDBC driver to your local system. Once downloaded, copy it to the jdk\jre\lib\ext directory underneath the directory where you have SQL Developer installed. For example:
My SQL Developer is installed here:
E:\app\oracle\product\SQL Developer 21.4.1.349\sqldeveloper
Therefore, I copied the postgresql-42.3.1.jar file to here:
E:\app\oracle\product\SQL Developer 21.4.1.349\sqldeveloper\jdk\jre\lib\ext
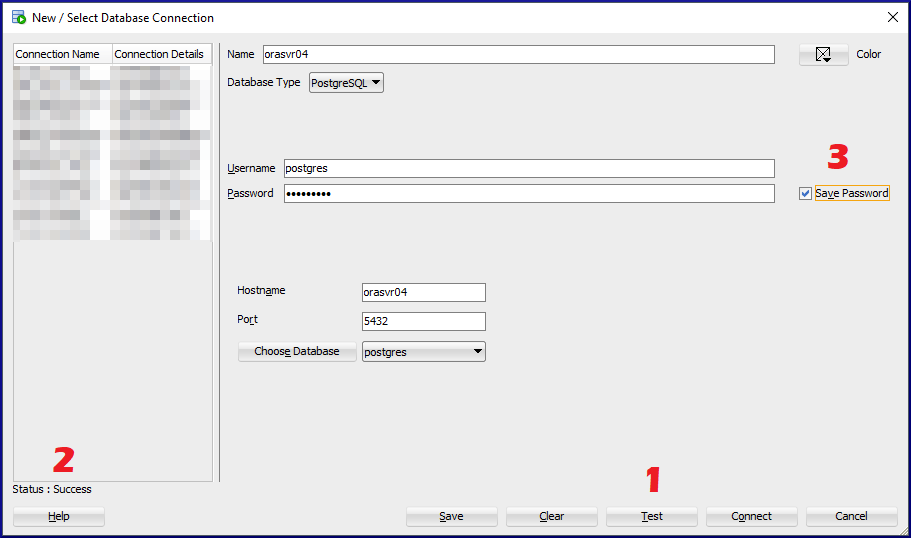
If SQL Developer is already up and running, you will need to re-start it for that change to take effect. Otherwise, fire up SQL Developer and create a connection to your PostgreSQL server:
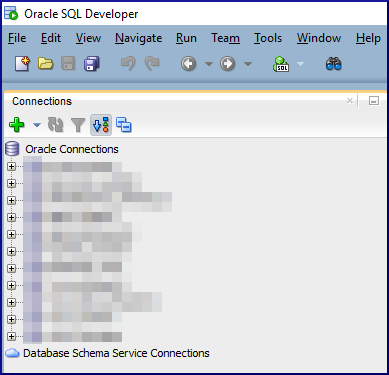
 to create a new connection
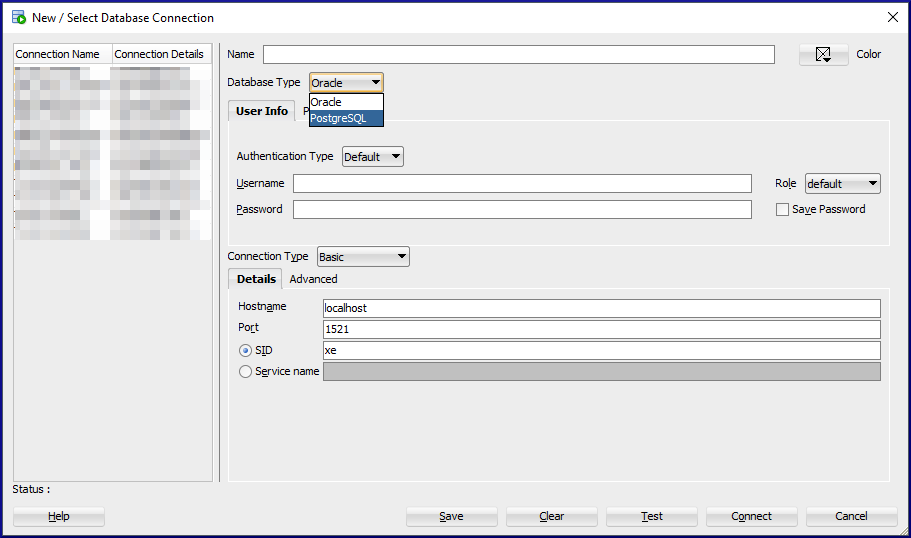
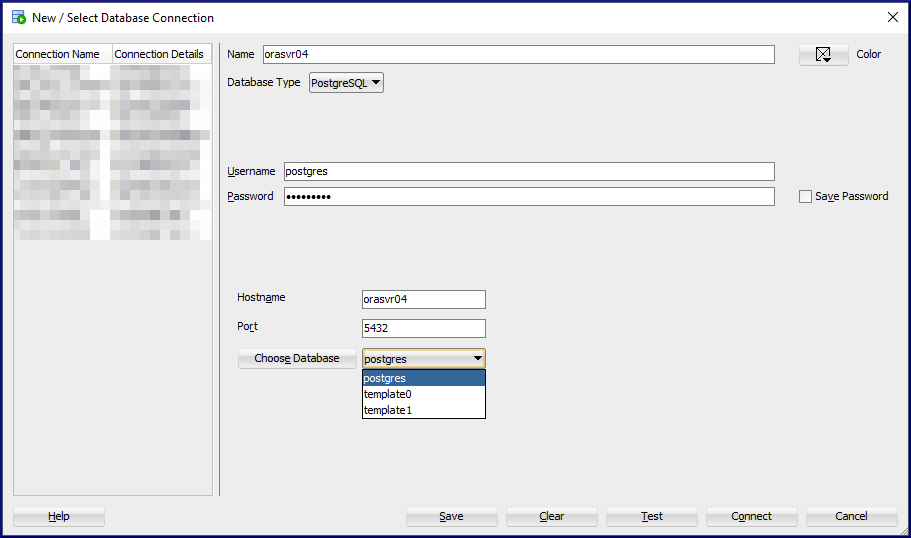
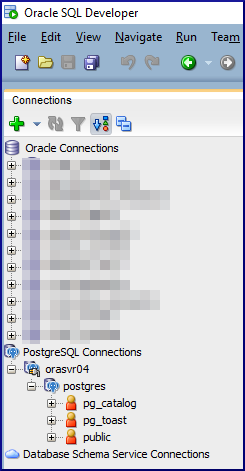
The PostgreSQL connection (orasvr04) is added to the SQL Developer connections and looks like this:
If you right click over postgres, the Schema Browser option appears:

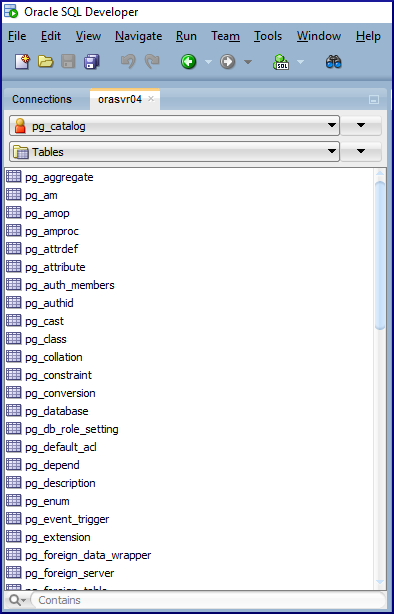
The Schema Browser allows you to, well browse objects. If you want to create any, you’ll need to open a SQL worksheet and type in the SQL commands. So not as feature rich as pgAdmin, but what did you expect? It’s usable familiar interface at least. Enjoy!