

The case to upgrade to OEM 13c R3 is that it supports Oracle Database 19c.
The MOS Certifications tab knows all. Check out the following screen shots.
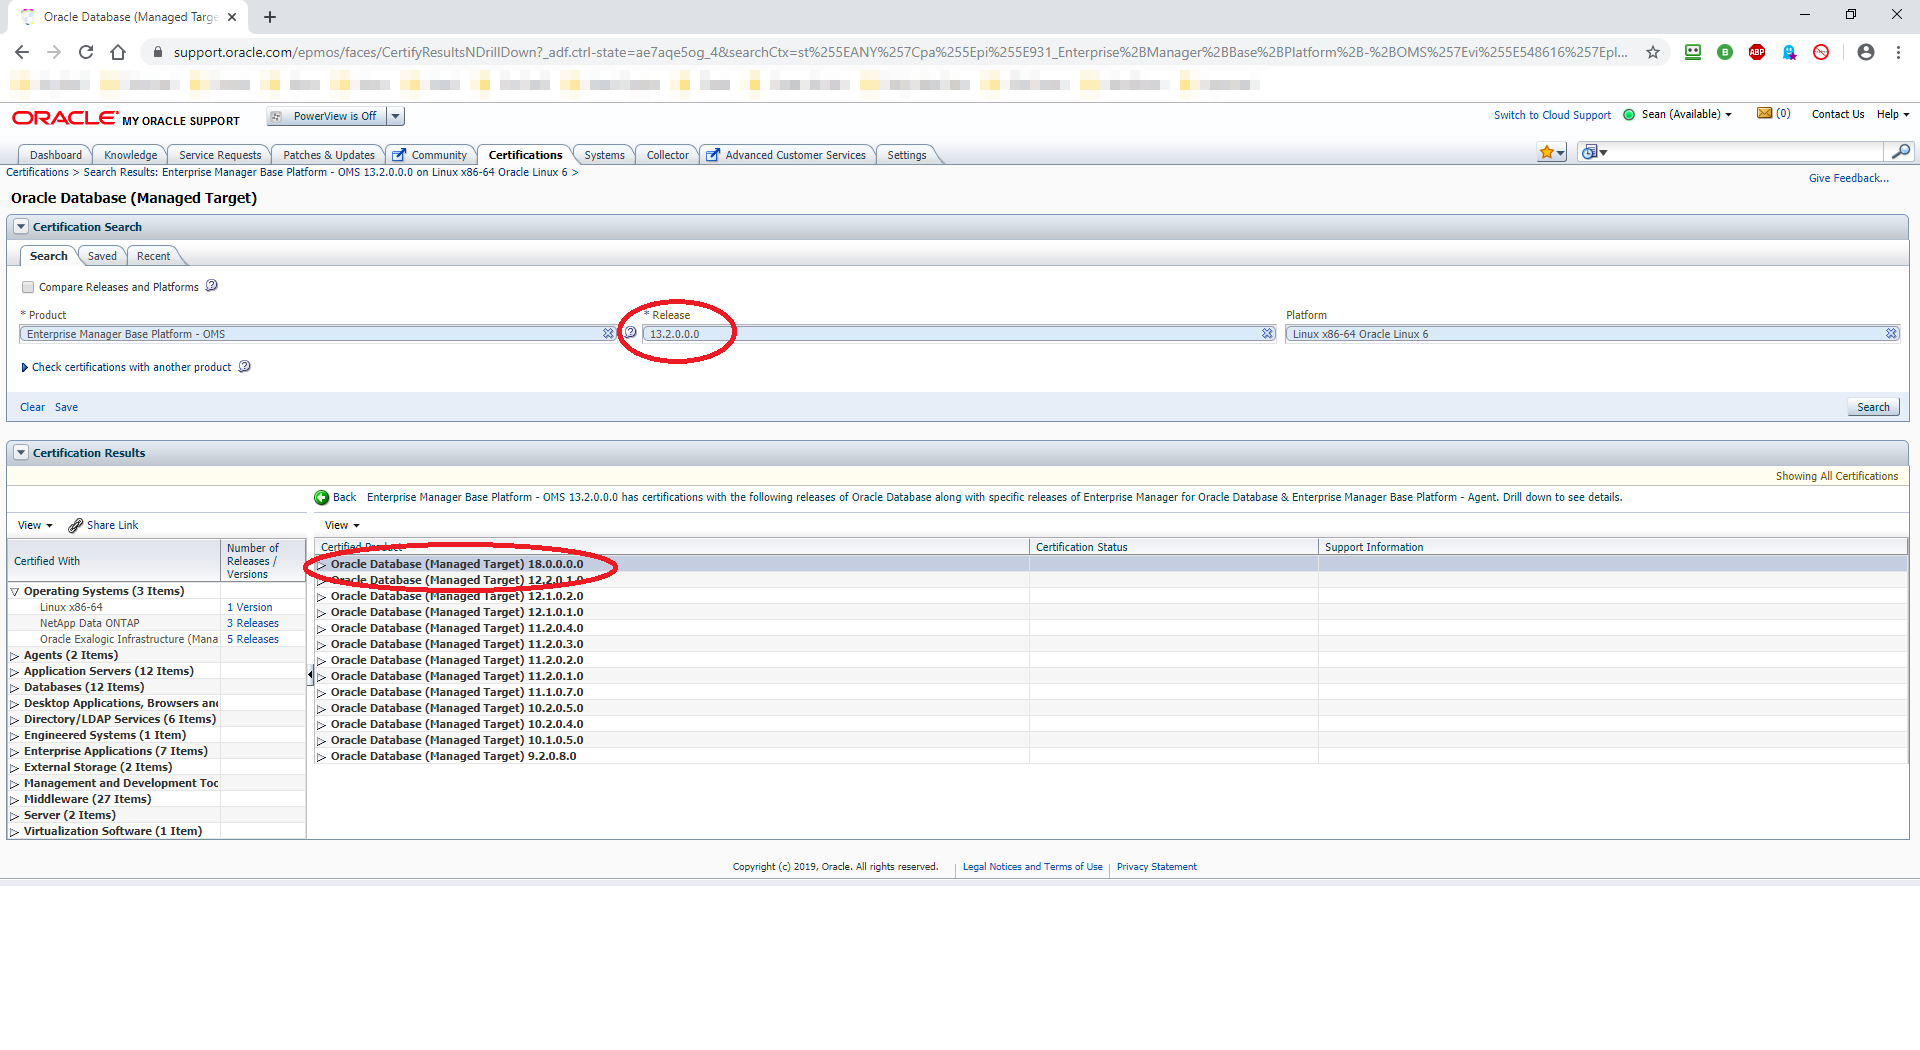
For Product, choose Enterprise Manager Base Platform – OMS and for Release, choose 13.2.0.0.0. Then click the Search button:
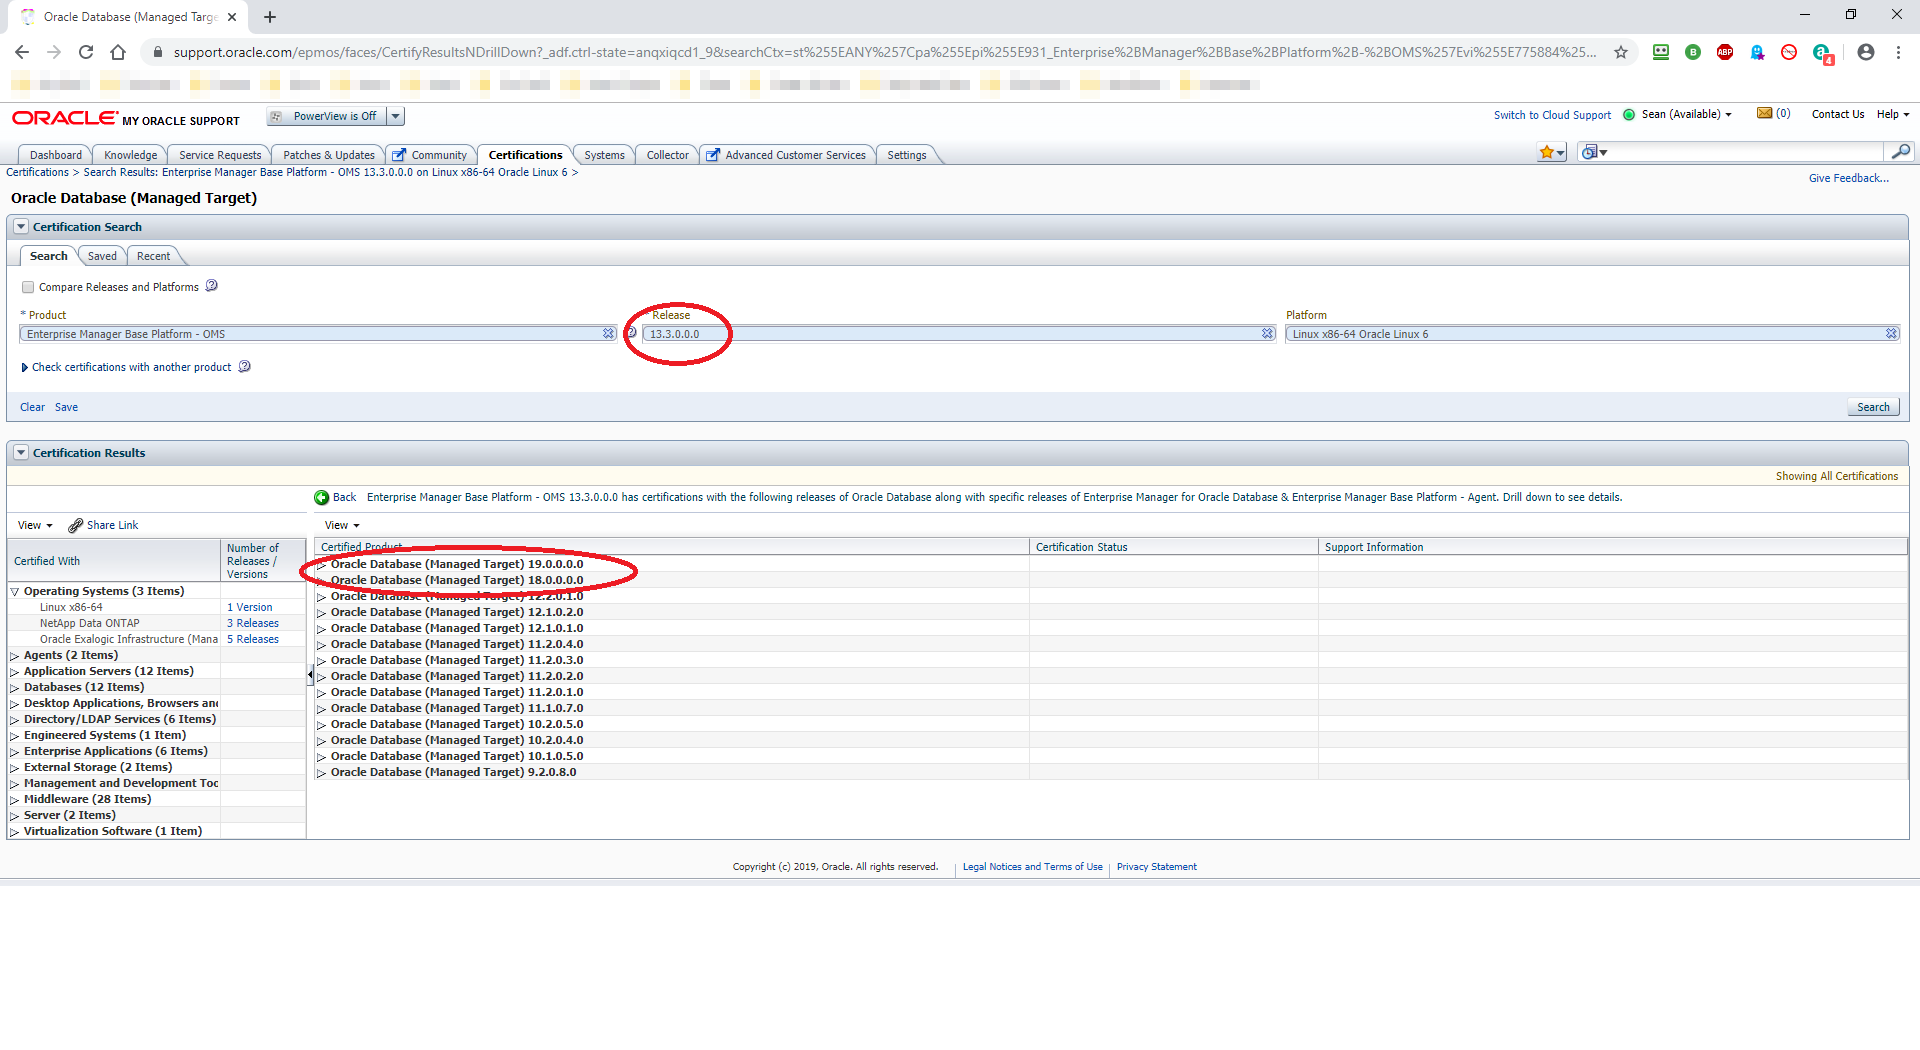
Run the same query, but this time for Release 13.3.0.0.0:
Long story short. I’m not even going to attempt upgrading from OEM 13.2 to OEM 13.3 in place. A fresh install seems the easiest way to get to where we need to be. Using Oracle’s deinstall scripts quickly reminded me why it’s best not to trust Oracle’s scripted method to do anything. Here’s what happened:
[oracle@oraemcc ~]$ cd /tmp
[oracle@oraemcc tmp]$ mkdir OEM
[oracle@oraemcc install]$ cd /u01/app/oracle/product/middleware/sysman/install
[oracle@oraemcc install]$ cp ./EMDeinstall.pl /tmp/OEM

[oracle@oraemcc oracle]$ /u01/app/oracle/product/middleware/perl/bin/perl /tmp/OEM/EMDeinstall.pl -mwHome /u01/app/oracle/product/middleware -stageLoc /tmp/OEM

OMSCA-ERR:Administration server is downrd:
 return value is : 256

The OMS delete of EMGC_OMS1 has failed. Rectify the error and try again
What the heck does “downrd” mean? I wasn’t going to spend my valuable time finding out and debugging an obviously flawed procedure. So instead, I rebuilt the ORAEMCC_VM virtual machine. When it came back to life, this is how it was configured:
| Component | Value |
|---|---|
| Server Name | oraemcc.mynet.com |
| RAM | 16 GB |
| CPU | 2 |
| Operating System | Oracle Linux 6 Update 6 |
| Operating System Disk | 40 GB (incl. 16 GB swap) |
| /u01 Disk | 50 GB (Oracle software) |
| /u02 Disk | 30 GB (Oracle Database files) |
| /u03 Disk | 30 GB (Fast Recover Area) |
Step #1: Create the OEM Repository Database.
For the sake of speed and simplicity, I used the CDB/PDB template for Oracle Database 12c Release 1 (12.1.0.2). I would have preferred to use either an 18c or 19c template, but there is (currently) no 19c template and the 18c template is for 18.1 which you cannot download from OTN. So 12.1.0.2 it is then. The procedure is simple enough, with just a couple of gotchas (as usual).
- First, download the database software from here.
- Second, download the OEM template for 12.1.0.2 from here.
- Third, unzip and install the database software.
- Fourth, unzip the template file in ORACLE_HOME/assistants/dbca/templates.
- Fifth, set your environment and run dbca to create the database.
A few notes about creating the OEM repository database:
- Remember to choose the appropriate template when navigating the dbca screens (Create Database ➡️ Advanced Mode ➡️ Select a template for your database).
- Make sure you deselect the option, Configure Enterprise Manager (EM) Database Express:

- The template documentation warns you to retain the selection of running the shpool.sql script on the Database Content screen. Trouble is, there is no Database Content screen and the script’s not called shpool.sql. I ran the appropriate script after the database had been created:
[oracle@oraemcc ~]$ cd /u01/app/oracle/product/12.1.0/dbhome_1/assistants/dbca/templates
[oracle@oraemcc templates]$ . oraenv
ORACLE_SID = [oracle] ? PADMIN

[oracle@oraemcc templates]$ sqlplus / as sysdba
SQL> @shpool_12.1.0.2.0_Database_SQL_for_EM13_3_0_0_0.sql

System altered.
System altered.
System altered.
- The installation documentation makes references to setting this underscored instance parameter:
_allow_insert_with_update_check=true
However, in 12.1.0.2, this doesn’t work either in SQL or by putting it in an instance startup parameter file:
SQL> alter system set "_allow_insert_with_update_check" = true;
alter system set "_allow_insert_with_update_check" = true
                  *
ERROR at line 1:
ORA-02065: illegal option for ALTER SYSTEM

SQL> startup pfile='/u01/app/oracle/pfile_padmin.ora'
LRM-00101: unknown parameter name '_allow_insert_with_update_check'
ORA-01078: failure in processing system parameters
Oh well. Let’s just move on. What we ended up with was a CDB called PADMIN, containing a PDB called EMPDBREPOS. That’s where the pre-configured Enterprise Manager repository lives. I also created a listener called LISTENER_PADMIN and configured TNS connection strings in tnsnames.ora for both the CDB and the PDB. Next we need to install the OEM 13c R2 software.
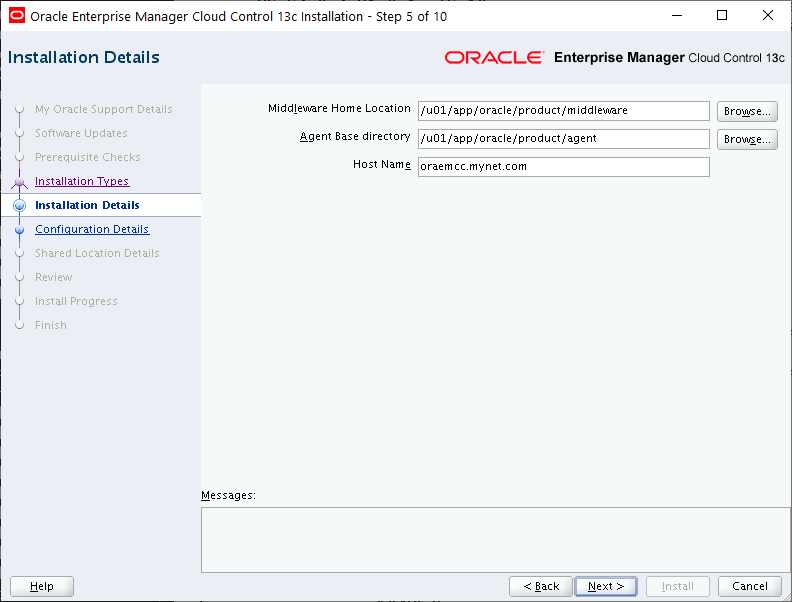
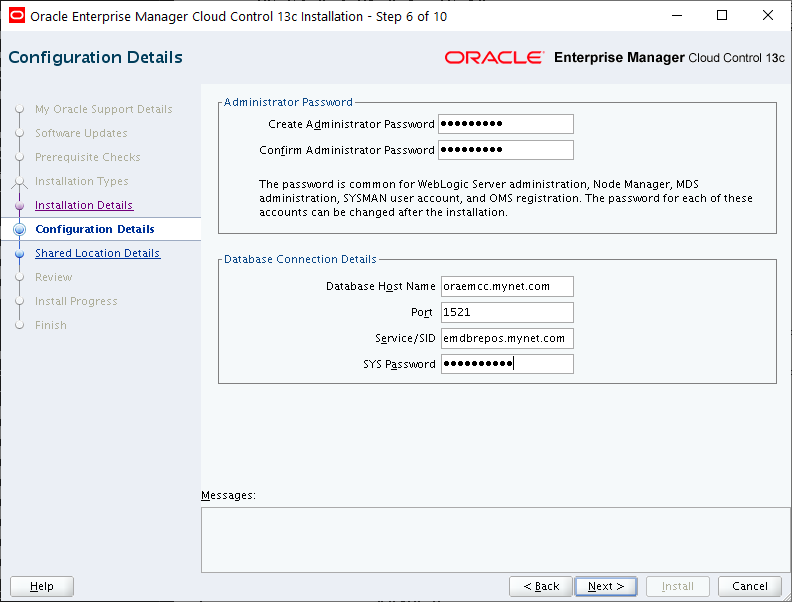
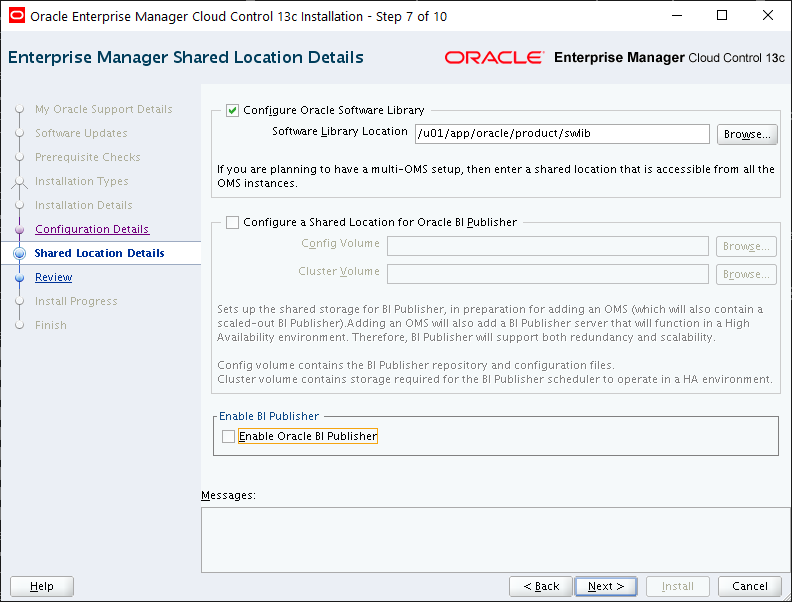
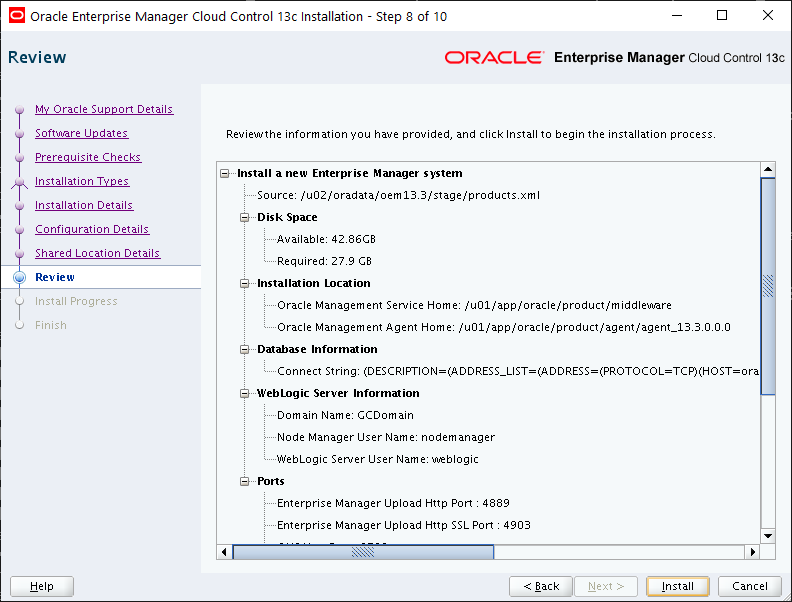
Step #2: Run the Enterprise Manager Installer.
The installation of OEM 13cR3 is practically identical to OEM 13cR2. Simple enough if you’re doing a small/basic installation:
- First, download the Enterprise Manager software from here.
- Second, add execute permission to the files:
[oracle@oraemcc oem13.3]$ pwd
/u02/oradata/oem13.3

[oracle@oraemcc oem13.3]$ ls -l
-r--r--r-- 1 oracle oinstall 1742204641 Nov 16 16:43 em13300_linux64-2.zip
-r--r--r-- 1 oracle oinstall 2090882426 Nov 16 16:44 em13300_linux64-3.zip
-r--r--r-- 1 oracle oinstall 2117436260 Nov 16 16:46 em13300_linux64-4.zip
-r--r--r-- 1 oracle oinstall  694002559 Nov 16 16:47 em13300_linux64-5.zip
-r--r--r-- 1 oracle oinstall 1801995711 Nov 16 16:48 em13300_linux64-6.zip
-r--r--r-- 1 oracle oinstall 1278491093 Nov 16 16:41 em13300_linux64.bin

[oracle@oraemcc oem13.3]$ chmod 754 *

[oracle@oraemcc oem13.3]$ ls -l
 -rwxr-xr-- 1 oracle oinstall 1742204641 Nov 16 16:43 em13300_linux64-2.zip
 -rwxr-xr-- 1 oracle oinstall 2090882426 Nov 16 16:44 em13300_linux64-3.zip
 -rwxr-xr-- 1 oracle oinstall 2117436260 Nov 16 16:46 em13300_linux64-4.zip
 -rwxr-xr-- 1 oracle oinstall  694002559 Nov 16 16:47 em13300_linux64-5.zip
 -rwxr-xr-- 1 oracle oinstall 1801995711 Nov 16 16:48 em13300_linux64-6.zip
 -rwxr-xr-- 1 oracle oinstall 1278491093 Nov 16 16:41 em13300_linux64.bin
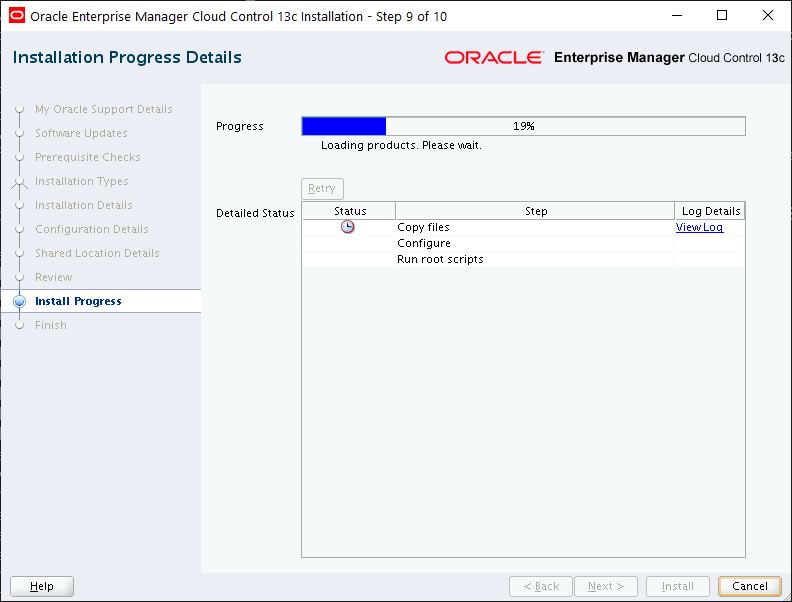
- Third, set your environment then run em13300_linux64.bin.Once the automatic unzip operation hits 100%, you’re off to the races:
[oracle@oraemcc oem13.3]$ ./em13300_linux64.bin
0%...............................................................................................100%


Eventually you’ll need to run the root script in another session:
[root@oraemcc ~]# /u01/app/oracle/product/middleware/allroot.sh

Starting to execute allroot.sh ....

Starting to execute /u01/app/oracle/product/middleware/root.sh ....
/etc exist

Creating /etc/oragchomelist file…
/u01/app/oracle/product/middleware
Finished product-specific root actions.
/etc exist
Finished execution of  /u01/app/oracle/product/middleware/root.sh ....

Starting to execute /u01/app/oracle/product/agent/agent_13.3.0.0.0/root.sh ....
Finished product-specific root actions.
/etc exist
Finished execution of /u01/app/oracle/product/agent/agent_13.3.0.0.0/root.sh ..
After which the completion screen is displayed which contains this information:
This information is also available at:

    /u01/app/oracle/product/middleware/install/setupinfo.txt

See the following for information pertaining to your Enterprise Manager installation:

Use the following URL to access:
    1. Enterprise Manager Cloud Control URL: https://oraemcc.mynet.com:7802/em
    2. Admin Server URL: https://oraemcc.mynet.com:7102/console
    3. BI Publisher URL: https://oraemcc.mynet.com:9803/xmlpserver/servlet/home

The following details need to be provided while installing an additional OMS:

    1. Admin Server Host Name: oraemcc.mynet.com
    2. Admin Server Port: 7102

You can find the details on ports used by this deployment at :
/u01/app/oracle/product/middleware/install/portlist.ini

NOTE:
An encryption key has been generated to encrypt sensitive data in the Management Repository.
If this key is lost, all encrypted data in the Repository becomes unusable.

A backup of the OMS configuration is available in
/u01/app/oracle/product/gc_inst/em/EMGC_OMS1/sysman/backup on host oraemcc.mynet.com.
See Cloud Control Administrators Guide for details on how to back up and recover an OMS.

NOTE: This backup is valid only for the initial OMS configuration. For example, it will not reflect
plug-ins installed later, topology changes like the addition of a load balancer, or changes to other
properties made using emctl or emcli. Backups should be created on a regular basis to ensure they
capture the current OMS configuration.
Use the following command to backup the OMS configuration:
 /u01/app/oracle/product/middleware/bin/emctl exportconfig oms -dir
Click Close and you’re done. OEM 13cR3 is installed!