

Introduction.
Getting ready to install, configure and use Oracle Database 18c and 19c meant rebuilding my two stand alone database servers with Oracle Linux 7. In time honored tradition of changing things for no good reason, setting up Oracle Linux 7 is slightly different to version 6 in a number of important ways. Not annoying at all then. So here we’ll run through installing and configuring Oracle Linux 7 Update 6 (OL7.6).
The two servers we’ll be rebuilding are called orasvr01 and orasvr02. The original build of orasvr01 can be found here. The rebuild will be similar, but this time around we’ll use Openfiler for the database storage. The orasvr01 server will use regular file system storage and orasvr02 will use ASM. The root and /u01 file systems will be allocated from the VM_Filesystems_Repo storage repository, just as they were before.
For the most part, installing and configuring OL7.6 will be the same for both orasvr01 and orasvr02, so we’ll mainly focus on orasvr01. The differences will come when setting up the Openfiler disks for file systems (orasvr01) and ASM (orasvr02). I’ll explain those differences in the relevant sections below. Let’s get started!
Quick links to all the tasks:
- Task #1: Create the VM.
- Task #2: Install Oracle Linux.
- Task #3: Run an Update.
- Task #4: Install X Windows Components.
- Task #5: Disable SE Linux.
- Task #6: Turn Off Linux Firewall.
- Task #7: Configure Storage Networking (eth1).
- Task #8: Add Users & Groups.
- Task #9: Modify Shell & Resource Limits.
- Task #10: Configure iSCSI Storage.
- Task #11: Partition Disks.
- Task #12: Configure Persistent Devices for iSCSI Targets.
- Task #13a: Create File Systems (orasvr01).
- Task #13b: Create ASM Disks (orasvr02).
Task #1: Create the VM.
In OVM Manager, click the Create Virtual Machine icon. Ensure the “Create a new VM (Click ‘Next’ to continue)” radio button is selected, then click Next. Use these values to populate the next screen:
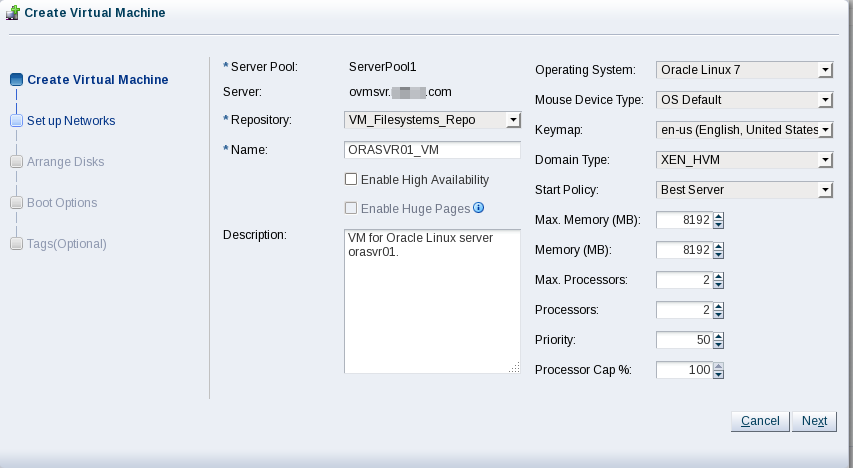
Note, I recently doubled the memory of the Oracle VM server from 72 GB to 144 GB. Hence, I was able to increase the memory of the orasvr01/02 VMs from 8192 MB to 16,384 MB.
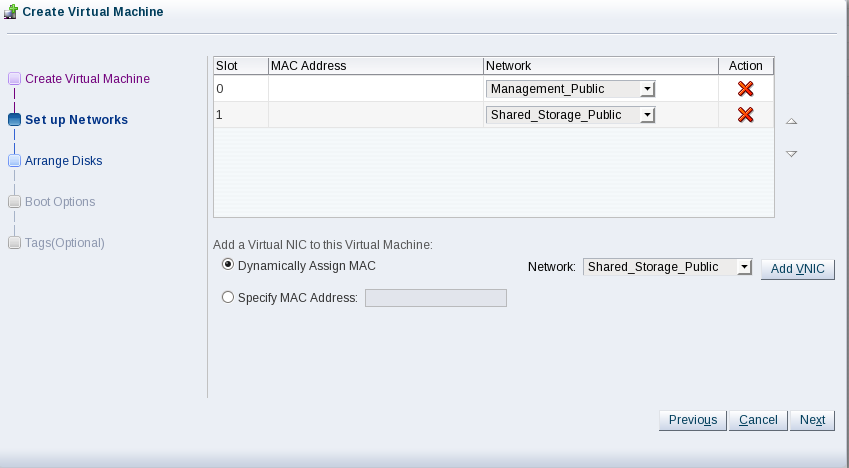
Click Next. Add the Management_Public and Shared_Storage_Public networks so your screen looks like this:
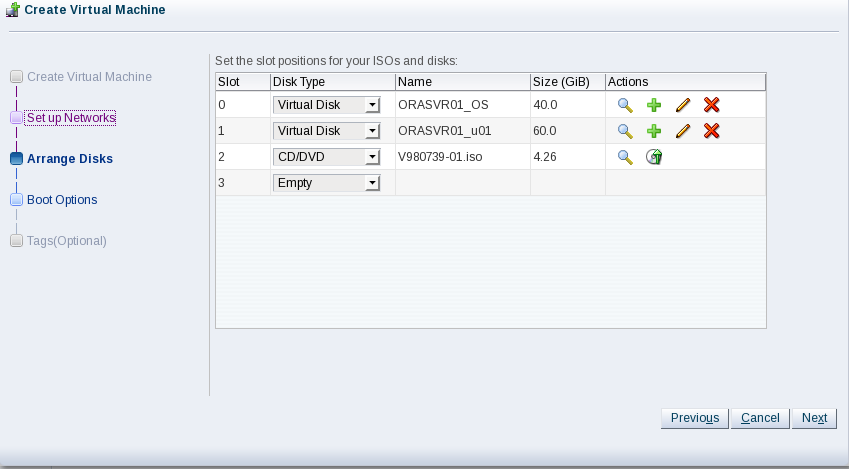
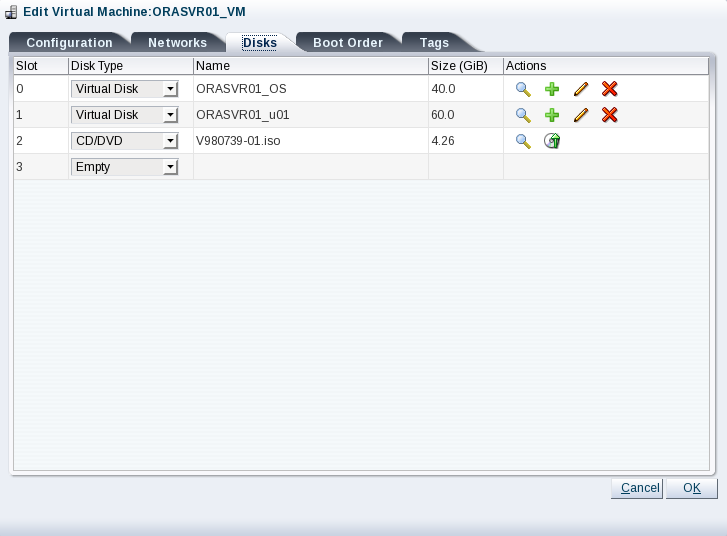
Click Next. Add two virtual disks for the operating system and /u01 file system. Then add a CD/DVD containing the ISO for Oracle Linux 7 Update 6. Your screen should look like this:
Click Next. Now change the boot order so when you start the VM for the first time, it will boot from the Linux ISO in the virtual CD/DVD drive. Your screen should look like this:
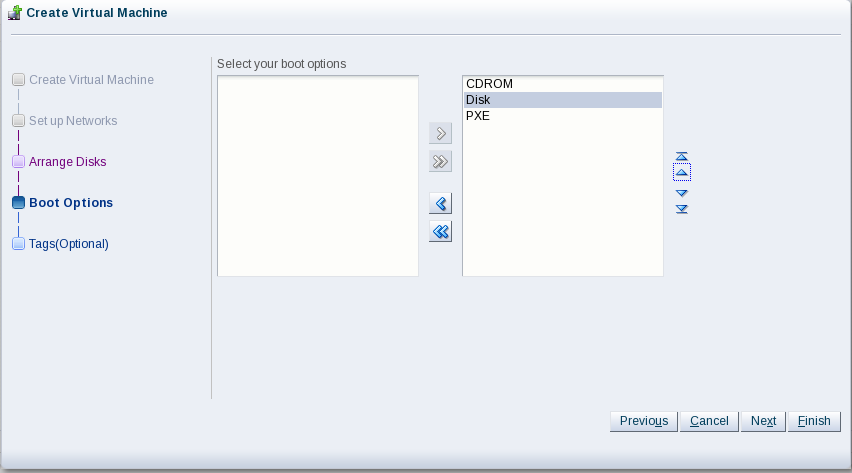
Click Finish and you’re done.
Task #2: Install Oracle Linux.
In OVM Manager start ORASVR01_VM, wait for a few seconds then connect to the console. You’ll see this opening screen:

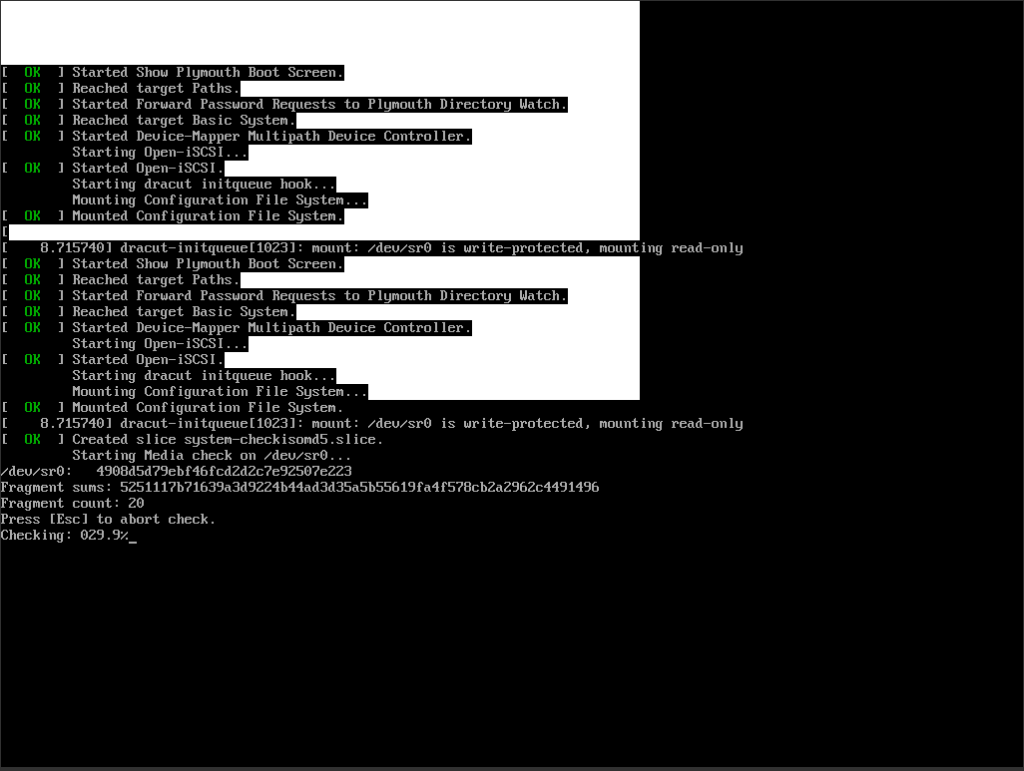
Once the installation kicks off, the CD/DVD drive will be mounted and the media checked:
After a few moments, the Welcome screen will appear where you will choose your language:

I had the separated double mouse pointer issue again, but was able to ‘fix’ it by moving the mouse pointer to a corner of the screen and getting the two pointers to superimpose. Once they are, don’t move the pointer too quickly or they’ll separate again.
Choose your language then click Continue. The Installation Summary screen appears next. Use the values below or choose your own:
| Category | Option | Value | Comments |
|---|---|---|---|
| LOCALIZATION | |||
| DATE & TIME | Americas/Chicago timezone | Your choice | |
| LANGUAGE SUPPORT | English (United States) | Your choice | |
| KEYBOARD | English (US) | Your choice | |
| SOFTWARE | |||
| INSTALLATION SOURCE | Local Media | OL 7.6 ISO in the CD/DVD drive | |
| SOFTWARE SELECTION | Infrastructure Server | Plus Add-Ons: System Administration Tools | |
| SYSTEM | |||
| INSTALLATION DESTINATION | Automatic partitioning selected | Use the 40 GiB xvda to install the OS | |
| NETWORK & HOSTNAME | Wired (eth0) connected | Only configure eth0 (public) and set the hostname | |
| KDUMP | Kdump is disabled | Uncheck Enable kdump | |
| SECURITY POLICY | No profile selected | Set Apply security policy to OFF | |
When you have configured each option, your screen should look like this:
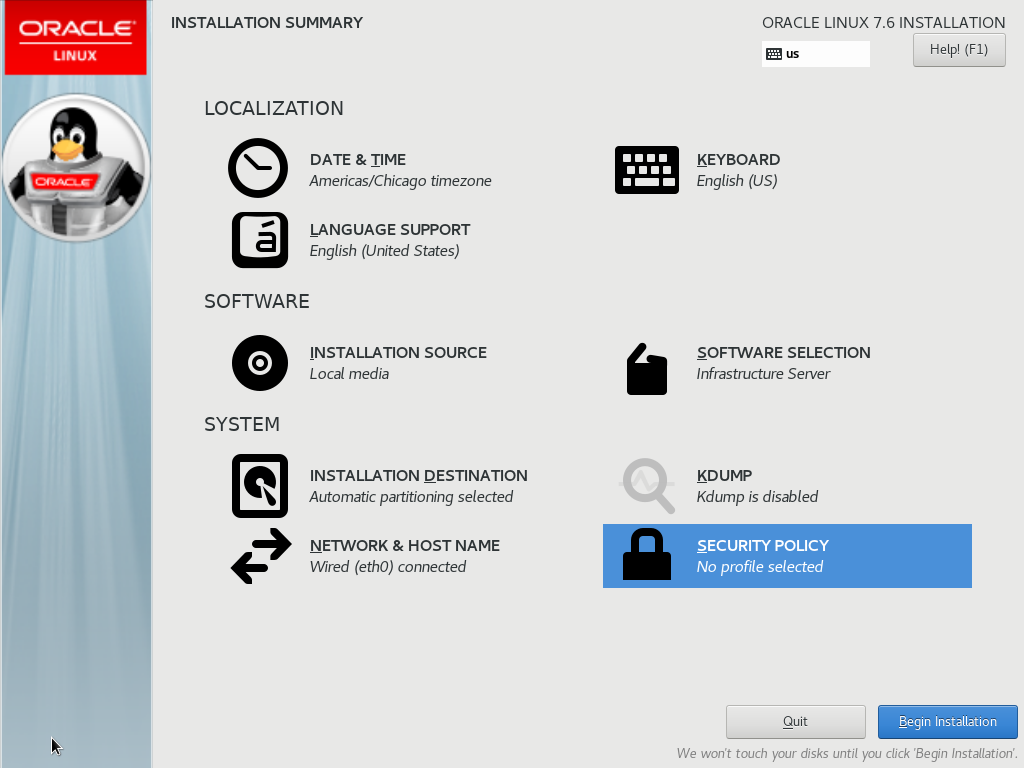
Click Begin Installation. This will display the CONFIGURATION USER SETTINGS screen:
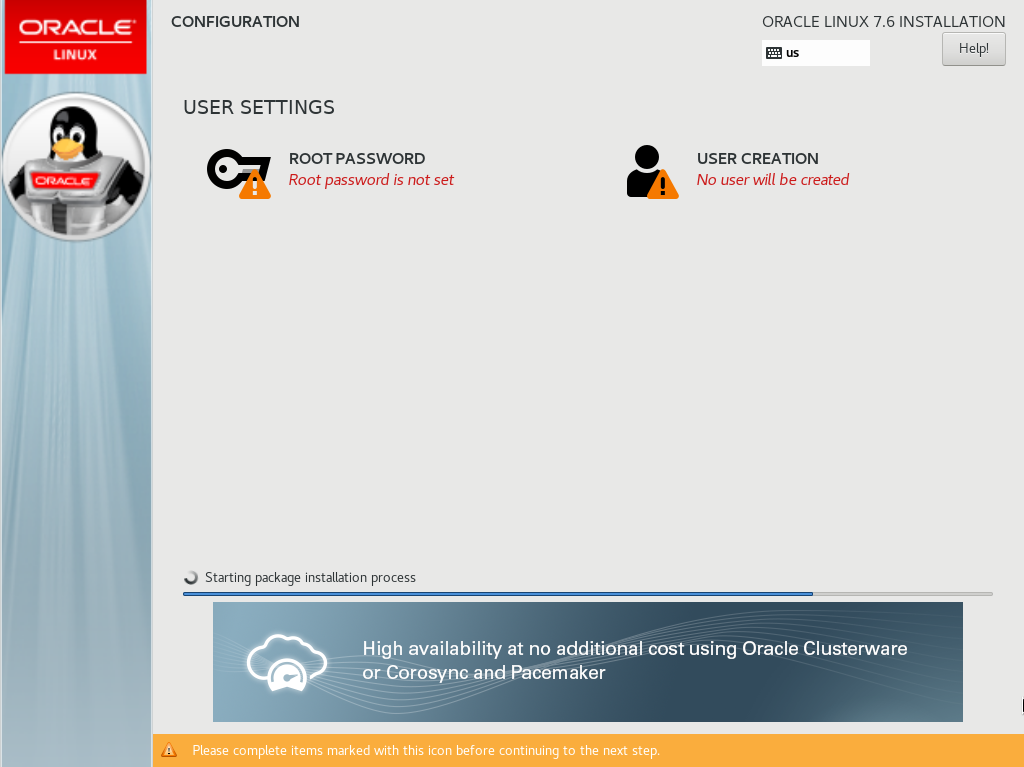
Click the ROOT PASSWORD icon. This will display a new screen allowing you to enter a password for the root user:
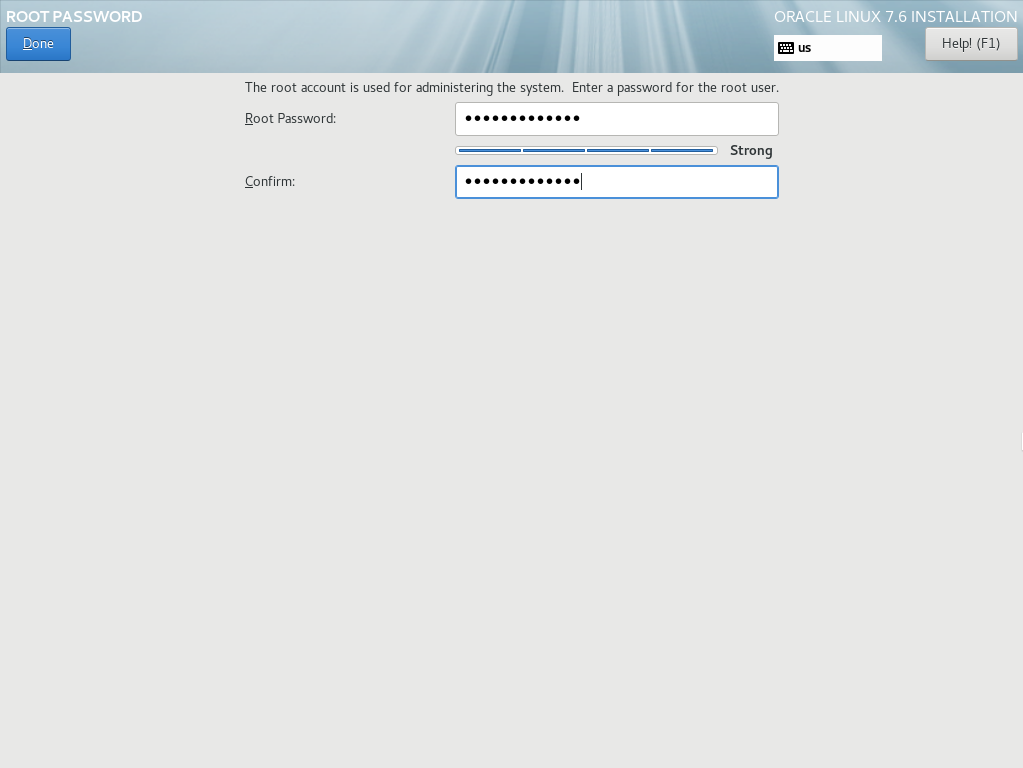
Enter your new root password, then click Done. This will return you to the CONFIGURATION USER SETTINGS screen where you can monitor the progress of the Oracle Linux package installation:
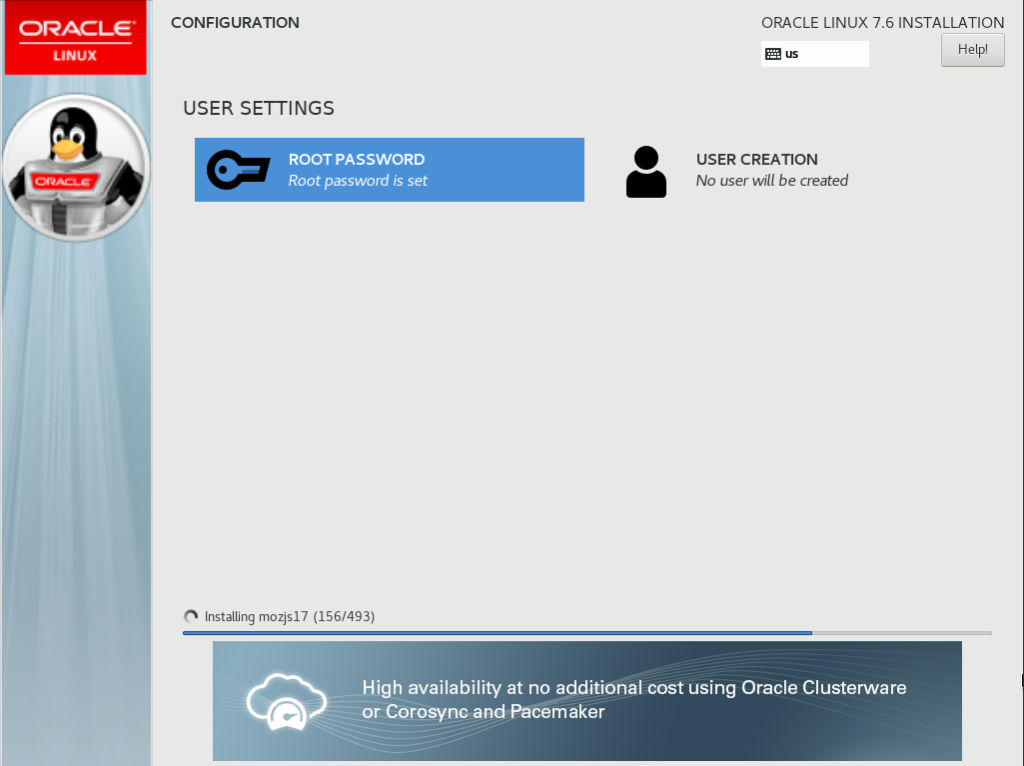
Once all the packages have installed you’ll see this screen:
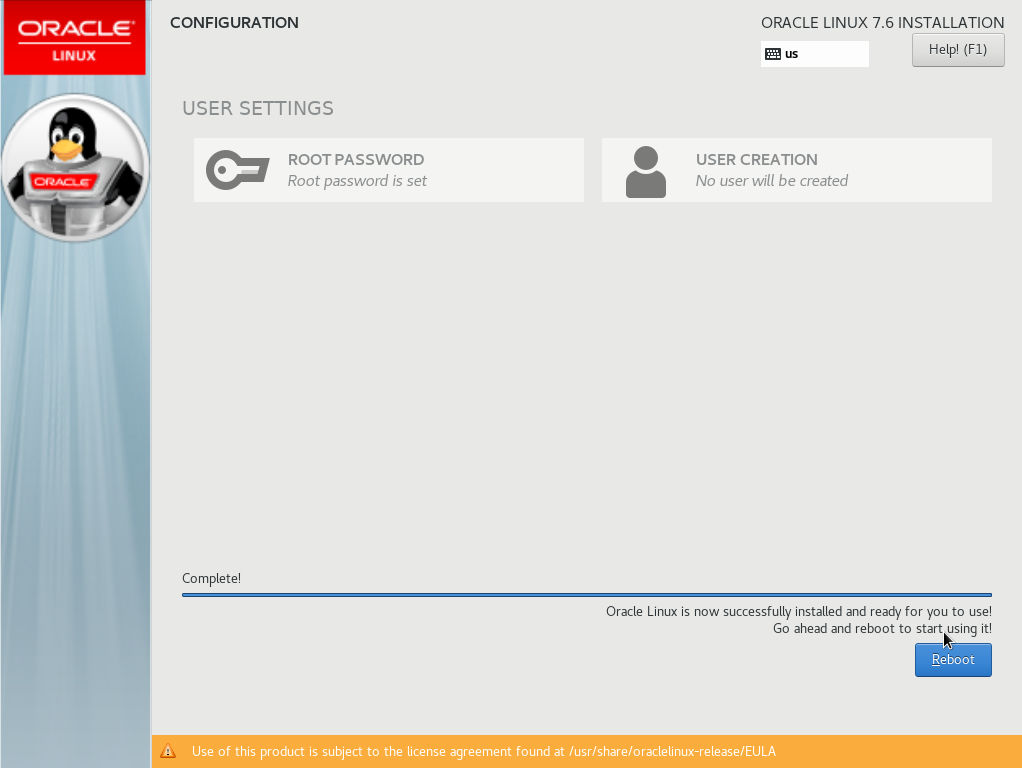
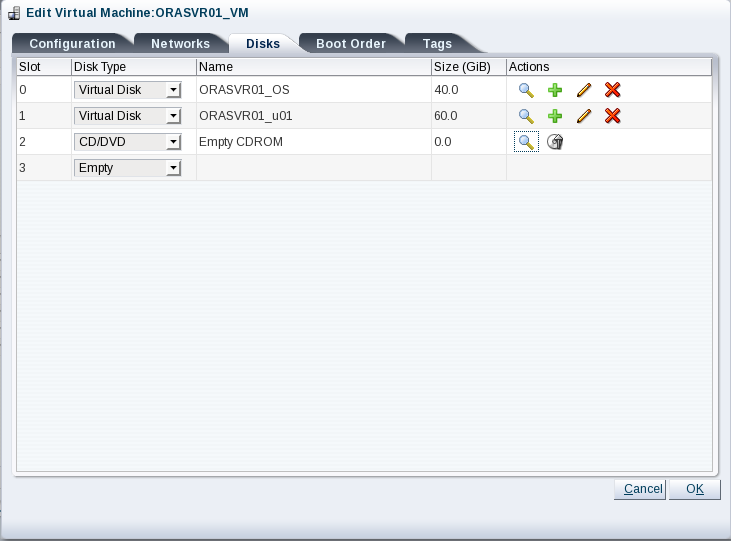
Before you click the Reboot button, we need to eject the Oracle Linux ISO from the virtual CD/DVD drive. Otherwise rebooting will start the installation process again. In OVM Manager, edit the ORASVR01_VM virtual machine and click the Disks tab:
Click the Eject icon to remove the ISO file from the CD/DVD drive. Your screen will look like this:
Return to the VM console and click Reboot. This is where life may get a little interesting. I tried this process multiple times. Sometimes clicking the Reboot button worked. Sometimes, but not often. Other times the reboot just hung, so I had to stop and restart the VM using OVM Manager. Sometimes even that didn’t work and I had to resort to killing the VM in OVM Manager, then re-starting it. Another time I had to ‘destroy’ the VM and re-create it using xm commands on the OVM server. It sounds worse than it is. It’s a quick and simple procedure documented here.
Eventually, the reboot happens and you’ll see a Linux login prompt:
Don’t get too excited. There are a few configuration changes we need to make before OL7.6 is ready for prime time. Some of these could have been configured via the INSTALLATION SUMMARY screen, but I wanted to explicitly cover how some Linux administration has changed in version 7. Clicking around in the installation GUI won’t show you that. So without further ado, fire up Putty and login as root.
Task #3: Run an Update.
Oracle claim the yum repository is all ready to go in Oracle Linux 7. Well, sort of. Run a yum update:
[root@orasvr01 ~]# yum update
There will probably be plenty of things to update which is fine. Look away though and you might miss this message:
IMPORTANT: A legacy Oracle Linux yum server repo file was found. Oracle Linux yum server repository
configurations have changed which means public-yum-ol7.repo will no longer be updated. New repository
configuration files have been installed but are disabled. To complete the transition, run this script
as the root user:

/usr/bin/ol_yum_configure.sh
Fair enough, let’s run that and see what it does:
[root@orasvr01 ~]# /usr/bin/ol_yum_configure.sh
Repository ol7_UEKR5 already enabled
Repository ol7_latest already enabled
Looks like we’re all set.
Task #4: Install X Windows.
Putty has its place, but I prefer working with a windows interface meant for adults. The command to install xterm can be found here. I use X-Win32 as my X Windows PC based server. It complained about not seeing xauth on the server side, so I installed that as well using this command:
[root@orasvr01 ~]# yum install xauth
Task #5: Disable SE Linux.
The simple edit to disable SE Linux can be found here.
Task #6: Turn Off Linux Firewall.
Managing the firewall has changed in Oracle Linux 7. By default, the firewall is provided via a daemon (firewalld) and is controlled by the systemctl command. Go here for the steps to disable the firewall in Oracle Linux 7.
Task #7: Configure Storage Networking (eth1).
The orasvr01 and orasvr02 servers have 2 NICs each. We’ve already configured the public interface (eth0). Now it’s time to configure the NIC which will connect the server to the storage coming from Openfiler (eth1).
Before we do that, replace the /etc/hosts file with our standard one which lists all our infrastructure IP addresses. That file can be found here.
Each NIC has a configuration file located in /etc/sysconfig/network-scripts. The file name follows the pattern ifcfg-ethN, where N is the number of the NIC you’re interested in. In this case, the file we want to edit is ifcfg-eth1. This is what OVM/Oracle Linux installer gave us by default:
[root@orasvr01 network-scripts]# cat ifcfg-eth1
TYPE=Ethernet
PROXY_METHOD=none
BROWSER_ONLY=no
BOOTPROTO=dhcp
DEFROUTE=yes
IPV4_FAILURE_FATAL=no
IPV6INIT=yes
IPV6_AUTOCONF=yes
IPV6_DEFROUTE=yes
IPV6_FAILURE_FATAL=no
IPV6_ADDR_GEN_MODE=stable-privacy
NAME=eth1
UUID=4eb42d7b-adcf-4389-9e6e-a006b3011424
DEVICE=eth1
ONBOOT=no
Edit ifcfg-eth1 so it looks like this:
TYPE=Ethernet
PROXY_METHOD=none
BROWSER_ONLY=no
BOOTPROTO=none
DEFROUTE=yes
IPV4_FAILURE_FATAL=no
IPV6INIT=yes
IPV6_AUTOCONF=yes
IPV6_DEFROUTE=yes
IPV6_FAILURE_FATAL=no
IPV6_ADDR_GEN_MODE=stable-privacy
NAME=eth1
UUID=4eb42d7b-adcf-4389-9e6e-a006b3011424
DEVICE=eth1
ONBOOT=yes
IPADDR=200.200.20.17
PREFIX=24
GATEWAY=200.200.10.1
DNS1=200.200.10.1
Next, check the NIC configuration for eth1. As you can see, not much going on:
[root@orasvr01 network-scripts]# ifconfig -a eth1
eth1: flags=4163  mtu 1500
        ether 00:21:f6:ef:3f:da  txqueuelen 1000  (Ethernet)
        RX packets 311  bytes 14326 (13.9 KiB)
        RX errors 0  dropped 0  overruns 0  frame 0
        TX packets 0  bytes 0 (0.0 B)
        TX errors 0  dropped 0 overruns 0  carrier 0  collisions 0
Next, check the status of the network. Note eth0 gets a mention, but not eth1:
[root@orasvr01 network-scripts]# systemctl status network
● network.service - LSB: Bring up/down networking
   Loaded: loaded (/etc/rc.d/init.d/network; bad; vendor preset: disabled)
   Active: active (exited) since Mon 2019-07-01 12:06:10 CDT; 2h 15min ago
     Docs: man:systemd-sysv-generator(8)
  Process: 1057 ExecStart=/etc/rc.d/init.d/network start (code=exited, status=0/SUCCESS)
Jul 01 12:06:09 orasvr01.mynet.com systemd[1]: Starting LSB: Bring up/down networking…
Jul 01 12:06:10 orasvr01.mynet.com network[1057]: Bringing up loopback interface:  [  OK  ]
Jul 01 12:06:10 orasvr01.mynet.com network[1057]: Bringing up interface eth0:  [  OK  ]
Jul 01 12:06:10 orasvr01.mynet.com systemd[1]: Started LSB: Bring up/down networking.
Start the eth1 interface:
[root@orasvr01 network-scripts]# ifup eth1
Now check the NIC configuration again:
[root@orasvr01 network-scripts]# ifconfig -a eth1
eth1: flags=4163  mtu 1500
        inet 200.200.20.17  netmask 255.255.255.0  broadcast 200.200.20.255
        inet6 fe80::908:e76e:8411:9051  prefixlen 64  scopeid 0x20
        ether 00:21:f6:ef:3f:da  txqueuelen 1000  (Ethernet)
        RX packets 371  bytes 17086 (16.6 KiB)
        RX errors 0  dropped 0  overruns 0  frame 0
        TX packets 63  bytes 9898 (9.6 KiB)
        TX errors 0  dropped 0 overruns 0  carrier 0  collisions 0
Signs of life! The eth1 interface is now up. Re-check the status of the network:
[root@orasvr01 network-scripts]# systemctl status network
● network.service - LSB: Bring up/down networking
    Loaded: loaded (/etc/rc.d/init.d/network; bad; vendor preset: disabled)
    Active: active (exited) since Mon 2019-07-01 12:06:10 CDT; 2h 42min ago
      Docs: man:systemd-sysv-generator(8)
   Process: 1057 ExecStart=/etc/rc.d/init.d/network start (code=exited, status=0/SUCCESS)
Jul 01 12:06:09 orasvr01.mynet.com systemd[1]: Starting LSB: Bring up/down networking…
Jul 01 12:06:10 orasvr01.mynet.com network[1057]: Bringing up loopback interface:  [  OK  ]
Jul 01 12:06:10 orasvr01.mynet.com network[1057]: Bringing up interface eth0:  [  OK  ]
Jul 01 12:06:10 orasvr01.mynet.com systemd[1]: Started LSB: Bring up/down networking.
Note the output still only references the eth0 NIC. Re-start the network then re-check its status:
[root@orasvr01 network-scripts]# systemctl restart network

[root@orasvr01 network-scripts]# systemctl status network
 ● network.service - LSB: Bring up/down networking
    Loaded: loaded (/etc/rc.d/init.d/network; bad; vendor preset: disabled)
    Active: active (exited) since Mon 2019-07-01 14:51:59 CDT; 3s ago
      Docs: man:systemd-sysv-generator(8)
   Process: 1884 ExecStop=/etc/rc.d/init.d/network stop (code=exited, status=0/SUCCESS)
   Process: 2092 ExecStart=/etc/rc.d/init.d/network start (code=exited, status=0/SUCCESS)
 Jul 01 14:51:58 orasvr01.mynet.com systemd[1]: Starting LSB: Bring up/down networking…
 Jul 01 14:51:59 orasvr01.mynet.com network[2092]: Bringing up loopback interface:  [  OK  ]
 Jul 01 14:51:59 orasvr01.mynet.com network[2092]: Bringing up interface eth0:  Connection successfully activated (D-Bus ac…ion/7)
 Jul 01 14:51:59 orasvr01.mynet.com network[2092]: [  OK  ]
 Jul 01 14:51:59 orasvr01.mynet.com network[2092]: Bringing up interface eth1:  Connection successfully activated (D-Bus ac…ion/8)
 Jul 01 14:51:59 orasvr01.mynet.com network[2092]: [  OK  ]
 Jul 01 14:51:59 orasvr01.mynet.com systemd[1]: Started LSB: Bring up/down networking.
 Hint: Some lines were ellipsized, use -l to show in full.
The output now references eth1 and all seems well. We should now be able to ping the openfiler-storage IP address using the eth1 interface:
[root@orasvr01 network-scripts]# ping -I eth1 openfiler-storage
PING openfiler-storage (200.200.20.6) from 200.200.20.17 eth1: 56(84) bytes of data.
64 bytes from openfiler-storage (200.200.20.6): icmp_seq=1 ttl=64 time=0.393 ms
64 bytes from openfiler-storage (200.200.20.6): icmp_seq=2 ttl=64 time=0.174 ms
64 bytes from openfiler-storage (200.200.20.6): icmp_seq=3 ttl=64 time=0.175 ms
Yes! Get in! Storage networking is sorted. Onto the next task.
Task #8: Add Users & Groups.
The easiest way to setup the users and groups necessary to run Oracle Database instances on your server is to use Oracle’s preinstallation package. Since we’re going to use Oracle Database 12c Release 2, 18c and 19c we may as well go for the highest version available. That’ll be the one for Oracle Database 19c then:
[root@orasvr01 ~]# yum install oracle-database-preinstall-19c
Amongst other things, this package creates the oracle user and a bunch of groups using a default UID and default GIDs.
In /etc/passwd:
oracle:x:54321:54321::/home/oracle:/bin/bash
In /etc/group:
oinstall:x:54321:oracle
dba:x:54322:oracle
oper:x:54323:oracle
backupdba:x:54324:oracle
dgdba:x:54325:oracle
kmdba:x:54326:oracle
racdba:x:54330:oracle
It does not create a grid user or the various ASM groups you’ll need to install Grid Infrastructure. To add those and to fix the default IDs, I used this script (modify for your own needs). The script makes the necessary changes and returns this result:
oracle user id:  uid=1000(oracle) gid=1000(oinstall) groups=1000(oinstall),1007(asmdba),1001(dba),1002(oper),1003(backupdba),1004(dgdba),1005(kmdba),1006(racdba)

grid user id:  uid=1001(grid) gid=1000(oinstall) groups=1000(oinstall),1007(asmdba),1008(asmadmin),1009(asmoper),1001(dba),1006(racdba)
Task #9: Modify Shell & Resource Limits.
For both the oracle and grid users the value of umask must be any one of these 22, 022, 0022.
[oracle@orasvr01 ~]$ umask
0022
If it’s not the correct value, set it explicitly in the ~/.bash_profile file:
umask 022
User resource limits are usually defined in /etc/security/limits.conf. When using the Oracle pre-installation package, these limits are created for the oracle user in this file instead:
/etc/security/limits.d/oracle-database-preinstall-19c.conf
These limits need to be replicated for the grid user, so add two sets of entries to /etc/security/limits.conf. Your values may be different depending upon your hardware configuration:
# resource limits for oracle user:
oracle   soft   nofile   1024
oracle   hard   nofile   65536
oracle   soft   nproc    16384
oracle   hard   nproc    16384
oracle   soft   stack    10240
oracle   hard   stack    32768
oracle   hard   memlock  134217728
oracle   soft   memlock  134217728

# resource limits for grid user:
grid   soft   nofile   1024
grid   hard   nofile   65536
grid   soft   nproc    16384
grid   hard   nproc    16384
grid   soft   stack    10240
grid   hard   stack    32768
grid   hard   memlock  134217728
grid   soft   memlock  134217728
You can check these are operational by using this simple script.
Finally, if it so pleases you and it does me, change the insane alias defaults for ls, vi and grep in the oracle and grid user’s ~/.bash_profile:
unalias ls
unalias vi
unalias grep
Task #10: Configure iSCSI Storage.
There are options you can choose during the installation of Oracle Linux which will install the necessary iscsi packages. However, this is how you do it manually.
First check if the iscsi packages are installed:
[root@orasvr01 ~]# rpm -qa | grep iscsi
[root@orasvr01 ~]#
Nope, so let’s install them:
[root@orasvr01 ~]# yum install iscsi-initiator-utils

[root@orasvr01 ~]# rpm -qa | grep iscsi
iscsi-initiator-utils-iscsiuio-6.2.0.874-10.0.9.el7.x86_64
iscsi-initiator-utils-6.2.0.874-10.0.9.el7.x86_64
Next, enable and start the iscsid daemon:
[root@orasvr01 ~]# systemctl enable iscsid
Created symlink from /etc/systemd/system/multi-user.target.wants/iscsid.service to /usr/lib/systemd/system/iscsid.service.

[root@orasvr01 ~]# systemctl start iscsid

[root@orasvr01 ~]# systemctl status iscsid
● iscsid.service - Open-iSCSI
    Loaded: loaded (/usr/lib/systemd/system/iscsid.service; enabled; vendor preset: disabled)
    Active: active (running) since Thu 2019-07-04 17:45:10 CDT; 7min ago
      Docs: man:iscsid(8)
            man:iscsiadm(8)
  Main PID: 23489 (iscsid)
    Status: "Ready to process requests"
    CGroup: /system.slice/iscsid.service
            └─23489 /sbin/iscsid -f -d2
Jul 04 17:45:10 orasvr01.mynet.com systemd[1]: Starting Open-iSCSI…
Jul 04 17:45:10 orasvr01.mynet.com iscsid[23489]: iscsid: InitiatorName=iqn.1988-12.com.oracle:274b38e4651d
Jul 04 17:45:10 orasvr01.mynet.com iscsid[23489]: iscsid: InitiatorAlias=orasvr01.mynet.com
Jul 04 17:45:10 orasvr01.mynet.com iscsid[23489]: iscsid: Max file limits 1024 4096
Jul 04 17:45:10 orasvr01.mynet.com systemd[1]: Started Open-iSCSI.
I already carved up the /dev/sdc disk device in Openfiler (Western Digital 300 GB VelociRaptor SATA 3 drive) into two sets of 10 volumes. A set will be allocated to each server. Here’s a summary of the volume allocation:
| Host | iSCSI Target | Disk Device (GB) | File System/ASM Disk |
|---|---|---|---|
| orasvr01 | iqn.2006-01.com.openfiler:orasvr01vg-vol01 | /dev/sda (20) | /u02 |
| iqn.2006-01.com.openfiler:orasvr01vg-vol02 | /dev/sdb (20) | /u03 | |
| iqn.2006-01.com.openfiler:orasvr01vg-vol03 | /dev/sdc (20) | /u04 | |
| iqn.2006-01.com.openfiler:orasvr01vg-vol04 | /dev/sdd (20) | /u05 | |
| iqn.2006-01.com.openfiler:orasvr01vg-vol05 | /dev/sde (20) | /u06 | |
| iqn.2006-01.com.openfiler:orasvr01vg-vol06 | /dev/sdf (20) | /u07 | |
| iqn.2006-01.com.openfiler:orasvr01vg-vol13 | /dev/sdg (10) | N/A | |
| iqn.2006-01.com.openfiler:orasvr01vg-vol15 | /dev/sdh (1) | N/A | |
| iqn.2006-01.com.openfiler:orasvr01vg-vol16 | /dev/sdi (1) | N/A | |
| iqn.2006-01.com.openfiler:orasvr01vg-vol17 | /dev/sdj (1) | N/A | |
| orasvr02 | iqn.2006-01.com.openfiler:orasvr02vg-vol07 | /dev/sdj (20) | DATA_000 |
| iqn.2006-01.com.openfiler:orasvr02vg-vol08 | /dev/sdi (20) | DATA_001 | |
| iqn.2006-01.com.openfiler:orasvr02vg-vol09 | /dev/sdh (20) | DATA_002 | |
| iqn.2006-01.com.openfiler:orasvr02vg-vol10 | /dev/sdg (20) | RECO_000 | |
| iqn.2006-01.com.openfiler:orasvr02vg-vol11 | /dev/sdf (20) | RECO_001 | |
| iqn.2006-01.com.openfiler:orasvr02vg-vol12 | /dev/sde (20) | RECO_002 | |
| iqn.2006-01.com.openfiler:orasvr02vg-vol14 | /dev/sdd (10) | REDO_000 | |
| iqn.2006-01.com.openfiler:orasvr02vg-vol18 | /dev/sdc (1) | N/A | |
| iqn.2006-01.com.openfiler:orasvr02vg-vol19 | /dev/sdb (1) | N/A | |
| iqn.2006-01.com.openfiler:orasvr02vg-vol20 | /dev/sda (1) | N/A | |
First, let’s discover the iSCSI targets allocated to orasvr01:
[root@orasvr01 ~]# iscsiadm -m discovery -t sendtargets -p openfiler-storage
200.200.20.6:3260,1 iqn.2006-01.com.openfiler:orasvr01vg-vol17
200.200.10.6:3260,1 iqn.2006-01.com.openfiler:orasvr01vg-vol17
200.200.20.6:3260,1 iqn.2006-01.com.openfiler:orasvr01vg-vol16
200.200.10.6:3260,1 iqn.2006-01.com.openfiler:orasvr01vg-vol16
200.200.20.6:3260,1 iqn.2006-01.com.openfiler:orasvr01vg-vol15
200.200.10.6:3260,1 iqn.2006-01.com.openfiler:orasvr01vg-vol15
200.200.20.6:3260,1 iqn.2006-01.com.openfiler:orasvr01vg-vol13
200.200.10.6:3260,1 iqn.2006-01.com.openfiler:orasvr01vg-vol13
200.200.20.6:3260,1 iqn.2006-01.com.openfiler:orasvr01vg-vol06
200.200.10.6:3260,1 iqn.2006-01.com.openfiler:orasvr01vg-vol06
200.200.20.6:3260,1 iqn.2006-01.com.openfiler:orasvr01vg-vol05
200.200.10.6:3260,1 iqn.2006-01.com.openfiler:orasvr01vg-vol05
200.200.20.6:3260,1 iqn.2006-01.com.openfiler:orasvr01vg-vol04
200.200.10.6:3260,1 iqn.2006-01.com.openfiler:orasvr01vg-vol04
200.200.20.6:3260,1 iqn.2006-01.com.openfiler:orasvr01vg-vol03
200.200.10.6:3260,1 iqn.2006-01.com.openfiler:orasvr01vg-vol03
200.200.20.6:3260,1 iqn.2006-01.com.openfiler:orasvr01vg-vol02
200.200.10.6:3260,1 iqn.2006-01.com.openfiler:orasvr01vg-vol02
200.200.20.6:3260,1 iqn.2006-01.com.openfiler:orasvr01vg-vol01
200.200.10.6:3260,1 iqn.2006-01.com.openfiler:orasvr01vg-vol01
As before, orasvr01 sees the iSCSI targets on both the public network (200.200.10.x) and the storage network (200.200.20.x). I have no idea why, but needless to say we’re only interested in the targets on the storage network.
Next, we need to log into each iSCSI target:
[root@orasvr01 ~]# iscsiadm -m node -T iqn.2006-01.com.openfiler:orasvr01vg-vol01 -p 200.200.20.6 -l
Logging in to iface: default, target: iqn.2006-01.com.openfiler:orasvr01vg-vol01, portal: 200.200.20.6,3260
Login to [iface: default, target: iqn.2006-01.com.openfiler:orasvr01vg-vol01, portal: 200.200.20.6,3260] successful.

[root@orasvr01 ~]# iscsiadm -m node -T iqn.2006-01.com.openfiler:orasvr01vg-vol02 -p 200.200.20.6 -l
Logging in to iface: default, target: iqn.2006-01.com.openfiler:orasvr01vg-vol02, portal: 200.200.20.6,3260
Login to [iface: default, target: iqn.2006-01.com.openfiler:orasvr01vg-vol02, portal: 200.200.20.6,3260] successful.

[root@orasvr01 ~]# iscsiadm -m node -T iqn.2006-01.com.openfiler:orasvr01vg-vol03 -p 200.200.20.6 -l
Logging in to iface: default, target: iqn.2006-01.com.openfiler:orasvr01vg-vol03, portal: 200.200.20.6,3260
Login to [iface: default, target: iqn.2006-01.com.openfiler:orasvr01vg-vol03, portal: 200.200.20.6,3260] successful.

[root@orasvr01 ~]# iscsiadm -m node -T iqn.2006-01.com.openfiler:orasvr01vg-vol04 -p 200.200.20.6 -l
Logging in to iface: default, target: iqn.2006-01.com.openfiler:orasvr01vg-vol04, portal: 200.200.20.6,3260
Login to [iface: default, target: iqn.2006-01.com.openfiler:orasvr01vg-vol04, portal: 200.200.20.6,3260] successful.

[root@orasvr01 ~]# iscsiadm -m node -T iqn.2006-01.com.openfiler:orasvr01vg-vol05 -p 200.200.20.6 -l
Logging in to iface: default, target: iqn.2006-01.com.openfiler:orasvr01vg-vol05, portal: 200.200.20.6,3260
Login to [iface: default, target: iqn.2006-01.com.openfiler:orasvr01vg-vol05, portal: 200.200.20.6,3260] successful.

[root@orasvr01 ~]# iscsiadm -m node -T iqn.2006-01.com.openfiler:orasvr01vg-vol06 -p 200.200.20.6 -l
Logging in to iface: default, target: iqn.2006-01.com.openfiler:orasvr01vg-vol06, portal: 200.200.20.6,3260
Login to [iface: default, target: iqn.2006-01.com.openfiler:orasvr01vg-vol06, portal: 200.200.20.6,3260] successful.

[root@orasvr01 ~]# iscsiadm -m node -T iqn.2006-01.com.openfiler:orasvr01vg-vol13 -p 200.200.20.6 -l
Logging in to iface: default, target: iqn.2006-01.com.openfiler:orasvr01vg-vol13, portal: 200.200.20.6,3260
Login to [iface: default, target: iqn.2006-01.com.openfiler:orasvr01vg-vol13, portal: 200.200.20.6,3260] successful.

[root@orasvr01 ~]# iscsiadm -m node -T iqn.2006-01.com.openfiler:orasvr01vg-vol15 -p 200.200.20.6 -l
Logging in to iface: default, target: iqn.2006-01.com.openfiler:orasvr01vg-vol15, portal: 200.200.20.6,3260
Login to [iface: default, target: iqn.2006-01.com.openfiler:orasvr01vg-vol15, portal: 200.200.20.6,3260] successful.

[root@orasvr01 ~]# iscsiadm -m node -T iqn.2006-01.com.openfiler:orasvr01vg-vol16 -p 200.200.20.6 -l
Logging in to iface: default, target: iqn.2006-01.com.openfiler:orasvr01vg-vol16, portal: 200.200.20.6,3260
Login to [iface: default, target: iqn.2006-01.com.openfiler:orasvr01vg-vol16, portal: 200.200.20.6,3260] successful.

[root@orasvr01 ~]# iscsiadm -m node -T iqn.2006-01.com.openfiler:orasvr01vg-vol17 -p 200.200.20.6 -l
Logging in to iface: default, target: iqn.2006-01.com.openfiler:orasvr01vg-vol17, portal: 200.200.20.6,3260
Login to [iface: default, target: iqn.2006-01.com.openfiler:orasvr01vg-vol17, portal: 200.200.20.6,3260] successful.
This has the effect of Oracle Linux creating disk devices for each iSCSI target. We can see the initial iSCSI target to disk device mapping here:
[root@orasvr01 ~]# ls -l /dev/disk/by-path | grep iscsi
lrwxrwxrwx 1 root root 9 Jul  4 18:48 ip-192.168.1.6:3260-iscsi-iqn.2006-01.com.openfiler:orasvr01vg-vol01-lun-0 -> ../../sda
lrwxrwxrwx 1 root root 9 Jul  4 18:49 ip-192.168.1.6:3260-iscsi-iqn.2006-01.com.openfiler:orasvr01vg-vol02-lun-0 -> ../../sdb
lrwxrwxrwx 1 root root 9 Jul  4 18:49 ip-192.168.1.6:3260-iscsi-iqn.2006-01.com.openfiler:orasvr01vg-vol03-lun-0 -> ../../sdc
lrwxrwxrwx 1 root root 9 Jul  4 18:49 ip-192.168.1.6:3260-iscsi-iqn.2006-01.com.openfiler:orasvr01vg-vol04-lun-0 -> ../../sdd
lrwxrwxrwx 1 root root 9 Jul  4 18:58 ip-192.168.1.6:3260-iscsi-iqn.2006-01.com.openfiler:orasvr01vg-vol05-lun-0 -> ../../sde
lrwxrwxrwx 1 root root 9 Jul  4 18:58 ip-192.168.1.6:3260-iscsi-iqn.2006-01.com.openfiler:orasvr01vg-vol06-lun-0 -> ../../sdf
lrwxrwxrwx 1 root root 9 Jul  4 18:59 ip-192.168.1.6:3260-iscsi-iqn.2006-01.com.openfiler:orasvr01vg-vol13-lun-0 -> ../../sdg
lrwxrwxrwx 1 root root 9 Jul  4 18:59 ip-192.168.1.6:3260-iscsi-iqn.2006-01.com.openfiler:orasvr01vg-vol15-lun-0 -> ../../sdh
lrwxrwxrwx 1 root root 9 Jul  4 18:59 ip-192.168.1.6:3260-iscsi-iqn.2006-01.com.openfiler:orasvr01vg-vol16-lun-0 -> ../../sdi
lrwxrwxrwx 1 root root 9 Jul  4 18:59 ip-192.168.1.6:3260-iscsi-iqn.2006-01.com.openfiler:orasvr01vg-vol17-lun-0 -> ../../sdj
Next, we need to configure automatic iSCSI client login so the server will log into the iSCSI targets each time the system is started or rebooted:
[root@orasvr01 ~]# iscsiadm -m node -T iqn.2006-01.com.openfiler:orasvr01vg-vol01 -p 192.168.1.6 --op update -n node.startup -v automatic

[root@orasvr01 ~]# iscsiadm -m node -T iqn.2006-01.com.openfiler:orasvr01vg-vol02 -p 192.168.1.6 --op update -n node.startup -v automatic

[root@orasvr01 ~]# iscsiadm -m node -T iqn.2006-01.com.openfiler:orasvr01vg-vol03 -p 192.168.1.6 --op update -n node.startup -v automatic

[root@orasvr01 ~]# iscsiadm -m node -T iqn.2006-01.com.openfiler:orasvr01vg-vol04 -p 192.168.1.6 --op update -n node.startup -v automatic

[root@orasvr01 ~]# iscsiadm -m node -T iqn.2006-01.com.openfiler:orasvr01vg-vol05 -p 192.168.1.6 --op update -n node.startup -v automatic

[root@orasvr01 ~]# iscsiadm -m node -T iqn.2006-01.com.openfiler:orasvr01vg-vol06 -p 192.168.1.6 --op update -n node.startup -v automatic

[root@orasvr01 ~]# iscsiadm -m node -T iqn.2006-01.com.openfiler:orasvr01vg-vol13 -p 192.168.1.6 --op update -n node.startup -v automatic

[root@orasvr01 ~]# iscsiadm -m node -T iqn.2006-01.com.openfiler:orasvr01vg-vol15 -p 192.168.1.6 --op update -n node.startup -v automatic

[root@orasvr01 ~]# iscsiadm -m node -T iqn.2006-01.com.openfiler:orasvr01vg-vol16 -p 192.168.1.6 --op update -n node.startup -v automatic

[root@orasvr01 ~]# iscsiadm -m node -T iqn.2006-01.com.openfiler:orasvr01vg-vol17 -p 192.168.1.6 --op update -n node.startup -v automatic
Task #11: Partition Disks.
For now, I’ll only partition the six 20 GB disk devices. The basic sequence of steps would be the same for each. Here’s how to do the first one:
[root@orasvr01 ~]# fdisk /dev/sda
Welcome to fdisk (util-linux 2.23.2).

Changes will remain in memory only, until you decide to write them.
Be careful before using the write command.

Command (m for help): n
Partition type:
   p   primary (0 primary, 0 extended, 4 free)
   e   extended
Select (default p): p
Partition number (1-4, default 1): 1
First sector (2048-41943039, default 2048):
Using default value 2048
Last sector, +sectors or +size{K,M,G} (2048-41943039, default 41943039):
Using default value 41943039
Partition 1 of type Linux and of size 20 GiB is set

Command (m for help): w
The partition table has been altered!
Calling ioctl() to re-read partition table.
Syncing disks.
This is what you end up with:
[root@orasvr01 ~]# fdisk –l /dev/sda
Disk /dev/sda: 21.5 GB, 21474836480 bytes, 41943040 sectors
Units = sectors of 1 * 512 = 512 bytes
Sector size (logical/physical): 512 bytes / 512 bytes
I/O size (minimum/optimal): 512 bytes / 512 bytes
Disk label type: dos
Disk identifier: 0xfba01026

Device Boot      Start         End      Blocks   Id  System
/dev/sda1         2048    41943039    20970496   83  Linux
Task #12: Configure Persistent Disk Device Names for iSCSI Targets.
Each time the server is booted, the iSCSI targets could be assigned a different device name. That’s a problem because it means your database files could be seen to change file system mount points. To ensure a given iSCSI target always maps to the same disk device, we can use udev rules. This has changed a little between Oracle Linux 6 and Oracle Linux 7.
Step 1 is to obtain the unique iSCSI id of each disk device we need a udev rule for. To do that, use the scsi_id command. It’s location has changed in OL7 and its path is no longer part of the root user’s default path. Here’s a quick alias and usage of the command:
[root@orasvr01 ~]# alias scsi_id='/usr/lib/udev/scsi_id'

[root@orasvr01 ~]# scsi_id -g -u -d /dev/sda
14f504e46494c455236547044684f2d336333412d51514561

[root@orasvr01 ~]# scsi_id -g -u -d /dev/sdb
14f504e46494c45526d31426172632d647932672d3450636f

[root@orasvr01 ~]# scsi_id -g -u -d /dev/sdc
14f504e46494c45523647754338332d563959522d4343746c

[root@orasvr01 ~]# scsi_id -g -u -d /dev/sdd
14f504e46494c4552716c344377502d474541532d4b56704d

[root@orasvr01 ~]# scsi_id -g -u -d /dev/sde
14f504e46494c4552736b3773624e2d4932594b2d76426b65

[root@orasvr01 ~]# scsi_id -g -u -d /dev/sdf
14f504e46494c45523471744464762d3532784b2d37314169
Step 2 is to create a udev rules script in /etc/udev/rules.d directory. The script can be called anything you like so long as it starts with a number and ends with “.rules”. It’s always important to name your script something meaningful. Here’s my file with the relevant syntax, one line per iSCSI target:
[root@orasvr01 rules.d]# ls -l
-rw-r--r-- 1 root root 1332 Jul  5 11:16 99-openfilerdevices.rules

[root@orasvr01 rules.d]# cat 99-openfilerdevices.rules
KERNEL=="sd?1", SUBSYSTEM=="block", PROGRAM=="/usr/lib/udev/scsi_id -g -u -d /dev/$parent", RESULT=="14f504e46494c455236547044684f2d336333412d51514561", SYMLINK+="orasvr01vg-vol01", OWNER="root", GROUP="disk", MODE="0660"
KERNEL=="sd?1", SUBSYSTEM=="block", PROGRAM=="/usr/lib/udev/scsi_id -g -u -d /dev/$parent", RESULT=="14f504e46494c45526d31426172632d647932672d3450636f", SYMLINK+="orasvr01vg-vol02", OWNER="root", GROUP="disk", MODE="0660"
KERNEL=="sd?1", SUBSYSTEM=="block", PROGRAM=="/usr/lib/udev/scsi_id -g -u -d /dev/$parent", RESULT=="14f504e46494c45523647754338332d563959522d4343746c", SYMLINK+="orasvr01vg-vol03", OWNER="root", GROUP="disk", MODE="0660"
KERNEL=="sd?1", SUBSYSTEM=="block", PROGRAM=="/usr/lib/udev/scsi_id -g -u -d /dev/$parent", RESULT=="14f504e46494c4552716c344377502d474541532d4b56704d", SYMLINK+="orasvr01vg-vol04", OWNER="root", GROUP="disk", MODE="0660"
KERNEL=="sd?1", SUBSYSTEM=="block", PROGRAM=="/usr/lib/udev/scsi_id -g -u -d /dev/$parent", RESULT=="14f504e46494c4552736b3773624e2d4932594b2d76426b65", SYMLINK+="orasvr01vg-vol05", OWNER="root", GROUP="disk", MODE="0660"
KERNEL=="sd?1", SUBSYSTEM=="block", PROGRAM=="/usr/lib/udev/scsi_id -g -u -d /dev/$parent", RESULT=="14f504e46494c45523471744464762d3532784b2d37314169", SYMLINK+="orasvr01vg-vol06", OWNER="root", GROUP="disk", MODE="0660"
A little explanation:
| Parameter | Value | Comment |
|---|---|---|
| KERNEL | sd?1 | Defaults to a wildcard pattern match for the disk device |
| SUBSYSTEM | block | /dev/sd?1 are block devices |
| PROGRAM | /usr/lib/udev/scsi_id … | Path to the scsi_id executable |
| RESULT | (iSCSI ID) | Unique iSCSI identifier returned by scsi_id |
| SYMLINK+ | (Name) | The symbolic link name which points to the disk device |
| OWNER | root | By default the root user owns disk devices |
| GROUP | disk | By default the OS group is disk |
| MODE | 0660 | Default permissions mask for the disk device |
Step 3 is to test the resolution of each line in the rules file. This is important because running a test actually creates the symbolic link. We already know what the current iSCSI target to disk device mappings are:
| iSCSI Target | Disk Device |
|---|---|
| iqn.2006-01.com.openfiler:orasvr01vg-vol01 | /dev/sda |
| iqn.2006-01.com.openfiler:orasvr01vg-vol02 | /dev/sdb |
| iqn.2006-01.com.openfiler:orasvr01vg-vol03 | /dev/sdc |
| iqn.2006-01.com.openfiler:orasvr01vg-vol04 | /dev/sdd |
| iqn.2006-01.com.openfiler:orasvr01vg-vol05 | /dev/sde |
| iqn.2006-01.com.openfiler:orasvr01vg-vol06 | /dev/sdf |
Taking /dev/sda as an example:
[root@orasvr01 ~]# ls -l /dev | grep sda
brw-rw---- 1 root disk      8,   0 Jul  4 19:35 sda
brw-rw---- 1 root disk      8,   1 Jul  4 19:35 sda1
We see they are block devices (b), their permissions mask is 0660 (rw-rw—-), they’re owned by root and belong to the group, disk.
Let’s run the test for /dev/sda1:
[root@orasvr01 ~]# ls -l /dev | grep orasvr01
(no output)

[root@orasvr01 ~]# udevadm test /block/sda/sda1
The output is quite verbose, but can be seen in its entirety here. Once the test completes, check to see if a symbolic link has shown up:
[root@orasvr01 ~]# ls -l /dev | grep orasvr01
lrwxrwxrwx 1 root root           4 Jul  5 12:08 orasvr01vg-vol01 -> sda1
Hurrah! By referencing the symbolic link and trusting that it always points to the correct disk device we’re all set to either build file systems on orasvr01 or create ASM Disks on orasvr02. Don’t forget to run the test for all the other disk devices to ensure their symbolic links get created.
Task #13a: Create File Systems (orasvr01).
First we need to build the /u01 file system whose storage is coming from the VM_Filesystems_Repo storage repository. Linux disk devices which come from OVM follow the naming convention /dev/xvd<letter>, where letter starts with a, then b and so on. The /dev/xvda disk has already been used for the Linux OS, so we should have /dev/xvdb waiting for us. Let’s check:
[root@orasvr01 ~]# fdisk -l /dev/xvdb
Disk /dev/xvdb: 64.4 GB, 64424509440 bytes, 125829120 sectors
Units = sectors of 1 * 512 = 512 bytes
Sector size (logical/physical): 512 bytes / 512 bytes
I/O size (minimum/optimal): 512 bytes / 512 bytes
Let’s create a primary partition, then build the file system:
[root@orasvr01 ~]# fdisk /dev/xvdb
Welcome to fdisk (util-linux 2.23.2).

Changes will remain in memory only, until you decide to write them.
Be careful before using the write command.

Device does not contain a recognized partition table
Building a new DOS disklabel with disk identifier 0x49a8eb2a.

Command (m for help): n
Partition type:
   p   primary (0 primary, 0 extended, 4 free)
   e   extended
Select (default p): p
Partition number (1-4, default 1): 1
First sector (2048-125829119, default 2048):
Using default value 2048
Last sector, +sectors or +size{K,M,G} (2048-125829119, default 125829119):
Using default value 125829119
Partition 1 of type Linux and of size 60 GiB is set

Command (m for help): w
The partition table has been altered!

Calling ioctl() to re-read partition table.
Syncing disks.

[root@orasvr01 ~]# mkfs -t ext4 -m 0 /dev/xvdb1
mke2fs 1.42.9 (28-Dec-2013)
Discarding device blocks: done
Filesystem label=
OS type: Linux
Block size=4096 (log=2)
Fragment size=4096 (log=2)
Stride=0 blocks, Stripe width=0 blocks
3932160 inodes, 15728384 blocks
0 blocks (0.00%) reserved for the super user
First data block=0
Maximum filesystem blocks=2164260864
480 block groups
32768 blocks per group, 32768 fragments per group
8192 inodes per group
Superblock backups stored on blocks:
         32768, 98304, 163840, 229376, 294912, 819200, 884736, 1605632, 2654208,
         4096000, 7962624, 11239424

Allocating group tables: done
Writing inode tables: done
Creating journal (32768 blocks): done
Writing superblocks and filesystem accounting information: done
Let’s go ahead and build file systems using the symbolic links which point to the 6 disk devices whose storage is coming from Openfiler:
[root@orasvr01 ~]# mkfs -t ext4 -m 0 /dev/orasvr01vg-vol01
[root@orasvr01 ~]# mkfs -t ext4 -m 0 /dev/orasvr01vg-vol02
[root@orasvr01 ~]# mkfs -t ext4 -m 0 /dev/orasvr01vg-vol03
[root@orasvr01 ~]# mkfs -t ext4 -m 0 /dev/orasvr01vg-vol04
[root@orasvr01 ~]# mkfs -t ext4 -m 0 /dev/orasvr01vg-vol05
[root@orasvr01 ~]# mkfs -t ext4 -m 0 /dev/orasvr01vg-vol06
Next, create the mount point directories for these file systems:
[root@orasvr01 ~]# cd /
[root@orasvr01 /]# mkdir /u01 /u02 /u03 /u04 /u05 /u06 /u07

[root@orasvr01 /]# ls -l
lrwxrwxrwx.   1 root root    7 Jun 29 11:35 bin -> usr/bin
dr-xr-xr-x.   4 root root 4096 Jun 29 12:40 boot
drwxr-xr-x   20 root root 3780 Jul  5 15:05 dev
drwxr-xr-x.  88 root root 8192 Jul  4 17:44 etc
drwxr-xr-x.   5 root root   44 Jul  4 13:55 home
lrwxrwxrwx.   1 root root    7 Jun 29 11:35 lib -> usr/lib
lrwxrwxrwx.   1 root root    9 Jun 29 11:35 lib64 -> usr/lib64
drwxr-xr-x.   2 root root    6 Apr 10  2018 media
drwxr-xr-x.   2 root root    6 Apr 10  2018 mnt
drwxr-xr-x.   3 root root   16 Jun 29 11:37 opt
dr-xr-xr-x  164 root root    0 Jul  1 12:05 proc
dr-xr-x---.   5 root root 4096 Jul  5 10:49 root
drwxr-xr-x   28 root root  820 Jul  4 17:44 run
lrwxrwxrwx.   1 root root    8 Jun 29 11:35 sbin -> usr/sbin
drwxr-xr-x.   2 root root    6 Apr 10  2018 srv
dr-xr-xr-x   13 root root    0 Jul  4 15:35 sys
drwxrwxrwt.   7 root root 4096 Jul  5 03:10 tmp
drwxr-xr-x    2 root root    6 Jul  5 15:07 u01
drwxr-xr-x    2 root root    6 Jul  5 15:07 u02
drwxr-xr-x    2 root root    6 Jul  5 15:07 u03
drwxr-xr-x    2 root root    6 Jul  5 15:07 u04
drwxr-xr-x    2 root root    6 Jul  5 15:07 u05
drwxr-xr-x    2 root root    6 Jul  5 15:07 u06
drwxr-xr-x    2 root root    6 Jul  5 15:07 u07
drwxr-xr-x.  13 root root 4096 Jun 29 11:35 usr
drwxr-xr-x.  20 root root 4096 Jun 29 12:30 var
Next, add the relevant entries to the /etc/fstab file:
/dev/xvdb1              /u01                    ext4    defaults        0 0
/dev/orasvr01vg-vol01   /u02                    ext4    defaults        0 0
/dev/orasvr01vg-vol02   /u03                    ext4    defaults        0 0
/dev/orasvr01vg-vol03   /u04                    ext4    defaults        0 0
/dev/orasvr01vg-vol04   /u05                    ext4    defaults        0 0
/dev/orasvr01vg-vol05   /u06                    ext4    defaults        0 0
/dev/orasvr01vg-vol06   /u07                    ext4    defaults        0 0
Finally, mount all the file systems and check they’re available:
[root@orasvr01 /]# mount –a
[root@orasvr01 /]# df -h
Filesystem           Size  Used Avail Use% Mounted on
devtmpfs             3.9G     0  3.9G   0% /dev
tmpfs                3.9G     0  3.9G   0% /dev/shm
tmpfs                3.9G  8.6M  3.9G   1% /run
tmpfs                3.9G     0  3.9G   0% /sys/fs/cgroup
/dev/mapper/ol-root   35G  1.8G   34G   5% /
/dev/xvda1          1014M  235M  780M  24% /boot
tmpfs                797M     0  797M   0% /run/user/0
/dev/xvdb1            59G   53M   59G   1% /u01
/dev/sda1             20G   45M   20G   1% /u02
/dev/sdb1             20G   45M   20G   1% /u03
/dev/sdc1             20G   45M   20G   1% /u04
/dev/sdd1             20G   45M   20G   1% /u05
/dev/sde1             20G   45M   20G   1% /u06
/dev/sdf1             20G   45M   20G   1% /u07
That’s it! We’re now ready to copy the Oracle Database code sets to /u01, install them and build databases using the storage in /u02 through /u07 on orasvr01.
Note, if you install Oracle Database 11g Release 11.2.0.4 on Oracle Linux 7, check this first!
Task #13b: Create ASM Disks (orasvr02).
As we know, each time the server is booted the iSCSI targets could be assigned a different device name. So the trick is to ensure the device name is persistent. That way Oracle will know which files are where. This can be done using udev rules and/or using Oracle’s ASMLib. Been there, done that, works great. There is a third way, however. Beginning with Oracle Database 12c Release 1 (12.1.0.2), Oracle provided the Oracle ASM Filter Driver (ASMFD). This is now Oracle’s recommended way to configure storage for ASM.
According to the Oracle ASMFD documentation, ASMFD “simplifies the configuration and management of disk devices by eliminating the need to rebind disk devices used with Oracle ASM each time the system is restarted”. So device name peristence then. It is further claimined that ASMFD is a kernel module which resides in the I/O path of the ASM Disks. Hence, its function is also to validate I/O requests to ASM Disks, filtering out invalid I/O. Presumably that means if you attempted to interfere with a system’s ASM Disks directly, the ASM Filter Driver would prevent you from doing so. Could be an interesting experiment when you have a spare moment. Don’t try it on a production system though, right?
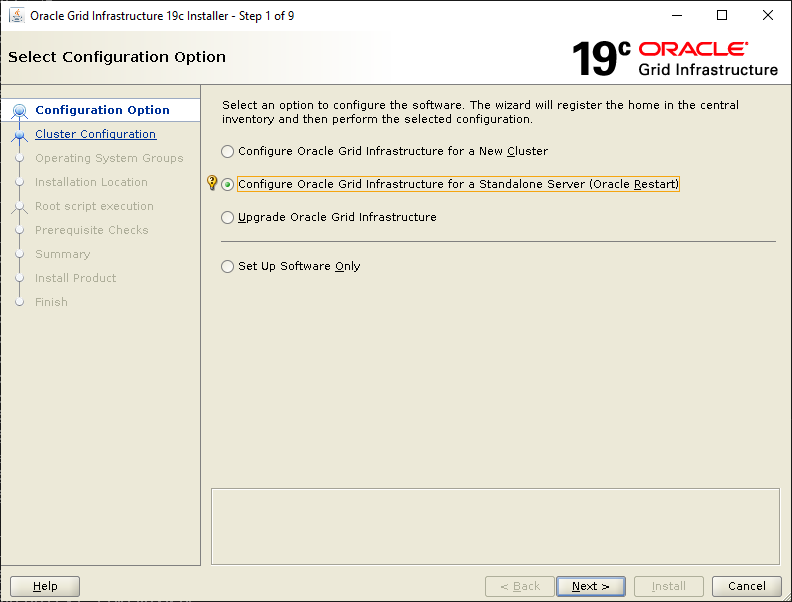
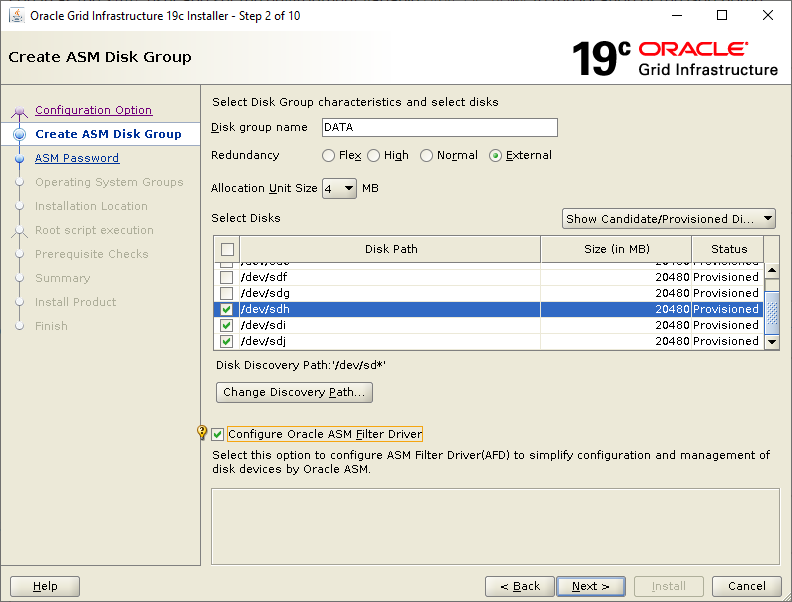
Anyway, let’s try out the ASM Filter Driver. The driver can be installed and configured as part of an Oracle Grid Infrastructure installation. Pretty handy. Since the rules of the game are you have to use an ASM instance whose version is equal to or exceeds that of your database, let’s go with Oracle Grid Infrastructure 19c Release 3. Before we run the installer, let’s review the iSCSI targets and disk devices the operating system can currently see:
| iSCSI Target | OS Device Name (GB) | Candidate ASM Disk | |
|---|---|---|---|
| openfiler:orasvr02vg-vol07-lun-0 | /dev/sdj (20) | DATA_000 | |
| openfiler:orasvr02vg-vol08-lun-0 | /dev/sdi (20) | DATA_001 | |
| openfiler:orasvr02vg-vol09-lun-0 | /dev/sdh (20) | DATA_002 | |
| openfiler:orasvr02vg-vol10-lun-0 | /dev/sdg (20) | RECO_000 | |
| openfiler:orasvr02vg-vol11-lun-0 | /dev/sdf (20) | RECO_001 | |
| openfiler:orasvr02vg-vol12-lun-0 | /dev/sde (20) | RECO_002 | |
| openfiler:orasvr02vg-vol14-lun-0 | /dev/sdd (10) | REDO_000 | |
I’m not going to define any udev rules to ensure ASMFD takes charge of device persistence. Previously we’ve used ASMLib’s oracleasm command to create candidate ASM Disks. When using ASMFD there’s a similar procedure to follow. We’ll get to that in a moment since the utility we need to use is contained in the Grid Infrastructure code set which we haven’t unzipped yet.
As is usual, there are a bunch of prerequisites to check before we get to install the Grid Infrastructure software. Since we’ll be performing a stand alone installation, the RAC and Clusterware prerequisites will not apply. Despite that, there are still a number of things to check. The full Oracle Grid Infrastructure Installation Checklist is here.
Just for fun, let’s check a few of the pre-installation items.
Pre-install Check #1: At least 8 GB of RAM.
[root@orasvr02 ~]# grep MemTotal /proc/meminfo
MemTotal:       16412260 kB
Pre-install Check #2: Oracle Linux 7.4 with UEK 4:4.1.12-124.19.2.el7uek.x86_64 or later.
[root@orasvr02 ~]# cat /etc/oracle-release
Oracle Linux Server release 7.6

[root@orasvr02 ~]# uname -a
Linux orasvr02.mynet.com 4.14.35-1902.2.0.el7uek.x86_64 #2 SMP Fri Jun 14 21:15:44 PDT 2019 x86_64 x86_64 x86_64 GNU/Linux
There is a major gotcha with this one which we’ll get to later. Stay tuned.
Pre-install Check #3: Oracle Preinstallation RPM for Oracle Linux.
[root@orasvr02 ~]# rpm -qa | grep pre
oracle-database-preinstall-19c-1.0-1.el7.x86_64
Note, when the preinstallation package is installed, a file called /etc/security/limits.d/oracle-database-preinstall-19c.conf gets created. The values in this file override settings in the standard /etc/security/limits.conf file. Also note, the package only defines values for the oracle user. Since we’ll be using the grid user to install Grid Infrastructure, you’ll need to duplicate all the oracle user entries for the grid user.
Pre-install Check #4: Disable transparent HugePages.
[root@orasvr02 ~]# cat /sys/kernel/mm/transparent_hugepage/enabled
always madvise [never]
Oracle recommends the use of HugePages on Linux. For additional information on those, go here. (coming soon)
Pre-install Check #5: Swap Space allocation relative to RAM
For 16 GB of RAM, we should have 16 GB of swap space:
[root@orasvr02 ~]# swapon --show
NAME      TYPE      SIZE USED PRIO
/dev/dm-1 partition   4G   0B   -2
Since we only have 4 GB of swap, we need another 12 GB. This can be done by adding a swap file.
Pre-install Check #6: Disk I/O Scheduler.
Oracle recommends the Deadline I/O scheduler for the best performance with ASM Disks. However, the Oracle documentation also says this:
“On some virtual environments (VM) and special devices such as fast storage devices, the output of the above command may be none. The operating system or VM bypasses the kernel I/O scheduling and submits all I/O requests directly to the device. Do not change the I/O Scheduler settings on such environments.”
In our configuration we are using VMs, but the storage is actually coming from a NAS (Openfiler). So let’s check which I/O scheduler Oracle Linux is using for the storage coming from the NAS:
[root@orasvr02 ~]# for disk in d e f g h i j
> do
> echo "Checking /dev/sd$disk: `cat /sys/block/sd$disk/queue/scheduler`"
> done

Checking /dev/sdd: noop [deadline] cfq
Checking /dev/sde: noop [deadline] cfq
Checking /dev/sdf: noop [deadline] cfq
Checking /dev/sdg: noop [deadline] cfq
Checking /dev/sdh: noop [deadline] cfq
Checking /dev/sdi: noop [deadline] cfq
Checking /dev/sdj: noop [deadline] cfq
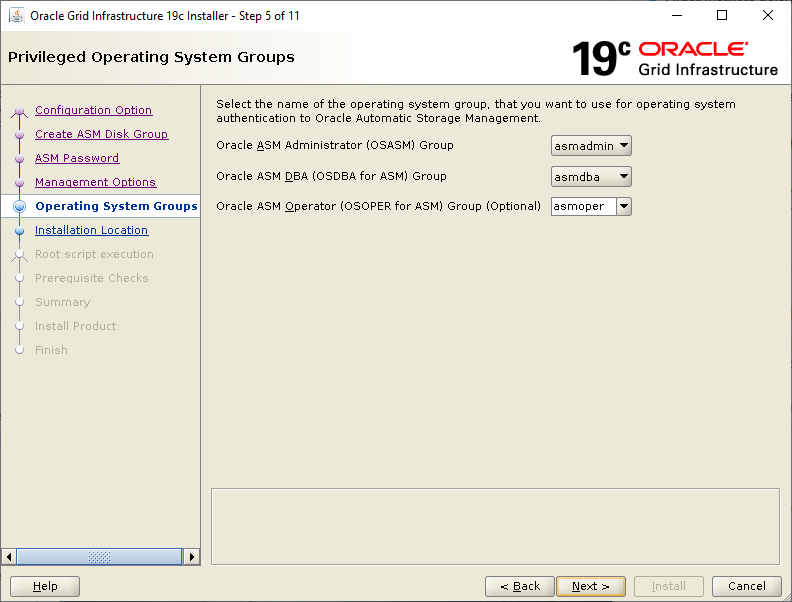
Pre-install Check #7: Creating Users, Groups and Paths.
[root@orasvr02 ~]# fgrep grid /etc/passwd
grid:x:1001:1000::/home/grid:/bin/bash

[grid@orasvr02 ~]$ id
uid=1001(grid) gid=1000(oinstall) groups=1000(oinstall),1001(dba),1006(racdba),1007(asmdba),1008(asmadmin),1009(asmoper)
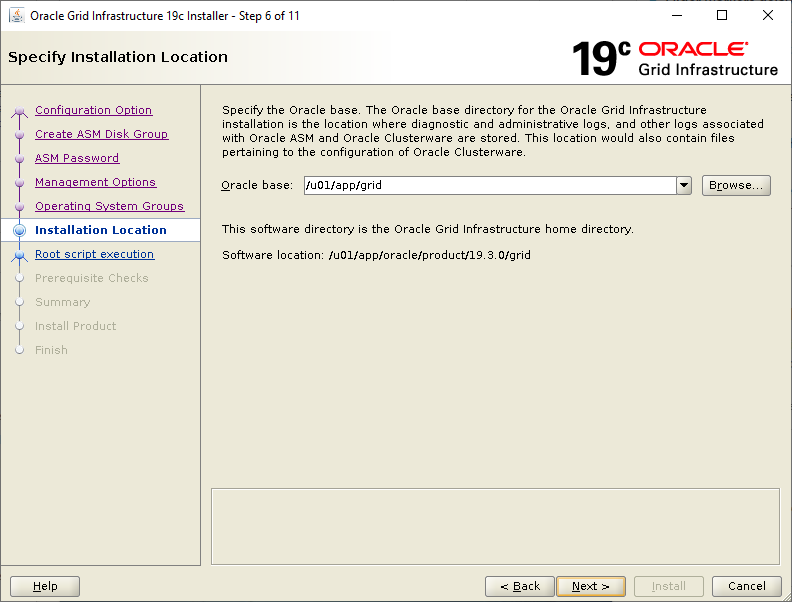
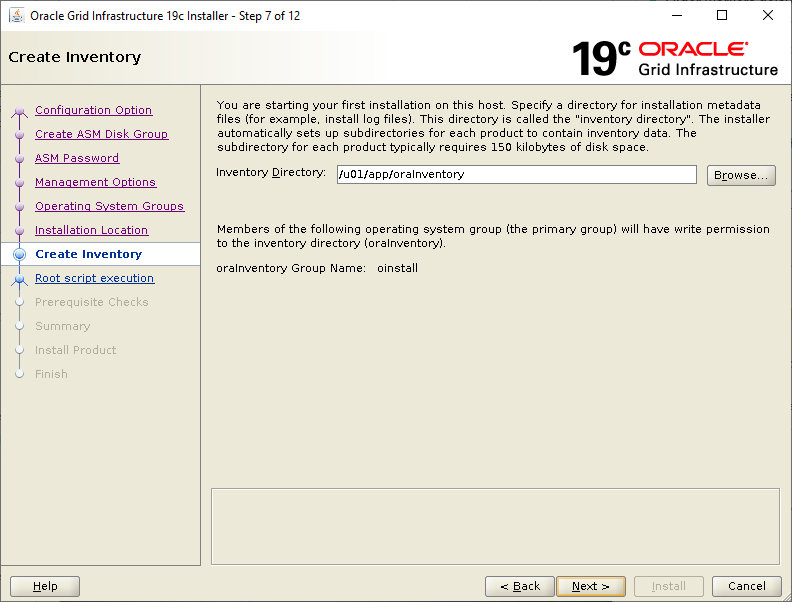
We need 3 paths for the Grid Infrastructre installation. A grid user ORACLE_BASE, an Oracle Inventory and a grid user ORACLE_HOME. Note, if this is the first Oracle software installtion on the server, then the Oracle Inventory directory must be owned by the software owner, which in our case is the grid user:
[root@orasvr02 ~]# ls -l /u01/app
drwxr-xr-x 3 grid   oinstall 4096 Nov  6 15:54 grid
drwxrwxr-x 2 grid   oinstall 4096 Nov  5 12:18 oraInventory

[root@orasvr02 ~]# ls -l /u01/app/oracle/product/19.3.0/
drwxr-xr-x 67 grid   oinstall 4096 Nov  6 15:54 grid
Pre-install Check #8: Configuring Candidate ASM Disks.
The Grid Infrastructure installation will attempt to create an initial ASM Diskgroup for which it will need a candidate ASM Disk. The utility used to create candidate ASM Disks is contained within the Grid Infrastructure code set, so we need to copy the downloaded Grid Infrastructure zip file to the grid user’s ORACLE_HOME directory and unzip it:
[grid@orasvr02 ~]$ cp /u01/MEDIA/GI_19.3.0/LINUX.X64_193000_grid_home.zip /u01/app/oracle/product/19.3.0/grid

[grid@orasvr02 ~]$ cd /u01/app/oracle/product/19.3.0/grid
[grid@orasvr02 grid]$ unzip LINUX.X64_193000_grid_home.zip
...
Next, login as root, set your environment then use the asmcmd command to label the disks, thus turning them into candidate ASM Disks:
[grid@orasvr02 grid]$ su -
Password:
Last login: Thu Nov  7 13:57:02 CST 2019 on pts/1

[root@orasvr02 ~]# cd /u01/app/grid
[root@orasvr02 grid]# export ORACLE_BASE=`pwd`

[root@orasvr02 grid]# cd /u01/app/oracle/product/19.3.0/grid
[root@orasvr02 grid]# export ORACLE_HOME=`pwd`

[root@orasvr02 grid]# env | grep ORA
ORACLE_BASE=/u01/app/grid
ORACLE_HOME=/u01/app/oracle/product/19.3.0/grid

[root@orasvr02 grid]# cd bin
The disk devices we’ll be using for ASM on this server are /dev/sdd through /dev/sdj (see above). I have created a single primary partition for each disk device. Let’s quickly check what the output looks like when you check the label of a disk which has not yet been labeled:
[root@orasvr02 bin]# for disk in d e f g h i j
> do
> echo "Checking ASM Label of /dev/sd$disk: `./asmcmd afd_lslbl /dev/sd$disk`"
> done

Checking ASM Label of /dev/sdd: No devices to be scanned.
Checking ASM Label of /dev/sde: No devices to be scanned.
Checking ASM Label of /dev/sdf: No devices to be scanned.
Checking ASM Label of /dev/sdg: No devices to be scanned.
Checking ASM Label of /dev/sdh: No devices to be scanned.
Checking ASM Label of /dev/sdi: No devices to be scanned.
Checking ASM Label of /dev/sdj: No devices to be scanned.
So let’s crack on and label those disks (these commands produce no output):
[root@orasvr02 bin]# ./asmcmd afd_label DATA_0000 /dev/sdj --init
[root@orasvr02 bin]# ./asmcmd afd_label DATA_0001 /dev/sdi --init
[root@orasvr02 bin]# ./asmcmd afd_label DATA_0002 /dev/sdh --init
[root@orasvr02 bin]# ./asmcmd afd_label RECO_0000 /dev/sdg --init
[root@orasvr02 bin]# ./asmcmd afd_label RECO_0001 /dev/sdf --init
[root@orasvr02 bin]# ./asmcmd afd_label RECO_0002 /dev/sde --init
[root@orasvr02 bin]# ./asmcmd afd_label REDO_0000 /dev/sdd --init
Now let’s check the labels are correct:
[root@orasvr02 bin]# for disk in d e f g h i j
> do
> echo "Checking ASM Label of /dev/sd$disk: `./asmcmd afd_lslbl /dev/sd$disk`"
> done

Checking ASM Label of /dev/sdd: ------------------------------------------------
Label                     Duplicate  Path
================================================================================
REDO_0000                             /dev/sdd
Checking ASM Label of /dev/sde: ------------------------------------------------
Label                     Duplicate  Path
================================================================================
RECO_0002                             /dev/sde
Checking ASM Label of /dev/sdf: ------------------------------------------------
Label                     Duplicate  Path
================================================================================
RECO_0001                             /dev/sdf
Checking ASM Label of /dev/sdg: ------------------------------------------------
Label                     Duplicate  Path
================================================================================
RECO_0000                             /dev/sdg
Checking ASM Label of /dev/sdh: ------------------------------------------------
Label                     Duplicate  Path
================================================================================
DATA_0002                             /dev/sdh
Checking ASM Label of /dev/sdi: ------------------------------------------------
Label                     Duplicate  Path
================================================================================
DATA_0001                             /dev/sdi
Checking ASM Label of /dev/sdj: ------------------------------------------------
Label                     Duplicate  Path
================================================================================
DATA_0000                             /dev/sdj
In addition, labeling the disks creates files in /dev/oracleafd/disks:
[root@orasvr02 ~]# ls -l /dev/oracleafd/disks
-rw-rw-r-- 1 grid oinstall 32 Nov  8 11:43 DATA_0000
-rw-rw-r-- 1 grid oinstall 32 Nov  8 11:43 DATA_0001
-rw-rw-r-- 1 grid oinstall 32 Nov  8 11:44 DATA_0002
-rw-rw-r-- 1 grid oinstall 32 Nov  8 11:44 RECO_0000
-rw-rw-r-- 1 grid oinstall 32 Nov  8 11:44 RECO_0001
-rw-rw-r-- 1 grid oinstall 32 Nov  8 11:44 RECO_0002
-rw-rw-r-- 1 grid oinstall 32 Nov  8 11:44 REDO_0000
Install Grid Infrastructure 19c Release 3.
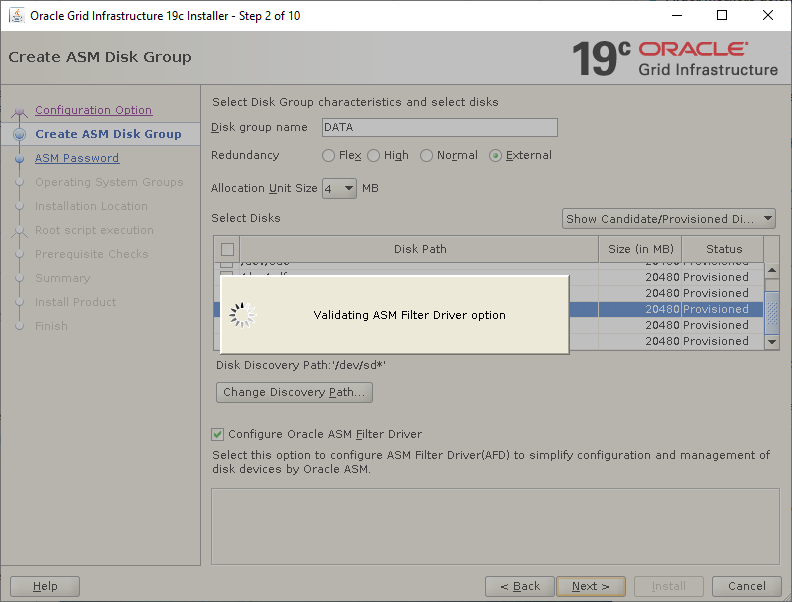
Now we’re ready to run the installation, but before we do be aware of a significant limitation of Oracle’s UEK. I believe that Oracle Linux 7.6 UEK and above does not (yet) support ASMFD. I ran into this issue and kept getting these errors when attempting to navigate past Step #2 of the installation (i.e. the ASM Diskgroup creation and ASMFD configuration):
INS-41223: ASM Filter Driver is not supported on this platform.

AFD-620: AFD is not supported on this operating system version: '4.14.35-1902.2.0.el7uek.x86_64'
So Oracle’s stuff doesn’t work on Oracle’s stuff. Lovely. To get around this, I booted to a different kernel. To change the default boot kernel, go here. Once you’re running a supported kernel, check to see Oracle agrees using a couple of utilities:
[root@orasvr02 ~]# cd /u01/app/grid [root@orasvr02 grid]# export ORACLE_BASE=pwd[root@orasvr02 grid]# cd ../oracle/product/19.3.0/grid [root@orasvr02 grid]# export ORACLE_HOME=pwd[root@orasvr02 grid]# cd bin [root@orasvr02 bin]# ./afdroot version_check AFD-616: Valid AFD distribution media detected at: '/u01/app/oracle/product/19.3.0/grid/usm/install/Oracle/EL7/x86_64/3.10.0-862/3.10.0-862-x86_64/bin' [root@orasvr02 bin]# ./afddriverstate -orahome /u01/app/oracle/product/19.3.0/grid version AFD-9325: Driver OS kernel version = 3.10.0-862.el7.x86_64. AFD-9326: Driver build number = 190222. AFD-9212: Driver build version = 19.0.0.0.0. AFD-9547: Driver available build number = 190222. AFD-9548: Driver available build version = 19.0.0.0.0. [root@orasvr02 bin]# ./afddriverstate -orahome /u01/app/oracle/product/19.3.0/grid supported AFD-9200: Supported
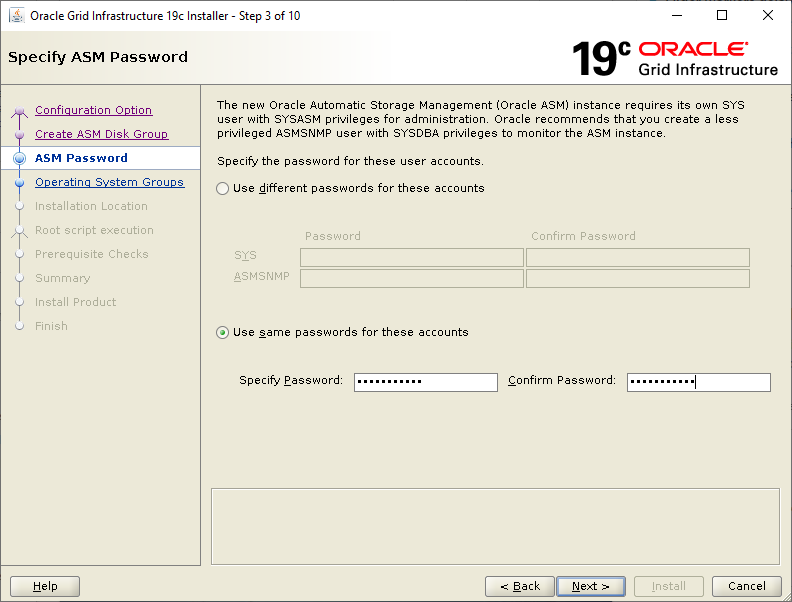
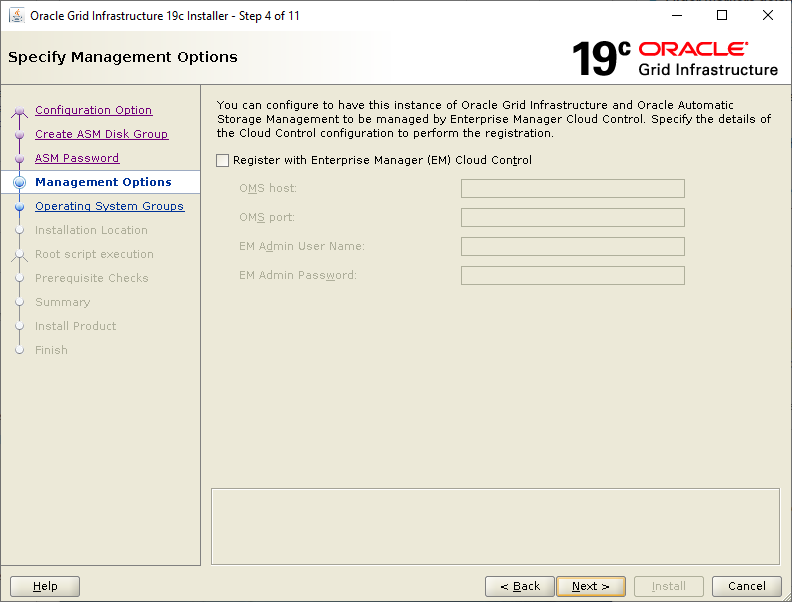
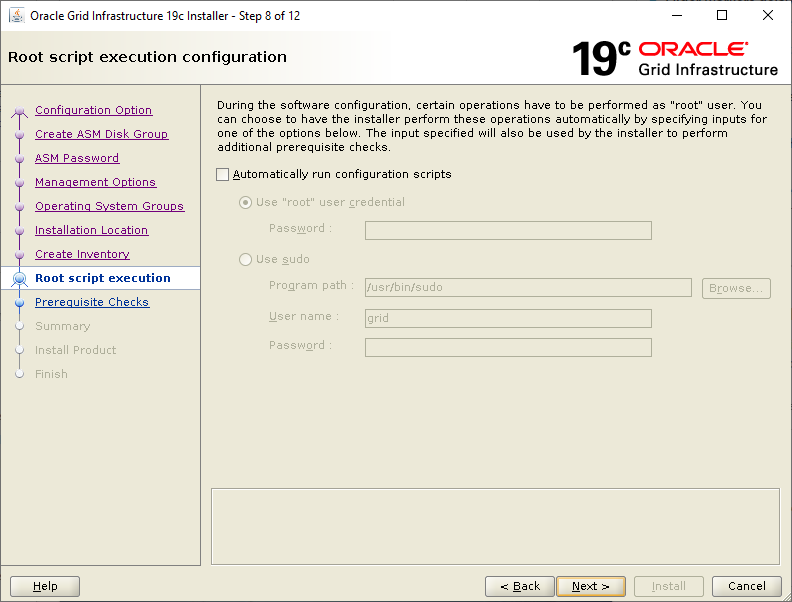
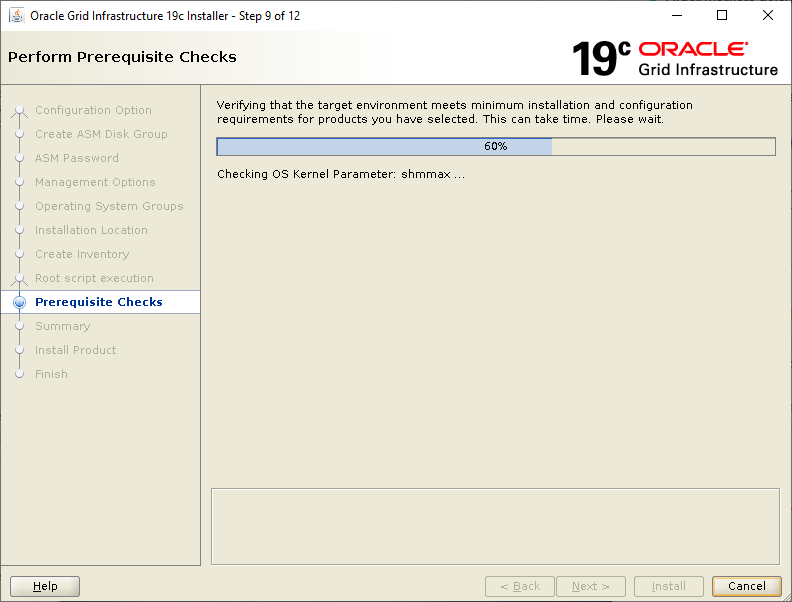
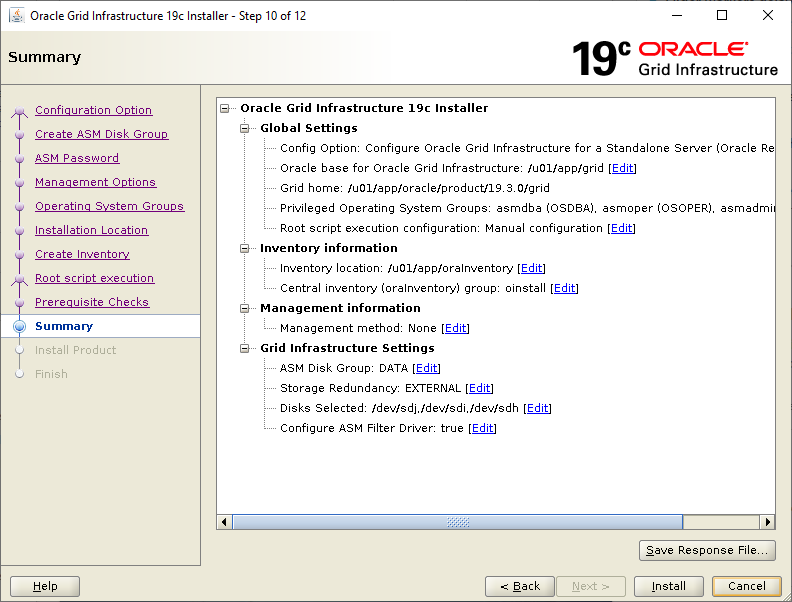
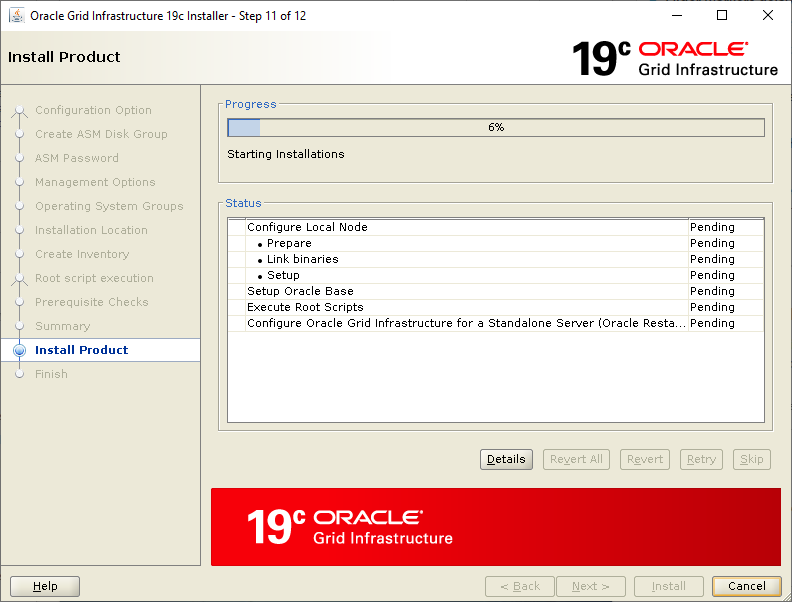
Assuming you’re running a kernel which plays nicely with ASMFD, let’s start the installtion.Login as the grid user, set your environment then run the installer script, gridSetup.sh:
[grid@orasvr02 ~]$ export ORACLE_BASE=/u01/app/grid
[grid@orasvr02 ~]$ export ORACLE_HOME=/u01/app/oracle/product/19.3.0/grid
[grid@orasvr02 ~]$ export DISPLAY=<your-workstation-or-IP-address>:0.0
[grid@orasvr02 ~]$ cd $ORACLE_HOME
[grid@orasvr02 grid]$ ls -l gridSetup.sh
-rwxr-x--- 1 grid oinstall 3294 Mar  8  2017 gridSetup.sh

[grid@orasvr02 grid]$ ./gridSetup.sh
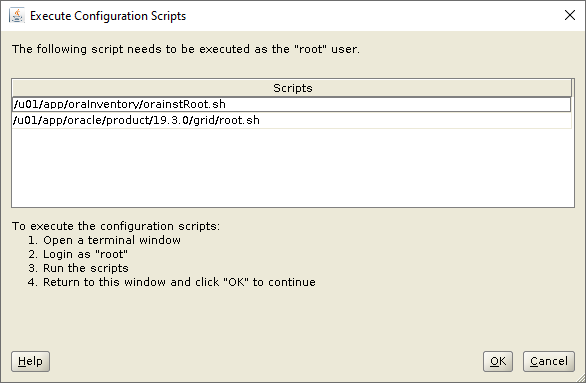
[root@orasvr02 ~]# /u01/app/oraInventory/orainstRoot.sh
Changing permissions of /u01/app/oraInventory.
Adding read,write permissions for group.
Removing read,write,execute permissions for world.
Changing groupname of /u01/app/oraInventory to oinstall.
The execution of the script is complete.
[root@orasvr02 ~]# /u01/app/oracle/product/19.3.0/grid/root.sh
Performing root user operation.
The following environment variables are set as:
ORACLE_OWNER= grid
ORACLE_HOME= /u01/app/oracle/product/19.3.0/grid
Enter the full pathname of the local bin directory: [/usr/local/bin]:
Copying dbhome to /usr/local/bin …
Copying oraenv to /usr/local/bin …
Copying coraenv to /usr/local/bin …
Creating /etc/oratab file…
Entries will be added to the /etc/oratab file as needed by
Database Configuration Assistant when a database is created
Finished running generic part of root script.
Now product-specific root actions will be performed.
Using configuration parameter file: /u01/app/oracle/product/19.3.0/grid/crs/install/crsconfig_params
The log of current session can be found at:
/u01/app/grid/crsdata/orasvr02/crsconfig/roothas_2019-11-08_12-05-49AM.log
LOCAL ADD MODE
Creating OCR keys for user 'grid', privgrp 'oinstall'..
Operation successful.
LOCAL ONLY MODE
Successfully accumulated necessary OCR keys.
Creating OCR keys for user 'root', privgrp 'root'..
Operation successful.
CRS-4664: Node orasvr02 successfully pinned.
2019/11/08 12:11:54 CLSRSC-330: Adding Clusterware entries to file 'oracle-ohasd.service'
orasvr02 2019/11/08 12:20:56 /u01/app/grid/crsdata/orasvr02/olr/backup_20191108_122056.olr 724960844
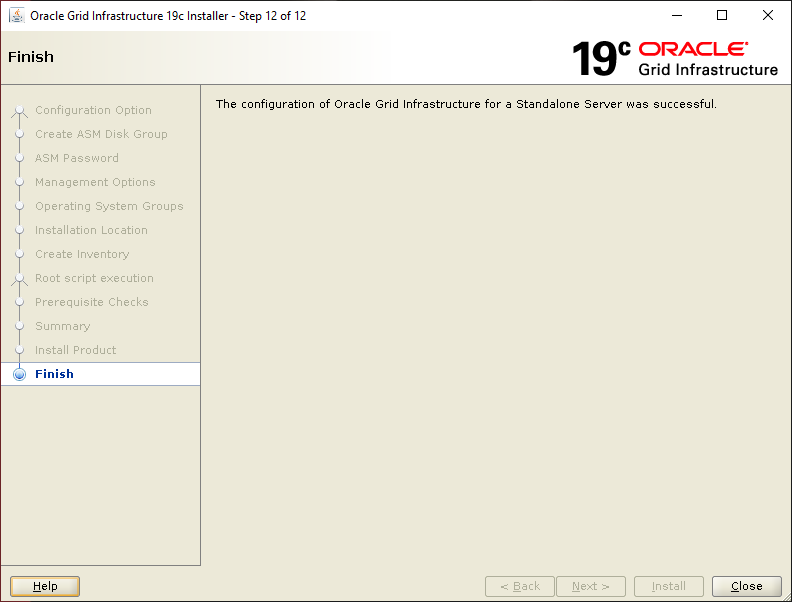
2019/11/08 12:22:55 CLSRSC-327: Successfully configured Oracle Restart for a standalone server

There are some post installation tasks that you might want to pay attention to. Those are documented here. Before finishing up with the ASM Diskgroup configuration, let’s check the status of the ASM Filter Driver now that the installation has completed (this command took ages to return output on my system – YMMV):
[root@orasvr02 ~]# cd /u01/app/oracle/product/19.3.0/grid/bin
[root@orasvr02 bin]# ./asmcmd afd_state
ASMCMD-9526: The AFD state is 'LOADED' and filtering is 'ENABLED' on host 'orasvr02.mynet.com'
Finally, create the remaining ASM Diskgroups in preparation for creating databases. First, check what the ASM Diskgroup configuration looks like so far:
[grid@orasvr02 ~]$ sqlplus / as sysasm

SQL> select dg.name "Diskgroup Name", d.name "Disk Name", d.label "Disk Label", d.path "Disk Path"
     from v$asm_diskgroup dg, v$asm_disk d
     where dg.group_number(+) = d.group_number
     order by dg.name, d.name
     /

Diskgroup Name  Disk Name       Disk Label      Disk Path
--------------- --------------- --------------- ---------------
DATA            DATA_0000       DATA_0000       AFD:DATA_0000
DATA            DATA_0001       DATA_0001       AFD:DATA_0001
DATA            DATA_0002       DATA_0002       AFD:DATA_0002
                                REDO_0000       AFD:REDO_0000
                                RECO_0001       AFD:RECO_0001
                                RECO_0000       AFD:RECO_0000
                                RECO_0002       AFD:RECO_0002
 7 rows selected.

SQL> save dg_query
Created file dg_query.sql
Create the RECO and REDO ASM Diskgroups, then re-check the configuration:
SQL> create diskgroup reco
     external redundancy
     disk 'AFD:RECO_0000', 'AFD:RECO_0001', 'AFD:RECO_0002';

Diskgroup created.

SQL> create diskgroup redo
     external redundancy
     disk 'AFD:REDO_0000';

Diskgroup created.

SQL> @dg_query

Diskgroup Name  Disk Name       Disk Label      Disk Path
--------------- --------------- --------------- ---------------
DATA            DATA_0000       DATA_0000       AFD:DATA_0000
DATA            DATA_0001       DATA_0001       AFD:DATA_0001
DATA            DATA_0002       DATA_0002       AFD:DATA_0002
RECO            RECO_0000       RECO_0000       AFD:RECO_0000
RECO            RECO_0001       RECO_0001       AFD:RECO_0001
RECO            RECO_0002       RECO_0002       AFD:RECO_0002
REDO            REDO_0000       REDO_0000       AFD:REDO_0000

7 rows selected.
That’s it! We’re now ready to copy the Oracle Database code sets to /u01, install them and build databases using the ASM Diskgroups DATA, REDO and RECO on orasvr02.
Note, if you install Oracle Database 11g Release 11.2.0.4 on Oracle Linux 7, check this first!