
After building and configuring the hardware infrastructure, it’s time to install some Oracle software.
If all the prior tasks have been completed successfully, the software installations should be easy.
In Part 10, we’ll install the OEM Management Agent, Oracle 12c Grid Infrastructure and the database software.
Quick links to all the tasks:
- Task #1: Install the OEM Cloud Control Management Agent.
- Task #2: Run the Grid Infrastructure Installer.
- Task #3: Run the Database Installer.
Task #1: Install the OEM Cloud Control Management Agent.
To avoid the hassle of adding targets manually to Cloud Control later, we’ll install the Management Agent now so it’ll just pick up targets as they materialize. Just 4 steps should do it.
Task #1a: Create a Management Agent Software Directory.
We need to create a base directory for the Management Agent software. It’s required that the base directory and all its parent directories are owned by the installing user (oracle). Therefore, we can’t install the Management Agent into /u01/app/oracle because /u01/app is owned by the grid user. So, on both racnode1 and racnode2, create a directory for the Management Agent software installation using these commands:
[root@racnode1 ~]# mkdir -p /u01/oracle/agent
[root@racnode1 ~]# chown -R oracle:oinstall /u01/oracle
[root@racnode1 ~]# chmod 755 /u01/oracle/agent
Task #1b: Manually Create an Oracle Inventory.
Since the Management Agent software will be the first Oracle software installed on the RAC server nodes, there won’t be a pre-existing Oracle Inventory it can write to. That causes a problem when Cloud Control tries to deploy the Management Agent. To get around that, do this:
[root@racnode1 ~]# touch /etc/oraInst.loc
[root@racnode1 ~]# chmod 644 /etc/oraInst.loc
[root@racnode1 ~]# mkdir /u01/app/oraInventory
[root@racnode1 ~]# chown grid:oinstall /u01/app/oraInventory
[root@racnode1 ~]# chmod 775 /u01/app/oraInventory
Then edit /etc/oraInst.loc to include these lines:
inventory_loc=/u01/app/oraInventory
inst_group=oinstall
Task #1c: Edit /etc/hosts on the OEM Cloud Control Server.
If you haven’t already, add these lines to the /etc/hosts file on the OEM Cloud Control server, oraemcc.mynet.com:
200.200.10.11    racnode1.mynet.com            racnode1
200.200.20.12    racnode2.mynet.com            racnode2
A fully documented /etc/hosts file can be viewed here.
Task 1d: Use Cloud Control.
For this walkthrough we’ll use racnode2 as the example. You could deploy Management Agents to both racnode servers at the same time or install them one at a time. Your call.
Log into Cloud Control, click on Setup ⇒ Add Target ⇒ Add Targets Manually:
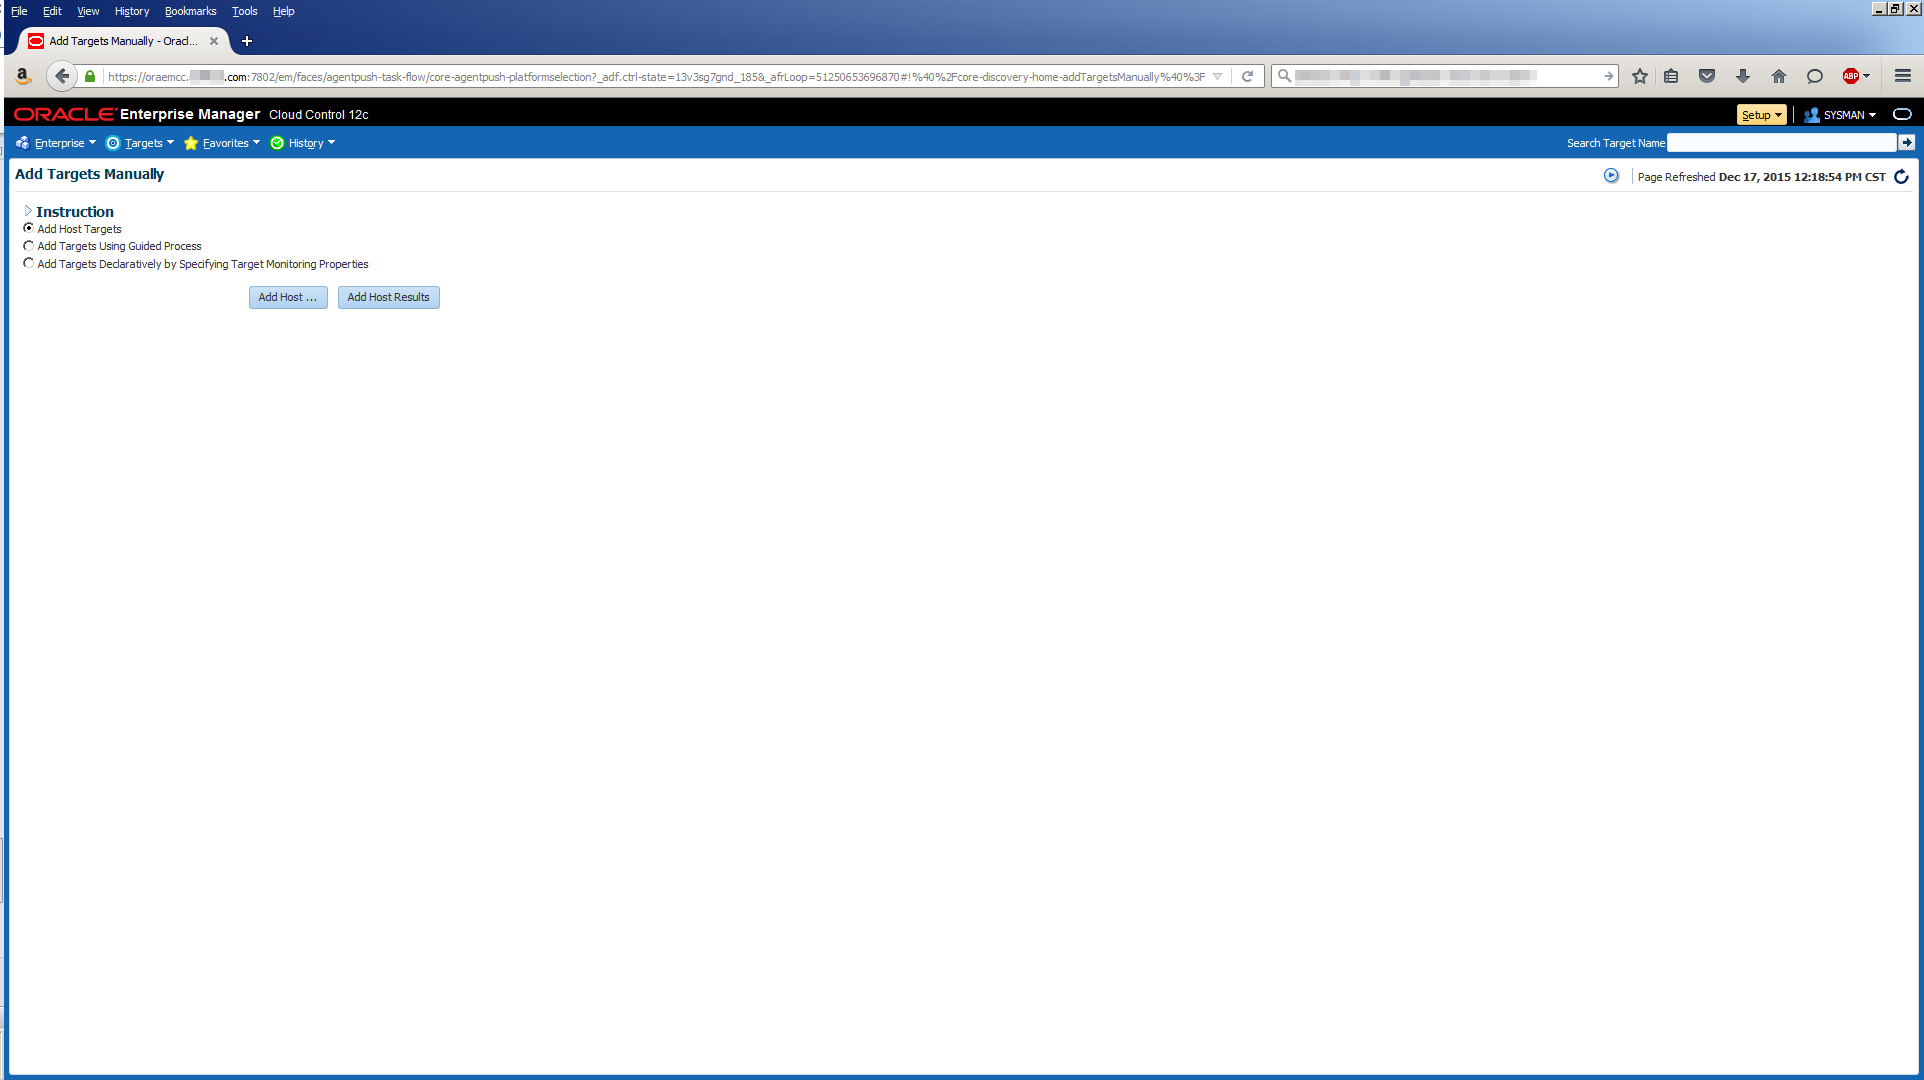
Click Add Host:
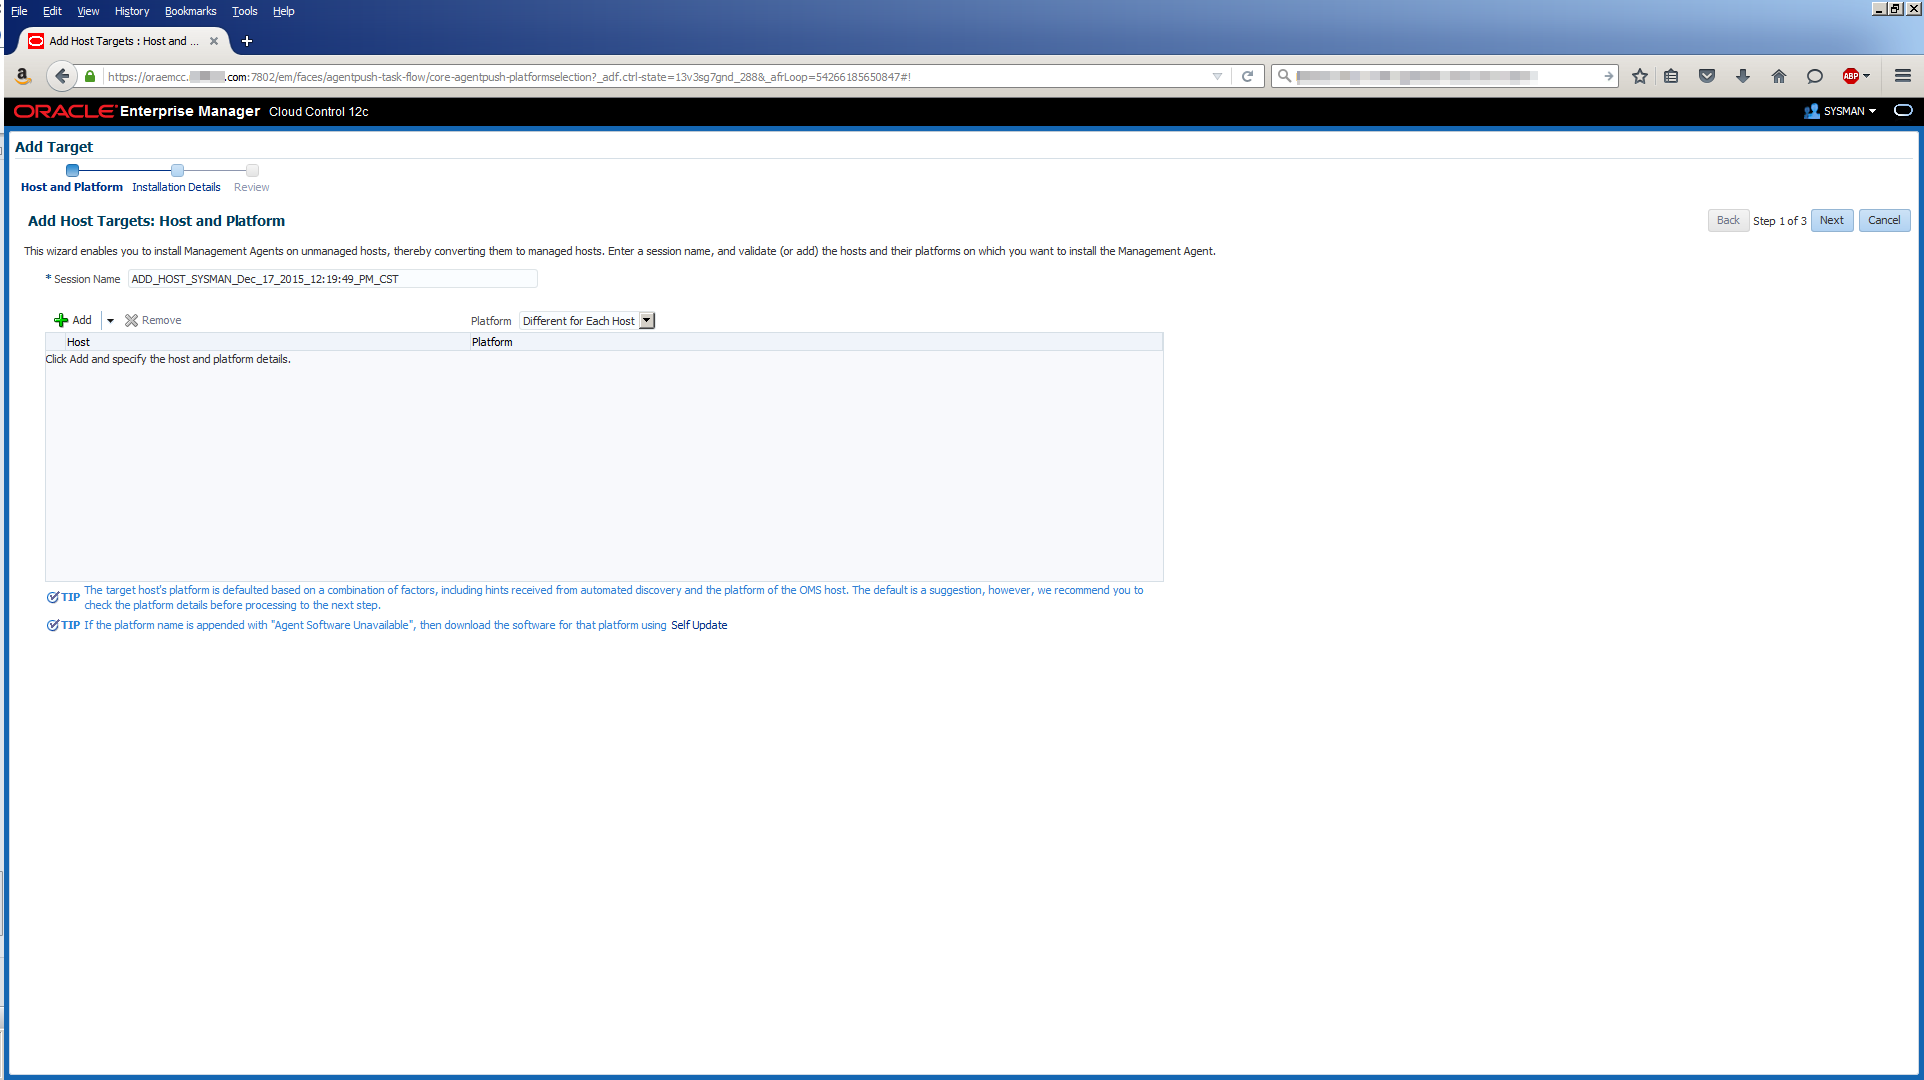
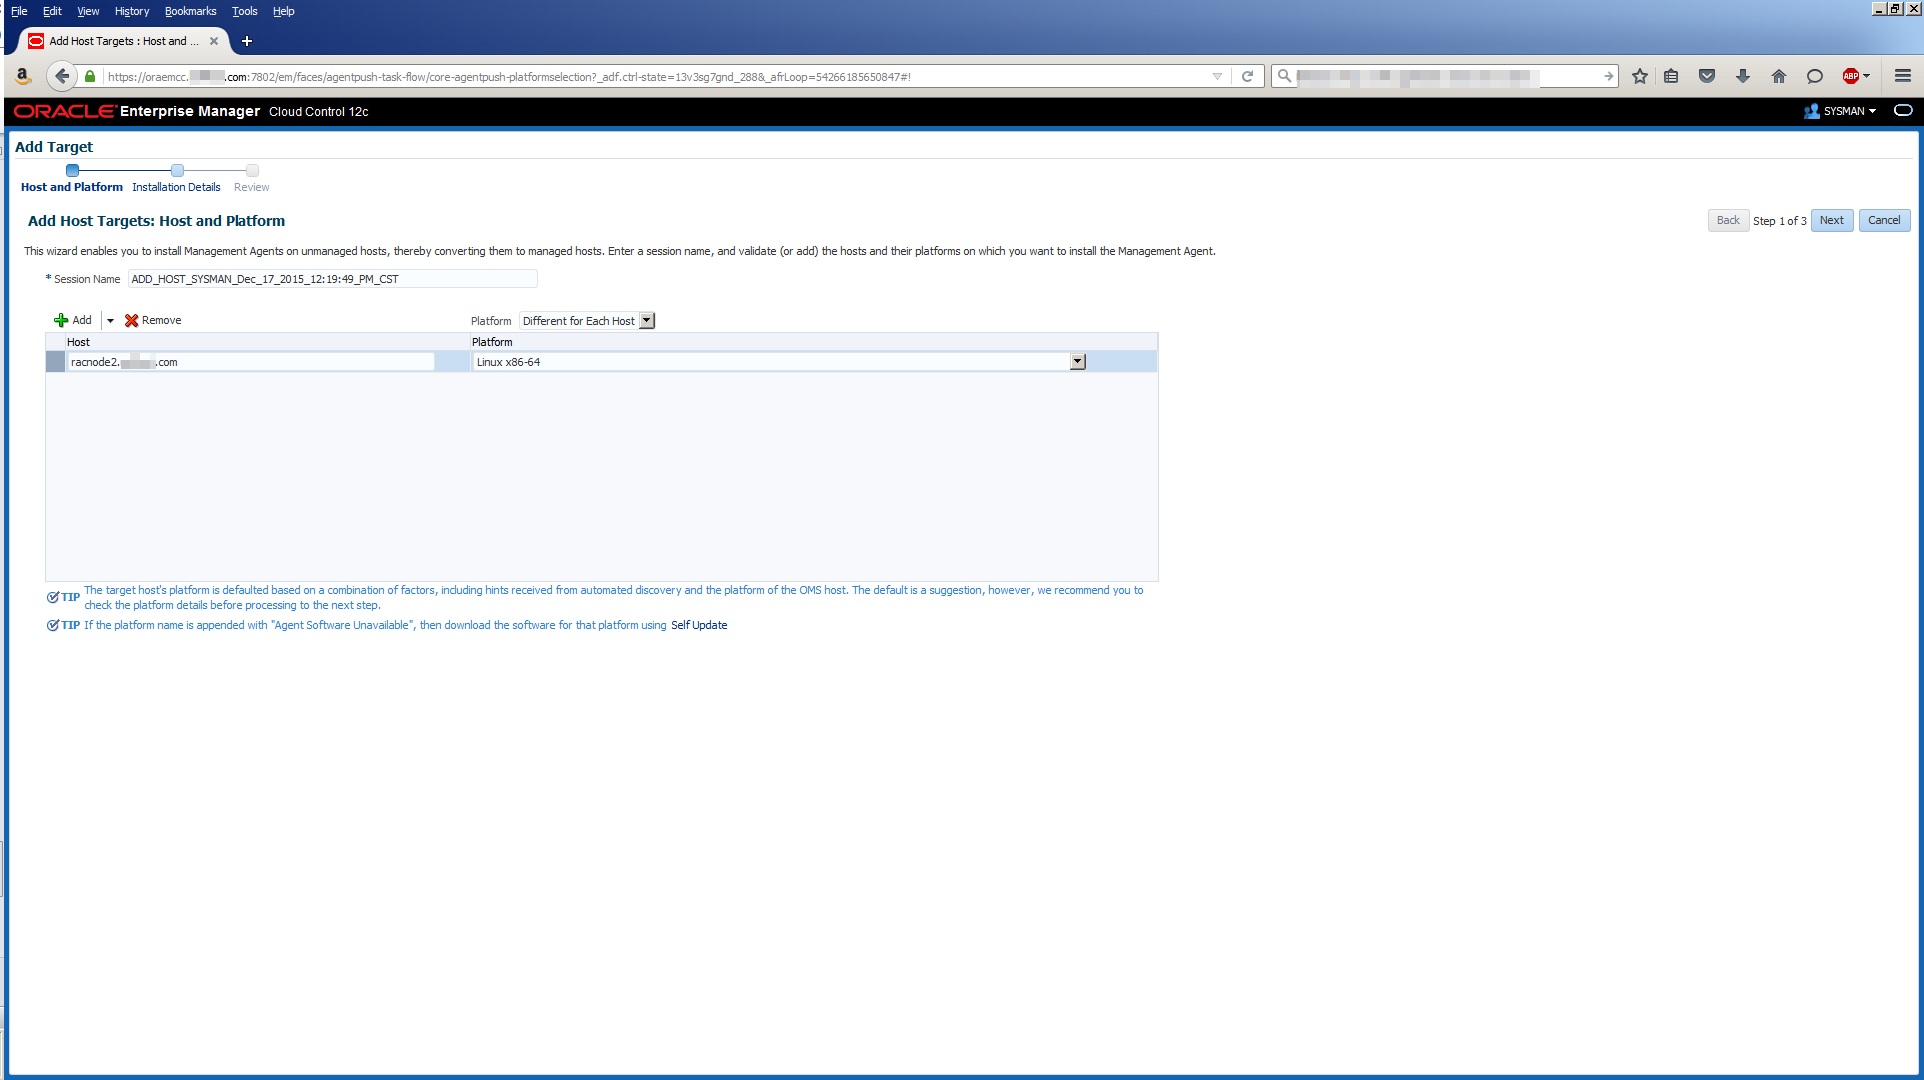
Click on the Add menu, choose Manually then enter hostname (racnode2.mynet.com) and platform (Linux x86-64):
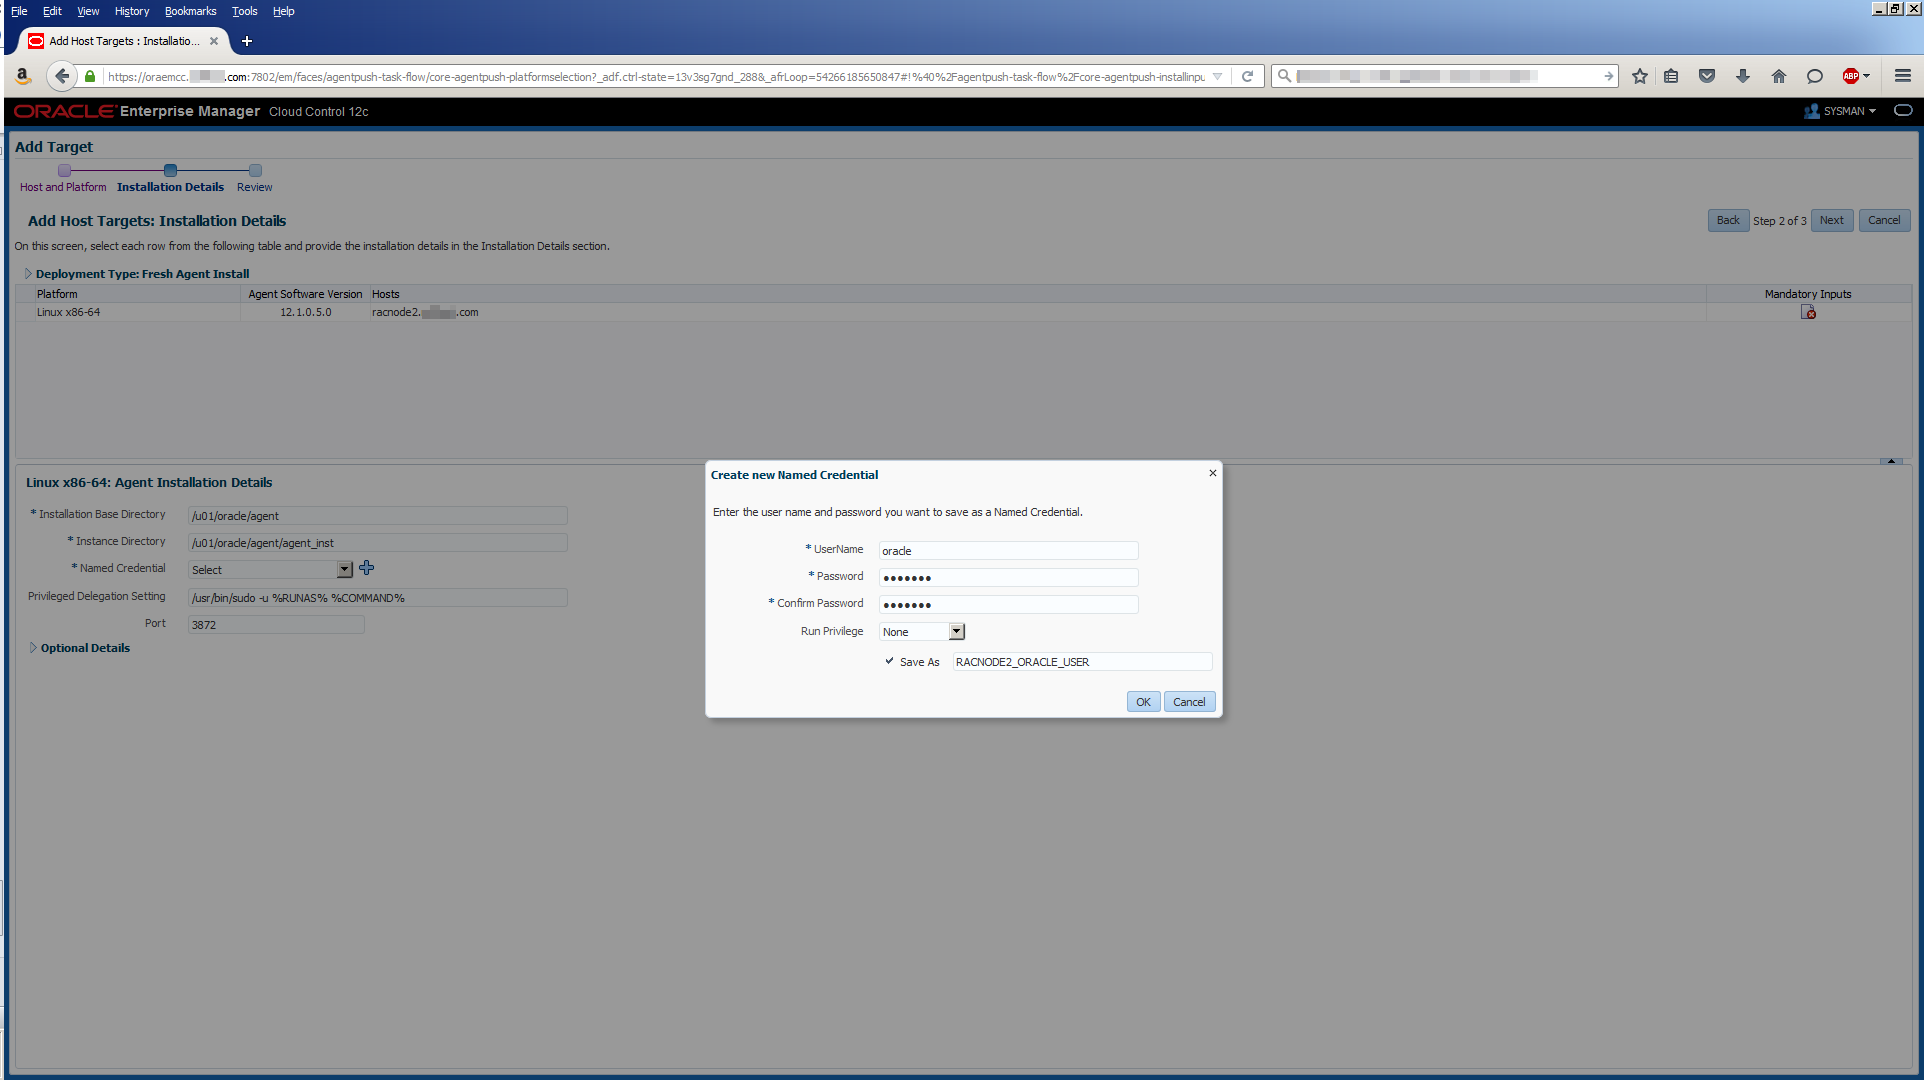
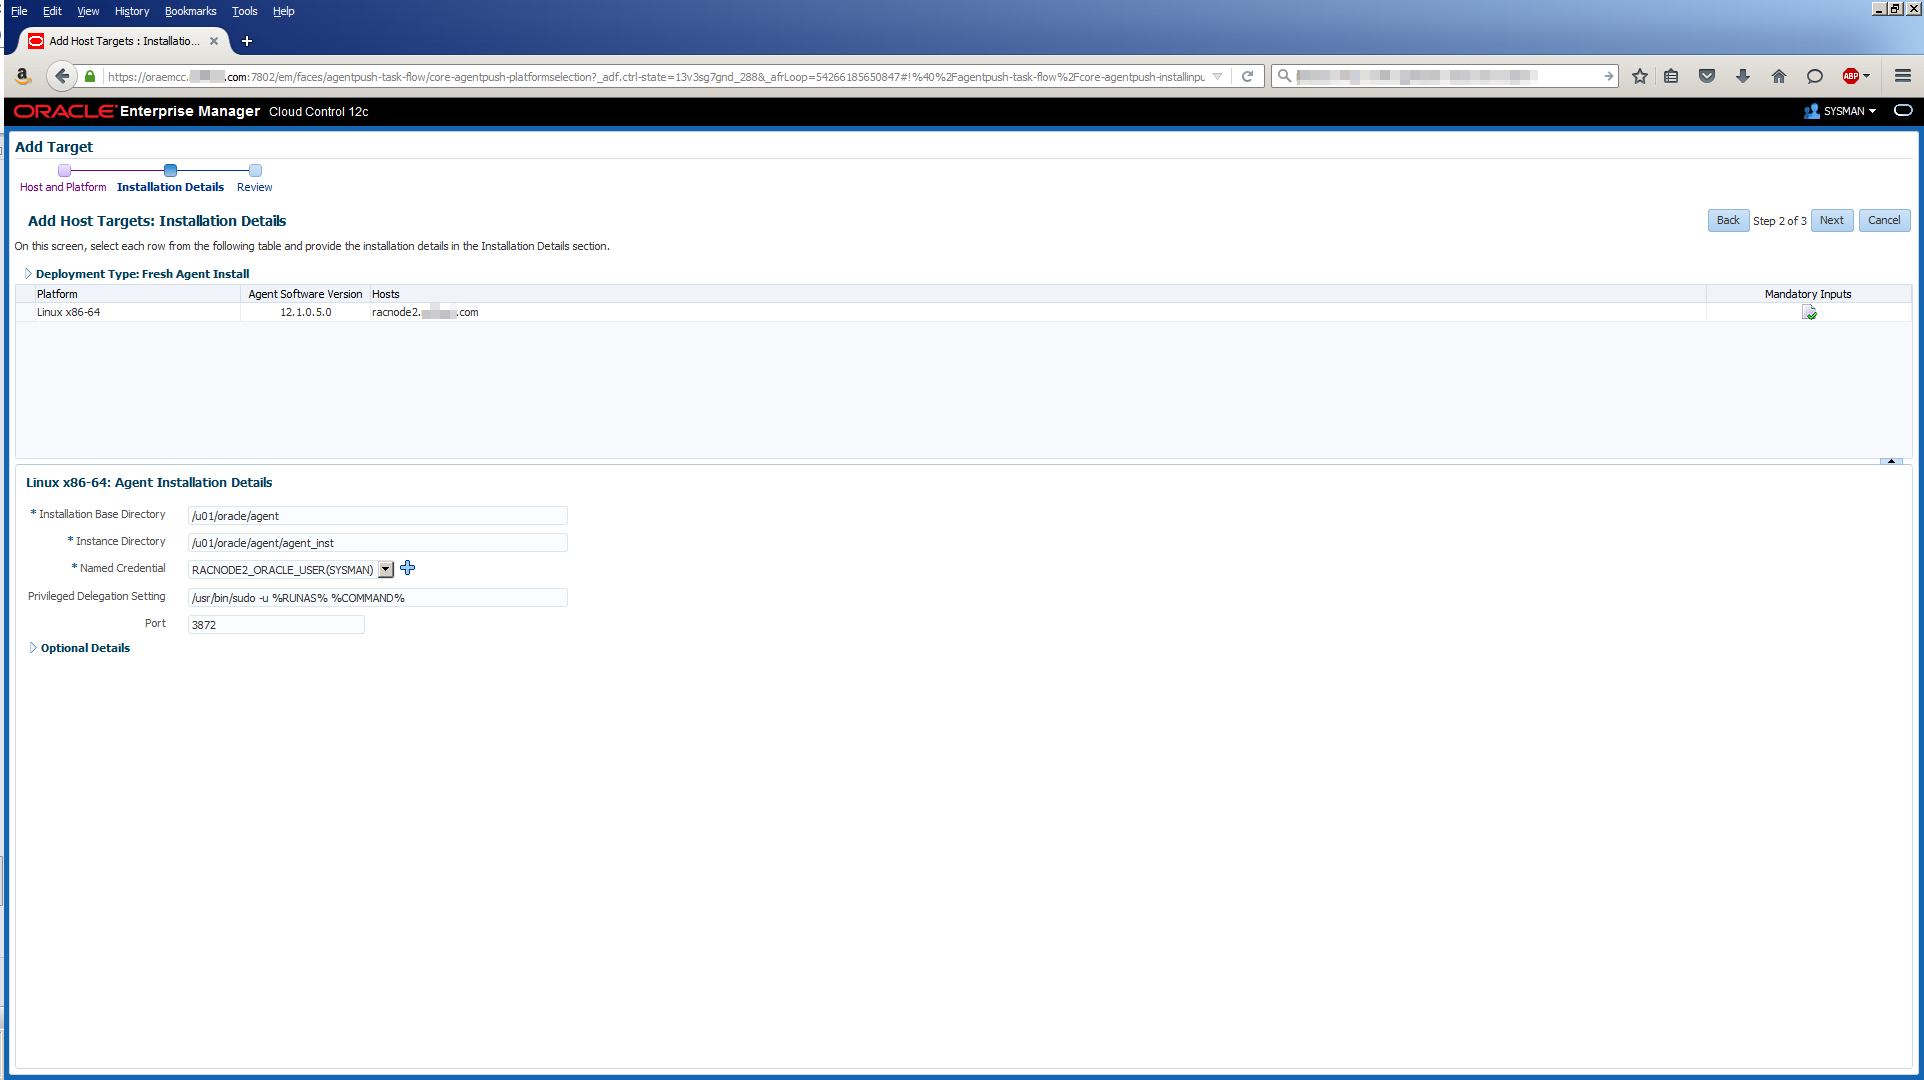
Click Next, then use these values to populate the screen:
| Field | Value |
|---|---|
| Installation Base Directory | /u01/oracle/agent |
| Instance Directory | /u01/oracle/agent/agent_inst |
In addition, create a new Named Credential for the oracle OS user then click OK:
With all the fields populated, the screen should look similar to this:
Click Next:

Click Deploy Agent:
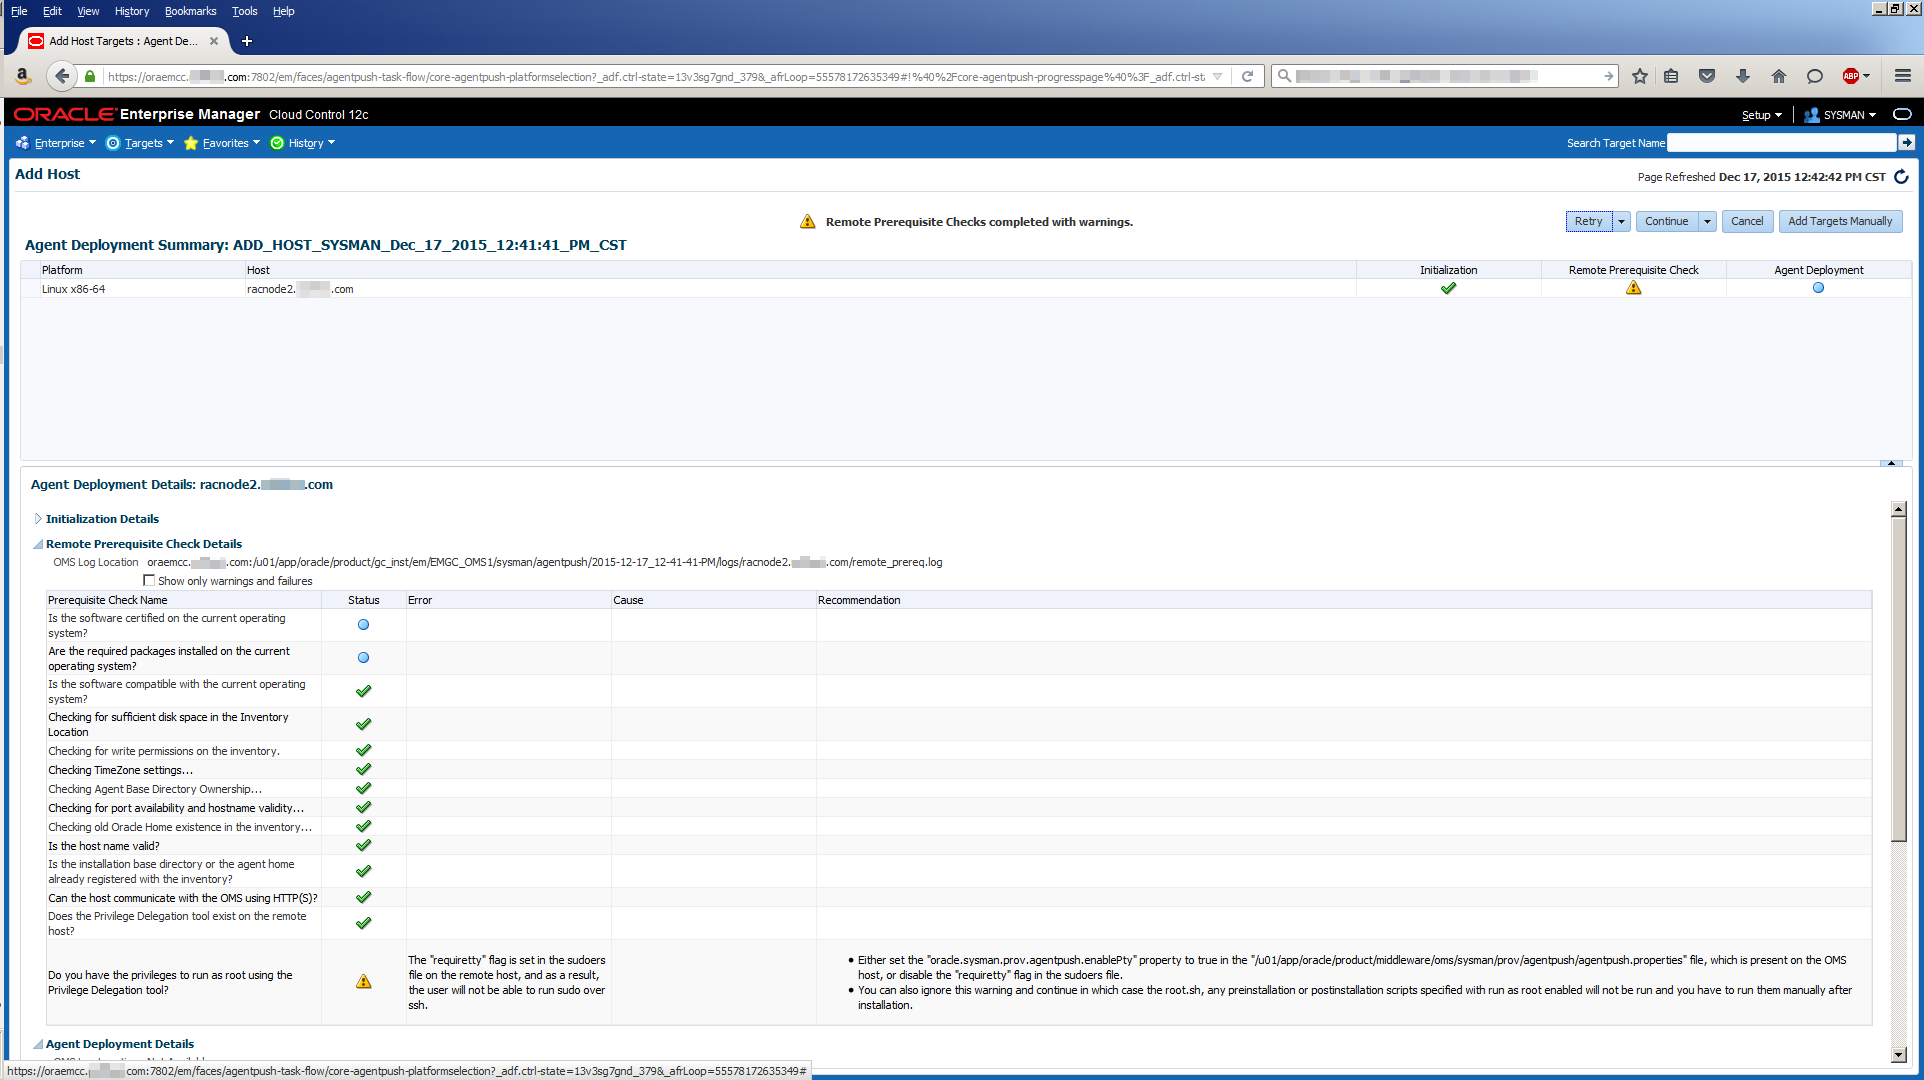
The deploy proceeds until it starts whining about running a root script. This can be ignored for now. Click the Continue menu then choose Continue, All hosts:
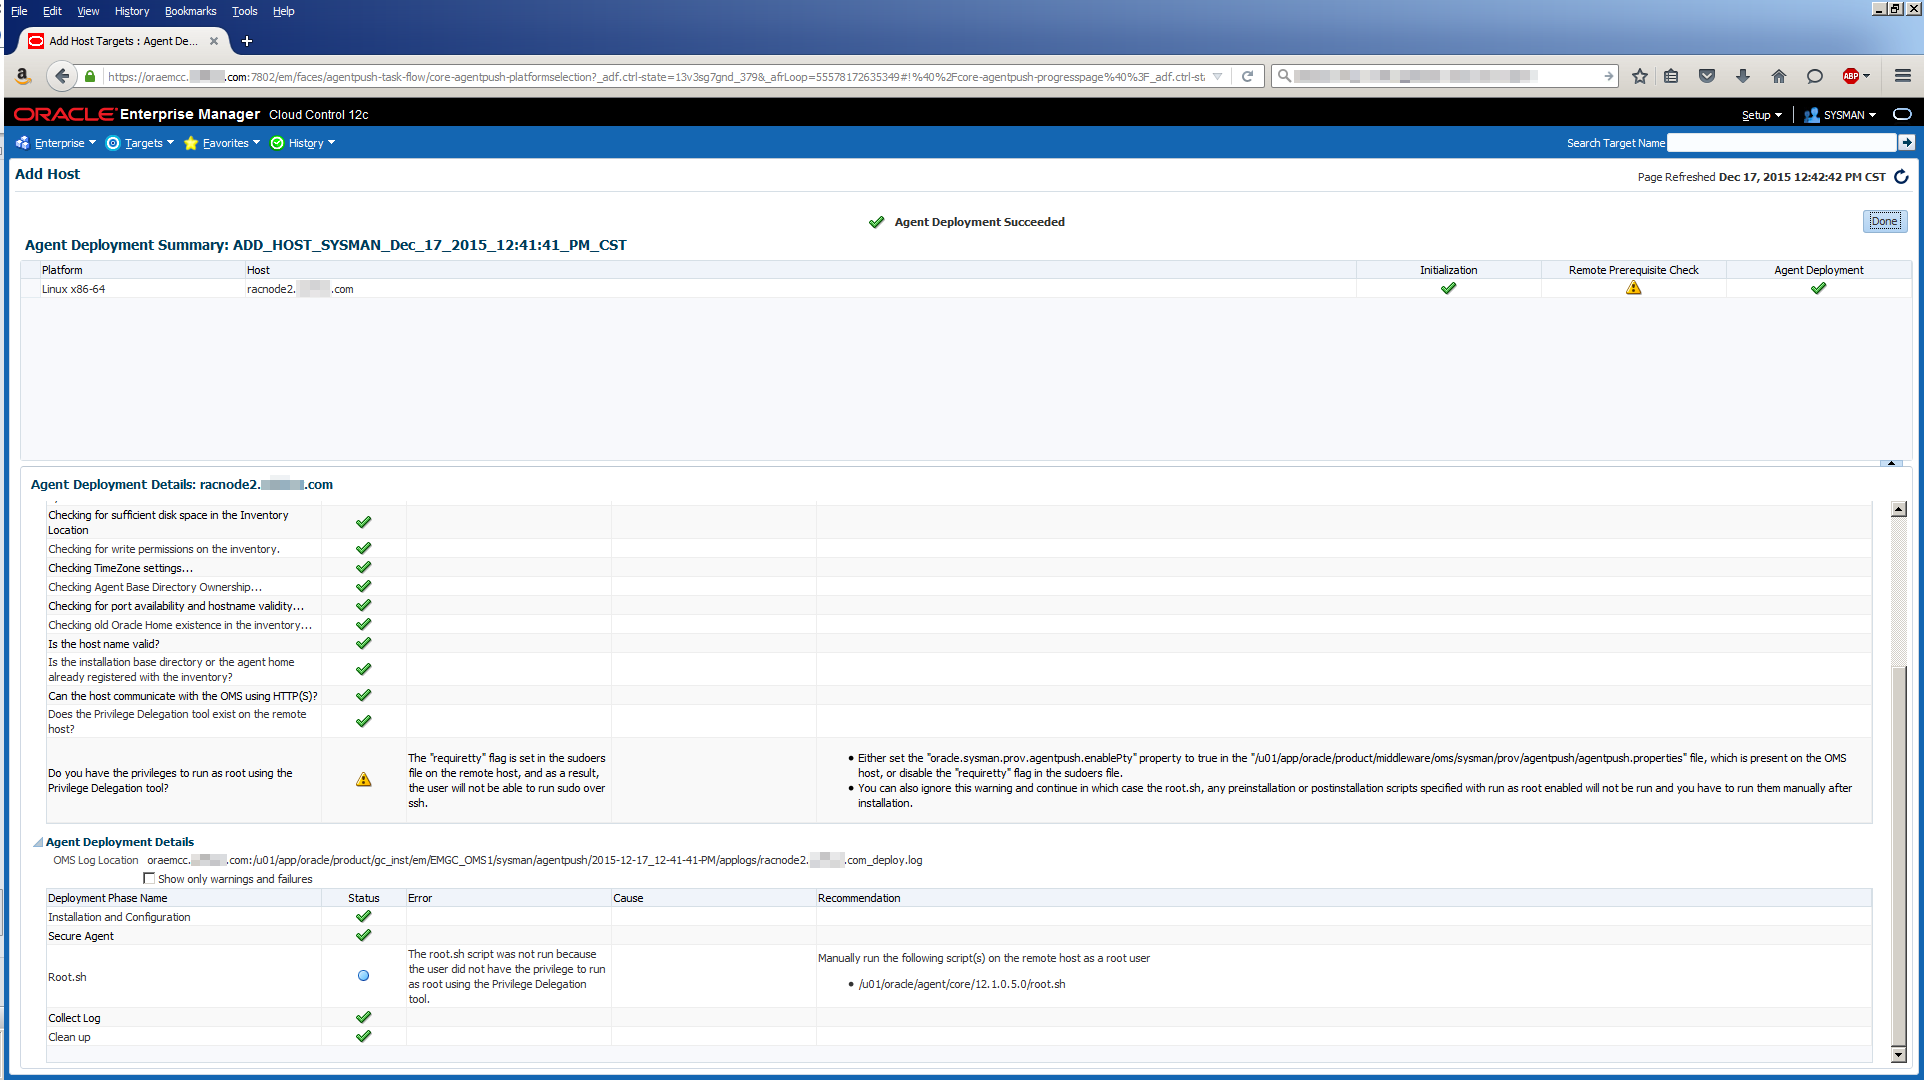
Now you can run the root.sh script as specified on the screen (/u01/oracle/agent/core/12.1.0.5.0/root.sh):
[root@racnode2 12.1.0.5.0]# ./root.sh
Finished product-specific root actions.
/etc exist
Creating /etc/oragchomelist file...
Then click the Done button and you’re done. Management Agent Deployed!
You can check all is well with the Management Agent by running these commands as the oracle user:
[oracle@racnode2 ~]$ cd /u01/oracle/agent/agent_inst/bin

[oracle@racnode2 bin]$ ./emctl status agent
Oracle Enterprise Manager Cloud Control 12c Release 5
Copyright (c) 1996, 2015 Oracle Corporation. All rights reserved.
---------------------------------------------------------------
Agent Version          : 12.1.0.5.0
OMS Version            : 12.1.0.5.0
Protocol Version       : 12.1.0.1.0
Agent Home             : /u01/oracle/agent/agent_inst
Agent Log Directory    : /u01/oracle/agent/agent_inst/sysman/log
Agent Binaries         : /u01/oracle/agent/core/12.1.0.5.0
Agent Process ID       : 4519
Parent Process ID      : 4258
Agent URL              : https://racnode2.mynet.com:3872/emd/main/
Local Agent URL in NAT : https://racnode2.mynet.com:3872/emd/main/
Repository URL         : https://oraemcc.mynet.com:4903/empbs/upload
Started at             : 2016-01-26 13:55:19
Started by user        : oracle
Operating System       : Linux version 3.8.13-118.2.2.el6uek.x86_64 (amd64)
Last Reload            : (none)
Last successful upload                       : 2016-02-02 21:50:25
Last attempted upload                        : 2016-02-02 21:50:25
Total Megabytes of XML files uploaded so far : 8.58
Number of XML files pending upload           : 0
Size of XML files pending upload(MB)         : 0
Available disk space on upload filesystem    : 32.51%
Collection Status                            : Collections enabled
Heartbeat Status                             : Ok
Last attempted heartbeat to OMS              : 2016-02-02 21:52:44
Last successful heartbeat to OMS             : 2016-02-02 21:52:44
Next scheduled heartbeat to OMS              : 2016-02-02 21:53:44
---------------------------------------------------------------
Agent is Running and Ready
Task #2: Run the Grid Infrastructure Installer.
With the Grid Infrastructure software copied to racnode1 and unzipped, ensure your DISPLAY environment variable is set to the IP address or hostname of your workstation:
Note, the Grid Infrastructure software is installed by the grid user.
[grid@racnode1 grid]$ export DISPLAY=<your-workstation-or-IP>:0.0
Test this is working by running an X Windows program, making sure the display opens on your workstation. Most people tend to use xclock as do I from time to time. I prefer xeyes though because it’s funnier:
[grid@racnode1 grid]$ xeyes

With the display set correctly, invoke the Grid Infrastructure installer:
[grid@racnode1 grid]$ ./runInstaller
Select Install and Configure Oracle Grid Infrastructure for a Cluster, then click Next:

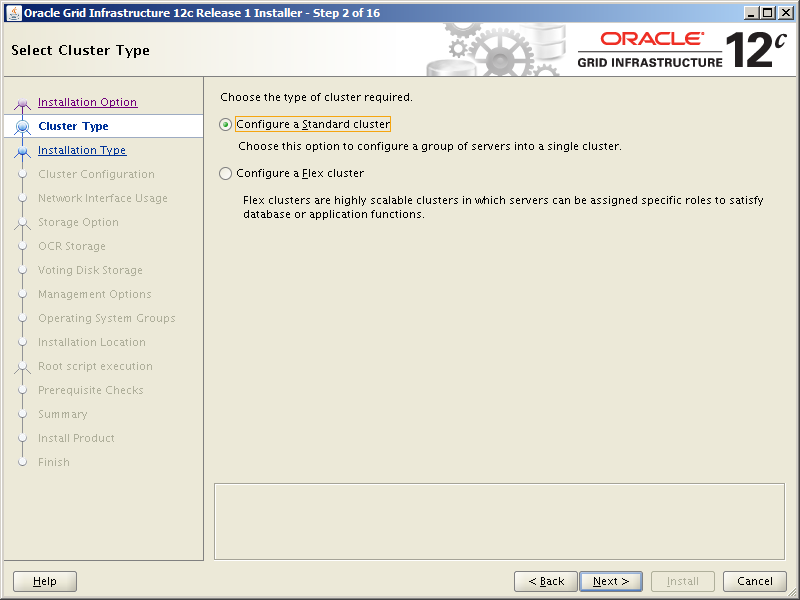
Select Configure a Standard cluster, then click Next:
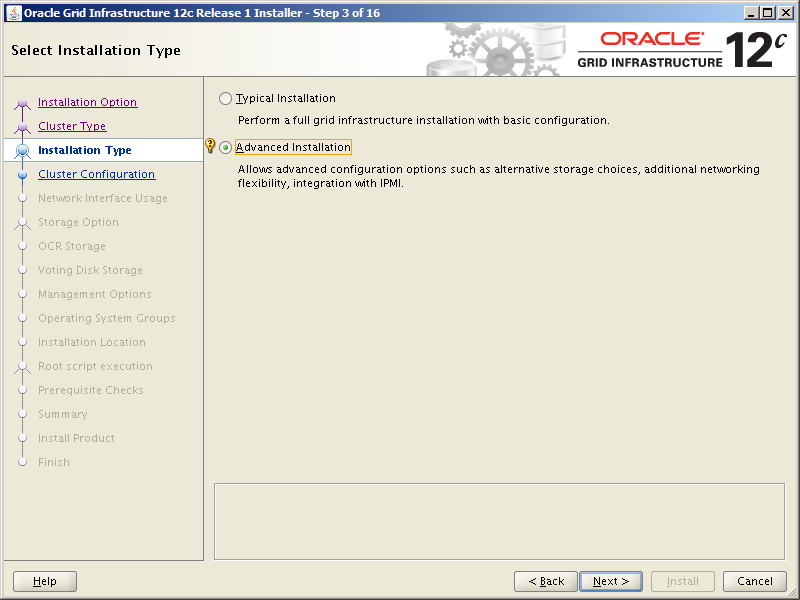
Select Advanced Installation, then click Next:
Use these values to populate the next screen, then click Next:
| Field | Value |
|---|---|
| Cluster Name | cluster1 |
| SCAN Name | cluster1-scan.mynet.com |
| SCAN Port | 1521 |
| Configure GNS | Uncheck this box |

Use these values to populate the next screen, then click SSH connectivity:
| Public Hostname | Virtual Hostname |
|---|---|
| racnode1.mynet.com | racnode1-vip.mynet.com |
| racnode2.mynet.com | racnode2-vip.mynet.com |

After clicking SSH connectivity, enter the OS password of the grid user, then click Setup. Let the installer re-do the SSH setup. It uses RSA keys. Again, let Oracle take care of this. If the installation goes wrong due to a user equivalency problem, it won’t be your fault! Once SSH is re-configured, click Next.
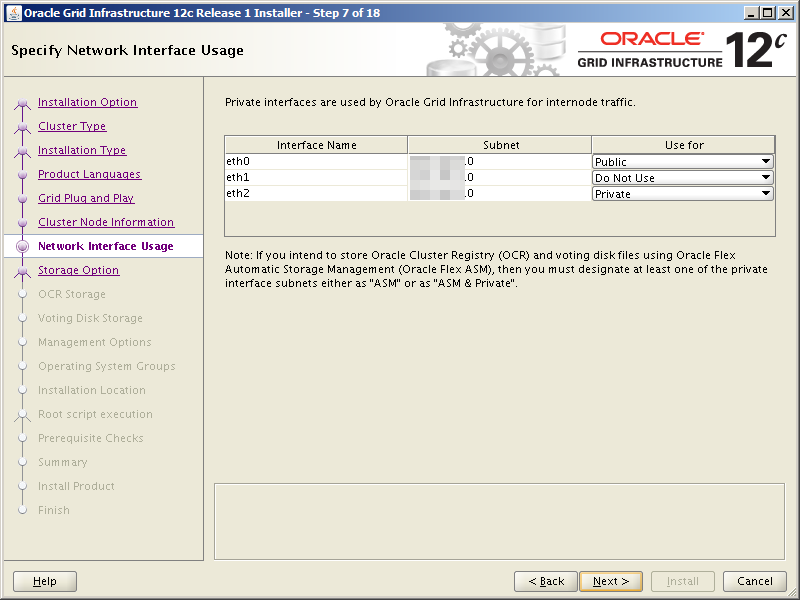
Use these values to populate the next screen, then click Next:
| Interface Name | Subnet | Use for |
|---|---|---|
| eth0 | 200.200.10.0 | Public |
| eth1 | 200.200.20.0 | Do Not Use |
| eth2 | 200.200.30.0 | Private |
Note, although we are using eth1 to access shared storage, Oracle Grid Infrastructure has no business on this network so it must be flagged as “Do Not Use”.
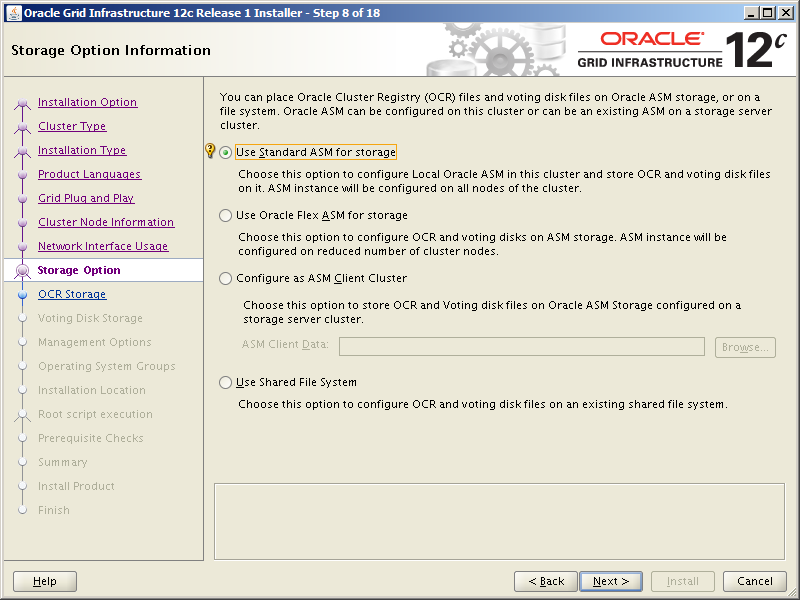
Select Use Standard ASM for storage, then click Next:
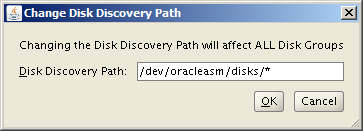
Click the Change Discovery Path button:

Change the Disk Discovery Path to /dev/oracleasm/disks/* then click OK:
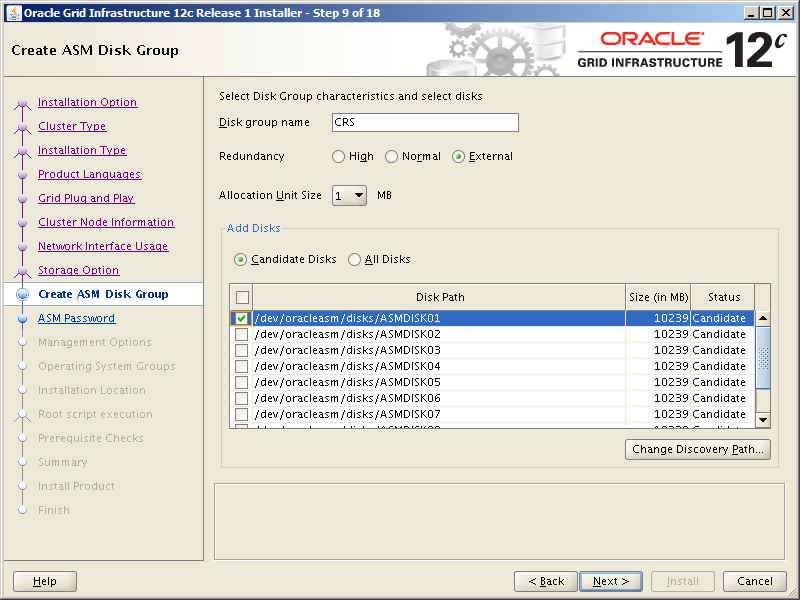
Use these values to populate the next screen, then click Next:
| Field | Value |
|---|---|
| Disk group name | CRS |
| Redundancy | External |
| Disk Path | Check /dev/oracleasm/disks/ASMDISK01 |
Click Use same password for these accounts, enter a password for SYSASM twice, then click Next:

Select Do not use Intelligent Platform Management Interface (IPMI):

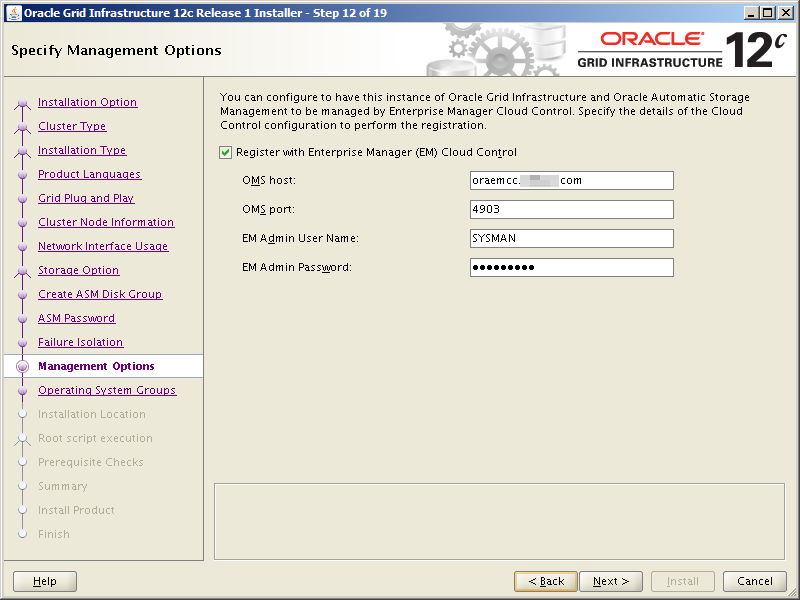
Click the check box to Register with Enterprise Manager (EM) Cloud Control. Use these values to populate the screen, then click Next:
| Field | Value |
|---|---|
| OMS host | oraemcc.mynet.com |
| OMS port | 4903 |
| EM Admin User Name | SYSMAN |
| EM Admin Password | (referenced here) |
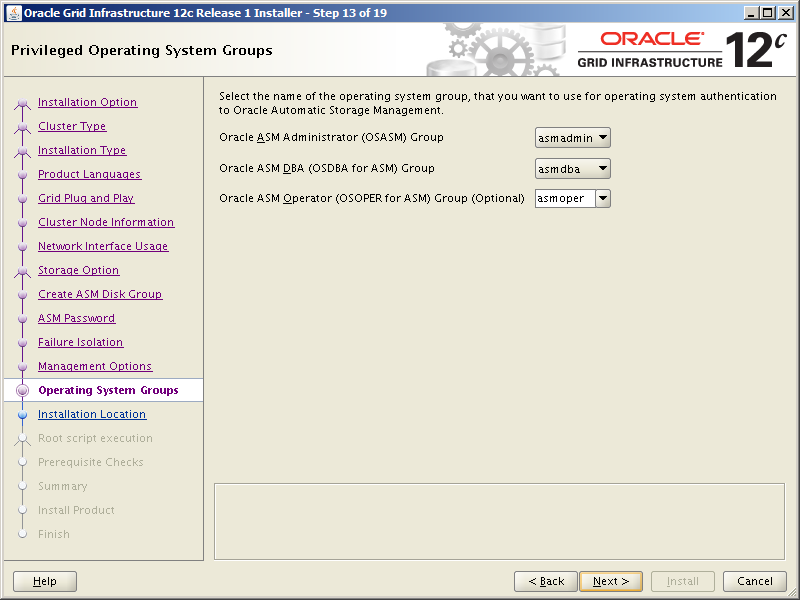
The 3 OS groups should be pre-populated with these values. Click Next:
| OS Group | OS Group Name |
|---|---|
| Oracle ASM Administrator (OSASM) Group | asmadmin |
| Oracle ASM DBA (OSDBA for ASM) Group | asmdba |
| Oracle ASM Operator (OSOPER for ASM) Group (Optional) | asmoper |
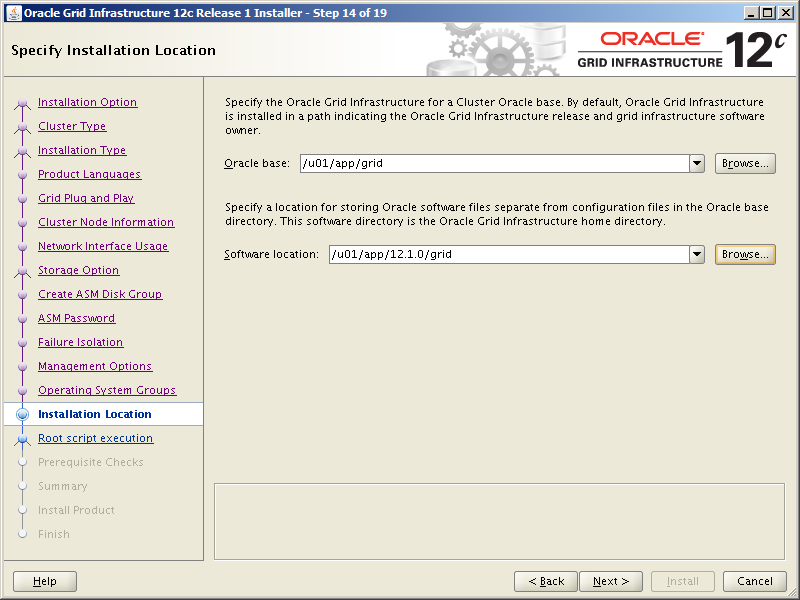
Use these values to populate the next screen, then click Next:
| Field | Value |
|---|---|
| Oracle base | /u01/app/grid |
| Software location | /u01/app/12.1.0/grid |
Make sure the Automatically run configuration scripts check box is unchecked. We’ll be running root scripts as the root user from the command line later. Click Next:

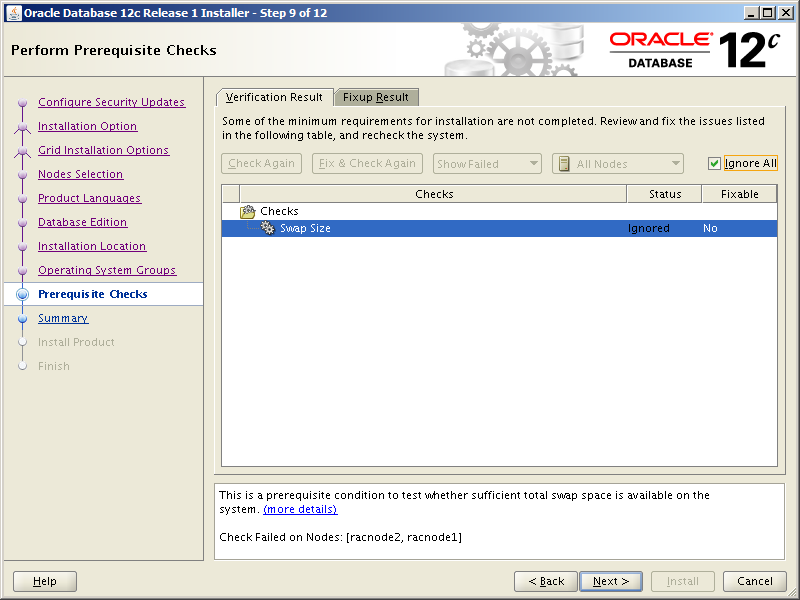
This next screen shows the results of the prerequisite checks. As you can see, the swap space issue came up which we know we can ignore. The screen also shows a Device Checks for ASM failure. What this boils down to is the installer’s inability to detect shared storage on both the RAC nodes.
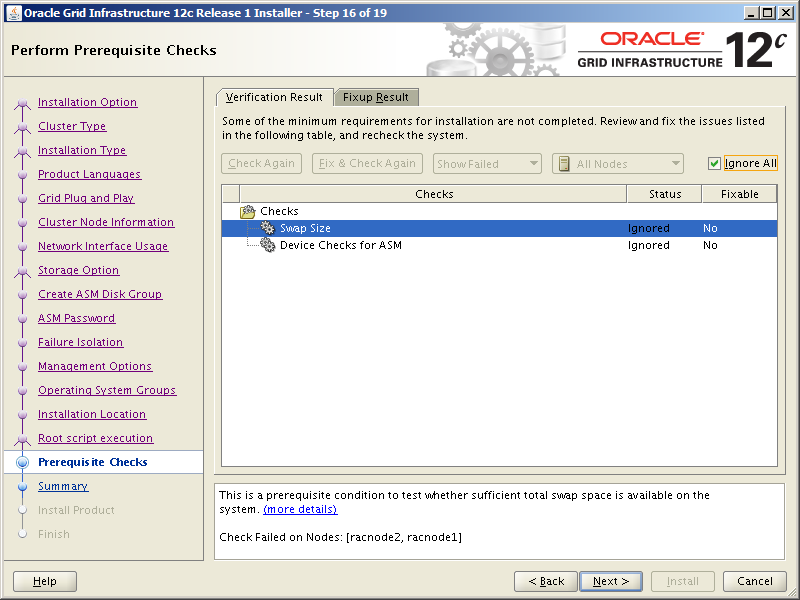
Here is the full text of the failure:
Device Checks for ASM - This is a prerequisite check to verify that the specified
devices meet the requirements for ASM.

Check Failed on Nodes: [racnode2,  racnode1]
Verification result of failed node: racnode2
Expected Value : cvuqdisk-1.0.9-1
Actual Value   : cvuqdisk-1.0.9-1
 Details:
 -
PRVF-9802 : Attempt to get 'udev' information from node "racnode2" failed No UDEV rule
found for device(s) specified  - Cause:  An attempt to read the ''udev'' permission or
rule file failed, or the permission or rule file did not contain any rules for the
specified device or devices.
- Action:  Make sure that the ''udev'' permission or rule directory is created, the
''udev'' permission or rule file is available and accessible by the user running the
check and that the permission or rule file contains the correct ''udev'' rule for the
device or devices being checked.
Back to Top

Verification result of failed node: racnode1
Expected Value : cvuqdisk-1.0.9-1
Actual Value   : cvuqdisk-1.0.9-1
 Details:
 -
PRVF-9802 : Attempt to get 'udev' information from node "racnode1" failed No UDEV rule
found for device(s) specified  - Cause:  An attempt to read the ''udev'' permission or
rule file failed, or the permission or rule file did not contain any rules for the
specified device or devices.
- Action:  Make sure that the ''udev'' permission or rule directory is created, the
''udev'' permission or rule file is available and accessible by the user running the
check and that the permission or rule file contains the correct ''udev'' rule for the
device or devices being checked.
What this essentially means is a check was made for the presence of the CVUQDISK package on both racnode1 and racnode2 (remember we installed that here). The installer is looking for version 1.0.9-1 and it found version 1.0.9-1, but apparently that wasn’t good enough. Further checks were made for udev rules regarding the shared disk selected earlier (ASMDISK01) and the installer couldn’t find those either. I actually tried this installation both with and without udev rules and it didn’t make any difference to the reporting of this ‘failure’. I even tried re-installing the CVUQDISK package on both nodes and that also made no difference. My thought was if this was such a significant problem we’d find out soon enough because the GI installation would fail. Hint – it doesn’t fail so ignore this ‘failure’ if you see it.
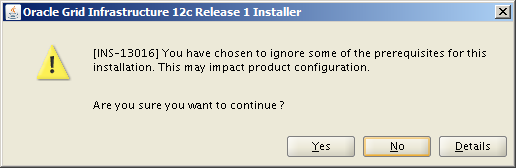
Click Yes:
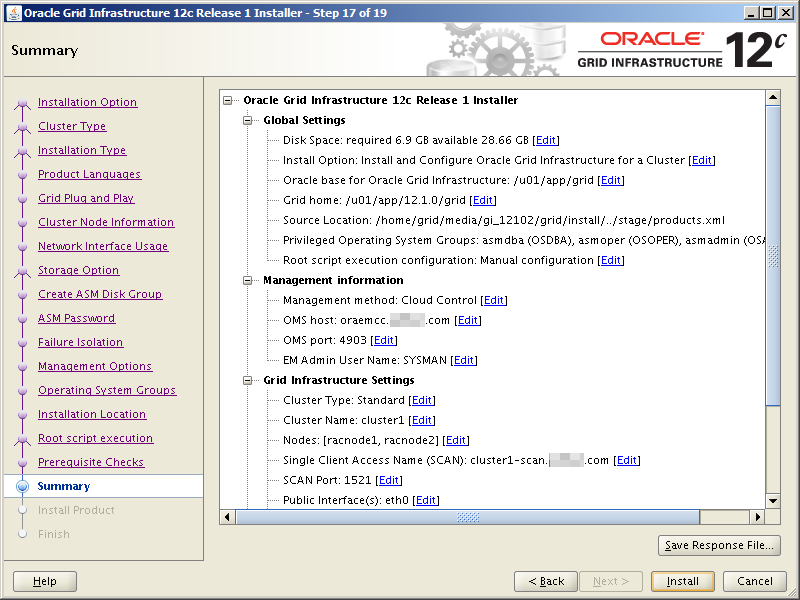
On the Summary screen, click Install:
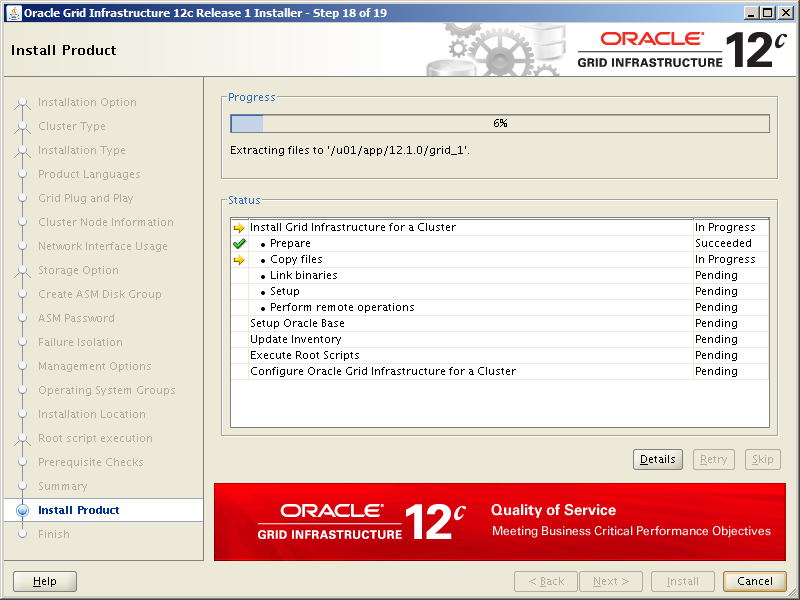
The installation thunders along:
Until a window pops up inviting you to run a root.sh script on both nodes.
Note, it is important that you run this script to completion in the order of the nodes listed, i.e. racnode1 first and racnode2 second.

The root.sh scripts take quite a while to run and their output is quite verbose. You can see what it looks like here. Once the root.sh script completes on racnode2, click OK. The installation will continue. Again, this part of the installation takes some time:

When the installation completes, you’ll see this screen:
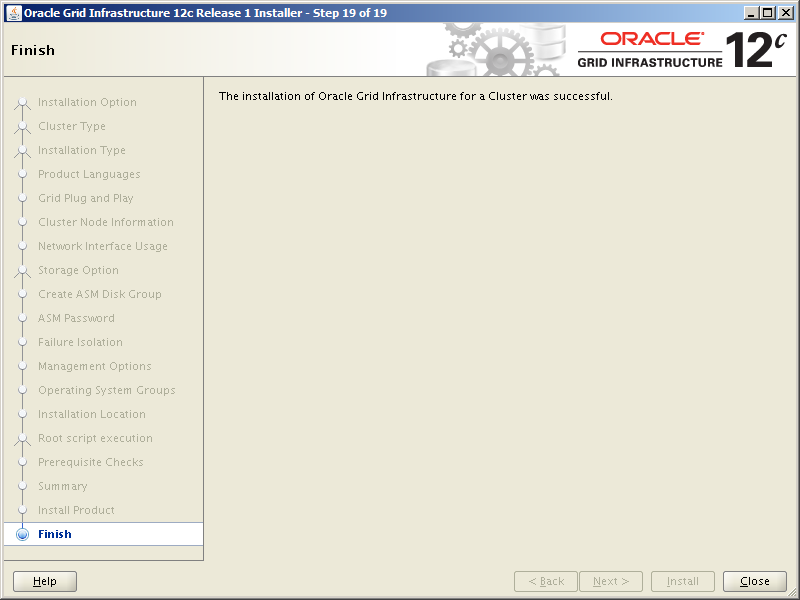
That’s Grid Infrastructure installed. Next, install the database software.
Task #3: Run the Database Installer.
Using FileZilla or your favorite file copy utility, copy the 2 Oracle Database software zip files to racnode1 and unzip them.
Note, the database software is installed by the oracle user.
[oracle@racnode1 ~]$ mkdir -p ./media/db_12.1.0.2
[oracle@racnode1 ~]$ cd ./media/db_12.1.0.2

[oracle@racnode1 db_12.1.0.2]$ unzip linuxamd64_12102_database_1of2.zip
[oracle@racnode1 db_12.1.0.2]$ unzip linuxamd64_12102_database_2of2.zip

[oracle@racnode1 db_12.1.0.2]$ cd database
Ensure your DISPLAY environment variable is set to the IP address or hostname of your workstation:
[oracle@racnode1 database]$ export DISPLAY=<your-workstation-or-IP>:0.0
With the display setup correctly, invoke the database installer:
[oracle@racnode1 database]$ ./runInstaller
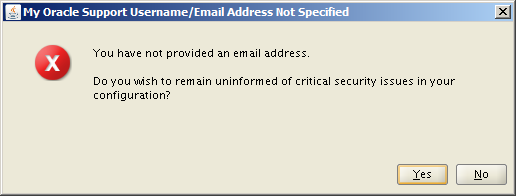
Uncheck the I wish to receive security updates via My Oracle Support option, then click Next:

Choose to remain uninformed by clicking Yes:
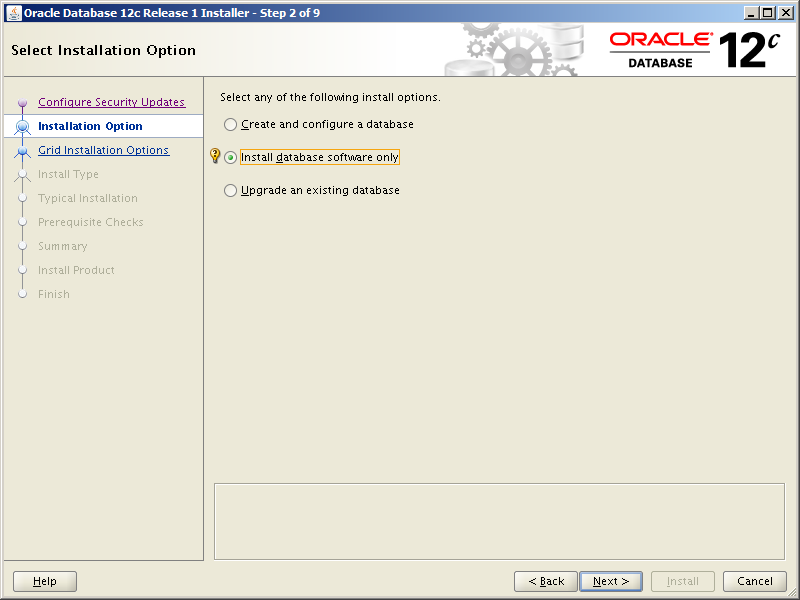
Select the Install database software only option, then click Next:
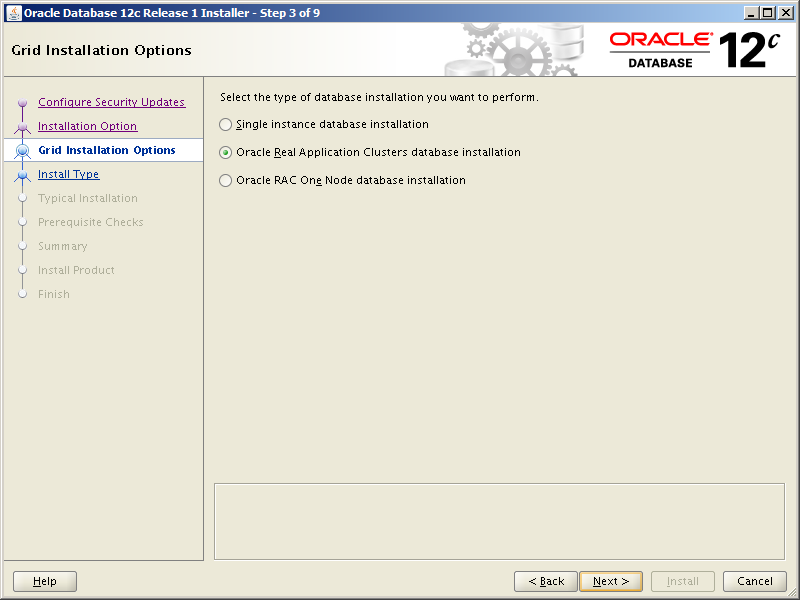
Select the Oracle Real Application Clusters database installation option, then click Next:
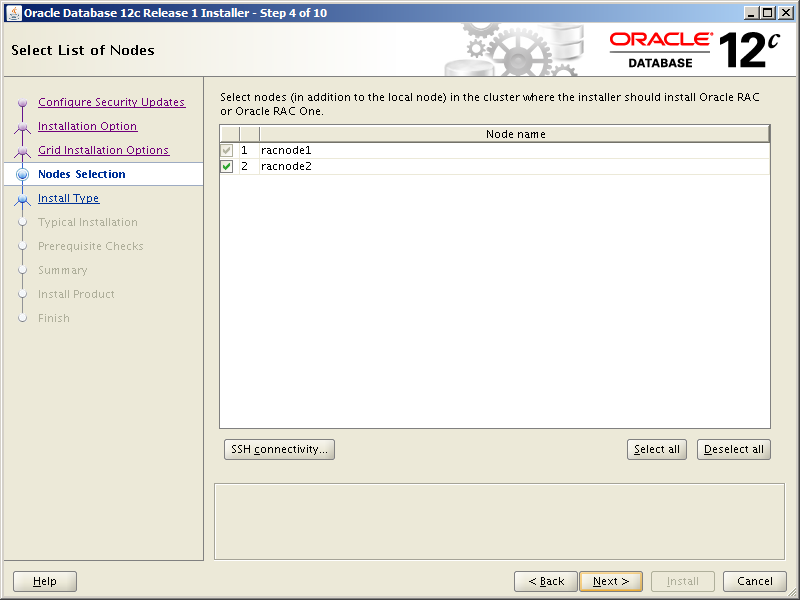
Make sure both nodes are selected. If you want the installer to re-do the SSH (user equivalency) setup, click the SSH connectivity button. When complete, click Next:
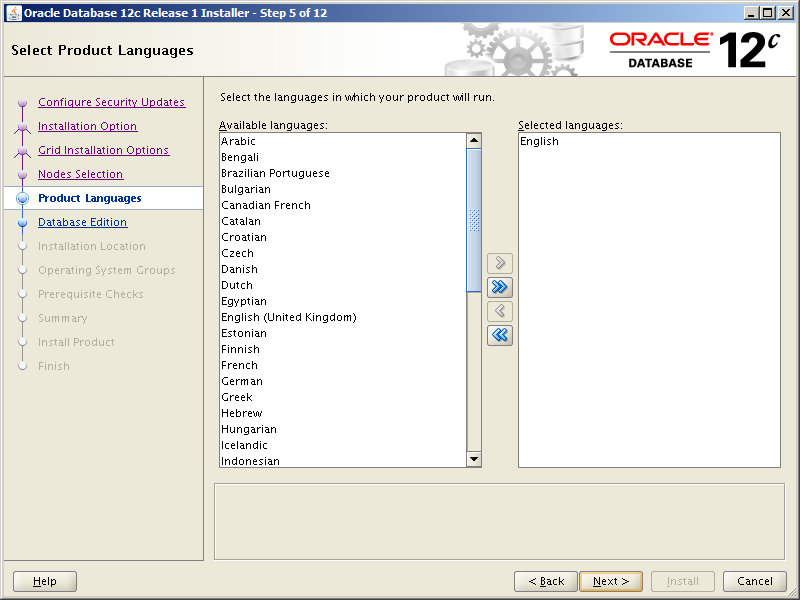
Select your preferred language:
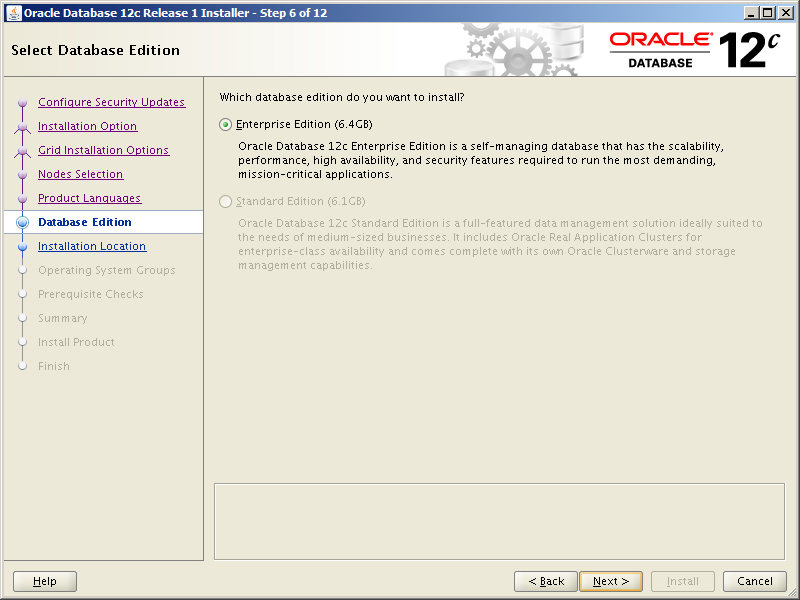
Select Enterprise Edition, then click Next:
Use the following values to populate the next screen, then click Next:
| Field | Value |
|---|---|
| Oracle base | /u01/app/oracle |
| Software location | /u01/app/oracle/product/12.1.0/dbhome_1 |

The next screen should pre-populate with the correct OS groups. If so, click Next:
| OS Group Privilege | OS Group |
|---|---|
| Database Administrator (OSDBA) group | dba |
| Database Operator (OSOPER) group (Optional) | oper |
| Database Backup and Recovery (OSBACKUPDBA) group | backupdba |
| Data Guard administrative (OSDGDBA) group | dgdba |
| Encryption Key Management administrative (OSKMDBA) group | kmdba |

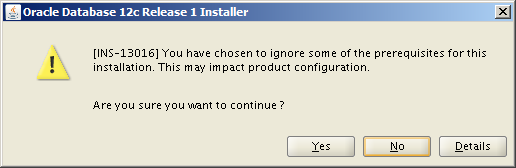
As with the Grid Infrastructure installation, the installer complains about swap space. We can safely ignore this prerequisite check failure by checking Ignore All and clicking Next:
Click Yes:
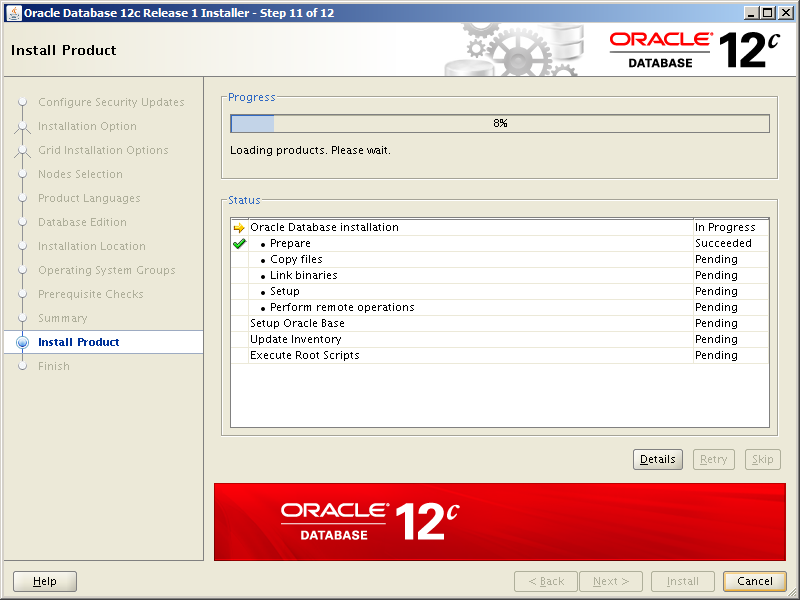
On the Summary screen, click Install:

The familiar progress bar screen appears:
After a short while, this window appears inviting you to run the root.sh script on racnode1 and racnode2. Always run the root.sh script to completion in the order the nodes are listed. When complete, click OK:
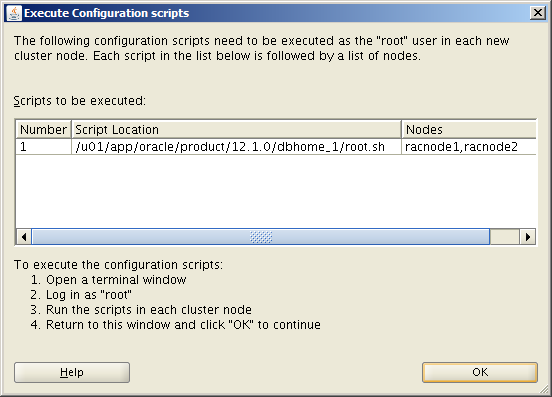
The root.sh script output looks like this:
[root@racnode1 ~] cd /u01/app/oracle/product/12.1.0/dbhome_1

[root@racnode1 dbhome_1]# ./root.sh
Performing root user operation.
The following environment variables are set as:
   ORACLE_OWNER= oracle
   ORACLE_HOME= /u01/app/oracle/product/12.1.0/dbhome_1
Enter the full pathname of the local bin directory: [/usr/local/bin]:
The contents of "dbhome" have not changed. No need to overwrite.
The contents of "oraenv" have not changed. No need to overwrite.
The contents of "coraenv" have not changed. No need to overwrite.
Entries will be added to the /etc/oratab file as needed by
Database Configuration Assistant when a database is created
Finished running generic part of root script.
Now product-specific root actions will be performed.
[root@racnode2 ~] cd /u01/app/oracle/product/12.1.0/dbhome_1

[root@racnode2 dbhome_1]# ./root.sh
Performing root user operation.
The following environment variables are set as:
   ORACLE_OWNER= oracle
   ORACLE_HOME= /u01/app/oracle/product/12.1.0/dbhome_1
Enter the full pathname of the local bin directory: [/usr/local/bin]:
The contents of "dbhome" have not changed. No need to overwrite.
The contents of "oraenv" have not changed. No need to overwrite.
The contents of "coraenv" have not changed. No need to overwrite.
Entries will be added to the /etc/oratab file as needed by
Database Configuration Assistant when a database is created
Finished running generic part of root script.
Now product-specific root actions will be performed.
Finally, the successful completion screen is displayed:
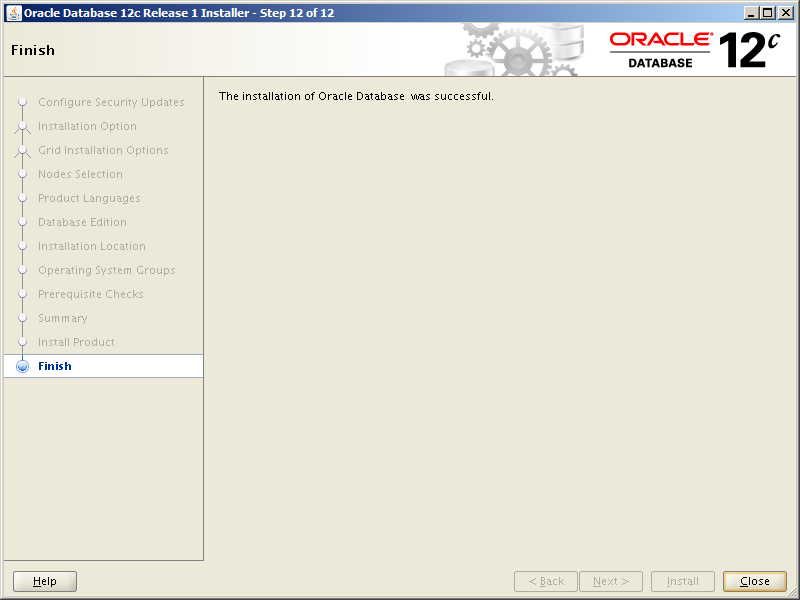
We now have everything we need in place to create an Oracle RAC database. Obviously it’s important to test and verify that what you have installed is actually up and running correctly. We’ll run a series of tests after we create a RAC database in Part 11. See you there!
If you have any comments or questions about this post, please use the Contact form here.