Getting ready to install, configure and use Oracle Database 18c and 19c meant rebuilding my two stand alone database servers with Oracle Linux 7. In time honored tradition of changing things for no good reason, setting up Oracle Linux 7 is slightly different to version 6 in a number of important ways. Not annoying at all then. So here we’ll run through installing and configuring Oracle Linux 7 Update 6 (OL7.6).
The two servers we’ll be rebuilding are called orasvr01 and orasvr02. The original build of orasvr01 can be found here. The rebuild will be similar, but this time around we’ll use Openfiler for the database storage. The orasvr01 server will use regular file system storage and orasvr02 will use ASM. The root and /u01 file systems will be allocated from the VM_Filesystems_Repo storage repository, just as they were before.
For the most part, installing and configuring OL7.6 will be the same for both orasvr01 and orasvr02, so we’ll mainly focus on orasvr01. The differences will come when setting up the Openfiler disks for file systems (orasvr01) and ASM (orasvr02). I’ll explain those differences in the relevant sections below. Let’s get started!
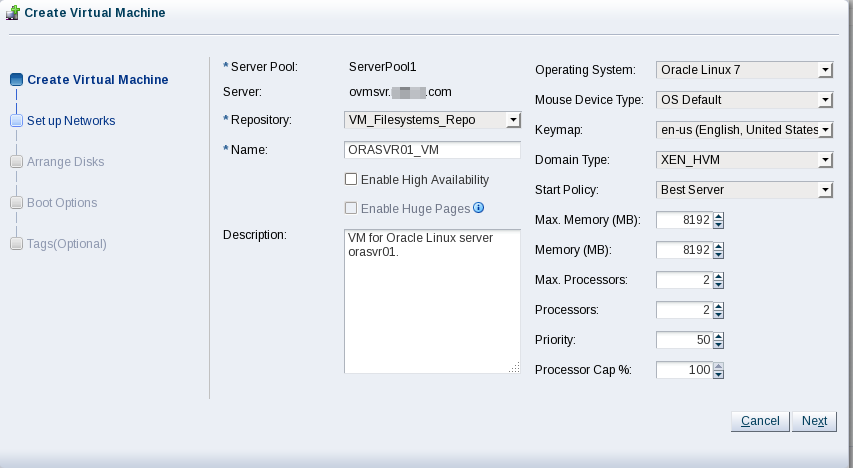
In OVM Manager, click the Create Virtual Machine icon. Ensure the “Create a new VM (Click ‘Next’ to continue)” radio button is selected, then click Next. Use these values to populate the next screen:
Note, I recently doubled the memory of the Oracle VM server from 72 GB to 144 GB. Hence, I was able to increase the memory of the orasvr01/02 VMs from 8192 MB to 16,384 MB.
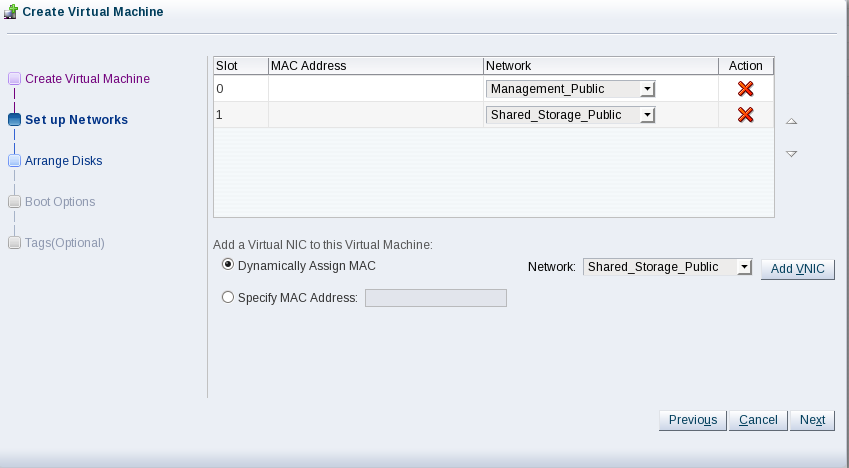
Click Next. Add the Management_Public and Shared_Storage_Public networks so your screen looks like this:
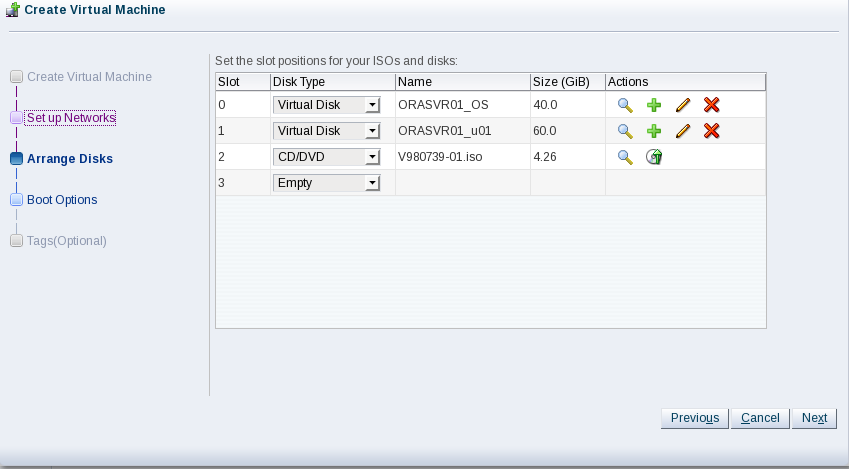
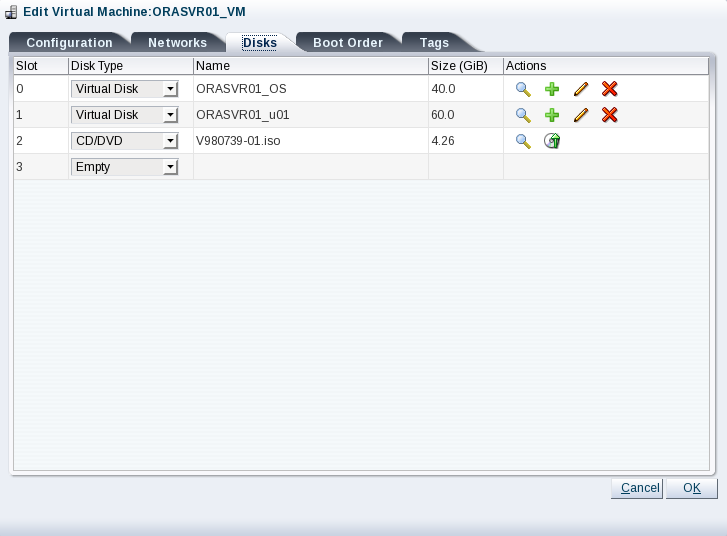
Click Next. Add two virtual disks for the operating system and /u01 file system. Then add a CD/DVD containing the ISO for Oracle Linux 7 Update 6. Your screen should look like this:
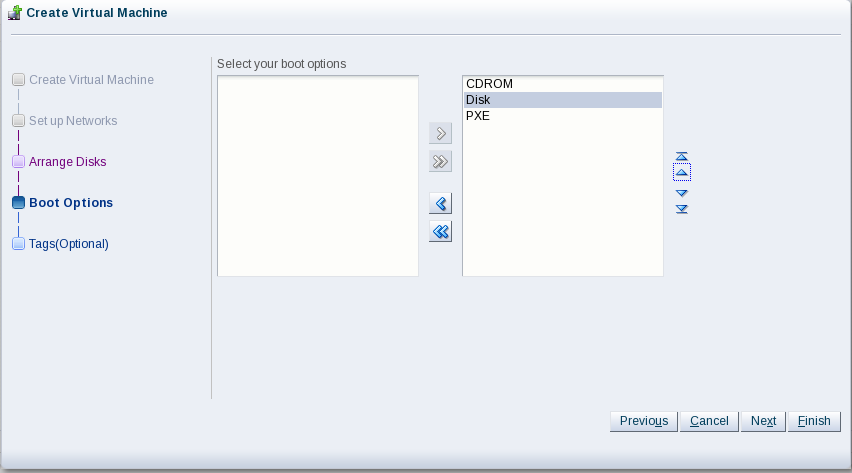
Click Next. Now change the boot order so when you start the VM for the first time, it will boot from the Linux ISO in the virtual CD/DVD drive. Your screen should look like this:
Click Finish and you’re done.
Task #2: Install Oracle Linux.
In OVM Manager start ORASVR01_VM, wait for a few seconds then connect to the console. You’ll see this opening screen:
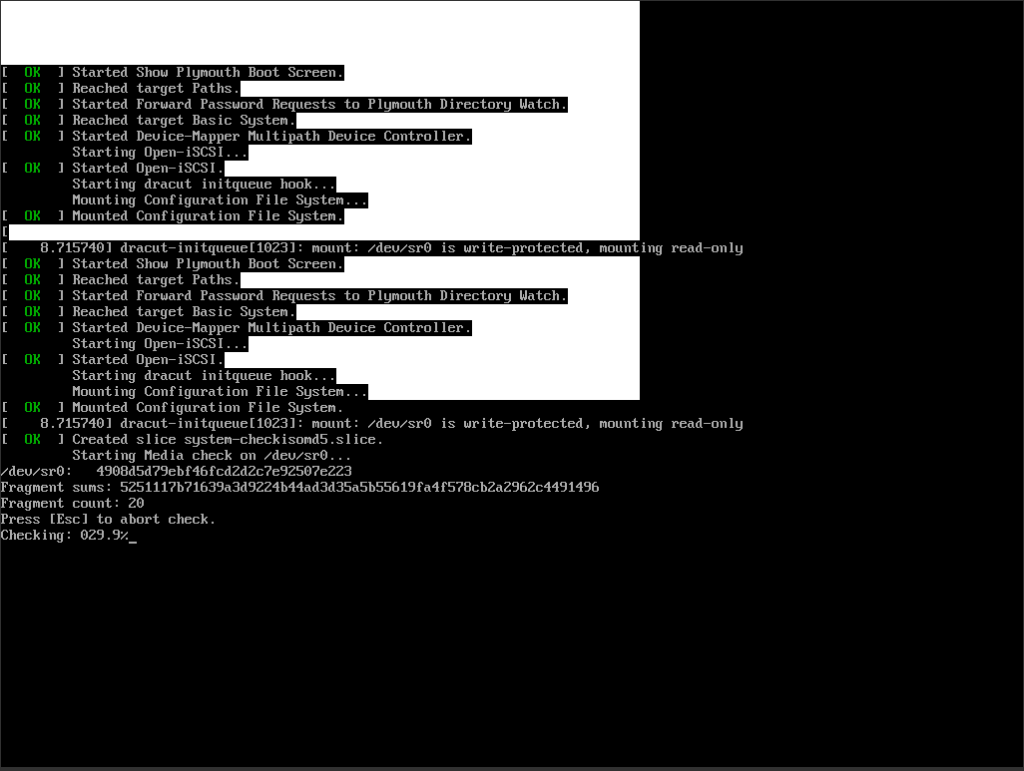
Once the installation kicks off, the CD/DVD drive will be mounted and the media checked:
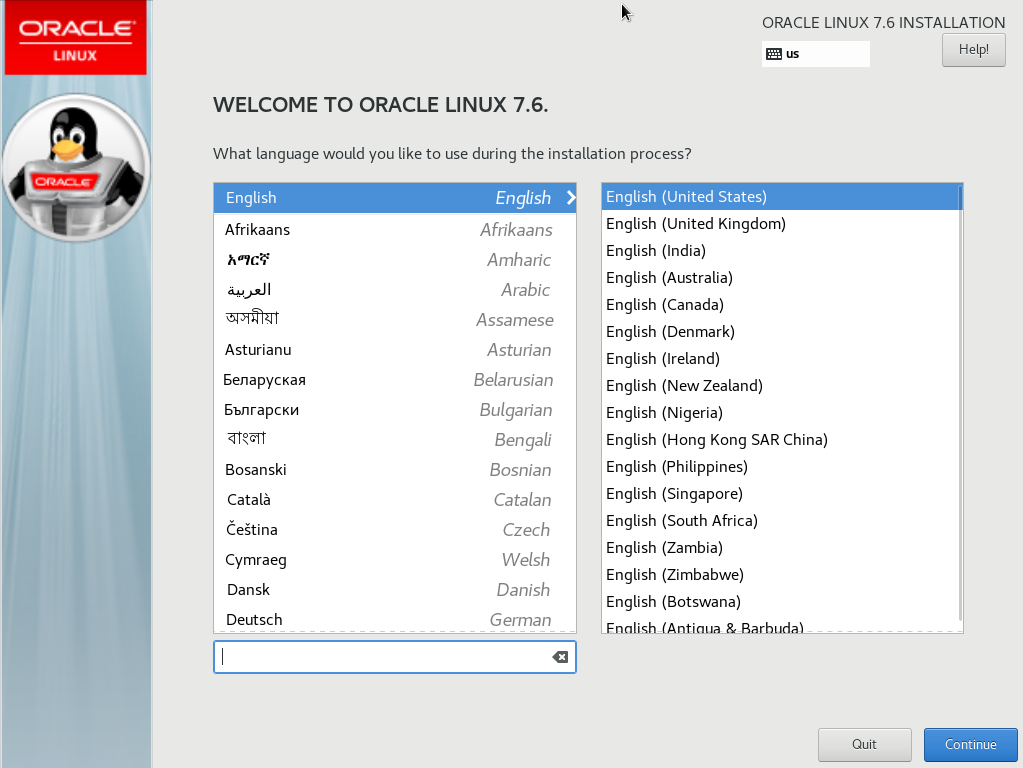
After a few moments, the Welcome screen will appear where you will choose your language:
I had the separated double mouse pointer issue again, but was able to ‘fix’ it by moving the mouse pointer to a corner of the screen and getting the two pointers to superimpose. Once they are, don’t move the pointer too quickly or they’ll separate again.
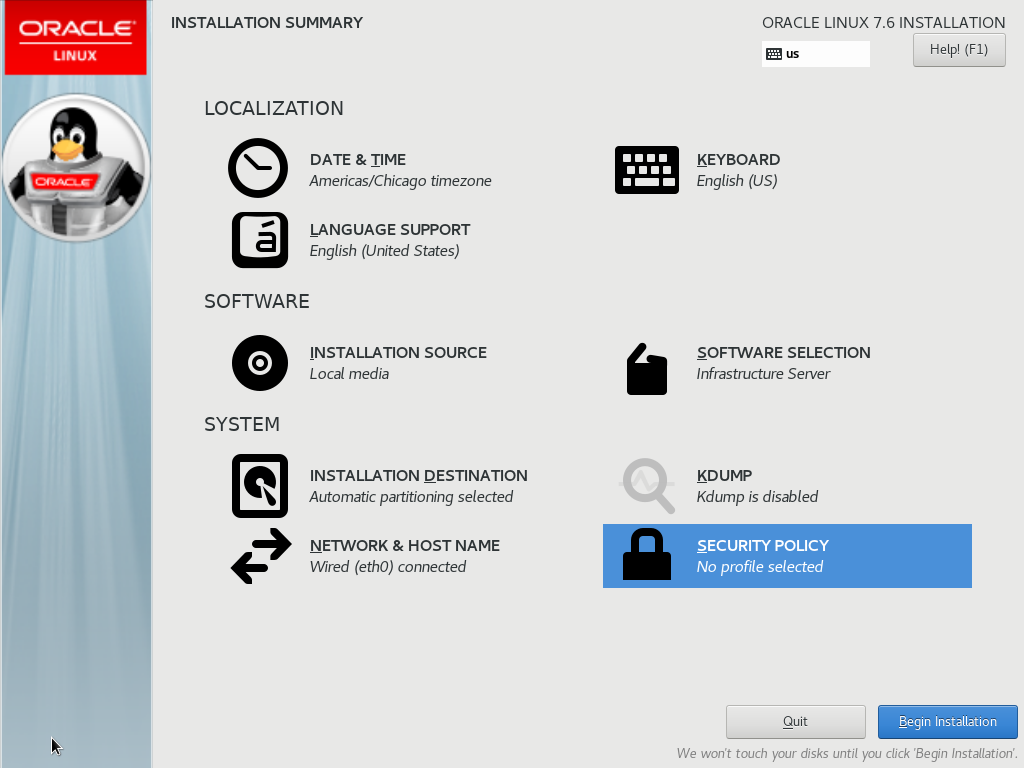
Choose your language then click Continue. The Installation Summary screen appears next. Use the values below or choose your own:
When you have configured each option, your screen should look like this:
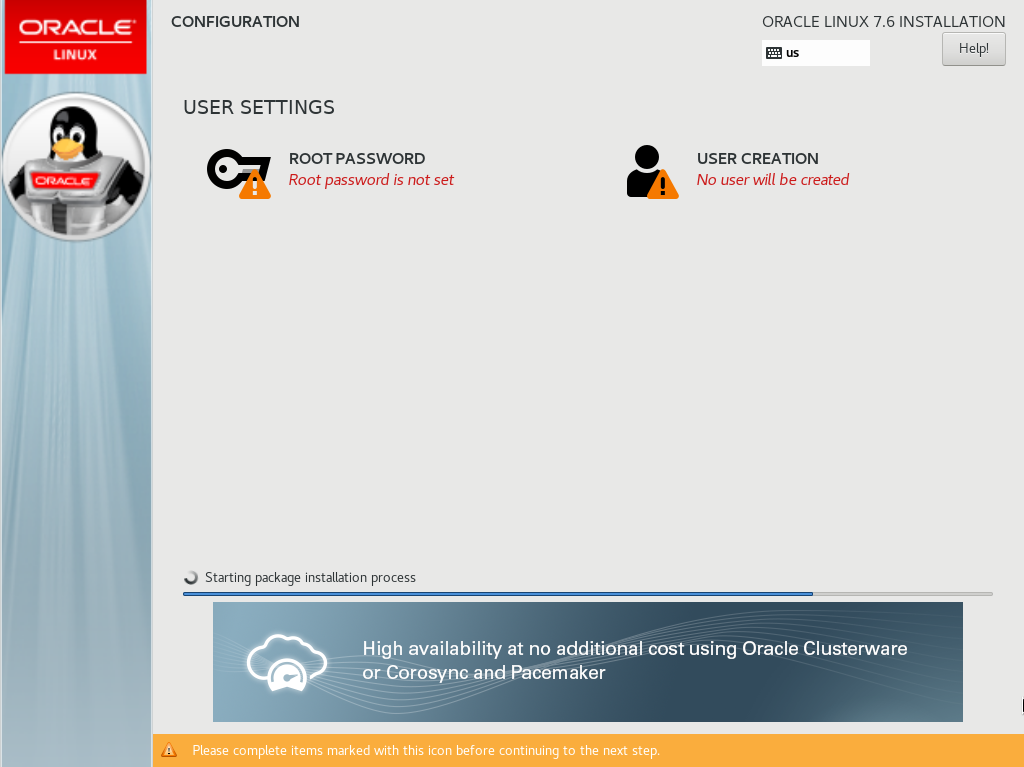
Click Begin Installation. This will display the CONFIGURATION USER SETTINGS screen:
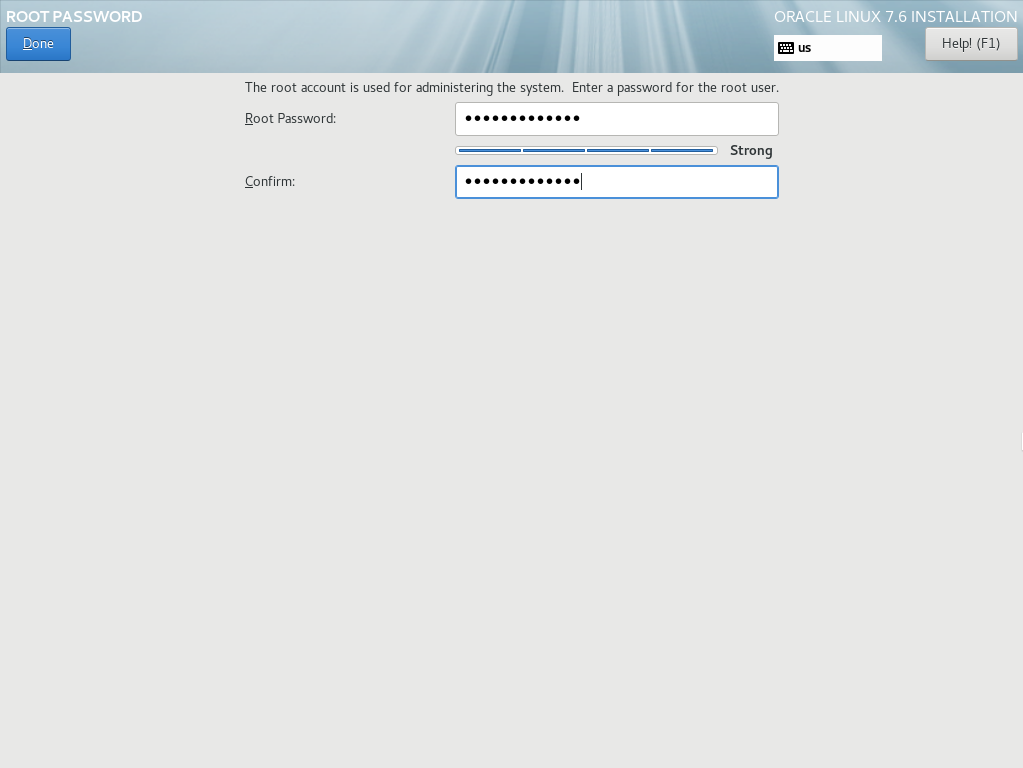
Click the ROOT PASSWORD icon. This will display a new screen allowing you to enter a password for the root user:
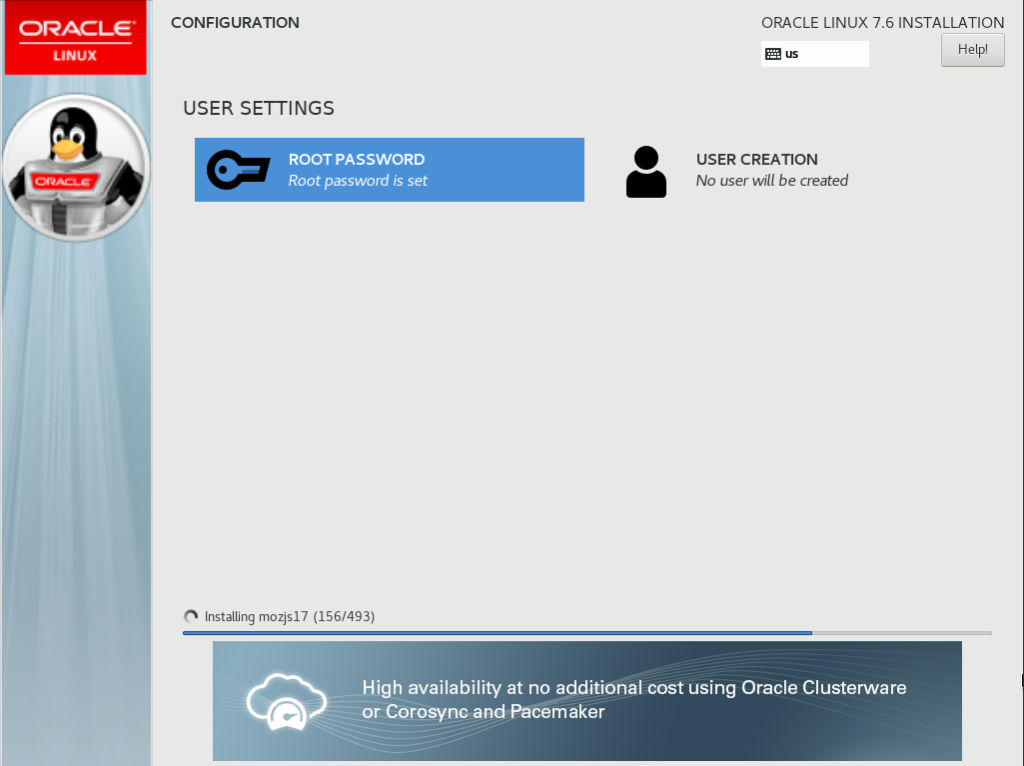
Enter your new root password, then click Done. This will return you to the CONFIGURATION USER SETTINGS screen where you can monitor the progress of the Oracle Linux package installation:
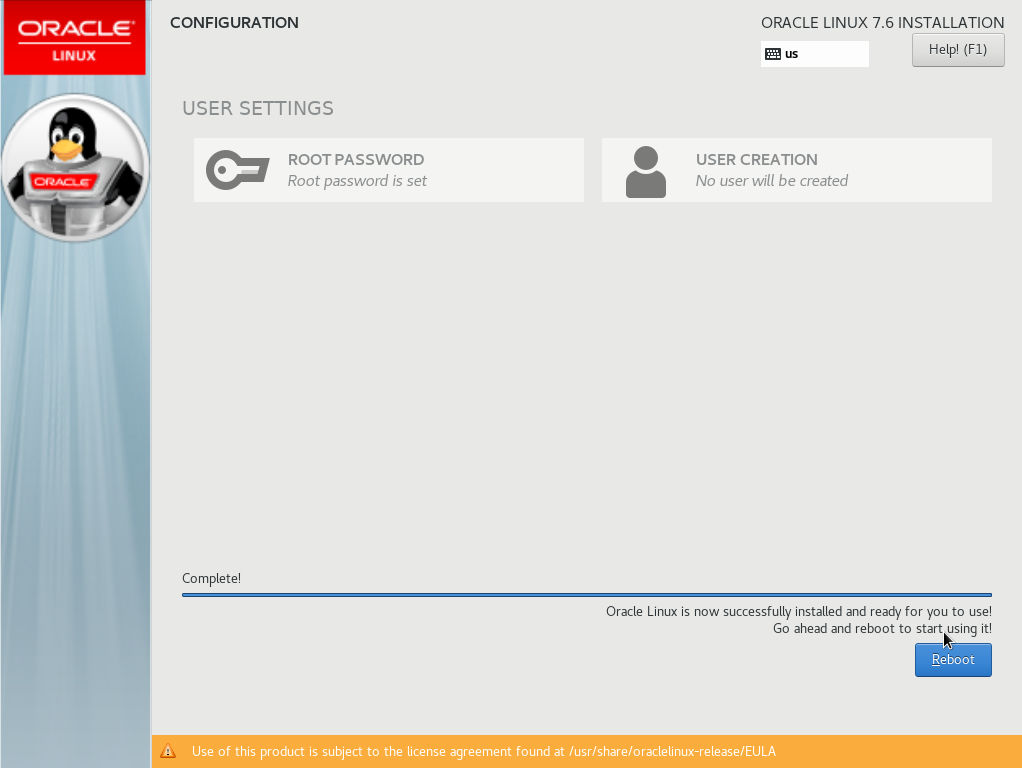
Once all the packages have installed you’ll see this screen:
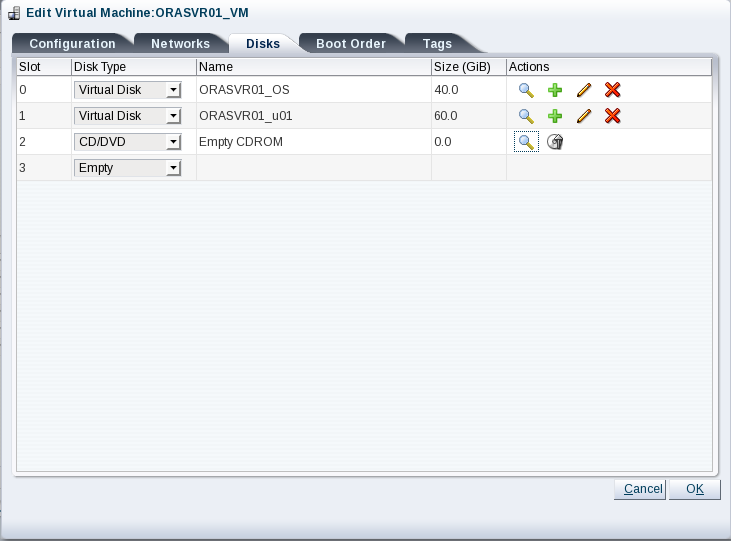
Before you click the Reboot button, we need to eject the Oracle Linux ISO from the virtual CD/DVD drive. Otherwise rebooting will start the installation process again. In OVM Manager, edit the ORASVR01_VM virtual machine and click the Disks tab:
Click the Eject icon to remove the ISO file from the CD/DVD drive. Your screen will look like this:
Return to the VM console and click Reboot. This is where life may get a little interesting. I tried this process multiple times. Sometimes clicking the Reboot button worked. Sometimes, but not often. Other times the reboot just hung, so I had to stop and restart the VM using OVM Manager. Sometimes even that didn’t work and I had to resort to killing the VM in OVM Manager, then re-starting it. Another time I had to ‘destroy’ the VM and re-create it using xm commands on the OVM server. It sounds worse than it is. It’s a quick and simple procedure documented here.
Eventually, the reboot happens and you’ll see a Linux login prompt:
Don’t get too excited. There are a few configuration changes we need to make before OL7.6 is ready for prime time. Some of these could have been configured via the INSTALLATION SUMMARY screen, but I wanted to explicitly cover how some Linux administration has changed in version 7. Clicking around in the installation GUI won’t show you that. So without further ado, fire up Putty and login as root.
Task #3: Run an Update.
Oracle claim the yum repository is all ready to go in Oracle Linux 7. Well, sort of. Run a yum update:
[root@orasvr01 ~]# yum update
There will probably be plenty of things to update which is fine. Look away though and you might miss this message:
IMPORTANT: A legacy Oracle Linux yum server repo file was found. Oracle Linux yum server repository
configurations have changed which means public-yum-ol7.repo will no longer be updated. New repository
configuration files have been installed but are disabled. To complete the transition, run this script
as the root user:

/usr/bin/ol_yum_configure.sh
Putty has its place, but I prefer working with a windows interface meant for adults. The command to install xterm can be found here. I use X-Win32 as my X Windows PC based server. It complained about not seeing xauth on the server side, so I installed that as well using this command:
[root@orasvr01 ~]# yum install xauth
Task #5: Disable SE Linux.
The simple edit to disable SE Linux can be found here.
Task #6: Turn Off Linux Firewall.
Managing the firewall has changed in Oracle Linux 7. By default, the firewall is provided via a daemon (firewalld) and is controlled by the systemctl command. Go here for the steps to disable the firewall in Oracle Linux 7.
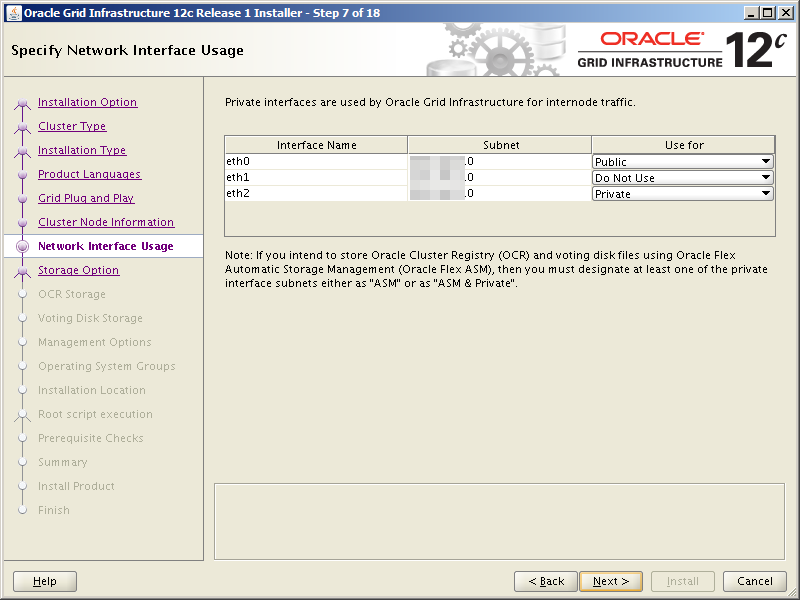
Task #7: Configure Storage Networking (eth1).
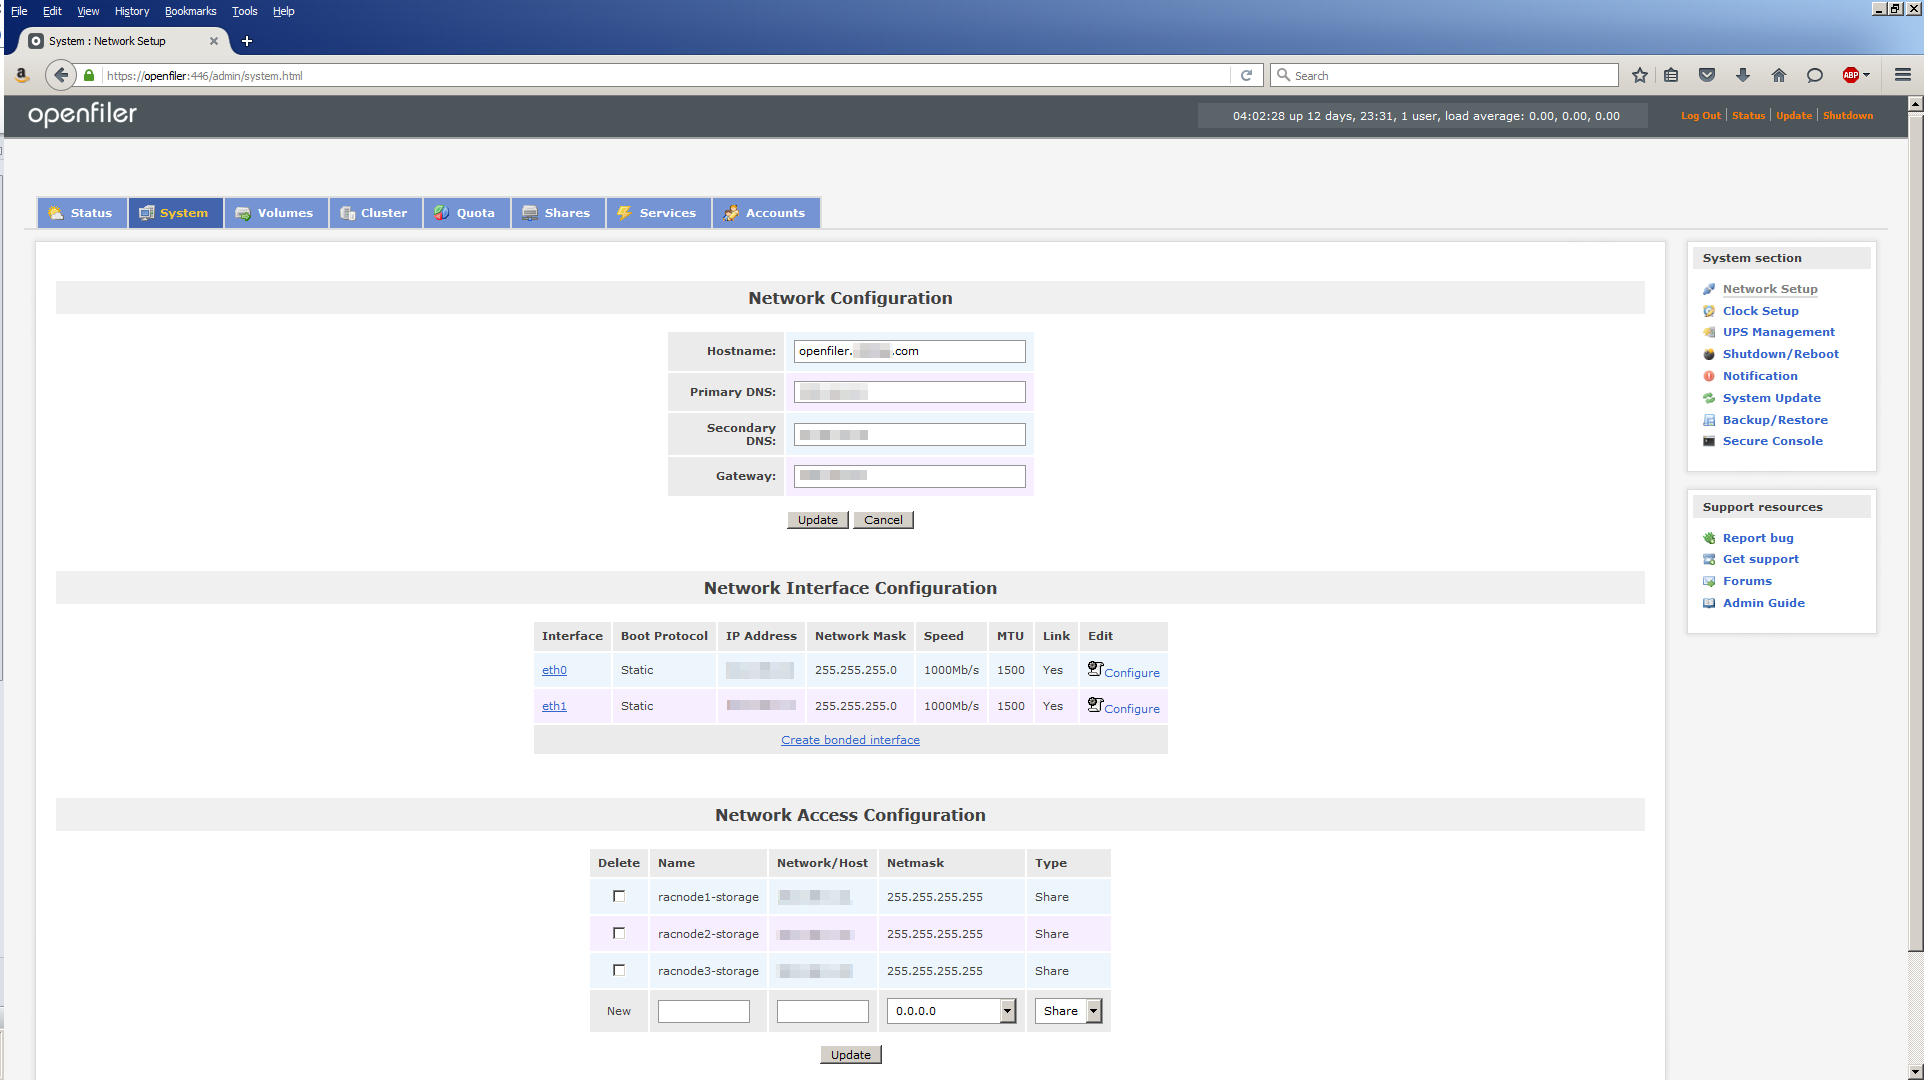
The orasvr01 and orasvr02 servers have 2 NICs each. We’ve already configured the public interface (eth0). Now it’s time to configure the NIC which will connect the server to the storage coming from Openfiler (eth1).
Before we do that, replace the /etc/hosts file with our standard one which lists all our infrastructure IP addresses. That file can be found here.
Each NIC has a configuration file located in /etc/sysconfig/network-scripts. The file name follows the pattern ifcfg-ethN, where N is the number of the NIC you’re interested in. In this case, the file we want to edit is ifcfg-eth1. This is what OVM/Oracle Linux installer gave us by default:
Signs of life! The eth1 interface is now up. Re-check the status of the network:
[root@orasvr01 network-scripts]# systemctl status network
● network.service - LSB: Bring up/down networking
    Loaded: loaded (/etc/rc.d/init.d/network; bad; vendor preset: disabled)
    Active: active (exited) since Mon 2019-07-01 12:06:10 CDT; 2h 42min ago
      Docs: man:systemd-sysv-generator(8)
   Process: 1057 ExecStart=/etc/rc.d/init.d/network start (code=exited, status=0/SUCCESS)
Jul 01 12:06:09 orasvr01.mynet.com systemd[1]: Starting LSB: Bring up/down networking…
Jul 01 12:06:10 orasvr01.mynet.com network[1057]: Bringing up loopback interface:  [  OK  ]
Jul 01 12:06:10 orasvr01.mynet.com network[1057]: Bringing up interface eth0:  [  OK  ]
Jul 01 12:06:10 orasvr01.mynet.com systemd[1]: Started LSB: Bring up/down networking.
Note the output still only references the eth0 NIC. Re-start the network then re-check its status:
[root@orasvr01 network-scripts]# systemctl restart network

[root@orasvr01 network-scripts]# systemctl status network
 ● network.service - LSB: Bring up/down networking
    Loaded: loaded (/etc/rc.d/init.d/network; bad; vendor preset: disabled)
    Active: active (exited) since Mon 2019-07-01 14:51:59 CDT; 3s ago
      Docs: man:systemd-sysv-generator(8)
   Process: 1884 ExecStop=/etc/rc.d/init.d/network stop (code=exited, status=0/SUCCESS)
   Process: 2092 ExecStart=/etc/rc.d/init.d/network start (code=exited, status=0/SUCCESS)
 Jul 01 14:51:58 orasvr01.mynet.com systemd[1]: Starting LSB: Bring up/down networking…
 Jul 01 14:51:59 orasvr01.mynet.com network[2092]: Bringing up loopback interface:  [  OK  ]
 Jul 01 14:51:59 orasvr01.mynet.com network[2092]: Bringing up interface eth0:  Connection successfully activated (D-Bus ac…ion/7)
 Jul 01 14:51:59 orasvr01.mynet.com network[2092]: [  OK  ]
 Jul 01 14:51:59 orasvr01.mynet.com network[2092]: Bringing up interface eth1:  Connection successfully activated (D-Bus ac…ion/8)
 Jul 01 14:51:59 orasvr01.mynet.com network[2092]: [  OK  ]
 Jul 01 14:51:59 orasvr01.mynet.com systemd[1]: Started LSB: Bring up/down networking.
 Hint: Some lines were ellipsized, use -l to show in full.
The output now references eth1 and all seems well. We should now be able to ping the openfiler-storage IP address using the eth1 interface:
[root@orasvr01 network-scripts]# ping -I eth1 openfiler-storage
PING openfiler-storage (200.200.20.6) from 200.200.20.17 eth1: 56(84) bytes of data.
64 bytes from openfiler-storage (200.200.20.6): icmp_seq=1 ttl=64 time=0.393 ms
64 bytes from openfiler-storage (200.200.20.6): icmp_seq=2 ttl=64 time=0.174 ms
64 bytes from openfiler-storage (200.200.20.6): icmp_seq=3 ttl=64 time=0.175 ms
Yes! Get in! Storage networking is sorted. Onto the next task.
Task #8: Add Users & Groups.
The easiest way to setup the users and groups necessary to run Oracle Database instances on your server is to use Oracle’s preinstallation package. Since we’re going to use Oracle Database 12c Release 2, 18c and 19c we may as well go for the highest version available. That’ll be the one for Oracle Database 19c then:
It does not create a grid user or the various ASM groups you’ll need to install Grid Infrastructure. To add those and to fix the default IDs, I used this script (modify for your own needs). The script makes the necessary changes and returns this result:
oracle user id:  uid=1000(oracle) gid=1000(oinstall) groups=1000(oinstall),1007(asmdba),1001(dba),1002(oper),1003(backupdba),1004(dgdba),1005(kmdba),1006(racdba)

grid user id:  uid=1001(grid) gid=1000(oinstall) groups=1000(oinstall),1007(asmdba),1008(asmadmin),1009(asmoper),1001(dba),1006(racdba)
Task #9: Modify Shell & Resource Limits.
For both the oracle and grid users the value of umask must be any one of these 22, 022, 0022.
[oracle@orasvr01 ~]$ umask
0022
If it’s not the correct value, set it explicitly in the ~/.bash_profile file:
umask 022
User resource limits are usually defined in /etc/security/limits.conf. When using the Oracle pre-installation package, these limits are created for the oracle user in this file instead:
These limits need to be replicated for the grid user, so add two sets of entries to /etc/security/limits.conf. Your values may be different depending upon your hardware configuration:
# resource limits for oracle user:
oracle   soft   nofile   1024
oracle   hard   nofile   65536
oracle   soft   nproc    16384
oracle   hard   nproc    16384
oracle   soft   stack    10240
oracle   hard   stack    32768
oracle   hard   memlock  134217728
oracle   soft   memlock  134217728

# resource limits for grid user:
grid   soft   nofile   1024
grid   hard   nofile   65536
grid   soft   nproc    16384
grid   hard   nproc    16384
grid   soft   stack    10240
grid   hard   stack    32768
grid   hard   memlock  134217728
grid   soft   memlock  134217728
You can check these are operational by using this simple script.
Finally, if it so pleases you and it does me, change the insane alias defaults for ls, vi and grep in the oracle and grid user’s ~/.bash_profile:
unalias ls
unalias vi
unalias grep
Task #10: Configure iSCSI Storage.
There are options you can choose during the installation of Oracle Linux which will install the necessary iscsi packages. However, this is how you do it manually.
[root@orasvr01 ~]# systemctl enable iscsid
Created symlink from /etc/systemd/system/multi-user.target.wants/iscsid.service to /usr/lib/systemd/system/iscsid.service.

[root@orasvr01 ~]# systemctl start iscsid

[root@orasvr01 ~]# systemctl status iscsid
● iscsid.service - Open-iSCSI
    Loaded: loaded (/usr/lib/systemd/system/iscsid.service; enabled; vendor preset: disabled)
    Active: active (running) since Thu 2019-07-04 17:45:10 CDT; 7min ago
      Docs: man:iscsid(8)
            man:iscsiadm(8)
  Main PID: 23489 (iscsid)
    Status: "Ready to process requests"
    CGroup: /system.slice/iscsid.service
            └─23489 /sbin/iscsid -f -d2
Jul 04 17:45:10 orasvr01.mynet.com systemd[1]: Starting Open-iSCSI…
Jul 04 17:45:10 orasvr01.mynet.com iscsid[23489]: iscsid: InitiatorName=iqn.1988-12.com.oracle:274b38e4651d
Jul 04 17:45:10 orasvr01.mynet.com iscsid[23489]: iscsid: InitiatorAlias=orasvr01.mynet.com
Jul 04 17:45:10 orasvr01.mynet.com iscsid[23489]: iscsid: Max file limits 1024 4096
Jul 04 17:45:10 orasvr01.mynet.com systemd[1]: Started Open-iSCSI.
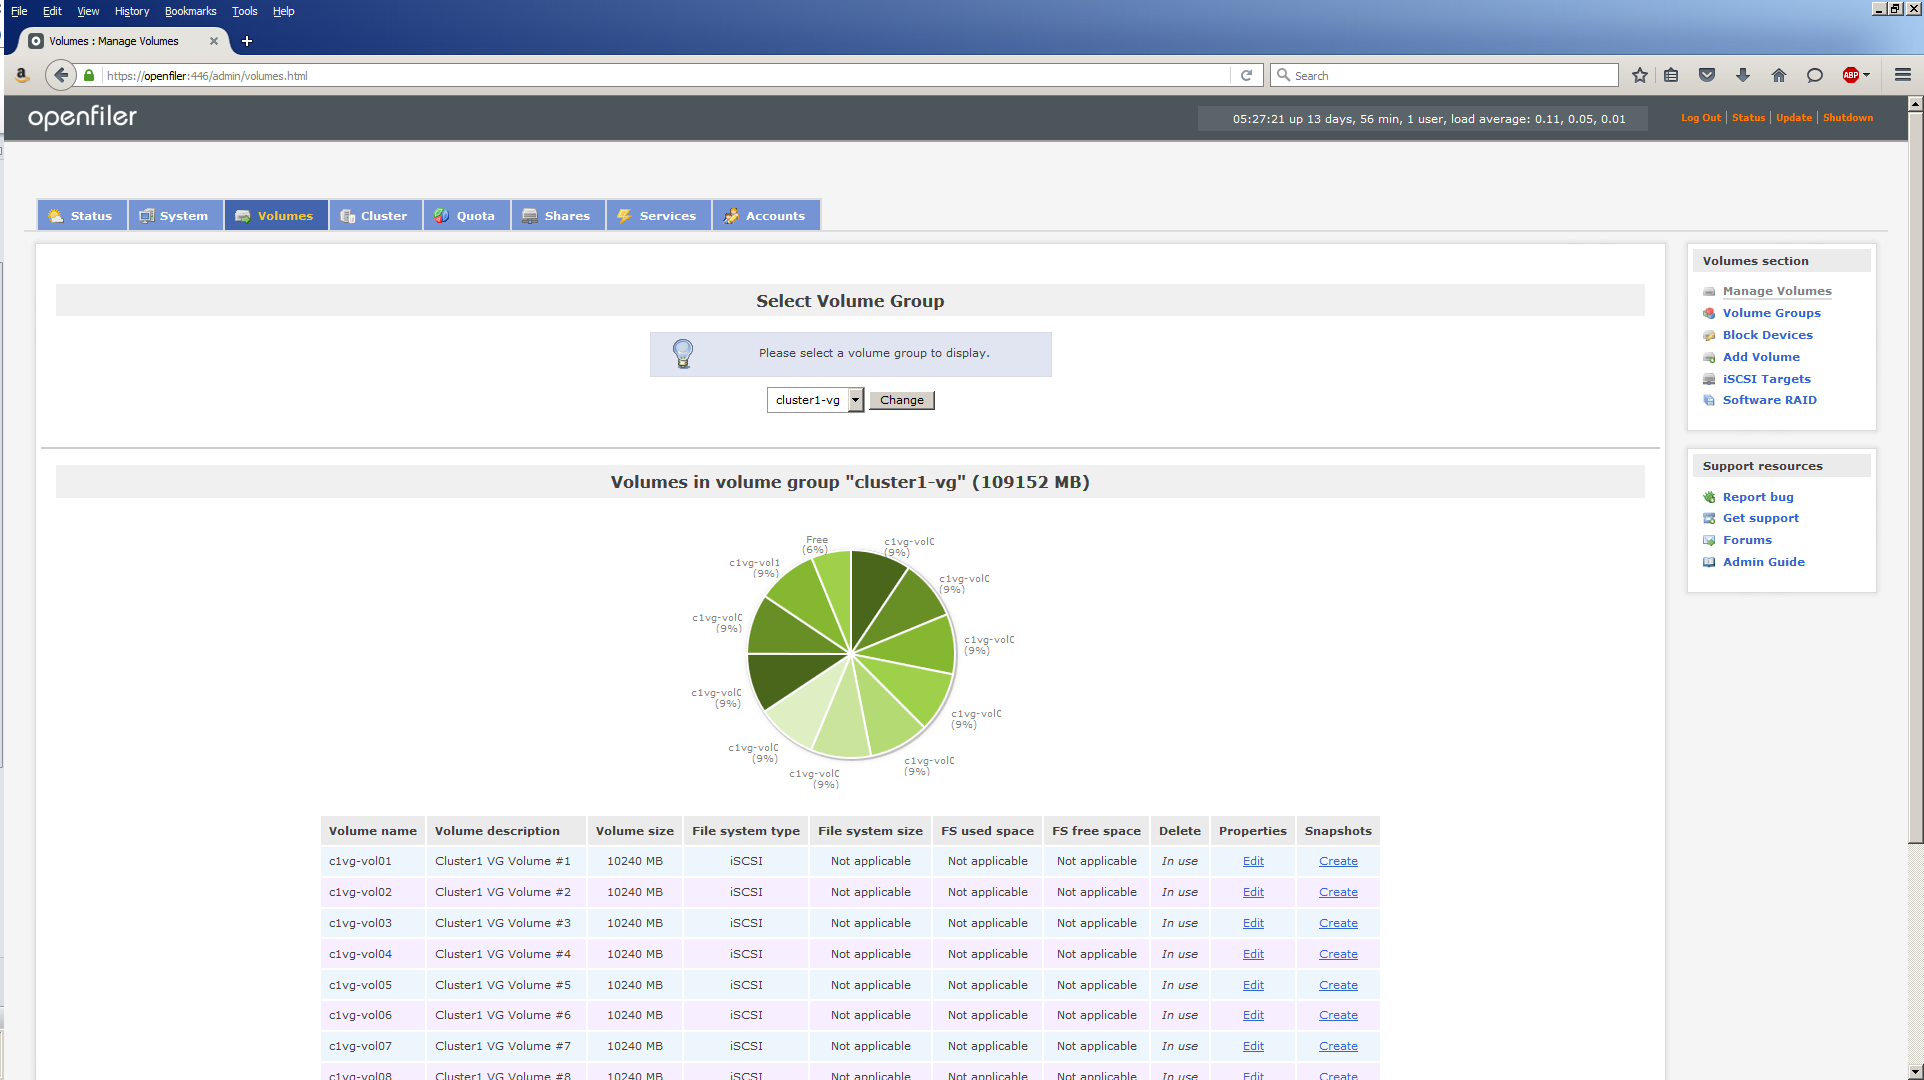
I already carved up the /dev/sdc disk device in Openfiler (Western Digital 300 GB VelociRaptor SATA 3 drive) into two sets of 10 volumes. A set will be allocated to each server. Here’s a summary of the volume allocation:
Host
iSCSI Target
Disk Device (GB)
File System/ASM Disk
orasvr01
iqn.2006-01.com.openfiler:orasvr01vg-vol01
/dev/sda (20)
/u02
iqn.2006-01.com.openfiler:orasvr01vg-vol02
/dev/sdb (20)
/u03
iqn.2006-01.com.openfiler:orasvr01vg-vol03
/dev/sdc (20)
/u04
iqn.2006-01.com.openfiler:orasvr01vg-vol04
/dev/sdd (20)
/u05
iqn.2006-01.com.openfiler:orasvr01vg-vol05
/dev/sde (20)
/u06
iqn.2006-01.com.openfiler:orasvr01vg-vol06
/dev/sdf (20)
/u07
iqn.2006-01.com.openfiler:orasvr01vg-vol13
/dev/sdg (10)
N/A
iqn.2006-01.com.openfiler:orasvr01vg-vol15
/dev/sdh (1)
N/A
iqn.2006-01.com.openfiler:orasvr01vg-vol16
/dev/sdi (1)
N/A
iqn.2006-01.com.openfiler:orasvr01vg-vol17
/dev/sdj (1)
N/A
orasvr02
iqn.2006-01.com.openfiler:orasvr02vg-vol07
/dev/sdj (20)
DATA_000
iqn.2006-01.com.openfiler:orasvr02vg-vol08
/dev/sdi (20)
DATA_001
iqn.2006-01.com.openfiler:orasvr02vg-vol09
/dev/sdh (20)
DATA_002
iqn.2006-01.com.openfiler:orasvr02vg-vol10
/dev/sdg (20)
RECO_000
iqn.2006-01.com.openfiler:orasvr02vg-vol11
/dev/sdf (20)
RECO_001
iqn.2006-01.com.openfiler:orasvr02vg-vol12
/dev/sde (20)
RECO_002
iqn.2006-01.com.openfiler:orasvr02vg-vol14
/dev/sdd (10)
REDO_000
iqn.2006-01.com.openfiler:orasvr02vg-vol18
/dev/sdc (1)
N/A
iqn.2006-01.com.openfiler:orasvr02vg-vol19
/dev/sdb (1)
N/A
iqn.2006-01.com.openfiler:orasvr02vg-vol20
/dev/sda (1)
N/A
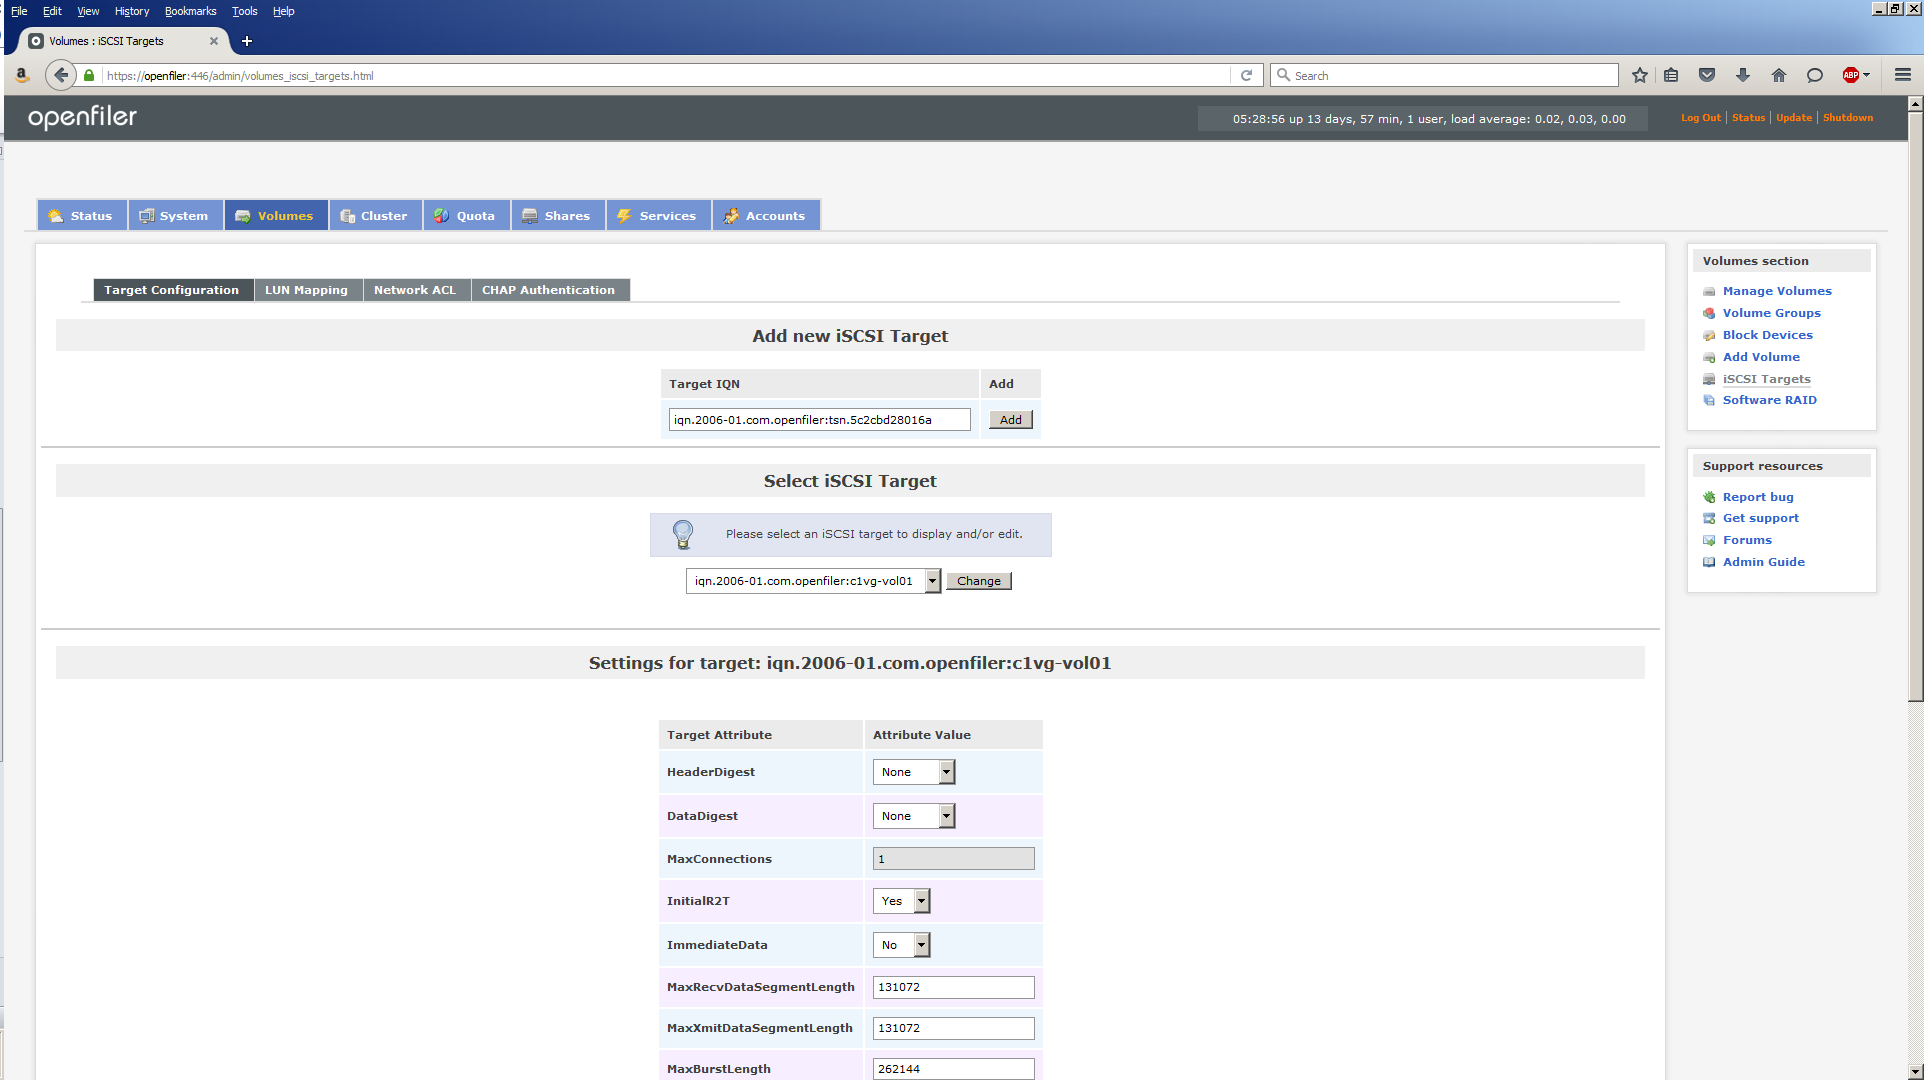
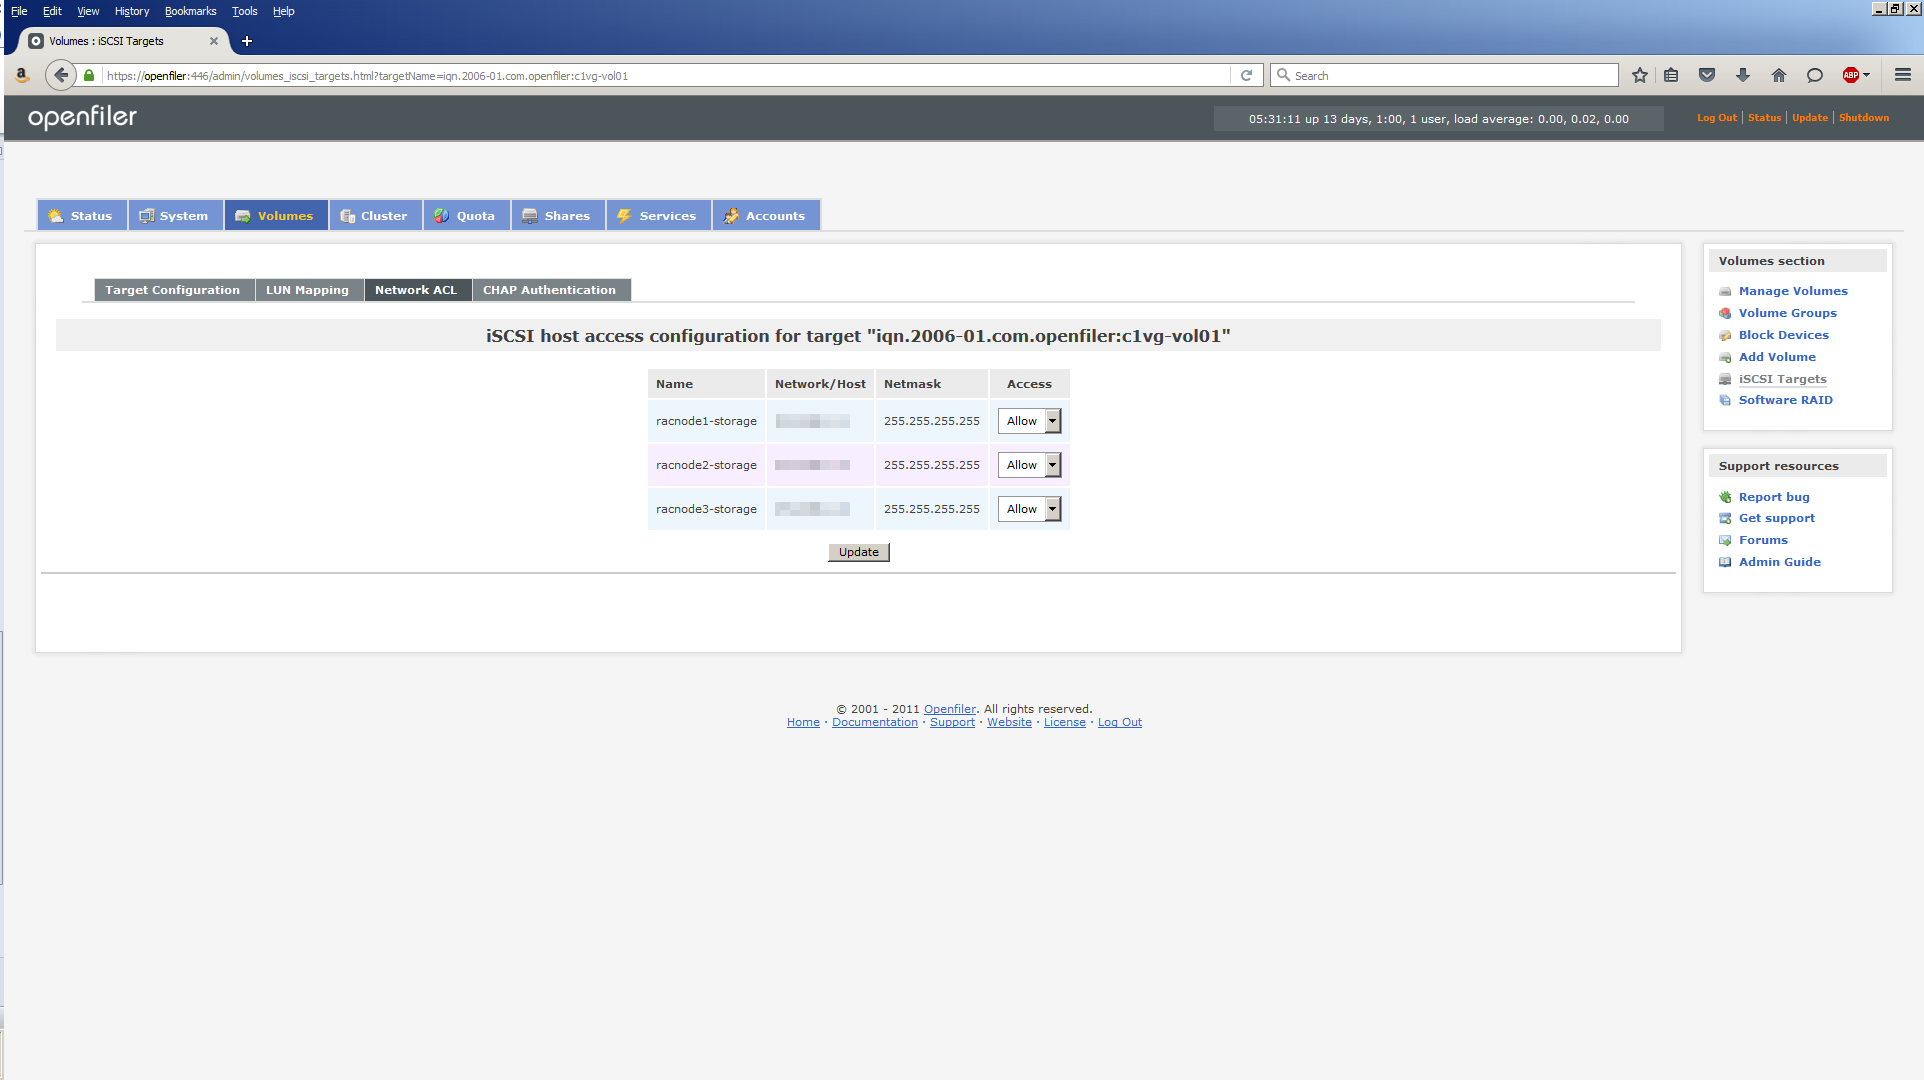
First, let’s discover the iSCSI targets allocated to orasvr01:
As before, orasvr01 sees the iSCSI targets on both the public network (200.200.10.x) and the storage network (200.200.20.x). I have no idea why, but needless to say we’re only interested in the targets on the storage network.
Next, we need to log into each iSCSI target:
[root@orasvr01 ~]# iscsiadm -m node -T iqn.2006-01.com.openfiler:orasvr01vg-vol01 -p 200.200.20.6 -l
Logging in to iface: default, target: iqn.2006-01.com.openfiler:orasvr01vg-vol01, portal: 200.200.20.6,3260
Login to [iface: default, target: iqn.2006-01.com.openfiler:orasvr01vg-vol01, portal: 200.200.20.6,3260] successful.

[root@orasvr01 ~]# iscsiadm -m node -T iqn.2006-01.com.openfiler:orasvr01vg-vol02 -p 200.200.20.6 -l
Logging in to iface: default, target: iqn.2006-01.com.openfiler:orasvr01vg-vol02, portal: 200.200.20.6,3260
Login to [iface: default, target: iqn.2006-01.com.openfiler:orasvr01vg-vol02, portal: 200.200.20.6,3260] successful.

[root@orasvr01 ~]# iscsiadm -m node -T iqn.2006-01.com.openfiler:orasvr01vg-vol03 -p 200.200.20.6 -l
Logging in to iface: default, target: iqn.2006-01.com.openfiler:orasvr01vg-vol03, portal: 200.200.20.6,3260
Login to [iface: default, target: iqn.2006-01.com.openfiler:orasvr01vg-vol03, portal: 200.200.20.6,3260] successful.

[root@orasvr01 ~]# iscsiadm -m node -T iqn.2006-01.com.openfiler:orasvr01vg-vol04 -p 200.200.20.6 -l
Logging in to iface: default, target: iqn.2006-01.com.openfiler:orasvr01vg-vol04, portal: 200.200.20.6,3260
Login to [iface: default, target: iqn.2006-01.com.openfiler:orasvr01vg-vol04, portal: 200.200.20.6,3260] successful.

[root@orasvr01 ~]# iscsiadm -m node -T iqn.2006-01.com.openfiler:orasvr01vg-vol05 -p 200.200.20.6 -l
Logging in to iface: default, target: iqn.2006-01.com.openfiler:orasvr01vg-vol05, portal: 200.200.20.6,3260
Login to [iface: default, target: iqn.2006-01.com.openfiler:orasvr01vg-vol05, portal: 200.200.20.6,3260] successful.

[root@orasvr01 ~]# iscsiadm -m node -T iqn.2006-01.com.openfiler:orasvr01vg-vol06 -p 200.200.20.6 -l
Logging in to iface: default, target: iqn.2006-01.com.openfiler:orasvr01vg-vol06, portal: 200.200.20.6,3260
Login to [iface: default, target: iqn.2006-01.com.openfiler:orasvr01vg-vol06, portal: 200.200.20.6,3260] successful.

[root@orasvr01 ~]# iscsiadm -m node -T iqn.2006-01.com.openfiler:orasvr01vg-vol13 -p 200.200.20.6 -l
Logging in to iface: default, target: iqn.2006-01.com.openfiler:orasvr01vg-vol13, portal: 200.200.20.6,3260
Login to [iface: default, target: iqn.2006-01.com.openfiler:orasvr01vg-vol13, portal: 200.200.20.6,3260] successful.

[root@orasvr01 ~]# iscsiadm -m node -T iqn.2006-01.com.openfiler:orasvr01vg-vol15 -p 200.200.20.6 -l
Logging in to iface: default, target: iqn.2006-01.com.openfiler:orasvr01vg-vol15, portal: 200.200.20.6,3260
Login to [iface: default, target: iqn.2006-01.com.openfiler:orasvr01vg-vol15, portal: 200.200.20.6,3260] successful.

[root@orasvr01 ~]# iscsiadm -m node -T iqn.2006-01.com.openfiler:orasvr01vg-vol16 -p 200.200.20.6 -l
Logging in to iface: default, target: iqn.2006-01.com.openfiler:orasvr01vg-vol16, portal: 200.200.20.6,3260
Login to [iface: default, target: iqn.2006-01.com.openfiler:orasvr01vg-vol16, portal: 200.200.20.6,3260] successful.

[root@orasvr01 ~]# iscsiadm -m node -T iqn.2006-01.com.openfiler:orasvr01vg-vol17 -p 200.200.20.6 -l
Logging in to iface: default, target: iqn.2006-01.com.openfiler:orasvr01vg-vol17, portal: 200.200.20.6,3260
Login to [iface: default, target: iqn.2006-01.com.openfiler:orasvr01vg-vol17, portal: 200.200.20.6,3260] successful.
This has the effect of Oracle Linux creating disk devices for each iSCSI target. We can see the initial iSCSI target to disk device mapping here:
For now, I’ll only partition the six 20 GB disk devices. The basic sequence of steps would be the same for each. Here’s how to do the first one:
[root@orasvr01 ~]# fdisk /dev/sda
Welcome to fdisk (util-linux 2.23.2).

Changes will remain in memory only, until you decide to write them.
Be careful before using the write command.

Command (m for help): n
Partition type:
   p   primary (0 primary, 0 extended, 4 free)
   e   extended
Select (default p): p
Partition number (1-4, default 1): 1
First sector (2048-41943039, default 2048):
Using default value 2048
Last sector, +sectors or +size{K,M,G} (2048-41943039, default 41943039):
Using default value 41943039
Partition 1 of type Linux and of size 20 GiB is set

Command (m for help): w
The partition table has been altered!
Calling ioctl() to re-read partition table.
Syncing disks.
This is what you end up with:
[root@orasvr01 ~]# fdisk –l /dev/sda
Disk /dev/sda: 21.5 GB, 21474836480 bytes, 41943040 sectors
Units = sectors of 1 * 512 = 512 bytes
Sector size (logical/physical): 512 bytes / 512 bytes
I/O size (minimum/optimal): 512 bytes / 512 bytes
Disk label type: dos
Disk identifier: 0xfba01026

Device Boot      Start         End      Blocks   Id  System
/dev/sda1         2048    41943039    20970496   83  Linux
Task #12: Configure Persistent Disk Device Names for iSCSI Targets.
Each time the server is booted, the iSCSI targets could be assigned a different device name. That’s a problem because it means your database files could be seen to change file system mount points. To ensure a given iSCSI target always maps to the same disk device, we can use udev rules. This has changed a little between Oracle Linux 6 and Oracle Linux 7.
Step 1 is to obtain the unique iSCSI id of each disk device we need a udev rule for. To do that, use the scsi_id command. It’s location has changed in OL7 and its path is no longer part of the root user’s default path. Here’s a quick alias and usage of the command:
Step 2 is to create a udev rules script in /etc/udev/rules.d directory. The script can be called anything you like so long as it starts with a number and ends with “.rules”. It’s always important to name your script something meaningful. Here’s my file with the relevant syntax, one line per iSCSI target:
Defaults to a wildcard pattern match for the disk device
SUBSYSTEM
block
/dev/sd?1 are block devices
PROGRAM
/usr/lib/udev/scsi_id …
Path to the scsi_id executable
RESULT
(iSCSI ID)
Unique iSCSI identifier returned by scsi_id
SYMLINK+
(Name)
The symbolic link name which points to the disk device
OWNER
root
By default the root user owns disk devices
GROUP
disk
By default the OS group is disk
MODE
0660
Default permissions mask for the disk device
Step 3 is to test the resolution of each line in the rules file. This is important because running a test actually creates the symbolic link. We already know what the current iSCSI target to disk device mappings are:
iSCSI Target
Disk Device
iqn.2006-01.com.openfiler:orasvr01vg-vol01
/dev/sda
iqn.2006-01.com.openfiler:orasvr01vg-vol02
/dev/sdb
iqn.2006-01.com.openfiler:orasvr01vg-vol03
/dev/sdc
iqn.2006-01.com.openfiler:orasvr01vg-vol04
/dev/sdd
iqn.2006-01.com.openfiler:orasvr01vg-vol05
/dev/sde
iqn.2006-01.com.openfiler:orasvr01vg-vol06
/dev/sdf
Taking /dev/sda as an example:
[root@orasvr01 ~]# ls -l /dev | grep sda
brw-rw---- 1 root disk      8,   0 Jul  4 19:35 sda
brw-rw---- 1 root disk      8,   1 Jul  4 19:35 sda1
We see they are block devices (b), their permissions mask is 0660 (rw-rw—-), they’re owned by root and belong to the group, disk.
Let’s run the test for /dev/sda1:
[root@orasvr01 ~]# ls -l /dev | grep orasvr01
(no output)

[root@orasvr01 ~]# udevadm test /block/sda/sda1
The output is quite verbose, but can be seen in its entirety here. Once the test completes, check to see if a symbolic link has shown up:
Hurrah! By referencing the symbolic link and trusting that it always points to the correct disk device we’re all set to either build file systems on orasvr01 or create ASM Disks on orasvr02. Don’t forget to run the test for all the other disk devices to ensure their symbolic links get created.
Task #13a: Create File Systems (orasvr01).
First we need to build the /u01 file system whose storage is coming from the VM_Filesystems_Repo storage repository. Linux disk devices which come from OVM follow the naming convention /dev/xvd<letter>, where letter starts with a, then b and so on. The /dev/xvda disk has already been used for the Linux OS, so we should have /dev/xvdb waiting for us. Let’s check:
Let’s create a primary partition, then build the file system:
[root@orasvr01 ~]# fdisk /dev/xvdb
Welcome to fdisk (util-linux 2.23.2).

Changes will remain in memory only, until you decide to write them.
Be careful before using the write command.

Device does not contain a recognized partition table
Building a new DOS disklabel with disk identifier 0x49a8eb2a.

Command (m for help): n
Partition type:
   p   primary (0 primary, 0 extended, 4 free)
   e   extended
Select (default p): p
Partition number (1-4, default 1): 1
First sector (2048-125829119, default 2048):
Using default value 2048
Last sector, +sectors or +size{K,M,G} (2048-125829119, default 125829119):
Using default value 125829119
Partition 1 of type Linux and of size 60 GiB is set

Command (m for help): w
The partition table has been altered!

Calling ioctl() to re-read partition table.
Syncing disks.

[root@orasvr01 ~]# mkfs -t ext4 -m 0 /dev/xvdb1
mke2fs 1.42.9 (28-Dec-2013)
Discarding device blocks: done
Filesystem label=
OS type: Linux
Block size=4096 (log=2)
Fragment size=4096 (log=2)
Stride=0 blocks, Stripe width=0 blocks
3932160 inodes, 15728384 blocks
0 blocks (0.00%) reserved for the super user
First data block=0
Maximum filesystem blocks=2164260864
480 block groups
32768 blocks per group, 32768 fragments per group
8192 inodes per group
Superblock backups stored on blocks:
         32768, 98304, 163840, 229376, 294912, 819200, 884736, 1605632, 2654208,
         4096000, 7962624, 11239424

Allocating group tables: done
Writing inode tables: done
Creating journal (32768 blocks): done
Writing superblocks and filesystem accounting information: done
Let’s go ahead and build file systems using the symbolic links which point to the 6 disk devices whose storage is coming from Openfiler:
That’s it! We’re now ready to copy the Oracle Database code sets to /u01, install them and build databases using the storage in /u02 through /u07 on orasvr01.
Note, if you install Oracle Database 11g Release 11.2.0.4 on Oracle Linux 7, check this first!
Task #13b: Create ASM Disks (orasvr02).
As we know, each time the server is booted the iSCSI targets could be assigned a different device name. So the trick is to ensure the device name is persistent. That way Oracle will know which files are where. This can be done using udev rules and/or using Oracle’s ASMLib. Been there, done that, works great. There is a third way, however. Beginning with Oracle Database 12c Release 1 (12.1.0.2), Oracle provided the Oracle ASM Filter Driver (ASMFD). This is now Oracle’s recommended way to configure storage for ASM.
According to the Oracle ASMFD documentation, ASMFD “simplifies the configuration and management of disk devices by eliminating the need to rebind disk devices used with Oracle ASM each time the system is restarted”. So device name peristence then. It is further claimined that ASMFD is a kernel module which resides in the I/O path of the ASM Disks. Hence, its function is also to validate I/O requests to ASM Disks, filtering out invalid I/O. Presumably that means if you attempted to interfere with a system’s ASM Disks directly, the ASM Filter Driver would prevent you from doing so. Could be an interesting experiment when you have a spare moment. Don’t try it on a production system though, right?
Anyway, let’s try out the ASM Filter Driver. The driver can be installed and configured as part of an Oracle Grid Infrastructure installation. Pretty handy. Since the rules of the game are you have to use an ASM instance whose version is equal to or exceeds that of your database, let’s go with Oracle Grid Infrastructure 19c Release 3. Before we run the installer, let’s review the iSCSI targets and disk devices the operating system can currently see:
iSCSI Target
OS Device Name (GB)
Candidate ASM Disk
openfiler:orasvr02vg-vol07-lun-0
/dev/sdj (20)
DATA_000
openfiler:orasvr02vg-vol08-lun-0
/dev/sdi (20)
DATA_001
openfiler:orasvr02vg-vol09-lun-0
/dev/sdh (20)
DATA_002
openfiler:orasvr02vg-vol10-lun-0
/dev/sdg (20)
RECO_000
openfiler:orasvr02vg-vol11-lun-0
/dev/sdf (20)
RECO_001
openfiler:orasvr02vg-vol12-lun-0
/dev/sde (20)
RECO_002
openfiler:orasvr02vg-vol14-lun-0
/dev/sdd (10)
REDO_000
I’m not going to define any udev rules to ensure ASMFD takes charge of device persistence. Previously we’ve used ASMLib’s oracleasm command to create candidate ASM Disks. When using ASMFD there’s a similar procedure to follow. We’ll get to that in a moment since the utility we need to use is contained in the Grid Infrastructure code set which we haven’t unzipped yet.
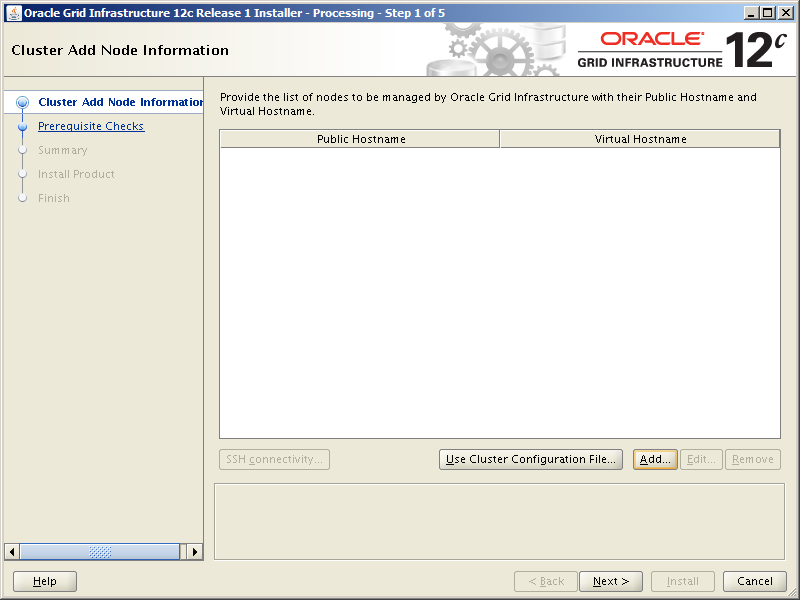
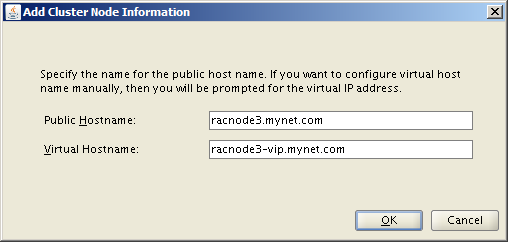
As is usual, there are a bunch of prerequisites to check before we get to install the Grid Infrastructure software. Since we’ll be performing a stand alone installation, the RAC and Clusterware prerequisites will not apply. Despite that, there are still a number of things to check. The full Oracle Grid Infrastructure Installation Checklist is here.
Just for fun, let’s check a few of the pre-installation items.
Pre-install Check #2: Oracle Linux 7.4 with UEK 4:4.1.12-124.19.2.el7uek.x86_64 or later.
[root@orasvr02 ~]# cat /etc/oracle-release
Oracle Linux Server release 7.6

[root@orasvr02 ~]# uname -a
Linux orasvr02.mynet.com 4.14.35-1902.2.0.el7uek.x86_64 #2 SMP Fri Jun 14 21:15:44 PDT 2019 x86_64 x86_64 x86_64 GNU/Linux
There is a major gotcha with this one which we’ll get to later. Stay tuned.
Pre-install Check #3: Oracle Preinstallation RPM for Oracle Linux.
[root@orasvr02 ~]# rpm -qa | grep pre
oracle-database-preinstall-19c-1.0-1.el7.x86_64
Note, when the preinstallation package is installed, a file called /etc/security/limits.d/oracle-database-preinstall-19c.conf gets created. The values in this file override settings in the standard /etc/security/limits.conf file. Also note, the package only defines values for the oracle user. Since we’ll be using the grid user to install Grid Infrastructure, you’ll need to duplicate all the oracle user entries for the grid user.
Oracle recommends the use of HugePages on Linux. For additional information on those, go here. (coming soon)
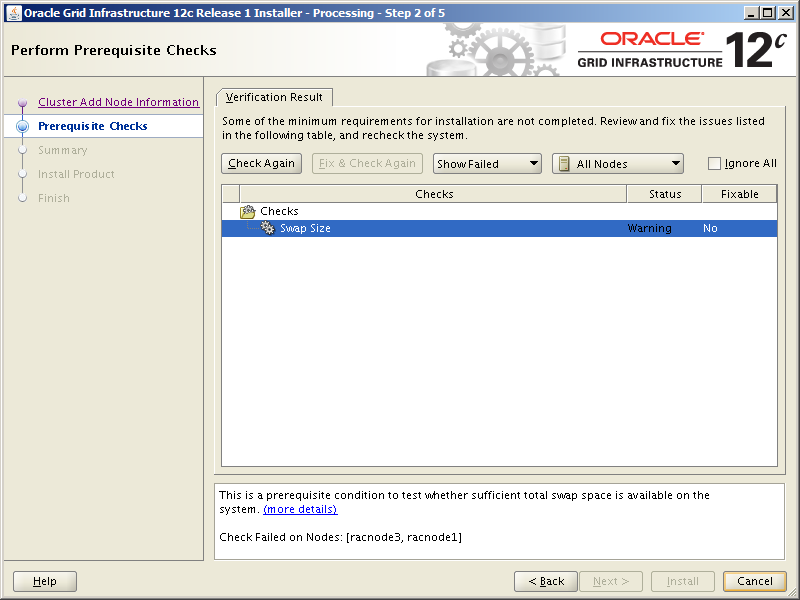
Pre-install Check #5: Swap Space allocation relative to RAM
For 16 GB of RAM, we should have 16 GB of swap space:
[root@orasvr02 ~]# swapon --show
NAME      TYPE      SIZE USED PRIO
/dev/dm-1 partition   4G   0B   -2
Since we only have 4 GB of swap, we need another 12 GB. This can be done by adding a swap file.
Pre-install Check #6: Disk I/O Scheduler.
Oracle recommends the Deadline I/O scheduler for the best
performance with ASM Disks. However, the Oracle documentation also says this:
“On some virtual environments (VM) and special devices such as fast storage devices, the output of the above command may be none. The operating system or VM bypasses the kernel I/O scheduling and submits all I/O requests directly to the device. Do not change the I/O Scheduler settings on such environments.”
In our configuration we are using VMs, but the storage is actually coming from a NAS (Openfiler). So let’s check which I/O scheduler Oracle Linux is using for the storage coming from the NAS:
[root@orasvr02 ~]# for disk in d e f g h i j
> do
> echo "Checking /dev/sd$disk: `cat /sys/block/sd$disk/queue/scheduler`"
> done

Checking /dev/sdd: noop [deadline] cfq
Checking /dev/sde: noop [deadline] cfq
Checking /dev/sdf: noop [deadline] cfq
Checking /dev/sdg: noop [deadline] cfq
Checking /dev/sdh: noop [deadline] cfq
Checking /dev/sdi: noop [deadline] cfq
Checking /dev/sdj: noop [deadline] cfq
Pre-install Check #7: Creating Users, Groups and Paths.
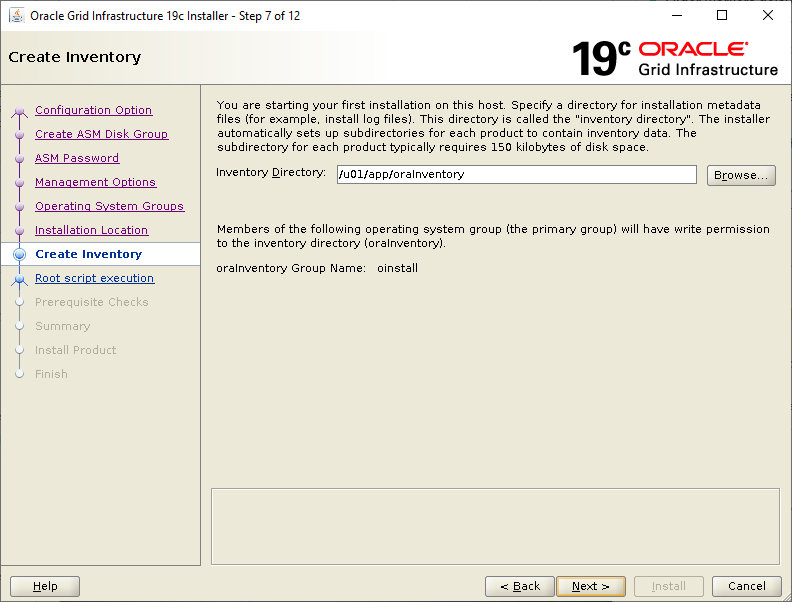
We need 3 paths for the Grid Infrastructre installation. A grid user ORACLE_BASE, an Oracle Inventory and a grid user ORACLE_HOME. Note, if this is the first Oracle software installtion on the server, then the Oracle Inventory directory must be owned by the software owner, which in our case is the grid user:
[root@orasvr02 ~]# ls -l /u01/app
drwxr-xr-x 3 grid   oinstall 4096 Nov  6 15:54 grid
drwxrwxr-x 2 grid   oinstall 4096 Nov  5 12:18 oraInventory

[root@orasvr02 ~]# ls -l /u01/app/oracle/product/19.3.0/
drwxr-xr-x 67 grid   oinstall 4096 Nov  6 15:54 grid
The Grid Infrastructure installation will attempt to create an initial ASM Diskgroup for which it will need a candidate ASM Disk. The utility used to create candidate ASM Disks is contained within the Grid Infrastructure code set, so we need to copy the downloaded Grid Infrastructure zip file to the grid user’s ORACLE_HOME directory and unzip it:
Next, login as root, set your environment then use the asmcmd command to label the disks, thus turning them into candidate ASM Disks:
[grid@orasvr02 grid]$ su -
Password:
Last login: Thu Nov  7 13:57:02 CST 2019 on pts/1

[root@orasvr02 ~]# cd /u01/app/grid
[root@orasvr02 grid]# export ORACLE_BASE=`pwd`

[root@orasvr02 grid]# cd /u01/app/oracle/product/19.3.0/grid
[root@orasvr02 grid]# export ORACLE_HOME=`pwd`

[root@orasvr02 grid]# env | grep ORA
ORACLE_BASE=/u01/app/grid
ORACLE_HOME=/u01/app/oracle/product/19.3.0/grid

[root@orasvr02 grid]# cd bin
The disk devices we’ll be using for ASM on this server are /dev/sdd through /dev/sdj (see above). I have created a single primary partition for each disk device. Let’s quickly check what the output looks like when you check the label of a disk which has not yet been labeled:
[root@orasvr02 bin]# for disk in d e f g h i j
> do
> echo "Checking ASM Label of /dev/sd$disk: `./asmcmd afd_lslbl /dev/sd$disk`"
> done

Checking ASM Label of /dev/sdd: No devices to be scanned.
Checking ASM Label of /dev/sde: No devices to be scanned.
Checking ASM Label of /dev/sdf: No devices to be scanned.
Checking ASM Label of /dev/sdg: No devices to be scanned.
Checking ASM Label of /dev/sdh: No devices to be scanned.
Checking ASM Label of /dev/sdi: No devices to be scanned.
Checking ASM Label of /dev/sdj: No devices to be scanned.
So let’s crack on and label those disks (these commands produce no output):
[root@orasvr02 bin]# for disk in d e f g h i j
> do
> echo "Checking ASM Label of /dev/sd$disk: `./asmcmd afd_lslbl /dev/sd$disk`"
> done

Checking ASM Label of /dev/sdd: ------------------------------------------------
Label                     Duplicate  Path
================================================================================
REDO_0000                             /dev/sdd
Checking ASM Label of /dev/sde: ------------------------------------------------
Label                     Duplicate  Path
================================================================================
RECO_0002                             /dev/sde
Checking ASM Label of /dev/sdf: ------------------------------------------------
Label                     Duplicate  Path
================================================================================
RECO_0001                             /dev/sdf
Checking ASM Label of /dev/sdg: ------------------------------------------------
Label                     Duplicate  Path
================================================================================
RECO_0000                             /dev/sdg
Checking ASM Label of /dev/sdh: ------------------------------------------------
Label                     Duplicate  Path
================================================================================
DATA_0002                             /dev/sdh
Checking ASM Label of /dev/sdi: ------------------------------------------------
Label                     Duplicate  Path
================================================================================
DATA_0001                             /dev/sdi
Checking ASM Label of /dev/sdj: ------------------------------------------------
Label                     Duplicate  Path
================================================================================
DATA_0000                             /dev/sdj
In addition, labeling the disks creates files in /dev/oracleafd/disks:
[root@orasvr02 ~]# ls -l /dev/oracleafd/disks
-rw-rw-r-- 1 grid oinstall 32 Nov  8 11:43 DATA_0000
-rw-rw-r-- 1 grid oinstall 32 Nov  8 11:43 DATA_0001
-rw-rw-r-- 1 grid oinstall 32 Nov  8 11:44 DATA_0002
-rw-rw-r-- 1 grid oinstall 32 Nov  8 11:44 RECO_0000
-rw-rw-r-- 1 grid oinstall 32 Nov  8 11:44 RECO_0001
-rw-rw-r-- 1 grid oinstall 32 Nov  8 11:44 RECO_0002
-rw-rw-r-- 1 grid oinstall 32 Nov  8 11:44 REDO_0000
Install Grid Infrastructure 19c Release 3.
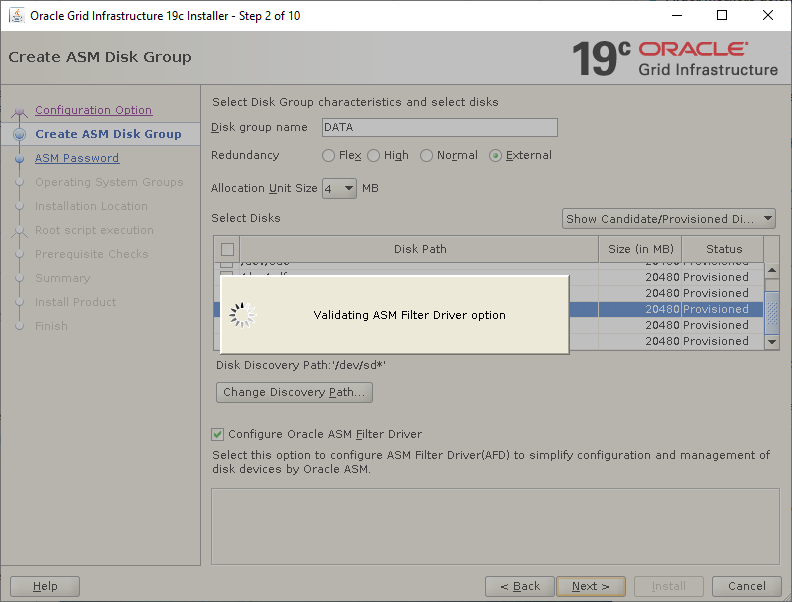
Now we’re ready to run the installation, but before we do be aware of a significant limitation of Oracle’s UEK. I believe that Oracle Linux 7.6 UEK and above does not (yet) support ASMFD. I ran into this issue and kept getting these errors when attempting to navigate past Step #2 of the installation (i.e. the ASM Diskgroup creation and ASMFD configuration):
INS-41223: ASM Filter Driver is not supported on this platform.AFD-620: AFD is not supported on this operating system version: '4.14.35-1902.2.0.el7uek.x86_64'
So Oracle’s stuff doesn’t work on Oracle’s stuff. Lovely. To get around this, I booted to a different kernel. To change the default boot kernel, go here. Once you’re running a supported kernel, check to see Oracle agrees using a couple of utilities:
[root@orasvr02 ~]# cd /u01/app/grid
[root@orasvr02 grid]# export ORACLE_BASE=pwd

[root@orasvr02 grid]# cd ../oracle/product/19.3.0/grid
[root@orasvr02 grid]# export ORACLE_HOME=pwd

[root@orasvr02 grid]# cd bin

[root@orasvr02 bin]# ./afdroot version_check
AFD-616: Valid AFD distribution media detected at: '/u01/app/oracle/product/19.3.0/grid/usm/install/Oracle/EL7/x86_64/3.10.0-862/3.10.0-862-x86_64/bin'

[root@orasvr02 bin]# ./afddriverstate -orahome /u01/app/oracle/product/19.3.0/grid version
AFD-9325:     Driver OS kernel version = 3.10.0-862.el7.x86_64.
AFD-9326:     Driver build number = 190222.
AFD-9212:     Driver build version = 19.0.0.0.0.
AFD-9547:     Driver available build number = 190222.
AFD-9548:     Driver available build version = 19.0.0.0.0.

[root@orasvr02 bin]# ./afddriverstate -orahome /u01/app/oracle/product/19.3.0/grid supported
AFD-9200: Supported
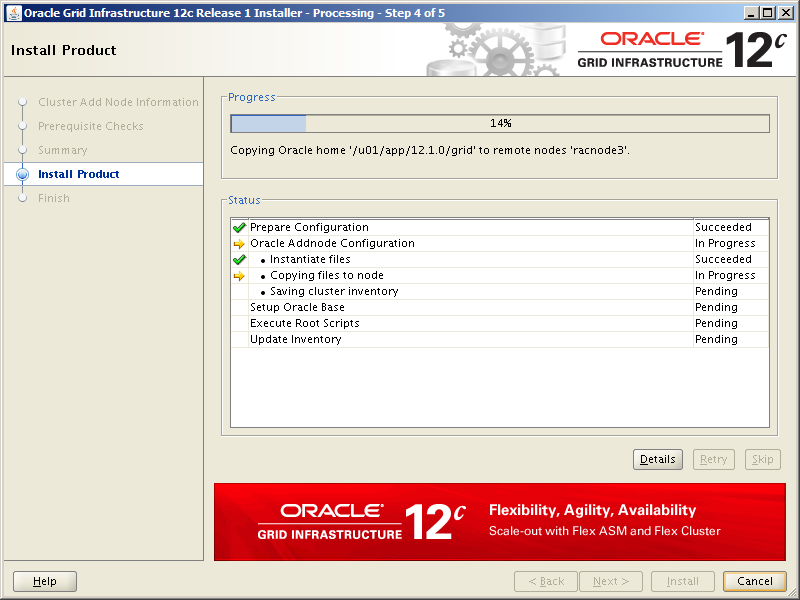
Assuming you’re running a kernel which plays nicely with ASMFD, let’s start the installtion.Login as the grid user, set your environment then run the installer script, gridSetup.sh:
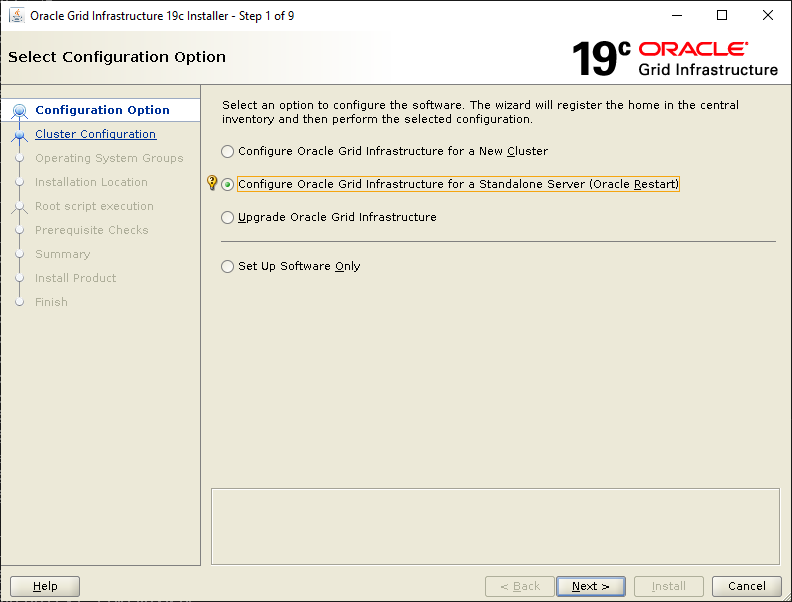
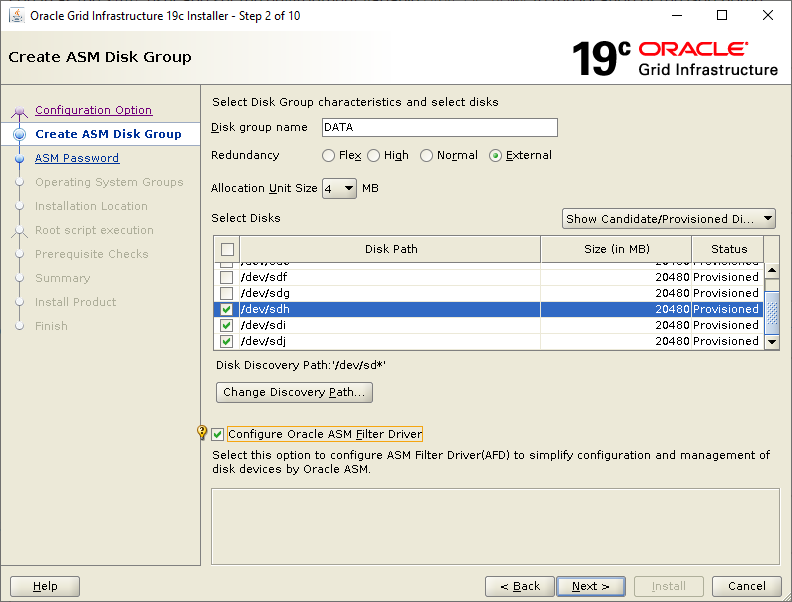
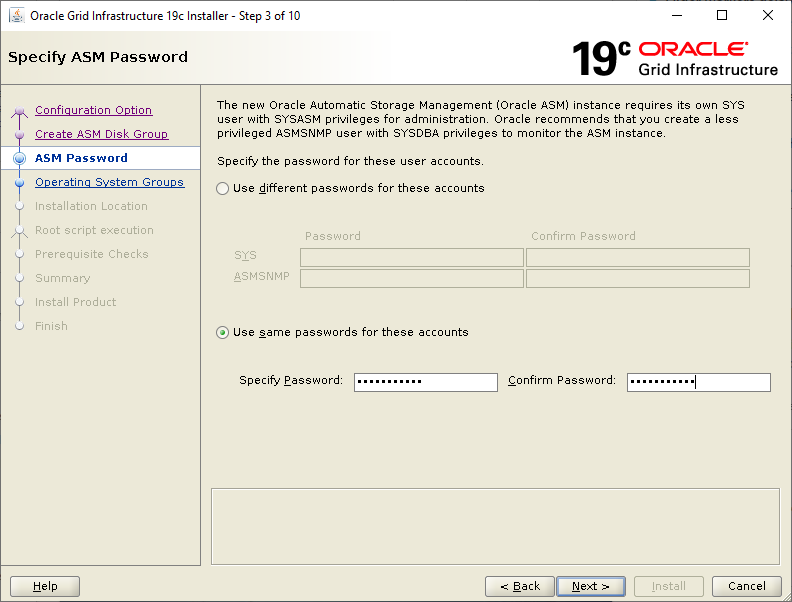
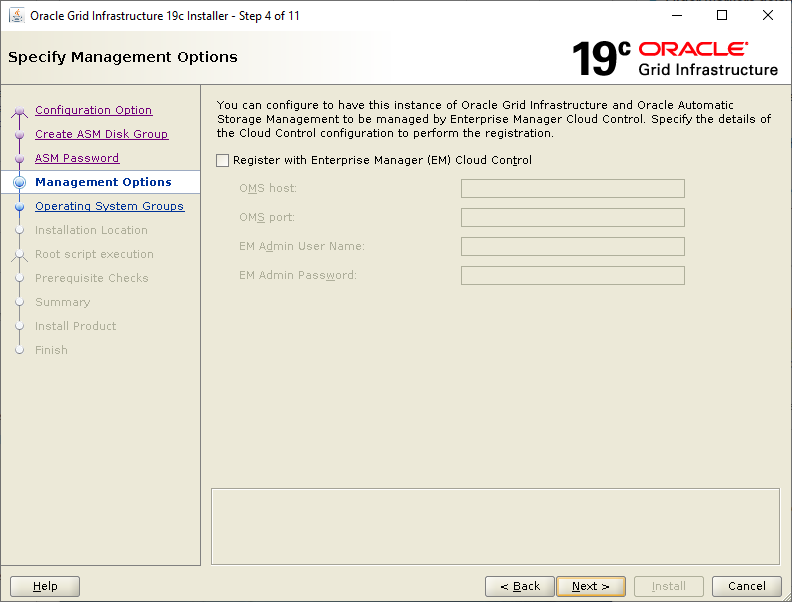
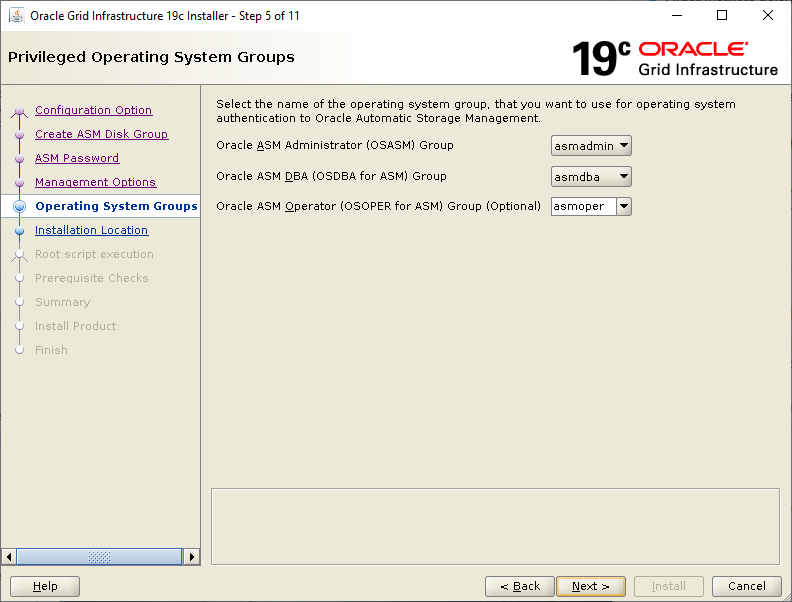
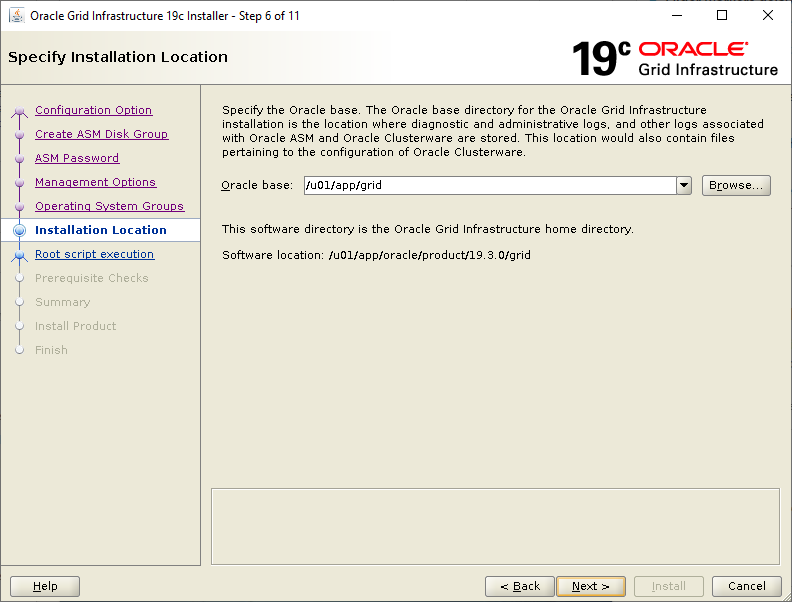
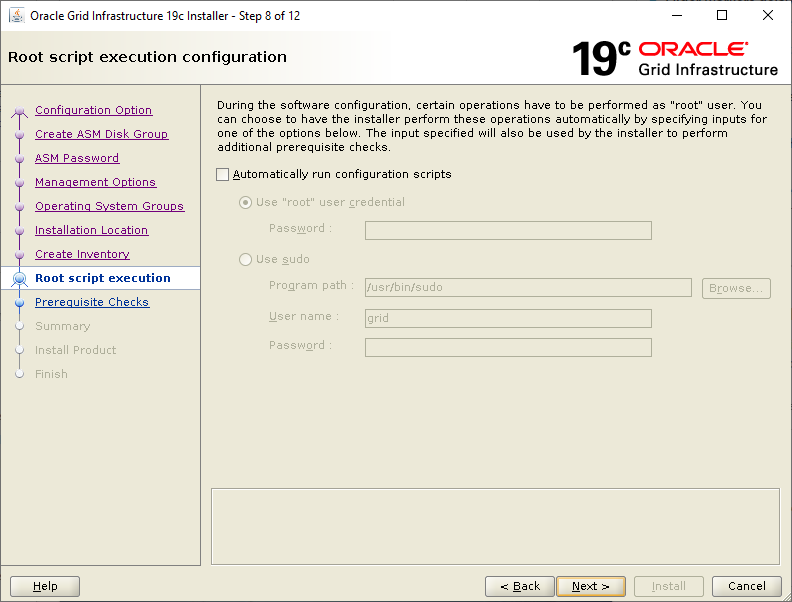
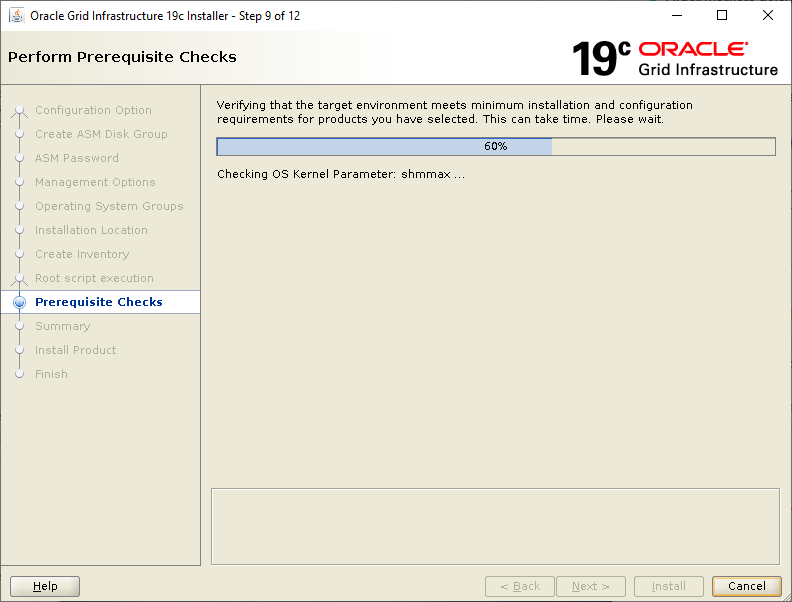
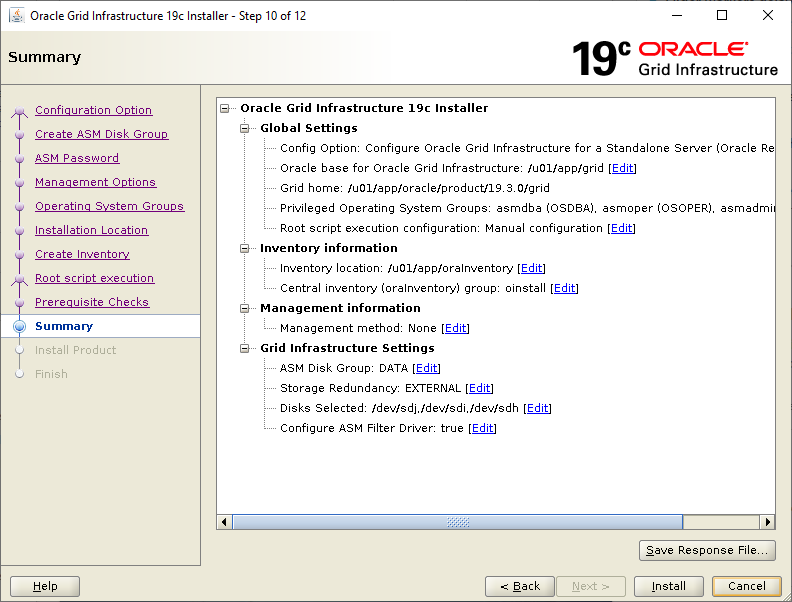
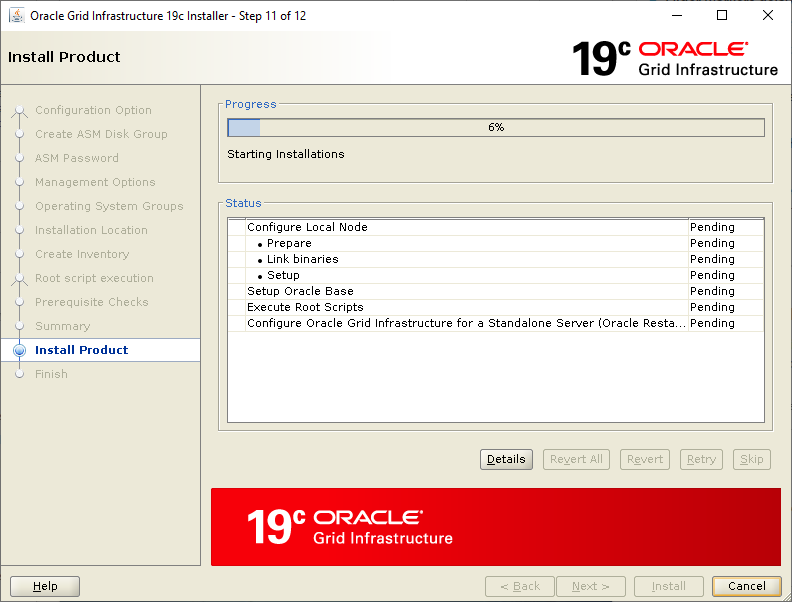
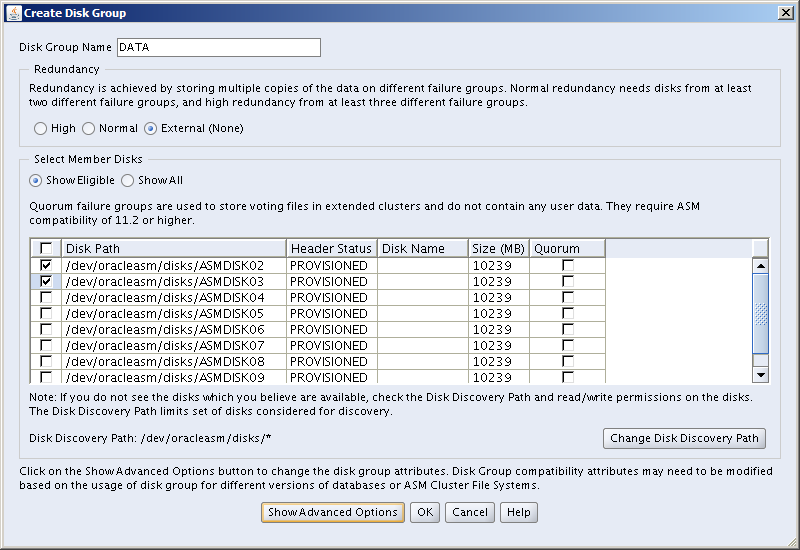
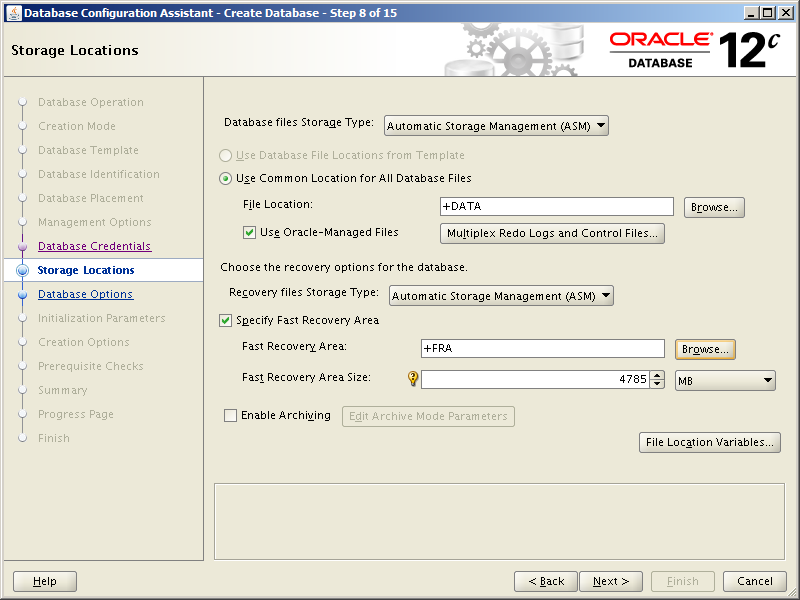
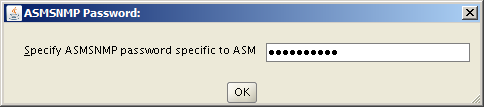
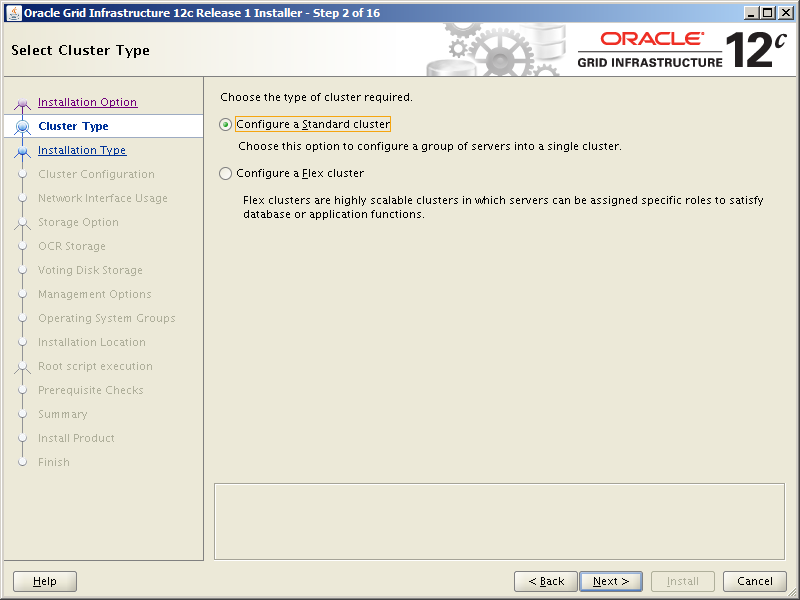
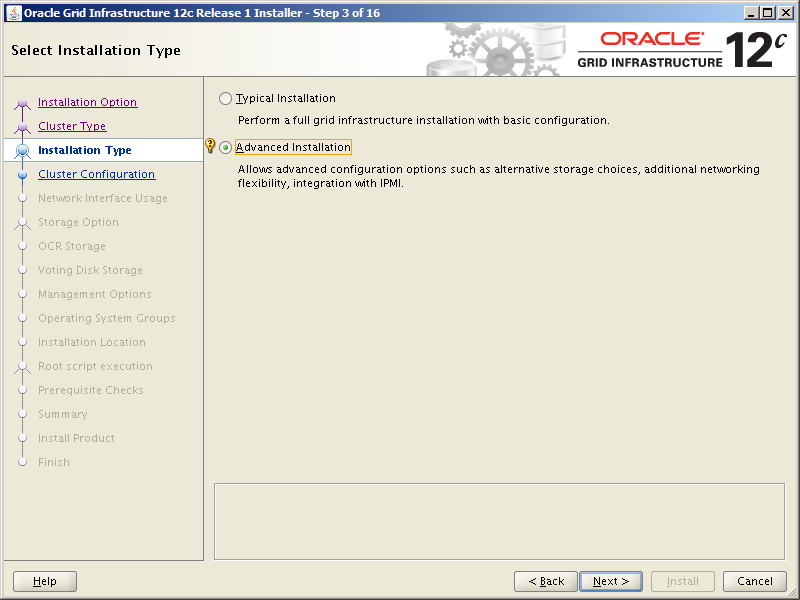
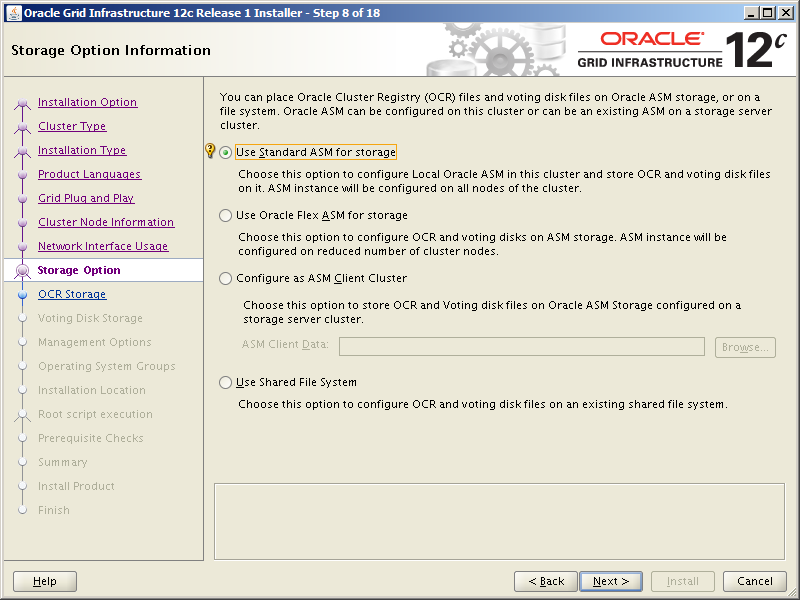
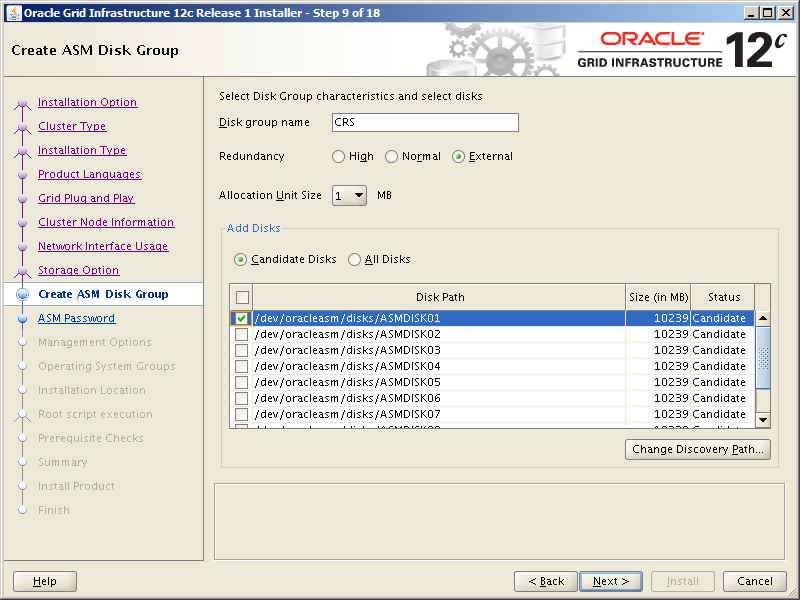
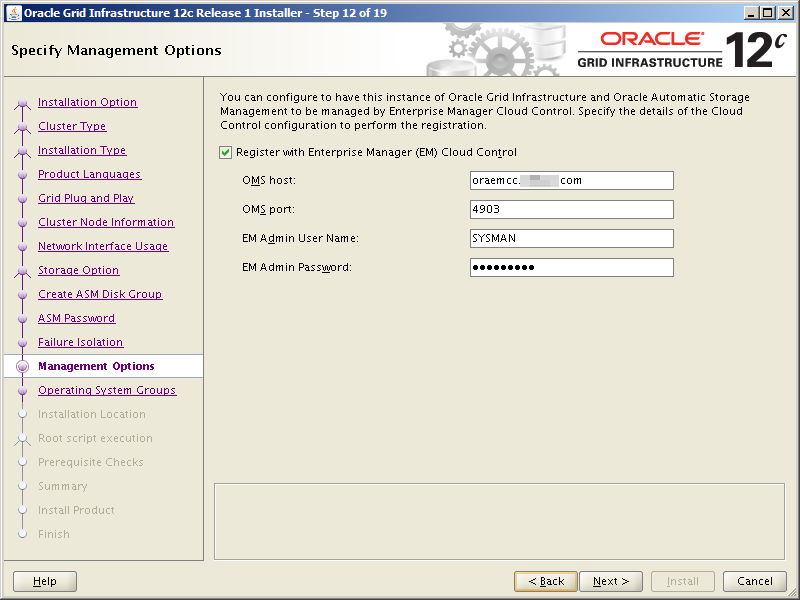
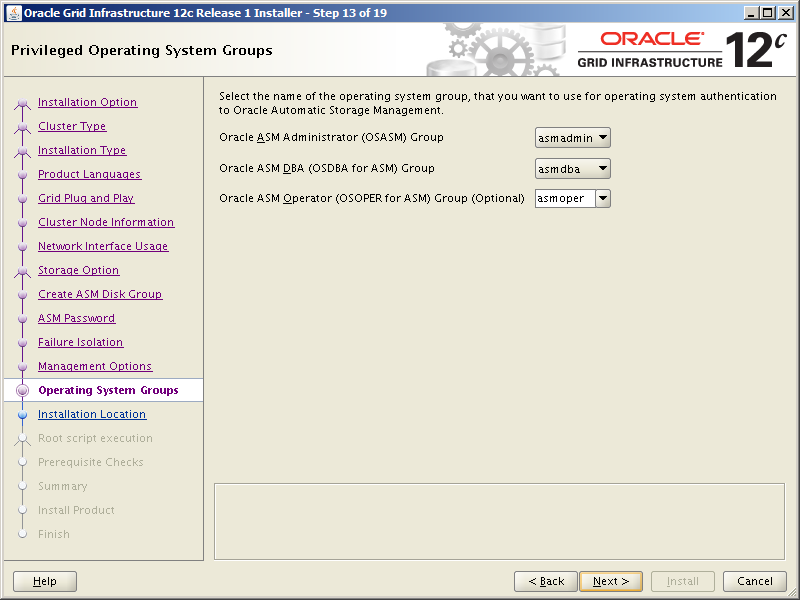
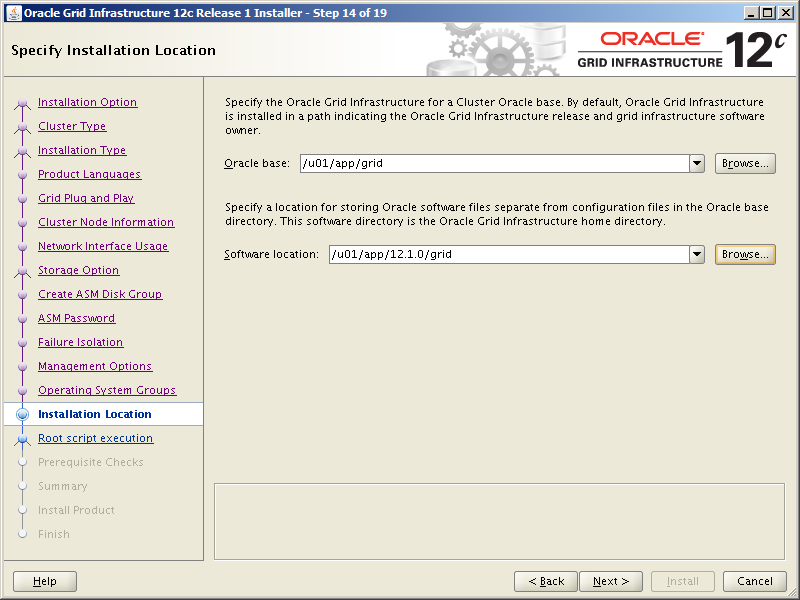
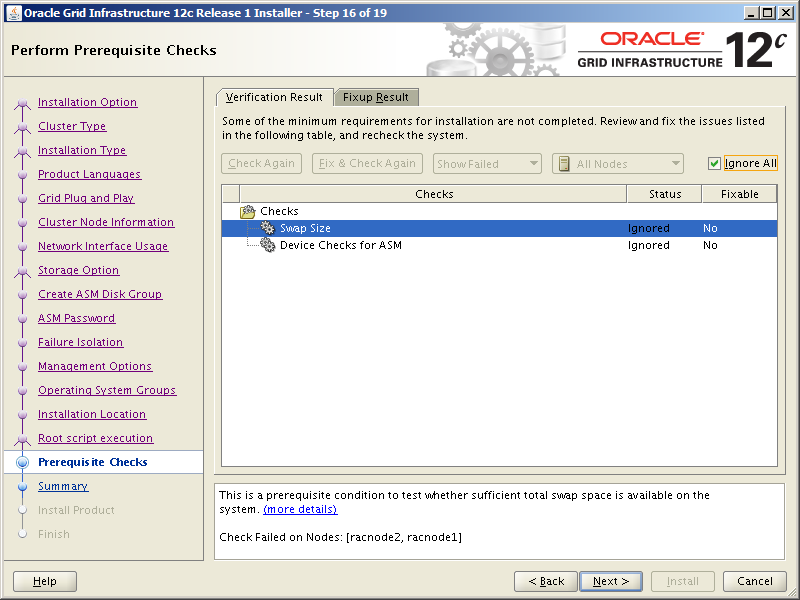
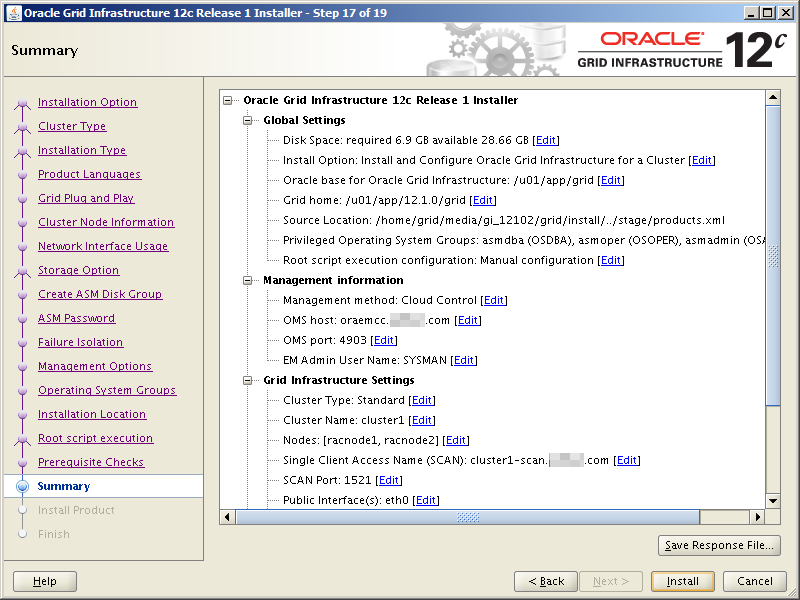
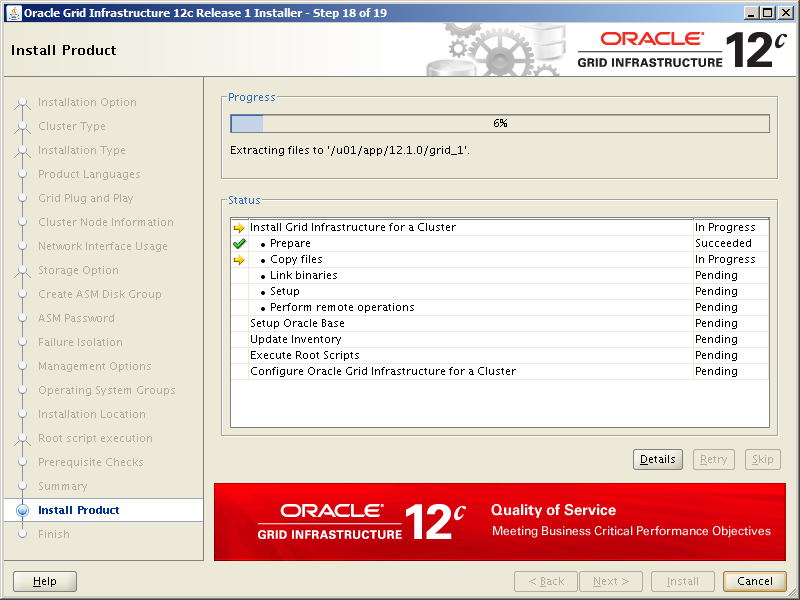
Select the Standalone Server (Oracle Restart) option then click NextClick External Redundancy, 3 disks for the DATA ASM Diskgroup & checkbox to configure ASM Filter Driver , then NextYou might be looking at this screen for a while – if your kernel is incompatible with ASMFD this is where you find out!Enter a password for the ASM SYS and ASMSNMP accounts then click NextComplete this screen if you already have Cloud Control setup otherwise just click NextIf you’ve setup your OS groups correctly then click NextThis screen picks up the values for ORACLE_BASE & ORACLE_HOME from your OS environment – Click NextClick NextWe will run the root scripts in a separate session – Click NextThe installer runs its pre-req checks and if all is well takes you to the next screenCheck the options and if all looks good click InstallSit back and wait for the root scripts
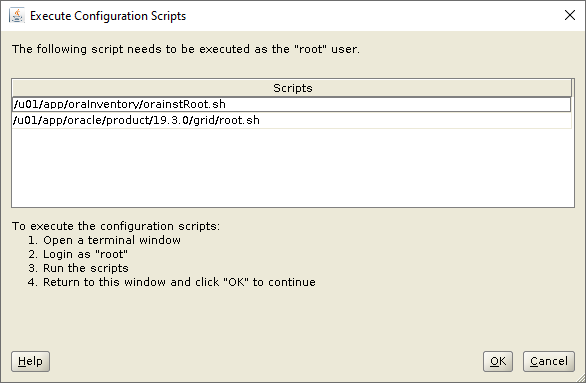
Run the root scripts in a separate terminal session
[root@orasvr02 ~]# /u01/app/oraInventory/orainstRoot.sh
Changing permissions of /u01/app/oraInventory.
Adding read,write permissions for group.

Removing read,write,execute permissions for world.

Changing groupname of /u01/app/oraInventory to oinstall.
The execution of the script is complete.

[root@orasvr02 ~]# /u01/app/oracle/product/19.3.0/grid/root.sh
Performing root user operation.

The following environment variables are set as:
    ORACLE_OWNER= grid
    ORACLE_HOME=  /u01/app/oracle/product/19.3.0/grid

Enter the full pathname of the local bin directory: [/usr/local/bin]:
    Copying dbhome to /usr/local/bin …
    Copying oraenv to /usr/local/bin …
    Copying coraenv to /usr/local/bin …

Creating /etc/oratab file…
Entries will be added to the /etc/oratab file as needed by
Database Configuration Assistant when a database is created
Finished running generic part of root script.
Now product-specific root actions will be performed.
Using configuration parameter file: /u01/app/oracle/product/19.3.0/grid/crs/install/crsconfig_params
The log of current session can be found at:
   /u01/app/grid/crsdata/orasvr02/crsconfig/roothas_2019-11-08_12-05-49AM.log
LOCAL ADD MODE
Creating OCR keys for user 'grid', privgrp 'oinstall'..
Operation successful.
LOCAL ONLY MODE
Successfully accumulated necessary OCR keys.
Creating OCR keys for user 'root', privgrp 'root'..
Operation successful.
CRS-4664: Node orasvr02 successfully pinned.
2019/11/08 12:11:54 CLSRSC-330: Adding Clusterware entries to file 'oracle-ohasd.service'

orasvr02 2019/11/08 12:20:56  /u01/app/grid/crsdata/orasvr02/olr/backup_20191108_122056.olr 724960844
2019/11/08 12:22:55 CLSRSC-327: Successfully configured Oracle Restart for a standalone server
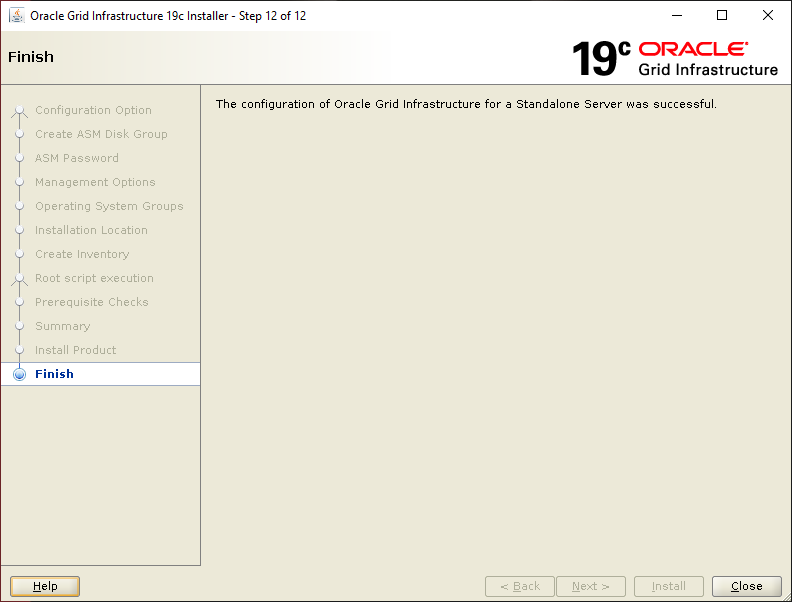
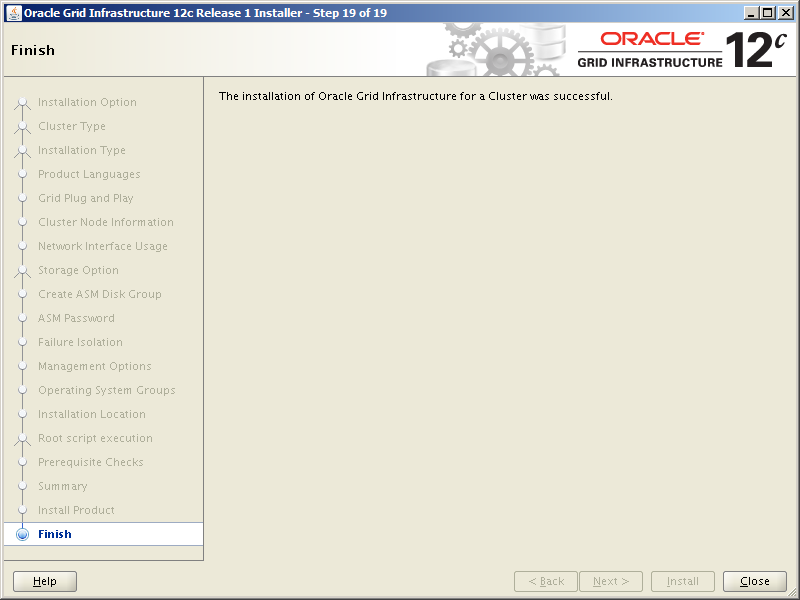
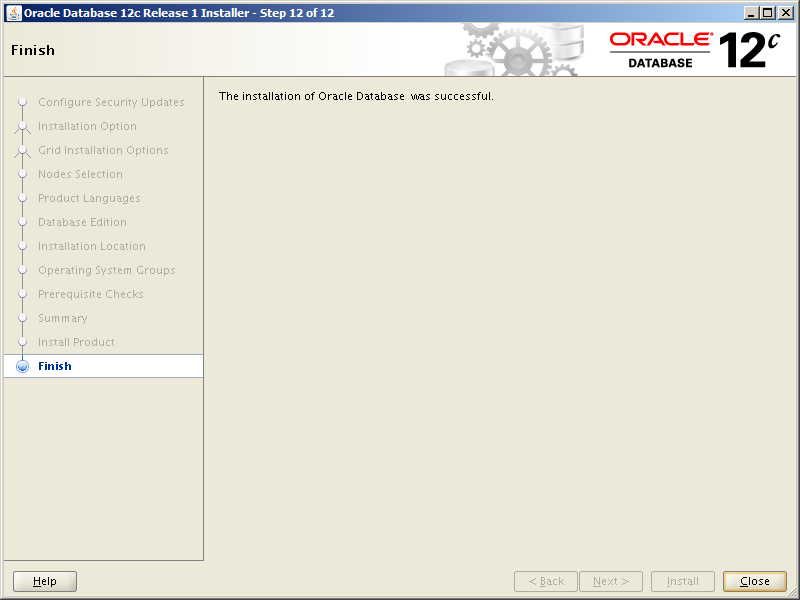
Clicking OK in the run root scripts window continues the installation and configuration stepsIf all went well you see this screen – click Close
There are some post installation tasks that you might want to pay attention to. Those are documented here. Before finishing up with the ASM Diskgroup configuration, let’s check the status of the ASM Filter Driver now that the installation has completed (this command took ages to return output on my system – YMMV):
[root@orasvr02 ~]# cd /u01/app/oracle/product/19.3.0/grid/bin
[root@orasvr02 bin]# ./asmcmd afd_state
ASMCMD-9526: The AFD state is 'LOADED' and filtering is 'ENABLED' on host 'orasvr02.mynet.com'
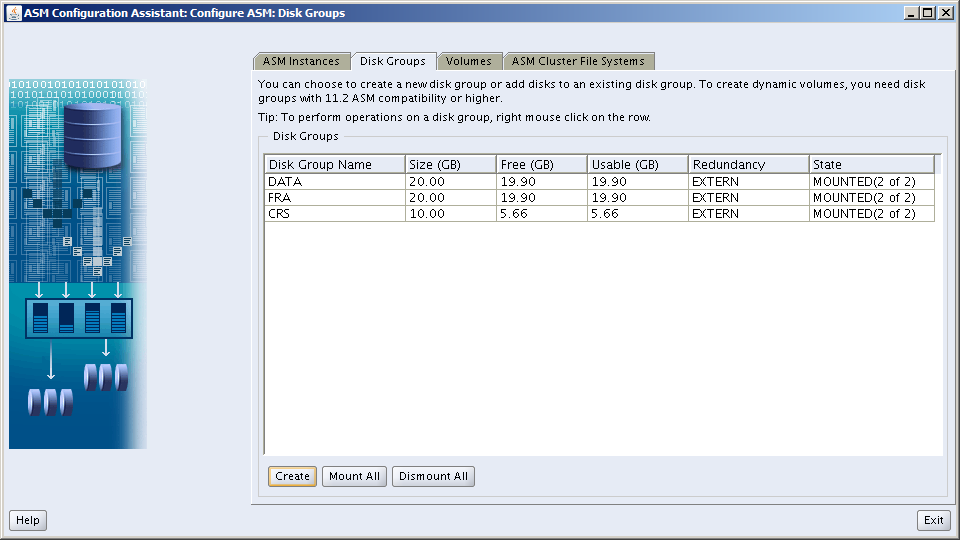
Finally, create the remaining ASM Diskgroups in preparation for creating databases. First, check what the ASM Diskgroup configuration looks like so far:
[grid@orasvr02 ~]$ sqlplus / as sysasm

SQL> select dg.name "Diskgroup Name", d.name "Disk Name", d.label "Disk Label", d.path "Disk Path"
     from v$asm_diskgroup dg, v$asm_disk d
     where dg.group_number(+) = d.group_number
     order by dg.name, d.name
     /

Diskgroup Name  Disk Name       Disk Label      Disk Path
--------------- --------------- --------------- ---------------
DATA            DATA_0000       DATA_0000       AFD:DATA_0000
DATA            DATA_0001       DATA_0001       AFD:DATA_0001
DATA            DATA_0002       DATA_0002       AFD:DATA_0002
                                REDO_0000       AFD:REDO_0000
                                RECO_0001       AFD:RECO_0001
                                RECO_0000       AFD:RECO_0000
                                RECO_0002       AFD:RECO_0002
 7 rows selected.

SQL> save dg_query
Created file dg_query.sql
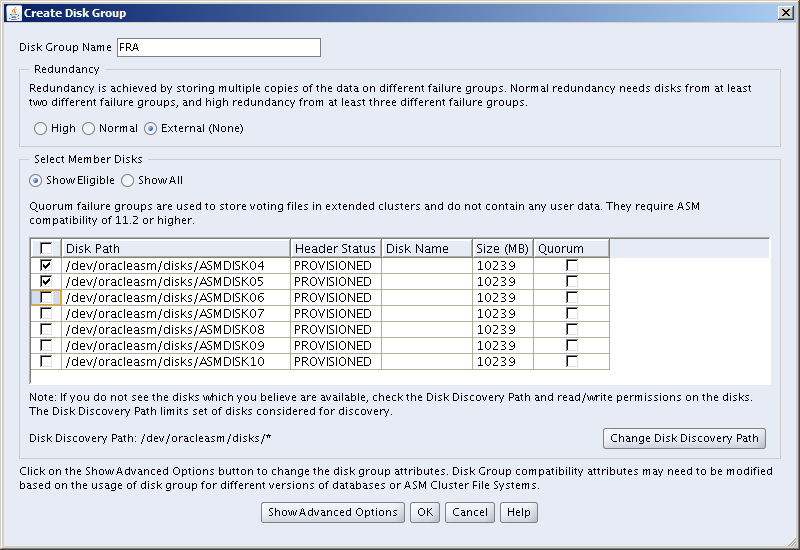
Create the RECO and REDO ASM Diskgroups, then re-check the configuration:
SQL> create diskgroup reco
     external redundancy
     disk 'AFD:RECO_0000', 'AFD:RECO_0001', 'AFD:RECO_0002';

Diskgroup created.

SQL> create diskgroup redo
     external redundancy
     disk 'AFD:REDO_0000';

Diskgroup created.

SQL> @dg_query

Diskgroup Name  Disk Name       Disk Label      Disk Path
--------------- --------------- --------------- ---------------
DATA            DATA_0000       DATA_0000       AFD:DATA_0000
DATA            DATA_0001       DATA_0001       AFD:DATA_0001
DATA            DATA_0002       DATA_0002       AFD:DATA_0002
RECO            RECO_0000       RECO_0000       AFD:RECO_0000
RECO            RECO_0001       RECO_0001       AFD:RECO_0001
RECO            RECO_0002       RECO_0002       AFD:RECO_0002
REDO            REDO_0000       REDO_0000       AFD:REDO_0000

7 rows selected.
That’s it! We’re now ready to copy the Oracle Database code sets to /u01, install them and build databases using the ASM Diskgroups DATA, REDO and RECO on orasvr02.
Note, if you install Oracle Database 11g Release 11.2.0.4 on Oracle Linux 7, check this first!
In the good old days, you could just login to the repository database and use an ALTER USER SQL command to change the password of the SYSMAN user. In an object lesson of how to make things more complicated, here’s how you have to change the SYSMAN password now. There are two slightly different methods described below. One worked for OEM 12c R5 (you know the current SYSMAN password) and the other worked for OEM 13c R2 (you do not know the current SYSMAN password). These steps and others are described in more detail in MOS Doc ID 1365930.1:
OEM 12c R5 Method (you know the current SYSMAN password):
Locate the OMS_HOME directory:
[oracle@oraemcc ~]$ cd /u01/app/oracle/product/middleware/oms/bin
Shutdown the middle tier:
[oracle@oraemcc bin]$ ./emctl stop oms
Oracle Enterprise Manager Cloud Control 12c Release 5
Copyright (c) 1996, 2015 Oracle Corporation.  All rights reserved.
Stopping WebTier...
WebTier Successfully Stopped
Stopping Oracle Management Server...
Oracle Management Server Successfully Stopped
Oracle Management Server is Down
Change the password:
[oracle@oraemcc bin]$ ./emctl config oms -change_repos_pwd
Oracle Enterprise Manager Cloud Control 12c Release 5
Copyright (c) 1996, 2015 Oracle Corporation.  All rights reserved.
Enter Repository User's Current Password : <enter-old-SYSMAN-password>
Enter Repository User's New Password : <enter-new-SYSMAN-password>

Changing passwords in backend ...
Passwords changed in backend successfully.
Updating repository password in Credential Store...
Successfully updated Repository password in Credential Store.
Restart all the OMSs using 'emctl stop oms -all' and 'emctl start oms'.
Successfully changed repository password.
Stop the admin server process:
[oracle@oraemcc bin]$ ./emctl stop oms -all
Oracle Enterprise Manager Cloud Control 12c Release 5
Copyright (c) 1996, 2015 Oracle Corporation.  All rights reserved.
Stopping WebTier...
WebTier Successfully Stopped
Stopping Oracle Management Server...
Oracle Management Server Already Stopped
AdminServer Successfully Stopped
Oracle Management Server is Down
Restart the middle tier:
[oracle@oraemcc bin]$ ./emctl start oms
Oracle Enterprise Manager Cloud Control 12c Release 5
Copyright (c) 1996, 2015 Oracle Corporation.  All rights reserved.
Starting Oracle Management Server...

Starting WebTier...
WebTier Successfully Started
Oracle Management Server Successfully Started
Oracle Management Server is Up
OEM 13c R2 (you do NOT know the current SYSMAN password):
Stop the OMS:
[oracle@oraemcc bin]$ pwd
/u01/app/oracle/product/middleware/bin

[oracle@oraemcc bin]$ ./emctl stop oms -all -force
Oracle Enterprise Manager Cloud Control 13c Release 2
Copyright (c) 1996, 2016 Oracle Corporation.  All rights reserved.
Stopping Oracle Management Server…
WebTier Successfully Stopped
Oracle Management Server Successfully Stopped
Oracle Management Server is Down
JVMD Engine is Down
BI Publisher is disabled, to enable BI Publisher on this host, use the 'emctl config oms -enable_bip' command
Stopping BI Publisher Server…
BI Publisher Server Already Stopped
BI Publisher is disabled, to enable BI Publisher on this host, use the 'emctl config oms -enable_bip' command
AdminServer Successfully Stopped
BI Publisher Server is Down
BI Publisher is disabled, to enable BI Publisher on this host, use the 'emctl config oms -enable_bip' command
Stop the local Management Agent (just in case):
[oracle@oraemcc bin]$ /u01/app/oracle/product/agent/agent_13.2.0.0.0/bin/emctl stop agent
Oracle Enterprise Manager Cloud Control 13c Release 2
Copyright (c) 1996, 2016 Oracle Corporation.  All rights reserved.
Stopping agent … stopped.
Ensure you can log into the SYSMAN_OPSS repository database account. Change the password using SQL*Plus if necessary:
SQL> connect sysman_opss/<your-SYSMAN_OPSS-pwd>@EMPDBREPOS
Connected.

SQL> show user
USER is "SYSMAN_OPSS"
Update the SYSMAN_OPSS password:
[oracle@oraemcc bin]$ ./emctl config oms -update_ds_pwd -ds_name sysman-opss-ds -ds_pwd <your-SYSMAN_OPSS-pwd>
Oracle Enterprise Manager Cloud Control 13c Release 2
Copyright (c) 1996, 2016 Oracle Corporation.  All rights reserved.
Successfully updated the datasource
Start the AdminServer and change the SYSMAN password:
[oracle@oraemcc bin]$ ./emctl start oms -admin_only
Oracle Enterprise Manager Cloud Control 13c Release 2
Copyright (c) 1996, 2016 Oracle Corporation.  All rights reserved.
Starting Admin Server only…
Admin Server Successfully Started

[oracle@oraemcc bin]$ ./emctl config oms -change_repos_pwd -use_sys_pwd
Oracle Enterprise Manager Cloud Control 13c Release 2
Copyright (c) 1996, 2016 Oracle Corporation.  All rights reserved.
Enter SYS Password : <your-repository-database-SYS-pwd>
Enter Repository User's New Password : <your-new-SYSMAN-pwd>
Changing passwords in backend …
Passwords changed in backend successfully.
Updating repository password in Credential Store…
Successfully updated Repository password in Credential Store.
Restart all the OMSs using 'emctl stop oms -all' and 'emctl start oms'.
Successfully changed repository password.
Re-start the OMS and local Management Agent:
[oracle@oraemcc bin]$ ./emctl start oms
Oracle Enterprise Manager Cloud Control 13c Release 2
Copyright (c) 1996, 2016 Oracle Corporation.  All rights reserved.
Starting Oracle Management Server…
WebTier Successfully Started
Oracle Management Server Successfully Started
Oracle Management Server is Up
JVMD Engine is Up

[oracle@oraemcc bin]$ ./emctl status oms
Oracle Enterprise Manager Cloud Control 13c Release 2
Copyright (c) 1996, 2016 Oracle Corporation.  All rights reserved.
WebTier is Up
Oracle Management Server is Up
JVMD Engine is Up
BI Publisher Server is Down
BI Publisher is disabled, to enable BI Publisher on this host, use the 'emctl config oms -enable_bip' command

[oracle@oraemcc bin]$ /u01/app/oracle/product/agent/agent_13.2.0.0.0/bin/emctl /emctl start agent
Oracle Enterprise Manager Cloud Control 13c Release 2
Copyright (c) 1996, 2016 Oracle Corporation.  All rights reserved.
Starting agent ………………………… started.
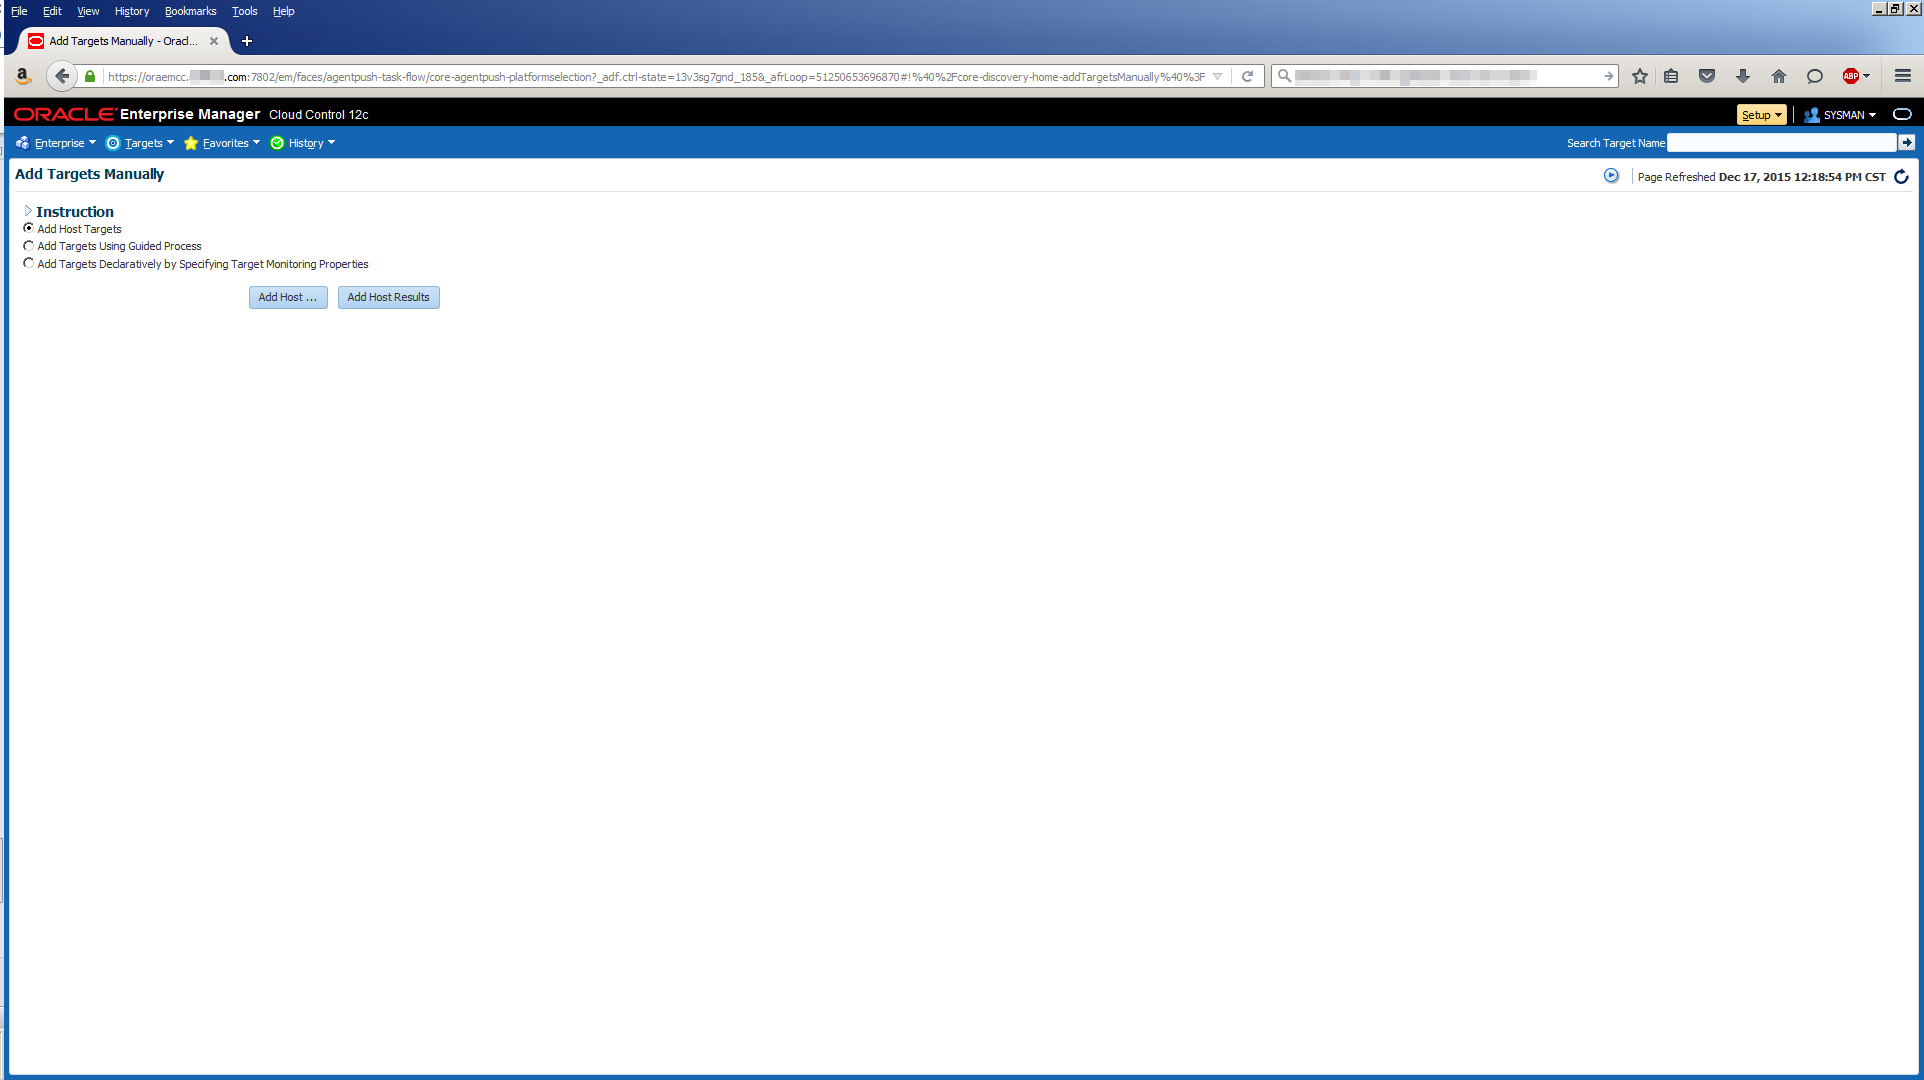
Manually Remove Targets from the Repository.
From time to time you’ll need to remove targets and the Cloud Control GUI will complain, throw an error and invite you to contact Oracle Support. Like you, I have no time for that and fortunately there is a CLI method to achieve the desired outcome. Here’s a summary of the sub-programs within the MGMT_ADMIN package owned by SYSMAN (some are overloaded):
PROCEDURE ADD_TARGET_ADDITION_CALLBACK
PROCEDURE ADD_TARGET_DELETION_CALLBACK
PROCEDURE ADD_TARGET_DELETION_EXCEPTIONS
PROCEDURE CLEANUP_AGENT
PROCEDURE CLEAR_SITE_URL
PROCEDURE DELETE_OMS
PROCEDURE DELETE_TARGET
PROCEDURE DELETE_TARGET_ASYNC
PROCEDURE DELETE_TARGET_INTERNAL
PROCEDURE DELETE_TARGET_METRICS_1DAY
PROCEDURE DELETE_TARGET_METRICS_1HOUR
PROCEDURE DELETE_TARGET_METRICS_RAW
PROCEDURE DELETE_TARGET_SYNC
PROCEDURE DELETE_TARGET_WITH_MEMBERS
PROCEDURE DEL_TARGET_ADDITION_CALLBACK
PROCEDURE DEL_TARGET_DELETION_CALLBACK
PROCEDURE DEL_TARGET_DELETION_EXCEPTIONS
PROCEDURE DEREGISTER_TGT_DEL_MATCH
PROCEDURE DISABLE_METRIC_DELETION
PROCEDURE ENABLE_METRIC_DELETION
FUNCTION GET_MS_NAME RETURNS VARCHAR2
FUNCTION GET_OMS_DATA RETURNS REF CURSOR
FUNCTION GET_OMS_STATUS RETURNS NUMBER
FUNCTION GET_OMS_URLS RETURNS REF CURSOR
FUNCTION GET_SITE_URL RETURNS VARCHAR2
FUNCTION IS_METRIC_DELETION_ENABLED RETURNS NUMBER(38)
PROCEDURE REGISTER_TGT_DEL_MATCH
PROCEDURE SET_INACTIVE_TIME
PROCEDURE SET_LOG_LEVEL
PROCEDURE SET_LOG_PURGE
PROCEDURE SET_SITE_URL
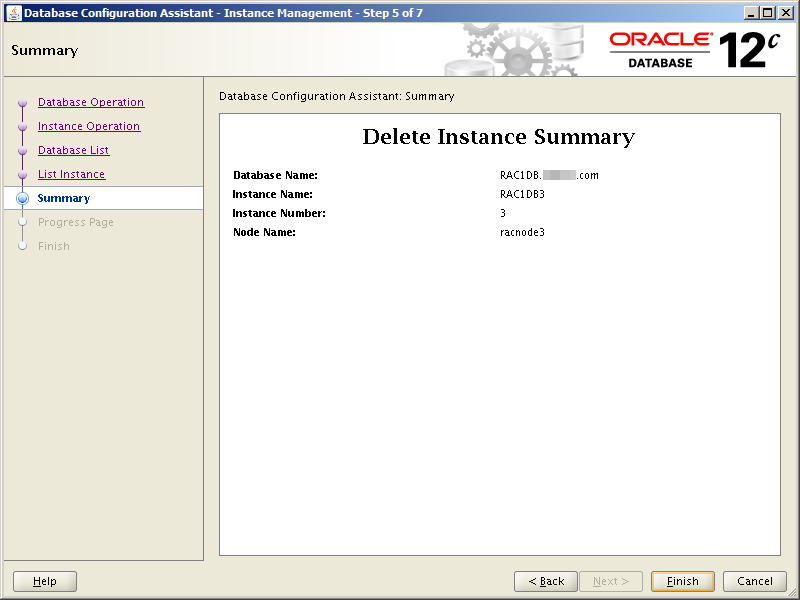
In SQL*Plus, query the official name and type of the target you want to delete:
select target_name,
target_type from mgmt_targetswhere target_name like 'orasvr02%';
TARGET_NAME TARGET_TYPE
------------------------------ --------------------
orasvr02.mynet.com host
orasvr02.mynet.com:3872 oracle_emd
Some notes about various 11g-isms which will hopefully keep you out of trouble.
Installing Oracle Database 11g Release 11.2.0.4 on Oracle Linux 7.
You’d think installing 11.2.0.4, which we’ve all done a thousand times, would be a stroll in the park, right? Wrong! On Oracle Linux 7 you will run into some gotchas. Fortunately, the following will speed you on your way to a successful installation.
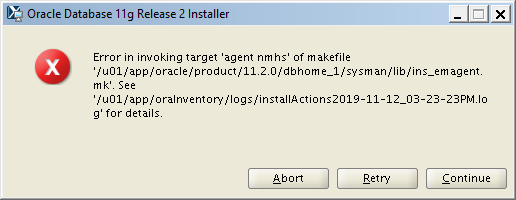
The installer pre-req checks fail for a number of missing packages:
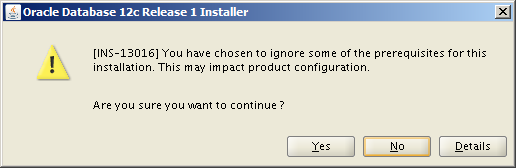
This still leaves one package which fails the pre-req check, pdksh-5.2.14. This is caused by bug #19947777, but can safely be ignored. So either click the Ignore All checkbox and let the installer continue or run the installer again using this command (assuming you have fixed the other pre-req check failures):
Starting with Oracle Database 18c, Oracle have made a few changes. The biggest one perhaps is the intention to make quarterly releases each year from now on. Hence, Oracle Database 18c Release 1 in Q1 of 2018 (18.1), Release 2 in Q2 (18.2) and so on. Not all of these releases will be or are available for download for on premise installation. At the time of writing, 18.3 is only available for download for 4 different platforms and 18.4 is only available for a further 3 platforms. We’ll be using 18.3 for Linux x86-64 for a series of Oracle Database 18c articles. Enjoy!
Also starting with Oracle Database 18c, Oracle have changed the way the database software is installed. Previously, you’d grab the zip file(s) from OTN or wherever, copy them to some staging area on your target server, unzip them then run the installer to actually install the code set into your OFA designated path (if you were doing things properly that is). That’s now changed.
Nowadays, you still grab the zip file(s) from Oracle, but now you have to copy them directly to your pre-created OFA designated path, unzip them and run the installer to install the code set in that directory. In other words, the installer will not create an OFA path for you like it has previously. I’m sure this will lead to many installations being in the wrong place, so let’s start off my running a deinstall so you can get it right the second time.
Given it’s 18.3, following OFA rules the path should be /u01/app/oracle/product/18.3.0/dbhome_1. So let’s uninstall it. These steps assume you haven’t created a database already. If you have, the deinstall process will detect it (and any associated Listener) and remove those too:
[oracle@orasvr01 dbhome_1]$ cd deinstall
[oracle@orasvr01 deinstall]$ pwd
/u01/app/oracle/product/18.0.0/dbhome_1/deinstall

[oracle@orasvr01 deinstall]$ ./deinstall
Checking for required files and bootstrapping …
Please wait …
Location of logs /u01/app/oraInventory/logs/
############ ORACLE DECONFIG TOOL START ############

################### DECONFIG CHECK OPERATION START ###################
## [START] Install check configuration ##

Checking for existence of the Oracle home location /u01/app/oracle/produc/18.0.0/dbhome_1
Oracle Home type selected for deinstall is: Oracle Single Instance Database
Oracle Base selected for deinstall is: /u01/app/oracle
Checking for existence of central inventory location /u01/app/oraInventory

## [END] Install check configuration

Network Configuration check config START

Network de-configuration trace file location: /u01/app/oraInventory/logs/netdc_check2019-07-12_11-27-40AM.log

Network Configuration check config END

Database Check Configuration START

Database de-configuration trace file location: /u01/app/oraInventory/logs/databasedc_check2019-07-12_11-27-40AM.log

Use comma as separator when specifying list of values as input

Specify the list of database names that are configured in this Oracle home []:

Database Check Configuration END

################### DECONFIG CHECK OPERATION END  ###################

################# DECONFIG CHECK OPERATION SUMMARY  #################
Oracle Home selected for deinstall is: /u01/app/oracle/product/18.0.0/dbhome_1
Inventory Location where the Oracle home registered is: /u01/app/oraInventory
Do you want to continue (y - yes, n - no)? [n]: y
A log of this session will be written to: '/u01/app/oraInventory/logs/deinstall_deconfig2019-07-12_11-27-39-AM.out'
Any error messages from this session will be written to: '/u01/app/oraInventory/logs/deinstall_deconfig2019-07-12_11-27-39-AM.err'

################## DECONFIG CLEAN OPERATION START  ##################
Database de-configuration trace file location: /u01/app/oraInventory/logs/databasedc_clean2019-07-12_11-27-40AM.log

Network Configuration clean config START

Network de-configuration trace file location: /u01/app/oraInventory/logs/netdc_clean2019-07-12_11-27-40AM.log

De-configuring Naming Methods configuration file…
Naming Methods configuration file de-configured successfully.

De-configuring Local Net Service Names configuration file…
Local Net Service Names configuration file de-configured successfully.

De-configuring backup files…
Backup files de-configured successfully.

The network configuration has been cleaned up successfully.

Network Configuration clean config END

################### DECONFIG CLEAN OPERATION END ###################

################# DECONFIG CLEAN OPERATION SUMMARY #################
#############################################################

####### ORACLE DECONFIG TOOL END #######

Using properties file /tmp/deinstall2019-07-12_11-27-30AM/response/deinstall_2019-07-12_11-27-39-AM.rsp
Location of logs /u01/app/oraInventory/logs/

###### ORACLE DEINSTALL TOOL START ######

################# DEINSTALL CHECK OPERATION SUMMARY #################
A log of this session will be written to: '/u01/app/oraInventory/logs/deinstall_deconfig2019-07-12_11-27-39-AM.out'
Any error messages from this session will be written to: '/u01/app/oraInventory/logs/deinstall_deconfig2019-07-12_11-27-39-AM.err'

################## DEINSTALL CLEAN OPERATION START ##################
## [START] Preparing for Deinstall ##
Setting LOCAL_NODE to orasvr01
Setting CRS_HOME to false
Setting oracle.installer.invPtrLoc to /tmp/deinstall2019-07-12_11-27-30AM/oraInst.loc
Setting oracle.installer.local to false
## [END] Preparing for Deinstall ##

Setting the force flag to false
Setting the force flag to cleanup the Oracle Base
Oracle Universal Installer clean START

Detach Oracle home '/u01/app/oracle/product/18.0.0/dbhome_1' from the central inventory on the local node : Done

Delete directory '/u01/app/oracle/product/18.0.0/dbhome_1' on the local node : Done

The Oracle Base directory '/u01/app/oracle' will not be removed on local node. The directory is in use by Oracle Home '/u01/app/oracle/product/19.3.0/dbhome_1'.

Oracle Universal Installer cleanup was successful.

Oracle Universal Installer clean END

## [START] Oracle install clean ##

## [END] Oracle install clean ##

################### DEINSTALL CLEAN OPERATION END ###################

################# DEINSTALL CLEAN OPERATION SUMMARY #################
Successfully detached Oracle home '/u01/app/oracle/product/18.0.0/dbhome_1' from the central inventory on the local node.
Successfully deleted directory '/u01/app/oracle/product/18.0.0/dbhome_1' on the local node.
Oracle Universal Installer cleanup was successful.

Review the permissions and contents of '/u01/app/oracle' on nodes(s) 'orasvr01'.
If there are no Oracle home(s) associated with '/u01/app/oracle', manually delete '/u01/app/oracle' and its contents.
Oracle deinstall tool successfully cleaned up temporary directories.
#######################################################################

####### ORACLE DEINSTALL TOOL END #######
Task #2: Installing Oracle Database 18c (GUI).
There’s really not much to write home about with regards to installing 18c compared to previous versions. It has changed just a little so let’s quickly run through what the GUI installation looks like:
[oracle@orasvr01 dbhome_1]$ pwd
/u01/app/oracle/product/18.3.0/dbhome_1

[oracle@orasvr01 dbhome_1]$ ls -l
-rw-r--r-- 1 oracle oinstall 4564649047 Jul 12 11:40 LINUX.X64_180000_db_home.zip

[oracle@orasvr01 dbhome_1]$ unzip LINUX.X64_180000_db_home.zip
(output is boring so I didn't include it)

[oracle@orasvr01 dbhome_1]$ export ORACLE_BASE=/u01/app/oracle
[oracle@orasvr01 dbhome_1]$ export DISPLAY=<your_workstation_or_IP>:0.0
[oracle@orasvr01 dbhome_1]$ ./runInstaller
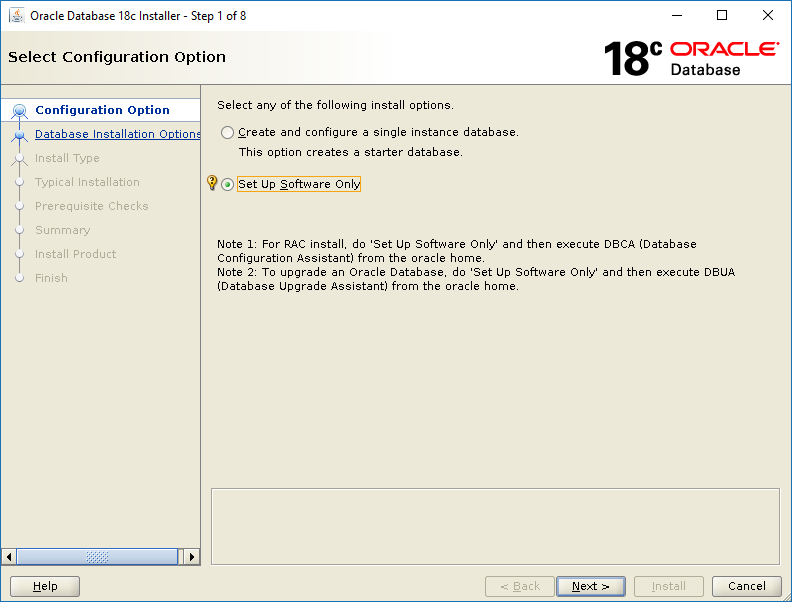
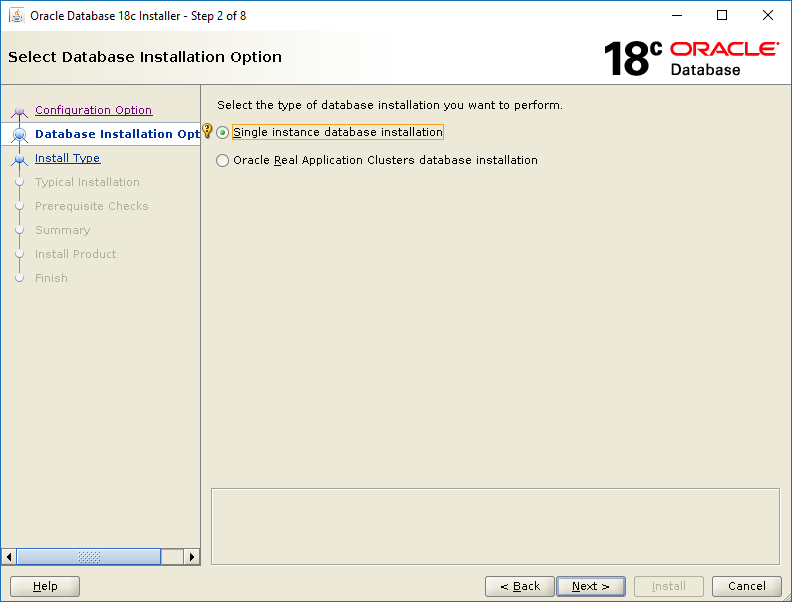
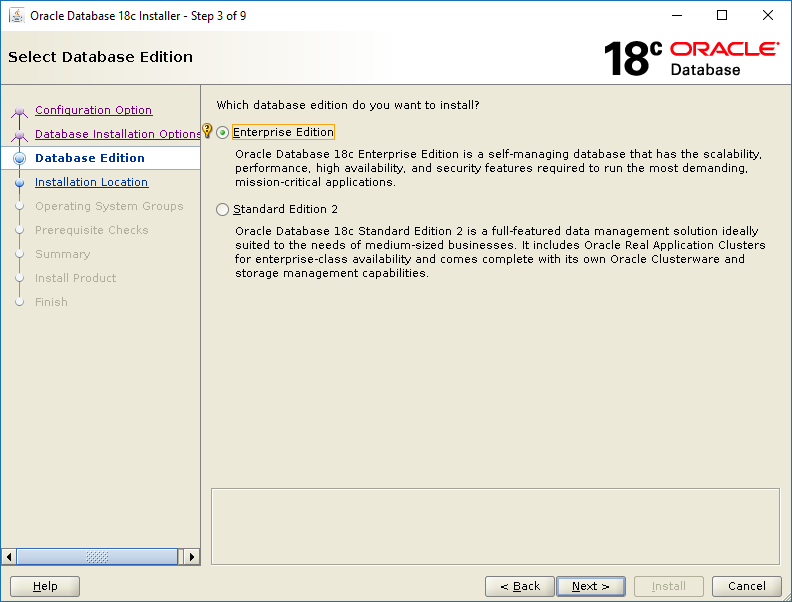
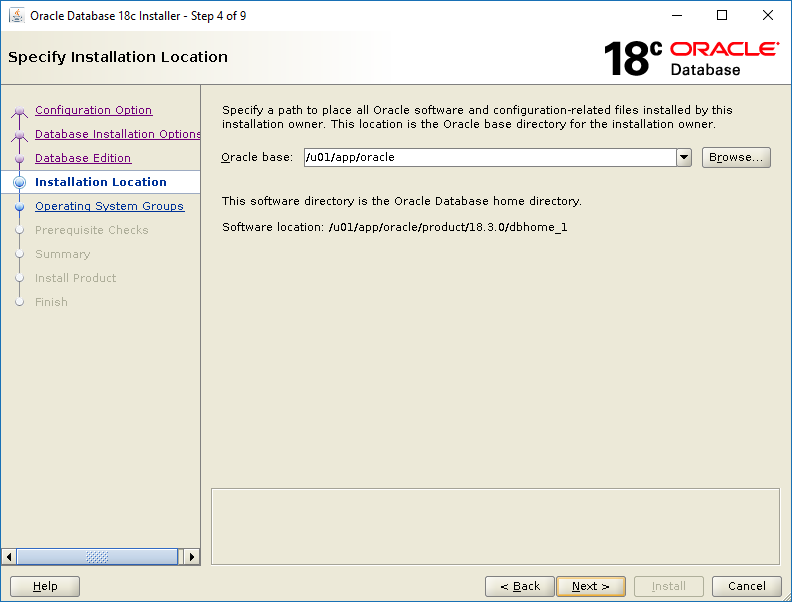
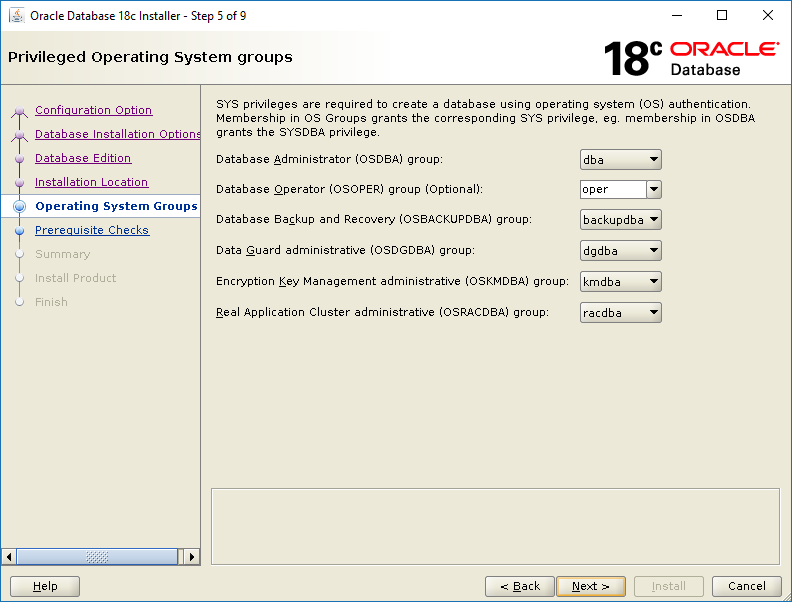
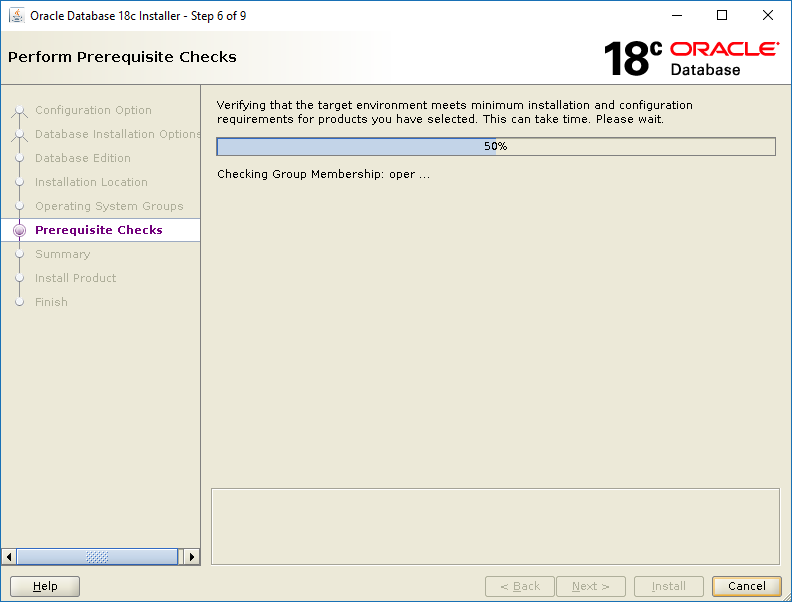
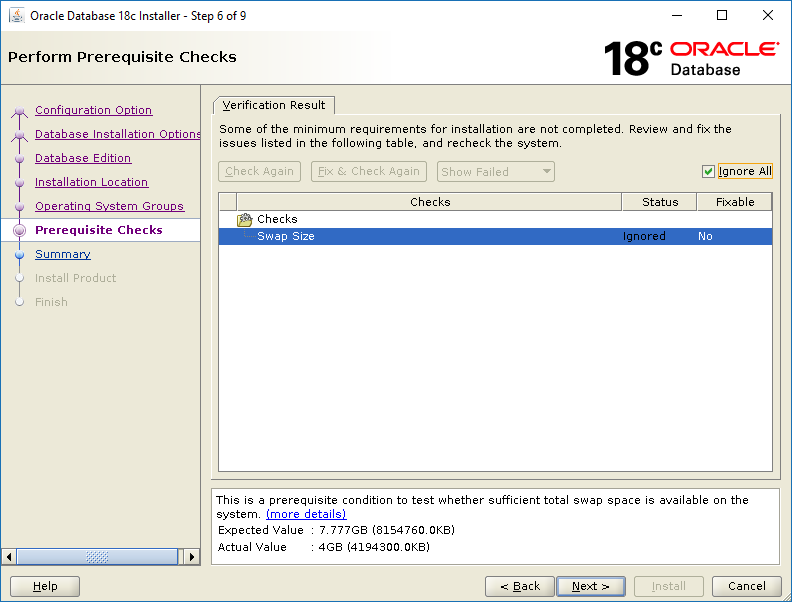
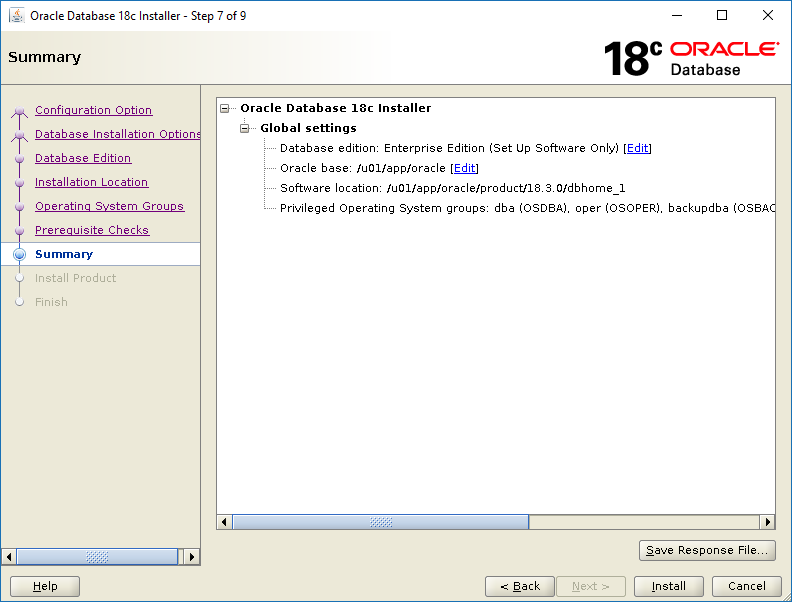
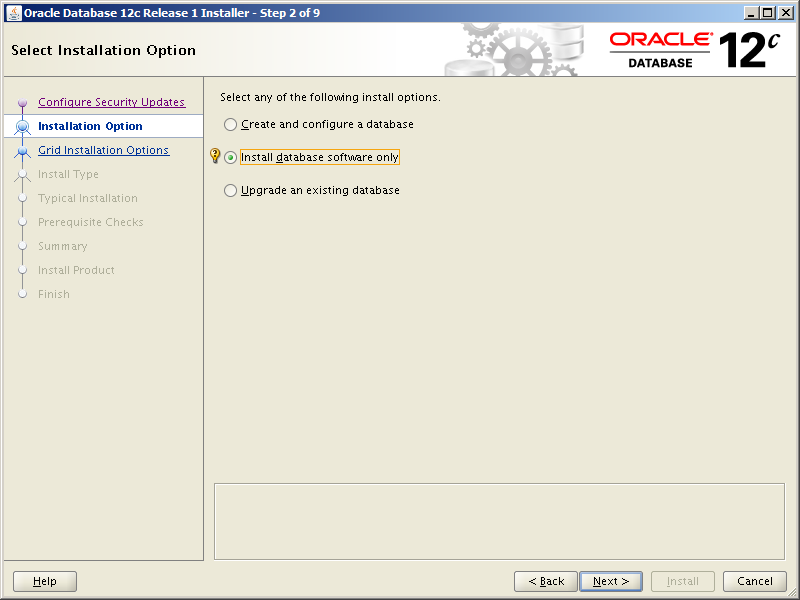
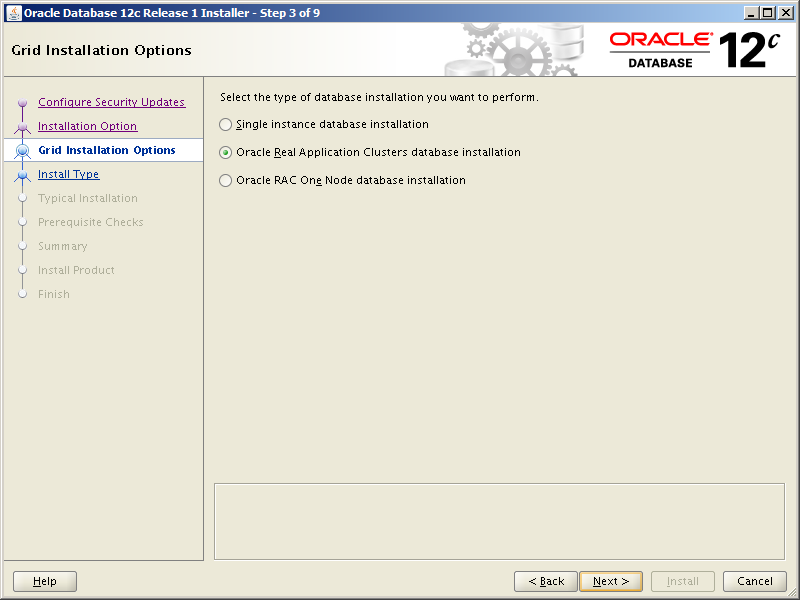
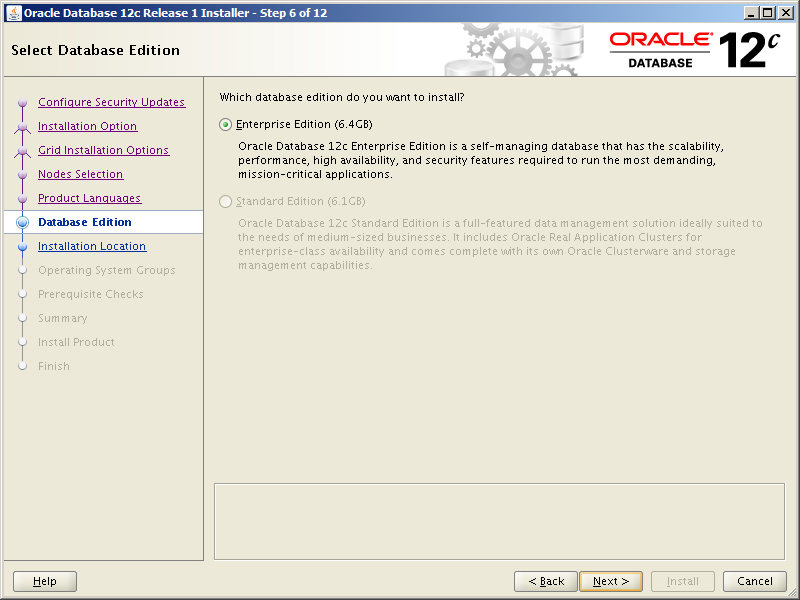
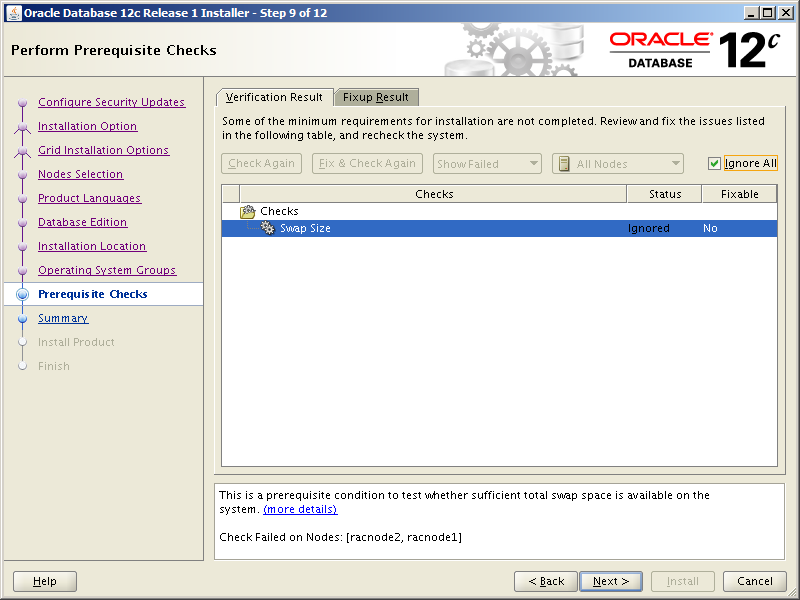
Select Set Up Software Only then click NextSelect Single instance database installation then click NextSelect Enterprise Edition then click NextThis screen tells you where the installer will install the software. Click Next.These groups are created beforehand here. Click Next.The installer runs the pre-req checks. It only takes a few seconds.Correct any pre-req check failures then click Next.
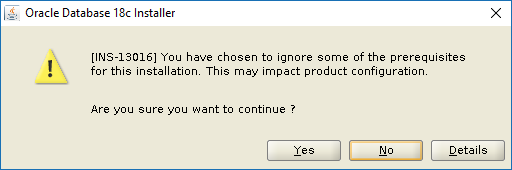
In my case, I haven’t configured enough swap space. Since this is a non-production system this doesn’t matter so I can safely check the Ignore All check box, click Next and move on. Incidentally, if you need to configure more swap via a swap file, check this out.
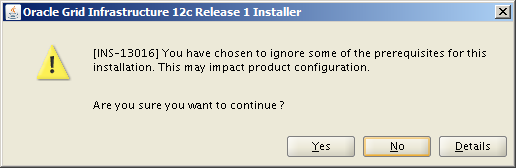
You see this only if you chose to ignore some pre-req check failures.
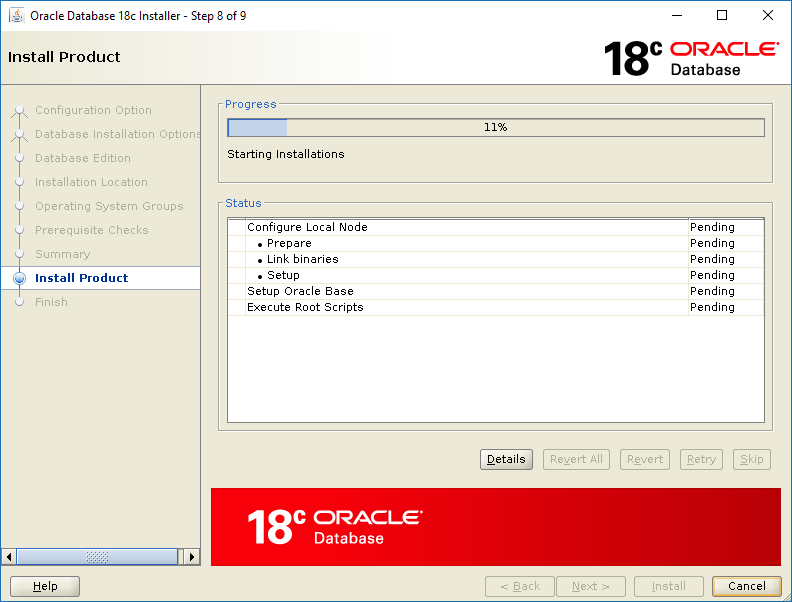
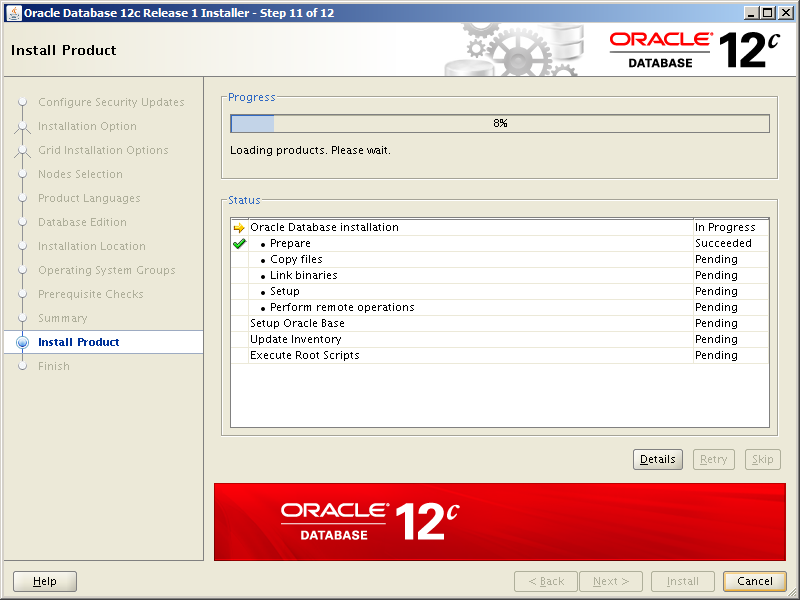
Review your settings then click Install.Tick tock tick tock…
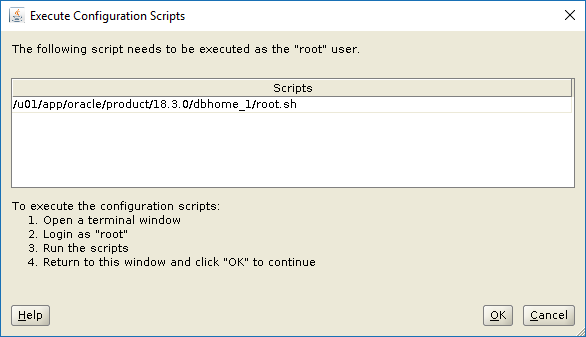
If all goes well, the installer tells you to run the root.sh script.
[root@orasvr01 ~]# /u01/app/oracle/product/18.3.0/dbhome_1/root.sh
Performing root user operation.

The following environment variables are set as:
     ORACLE_OWNER= oracle
     ORACLE_HOME=  /u01/app/oracle/product/18.3.0/dbhome_1

Enter the full pathname of the local bin directory: [/usr/local/bin]:
The contents of "dbhome" have not changed. No need to overwrite.
The contents of "oraenv" have not changed. No need to overwrite.
The contents of "coraenv" have not changed. No need to overwrite.

Entries will be added to the /etc/oratab file as needed by
Database Configuration Assistant when a database is created
Finished running generic part of root script.
Now product-specific root actions will be performed.
Do you want to setup Oracle Trace File Analyzer (TFA) now ? yes|[no] : no
Oracle Trace File Analyzer (TFA - Non Daemon Mode) is available at :
     /u01/app/oracle/product/18.3.0/dbhome_1/suptools/tfa/release/tfa_home/bin/tfactl

Note :
1. tfactl will use TFA Daemon Mode if TFA already running in Daemon Mode and user has access to TFA
2. tfactl will configure TFA Non Daemon Mode only if user has no access to TFA Daemon mode or TFA Daemon mode is not installed

OR

Oracle Trace File Analyzer (TFA - Daemon Mode) can be installed by running this script :
     /u01/app/oracle/product/18.3.0/dbhome_1/suptools/tfa/release/tfa_home/install/roottfa.sh
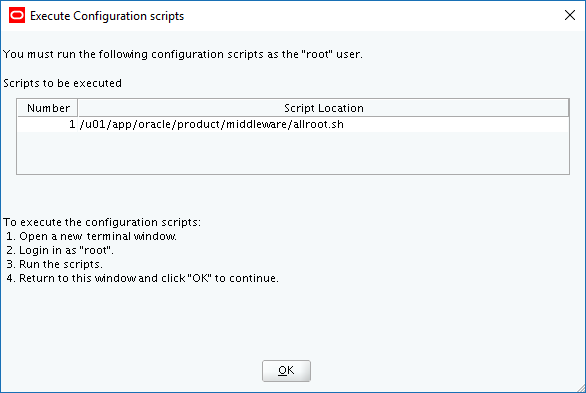
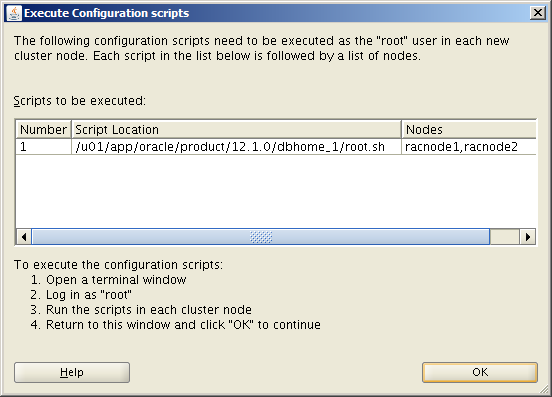
Click OK in the Execute Configuration Scripts window.
Although it doesn’t take that long to install the database software, sometimes you just haven’t got the time (or patience) to sit there and click-click-click. Silent (non-interactive) installations have been around for a while and Oracle Database 18c also supports that method. Rather useful if you’ve got a load of installations to do and need to (mostly) automate them.
Silent installations reply upon a response file which contains most or all of the values you would be prompted for if you were to run an interactive installation. Response files have a specific format which you must adhere to. A database software installation response file template can be found in $ORACLE_HOME/install/response/db_install.rsp. A more effective way to generate a populated response file is to run the GUI installation and save the response file towards the end of that process. That’s what I did to demonstrate the silent installation coming up shortly.
I always use a staging area to store the database media zip file. To speed up the copying, unzipping and installation of the software, I use this simple script. The significant line of code which runs the silent installation is this:
Here is the screen output from running the script as the oracle user:
[oracle@orasvr01 shell]$ ./silent_db_install.sh -help

Usage: silent_db_install.sh DB_Release Zip_File_Path Response_File_Path DELETE|NODELETE

       where:
       DB_Release               = Database_Version.Database_Release.0 (e.g. 18.3.0)
       Zip_File_Path            = Full path to the database binaries zip file
       Response_File_Path       = Full path to the silent install response file
       DELETE|NODELETE          = Delete the zip file in the new ORACLE_HOME (DELETE) or not (NODELETE)

[oracle@orasvr01 shell]$ ./silent_db_install.sh 18.3.0 /u01/MEDIA/database/18c/LINUX.X64_180000_db_home.zip /home/oracle/scripts/shell/install_183.rsp DELETE

     *** Checking parameters
     *** Copying zip file: /u01/MEDIA/database/18c/LINUX.X64_180000_db_home.zip to the new
              ORACLE_HOME: /u01/app/oracle/product/18.3.0/dbhome_1
     *** Unzipping LINUX.X64_180000_db_home.zip into /u01/app/oracle/product/18.3.0/dbhome_1
     *** Deleting /u01/app/oracle/product/18.3.0/dbhome_1/LINUX.X64_180000_db_home.zip
     *** Passing execution to the Oracle Installer in silent mode

Launching Oracle Database Setup Wizard…
The response file for this session can be found at:
 /u01/app/oracle/product/18.3.0/dbhome_1/install/response/db_2019-08-16_12-10-14PM.rsp

You can find the log of this install session at:
 /tmp/InstallActions2019-08-16_12-10-14PM/installActions2019-08-16_12-10-14PM.log

As a root user, execute the following script(s):
         1. /u01/app/oraInventory/orainstRoot.sh
         2. /u01/app/oracle/product/18.3.0/dbhome_1/root.sh

Execute /u01/app/oraInventory/orainstRoot.sh on the following nodes:
 [orasvr01]

Execute /u01/app/oracle/product/18.3.0/dbhome_1/root.sh on the following nodes:
 [orasvr01]

Successfully Setup Software.
Moved the install session logs to:
 /u01/app/oraInventory/logs/InstallActions2019-08-16_12-10-14PM

     *** Please check the Oracle Installer output for additional root scripts to run.
Note, the first database software installation does take into account the absence of an Oracle inventory. Subsequent installations on the same server leverage a preexisting inventory. Also note, I had to fix the swap space issue otherwise the silent installation complained. Fixing a low swap space issue is documented here.
For completeness, here’s the output from the two root scripts referenced in the above output:
[root@orasvr01 ~]# /u01/app/oraInventory/orainstRoot.sh
Changing permissions of /u01/app/oraInventory.
Adding read,write permissions for group.
Removing read,write,execute permissions for world.
Changing groupname of /u01/app/oraInventory to oinstall.
The execution of the script is complete.

[root@orasvr01 app]# /u01/app/oracle/product/18.3.0/dbhome_1/root.sh
Check /u01/app/oracle/product/18.3.0/dbhome_1/install/root_orasvr01.mynet.com_2019-08-16_12-12-24-830643173.log for the output of root script
The script can be run multiple times on the same server. Each time it will create a new OFA compliant ORACLE_HOME, copy the zip file to it, unzip it, run a silent installation and optionally delete the zip file from the new ORACLE_HOME (but not from the staging area). Hopefully it will save you some time.
With the recent release of Oracle Enterprise Manager Cloud Control 13c Release 2 Plug-in Update 1, I felt it was time to finally say goodbye to 12c Release 5.
The Oracle documentation does a pretty decent job of explaining how to uninstall Oracle Enterprise Manager (OEM) Cloud Control (CC) 12c Release 5 which can be accessed here.
The only weirdness I encountered was while uninstalling the Oracle Management Agents. Everything worked successfully, but the final output of the AgentDeinstall.pl script was this:
Can't locate Carp.pm in @INC (@INC contains:
/u01/oracle/agent/core/12.1.0.5.0/perl/lib/5.10.0/x86_64-linux-thread-multi
/u01/oracle/agent/core/12.1.0.5.0/perl/lib/5.10.0
/u01/oracle/agent/core/12.1.0.5.0/perl/lib/site_perl/5.10.0/x86_64-linux-thread-multi
/u01/oracle/agent/core/12.1.0.5.0/perl/lib/site_perl/5.10.0
/u01/oracle/agent/core/12.1.0.5.0/perl/lib/5.10.0/x86_64-linux-thread-multi
/u01/oracle/agent/core/12.1.0.5.0/perl/lib/5.10.0/x86_64-linux-thread-multi
/u01/oracle/agent/core/12.1.0.5.0/perl/lib/5.10.0
/u01/oracle/agent/core/12.1.0.5.0/perl/lib/site_perl/5.10.0/x86_64-linux-thread-multi
/u01/oracle/agent/core/12.1.0.5.0/perl/lib/site_perl/5.10.0
/u01/oracle/agent/core/12.1.0.5.0/perl/lib/site_perl .) at
/u01/oracle/agent/core/12.1.0.5.0/perl/lib/5.10.0/File/Path.pm line 32.
The uninstall worked OK, so I’m guessing this message is just a ‘special feature’ which we can ignore. ?
To install OEM CC 13c R2, we will need a server. I’m going to use the same server (oraemcc) to run the Oracle Management Service (OMS) and the Management Repository Database (MRDB). Since we’ll need a little more space than we did for the OEM CC 12c R5 installation, I increased the size of the /u01 and /u02 file systems on oraemcc accordingly:
File System
Old Size
New Size
Usage
/u01
30 GB
50 GB
Oracle Software Installations
/u02
30 GB
80 GB
Oracle Database Files
There are 4 main tasks we need to complete to get OEM CC 13c R2 up and running. Click the link you need:
We will be using a CDB with a PDB containing the Management Repository. You don’t have to set it up this way, but I’m going to use another PDB within the same CDB to host an RMAN Catalog. See Part 12 of my Build Your Own Oracle Infrastructure series for more details.
Task #2: Install the Oracle Database Software (12.1.0.2).
This particular task is covered here so I won’t dwell on it again. Once the database software is installed, copy the template zip file to $ORACLE_HOME/assistants/dbca/templates and unzip it:
Again, I have already covered this task here for 12c Release 5. It’s essentially the same process and is reasonably documented by Oracle here. However, a few things are worth noting.
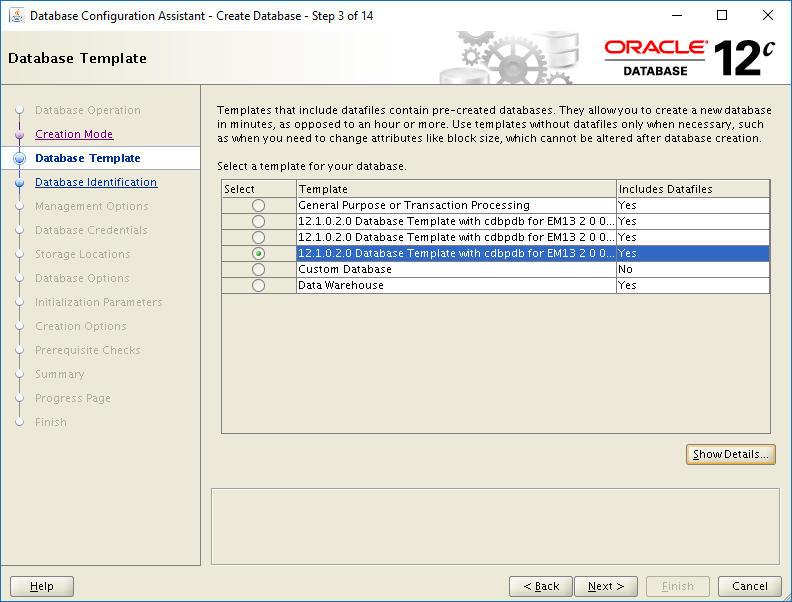
Note #1: Pick the Correct Template.
The names of the templates are so long now that they extend beyond the width of Template field as shown in the screen shot. That’s fine except you can’t increase the width of the field to see which template is which. I could increase the size of the window, but not the width of the field. Genius!
Click to Open Full Size
The template selected in the screen shot is the one for a small repository. Clicking any of the radio buttons in the Select column and then clicking the Show Details button will show you more information about that template. How about putting “small”, “medium” or “large” at the beginning of the template name? Thanks Captain Obvious! ?
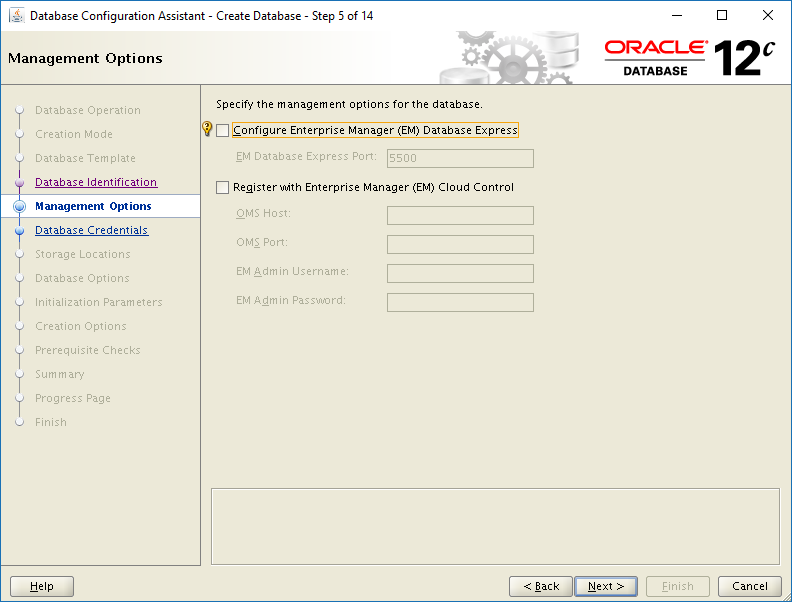
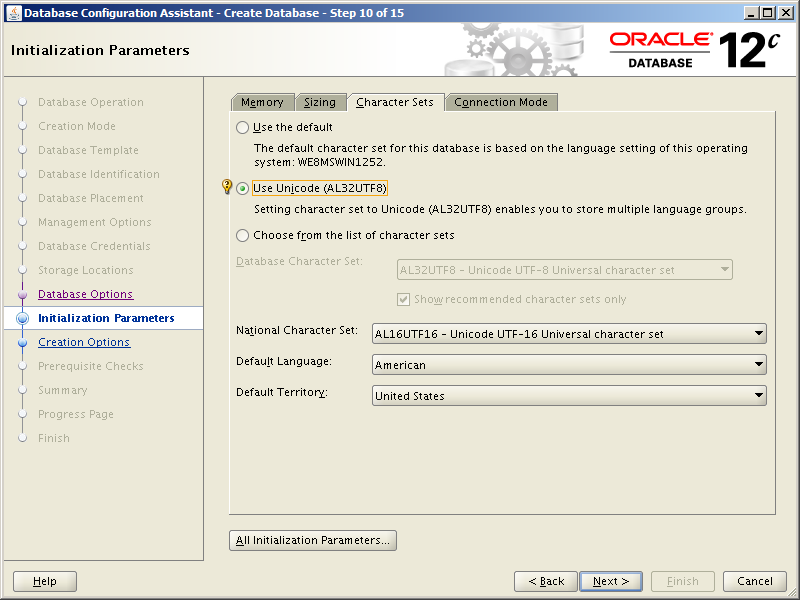
Note #2: Do Not Configure Enterprise Manager.
The documentation does mention this, but it’s worth repeating because not following this instruction will lead to bad things happening. When you get to Step #5 in the dbca dialogue, make sure both Enterprise Manager options are UNCHECKED, as shown in the screen shot below.
Click to Open Full Size
Note #3: Run the shpool SQL Script.
The documentation still includes this warning:
“When you run Oracle Database Configuration Assistant to create the database, on the Database Content screen, by default the Run the following scripts option is selected to run the shpool script. The script sets the shared pool in the database. Make sure you RETAIN THE SELECTION. Do not deselect it.”
There is no Database Content screen as the left panel of the screen shots above clearly show. The script still isn’t called “shpool” either. It’s actually called:
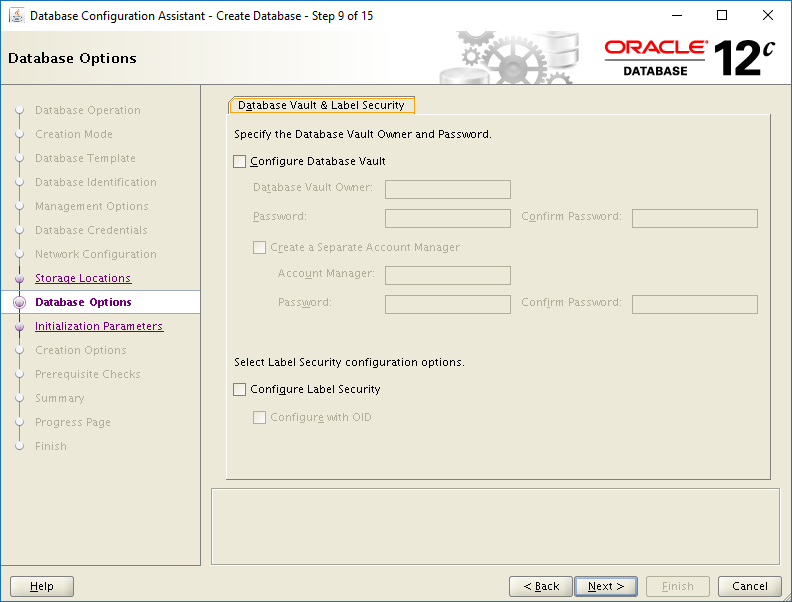
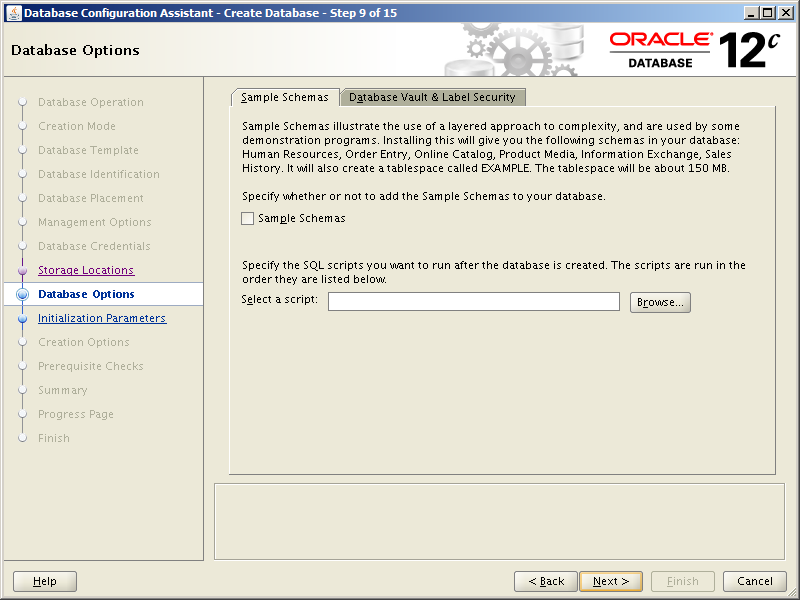
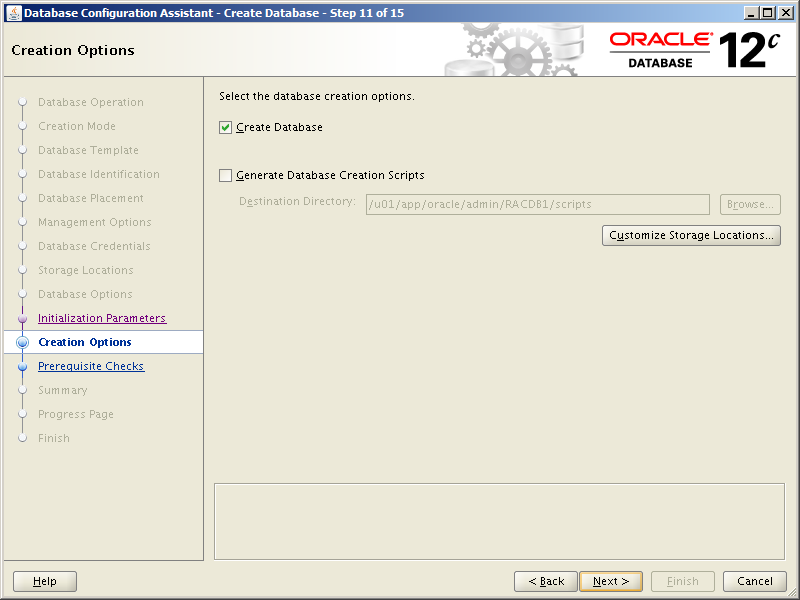
Unlike with the 12c Release 5 procedure, there is no option to specify a custom script on the Step 9 screen. This is what the Step 9 screen looks like when using the 13c Release 2 database template:
Click to Open Full Size
As you can see, no option to specify the shpool SQL script. Instead, I let the dbca run to completion, then ran the shpool SQL script from a SQL*Plus session once the database had been created:
[oracle@oraemcc templates]$ pwd
/u01/app/oracle/product/12.1.0/dbhome_1/assistants/dbca/templates

[oracle@oraemcc templates]$ . oraenv
ORACLE_SID = [oracle] ? PADMIN
The Oracle base remains unchanged with value /u01/app/oracle

[oracle@oraemcc templates]$ sqlplus / as sysdba
SQL*Plus: Release 12.1.0.2.0 Production on Mon Feb 26 13:59:34 2018
Copyright (c) 1982, 2014, Oracle. All rights reserved.

Connected to:
Oracle Database 12c Enterprise Edition Release 12.1.0.2.0 - 64bit Production
With the Partitioning, OLAP, Advanced Analytics and Real Application Testing options

SQL> @shpool_12.1.0.2.0_Database_SQL_for_EM13_2_0_0_0.sql
System altered.
System altered.
System altered.
I did a little research on this and it would appear not having the option to specify a SQL script on on the Step 9 screen may have something to do with the template I used. YMMV.
Note #4: The PDB Containing the Management Repository.
Using this template creates a CDB (called PADMIN in my case) and a PDB called EMPDBREPOS. You can call the CDB what you like, but the name of the PDB is fixed. You can tell the PDB contains the Management Repository tablespaces by using these queries:
SQL> show con_name

CON_NAME
------------------------------
CDB$ROOT

SQL> select file_name from dba_data_files;

FILE_NAME
--------------------------------------------------------------------------------
/u02/oradata/PADMIN/datafile/o1_mf_users_f96sgg98_.dbf
/u02/oradata/PADMIN/datafile/o1_mf_undotbs1_f96sghfp_.dbf
/u02/oradata/PADMIN/datafile/o1_mf_system_f96sbzxo_.dbf
/u02/oradata/PADMIN/datafile/o1_mf_sysaux_f96s8dcb_.dbf

SQL> alter session set container=EMPDBREPOS;
Session altered.

SQL> show con_name

CON_NAME
------------------------------
EMPDBREPOS

SQL> select file_name from dba_data_files;

FILE_NAME
--------------------------------------------------------------------------------
/u02/oradata/PADMIN/datafile/o1_mf_users_f96slktd_.dbf
/u02/oradata/PADMIN/datafile/o1_mf_system_f96sfc35_.dbf
/u02/oradata/PADMIN/datafile/o1_mf_sysaux_f96sllyg_.dbf
/u02/oradata/PADMIN/datafile/o1_mf_mgmt_tab_f96smp4m_.dbf
/u02/oradata/PADMIN/datafile/o1_mf_mgmt_ecm_f96sbwrj_.dbf
/u02/oradata/PADMIN/datafile/o1_mf_mgmt_ad4_f96so3by_.dbf
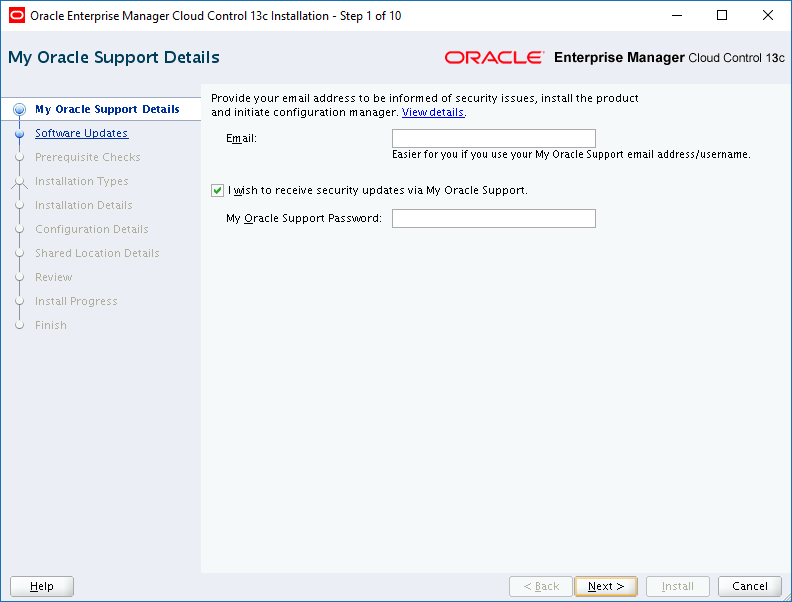
Task #4: Install OEM CC 13.2.
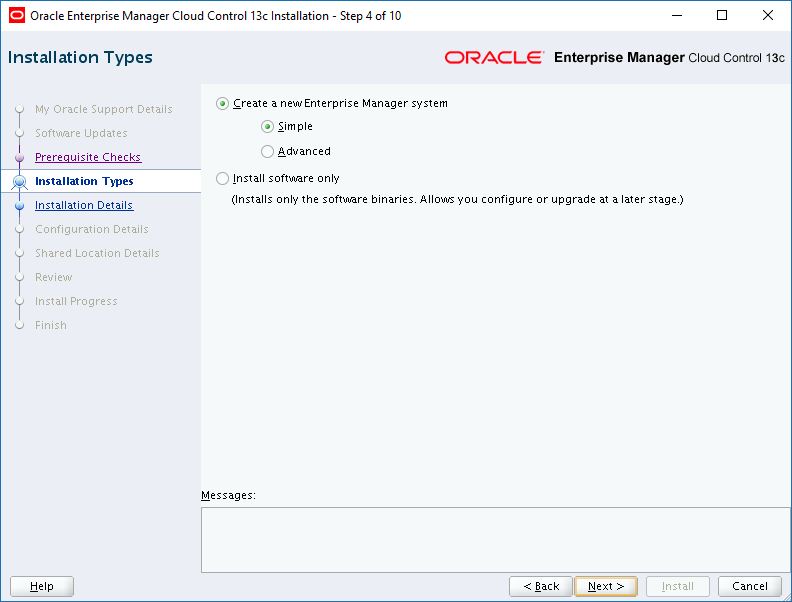
There are different hardware and software requirements for installing Release 13.2 depending upon the size and complexity of your infrastructure. We will be performing the simple/small installation. Here are the links to the relevant sections of Oracle’s documentation:
Despite performing a simple/small installation, it makes sense to go through the main items in the pre-installation/prerequisite check list. These are documented in full here, but here are a selection of just 9 to keep you amused:
Check #1: White Space.
Ensure there is no white space in the name of the directory from which you will run the installer:
[oracle@oraemcc ~]$ cd /u01/MEDIA/oem_13cr2p1

[oracle@oraemcc oem_13cr2p1]$ ls -l
-rwxr-xr-x 1 oracle oinstall 2123211088 Feb 24 18:45 em13200p1_linux64-2.zip
-rwxr-xr-x 1 oracle oinstall 741526563 Feb 24 18:45 em13200p1_linux64-3.zip
-rwxr-xr-x 1 oracle oinstall 2084231936 Feb 24 18:46 em13200p1_linux64-4.zip
-rwxr-xr-x 1 oracle oinstall 109191154 Feb 24 18:45 em13200p1_linux64-5.zip
-rwxr-xr-x 1 oracle oinstall 2146696423 Feb 24 18:47 em13200p1_linux64-6.zip
-rwxr-xr-x 1 oracle oinstall 771426157 Feb 24 18:47 em13200p1_linux64-7.zip
-rwxr-xr-x 1 oracle oinstall 554606940 Feb 24 18:47 em13200p1_linux64.bin
Check #2: DISPLAY Variable.
Ensure your DISPLAY environment variable is set accordingly (i.e. to the hostname or IP address of the server from where you’ll run the installation):
If you used the database template, then this should have been taken care of already, but let’s check:
SQL> show con_name

CON_NAME
------------------------------
CDB$ROOT

SQL> show parameter optimizer_adaptive_features

NAME TYPE VALUE
------------------------------------ ----------- ------------------------------
optimizer_adaptive_features boolean FALSE

SQL> alter session set container=empdbrepos;
Session altered.

SQL> show con_name

CON_NAME
------------------------------
EMPDBREPOS

SQL> show parameter optimizer_adaptive_features

NAME TYPE VALUE
------------------------------------ ----------- ------------------------------
optimizer_adaptive_features boolean FALSE
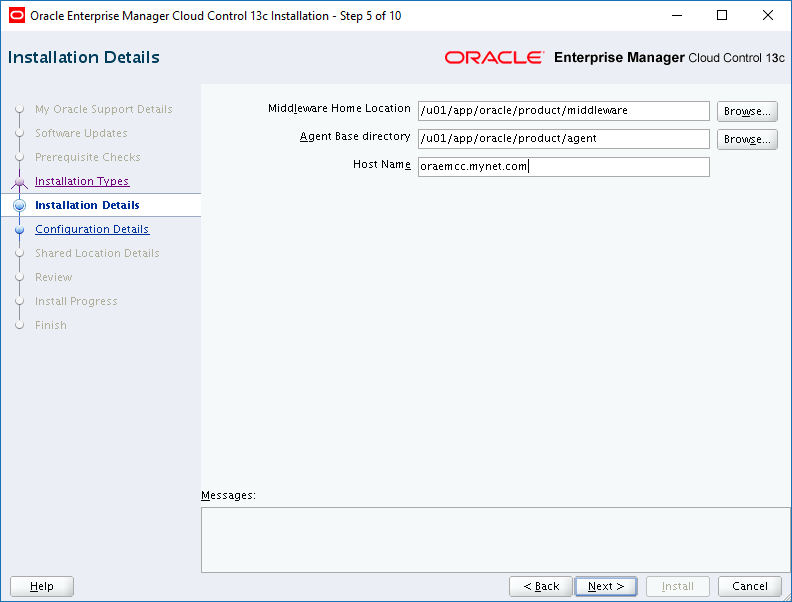
Check #4: Middleware Home Path.
Ensure the full path to the Middleware home directory does not exceed 70 characters:
In a production environment, I have come across situations where the required ports are being blocked by the corporate firewall. This provides an excellent opportunity to makes friends with the Network Administrator. If you’re really lucky and work in a bureaucratic nightmare, you’ll get to fill out lots and lots of forms to ask really nicely if your ports can be opened up, pretty please. ?
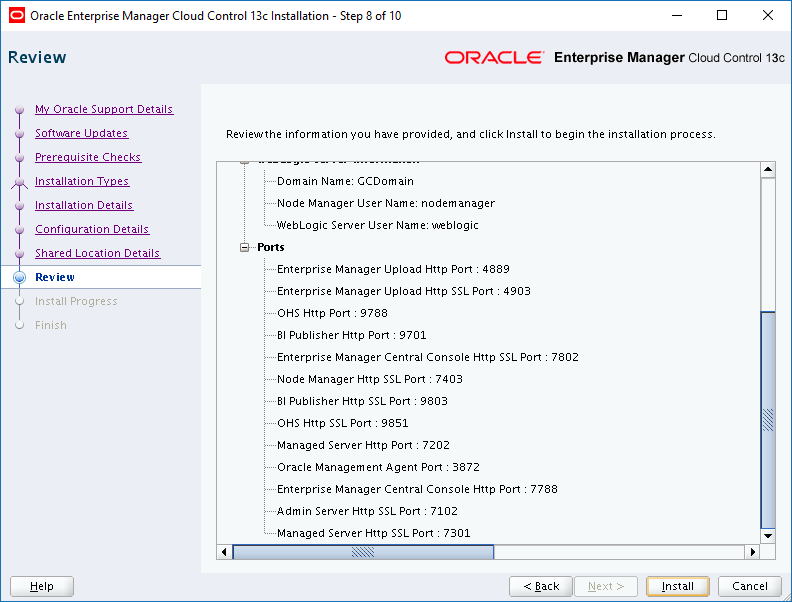
The port requirements are fully documented here, but essentially boil down to these (YMMV):
Usage
Port#
Enterprise Manager Upload HTTP Port
4889
Enterprise Manager Upload HTTP SSL Port
4903
OHS HTTP Port
9788
OHS HTTP SSL Port
9851
Oracle BI Publisher HTTP Port
9701
Oracle BI Publisher HTTP SSL Port
9803
OEM Central Console HTTP Port
7788
OEM Central Console HTTP SSL Port
7802
Node Manager HTTP SSL Port
7403
Managed Server HTTP Port
7202
Managed Server HTTP SSL Port
7301
Management Agent Port
3872
Admin Server HTTP SSL Port
7102
Use the netstat command to figure out if a port is being used. If the command returns no output, then it’s free. Let’s use port #1521 as an example because we know the TNS Listener process is using that port:
Gone are the days when we’d invoke the runInstaller installer. Now it’s called a Wizard. Coloring books and crayons are optional. A couple of things to note here. First, you’ll be executing the .bin file and second, you don’t unzip any of the other files. The ‘wizard’ will do that for us since we can’t be trusted, apparently:
[oracle@oraemcc ~]$ cd /u01/MEDIA/oem_13cr2p1

[oracle@oraemcc oem_13cr2p1]$ ls -l
-rw-r--r-- 1 oracle oinstall 2123211088 Feb 24 18:45 em13200p1_linux64-2.zip
-rw-r--r-- 1 oracle oinstall 741526563 Feb 24 18:45 em13200p1_linux64-3.zip
-rw-r--r-- 1 oracle oinstall 2084231936 Feb 24 18:46 em13200p1_linux64-4.zip
-rw-r--r-- 1 oracle oinstall 109191154 Feb 24 18:45 em13200p1_linux64-5.zip
-rw-r--r-- 1 oracle oinstall 2146696423 Feb 24 18:47 em13200p1_linux64-6.zip
-rw-r--r-- 1 oracle oinstall 771426157 Feb 24 18:47 em13200p1_linux64-7.zip
-rw-r--r-- 1 oracle oinstall 554606940 Feb 24 18:47 em13200p1_linux64.bin
I had to add execute permissions before the .bin file would run:
0%...............................................................................100%
Launcher log file is /tmp/OraInstall2018-02-26_07-08-06PM/launcher2018-02-26_07-08-06PM.log.
Starting Oracle Universal Installer

Checking if CPU speed is above 300 MHz. Actual 2665.986 MHz Passed
Checking monitor: must be configured to display at least 256 colors. Actual 16777216 Passed
Checking swap space: must be greater than 512 MB. Actual 16383 MB Passed
Checking if this platform requires a 64-bit JVM. Actual 64 Passed (64-bit not required)

Preparing to launch the Oracle Universal Installer from /tmp/OraInstall2018-02-26_07-08-06PM
====Prereq Config Location main===
/tmp/OraInstall2018-02-26_07-08-06PM/stage/prereq
EMGCInstaller args -scratchPath
EMGCInstaller args /tmp/OraInstall2018-02-26_07-08-06PM
EMGCInstaller args -sourceType
EMGCInstaller args network
EMGCInstaller args -timestamp
EMGCInstaller args 2018-02-26_07-08-06PM
EMGCInstaller args -paramFile
EMGCInstaller args /tmp/sfx_ArNIXh/Disk1/install/linux64/oraparam.ini
EMGCInstaller args -nocleanUpOnExit
DiskLoc inside SourceLoc/u01/MEDIA/oem_13cr2p1
EMFileLoc:/tmp/OraInstall2018-02-26_07-08-06PM/oui/em/
ScratchPathValue :/tmp/OraInstall2018-02-26_07-08-06PM
Then what looks suspiciously like an installer screen appears and we’re off to the races. Uncheck the option to receive security updates and click Next:
Click to Open Full Size
Ignore the patronizing warning message by clicking Yes:
Click to Open Full Size
Select the Skip radio button and click Next:
Click to Open Full Size
So here we have a couple of prereq check failures. I left these in to drawn your attention to a ‘gotcha’.
Click to Open Full Size
We’re using the same server to run both the OMS and the MRDB. Consequently, we needed to install the Database 12c Release 1 database and before that, we installed the Oracle Database 12c Release 1 pre-install package into the OS. That installation is documented here.
The softnofiles issue is slightly more devious. The soft and hard limits for the number of files a process can have open is (usually) set in the file, /etc/security/limits.conf:
[root@oraemcc ~]# vi /etc/security/limits.conf

...
oracle   soft   nofile  8192
oracle   hard   nofile  65536
...
However, the error is reporting the soft limit is currently set to 16384 which, according to the value in /etc/security/limits.conf, is NOT the current soft limit. Trust me, setting either the hard or soft limit in this file will have no effect on the error the OEM 13.2 installer is reporting. So what’s going on?
Installing the pre-install RDBMS package creates a configuration file which overrides the limits.conf file:
[root@oraemcc ~]# cd /etc/security/limits.d
[root@oraemcc limits.d]# ls -l

-rw-r--r--. 1 root root  191 Aug 18  2015 90-nproc.conf
-rw-r--r--  1 root root 1093 Feb 26 21:52 oracle-rdbms-server-12cR1-preinstall.conf

[root@oraemcc limits.d]# view oracle-rdbms-server-12cR1-preinstall.conf

# oracle-rdbms-server-12cR1-preinstall setting for nofile soft limit is 1024
oracle   soft   nofile    1024
# oracle-rdbms-server-12cR1-preinstall setting for nofile hard limit is 65536
oracle   hard   nofile    16384
...
This is where the OEM 13.2 installer is getting its information from and is actually using the hard limit, not the soft limit. Editing this file will fix the problem, but you will need to reboot afterwards, re-start the MRDB and start the OEM 13.2 installation again.
[root@oraemcc limits.d]# vi oracle-rdbms-server-12cR1-preinstall.conf

# oracle-rdbms-server-12cR1-preinstall setting for nofile soft limit is 1024
oracle   soft   nofile    30000
# oracle-rdbms-server-12cR1-preinstall setting for nofile hard limit is 65536
oracle   hard   nofile    65536
Notice it’s the hard limit value the OEM 13.2 installer references. With all the prereq checks successfully completed, click Next:
Click to Open Full Size
Select the Simple option of Create a new Enterprise Manager system, then click Next:
Click to Open Full Size
Use these values to populate this next screen, then click Next:
Field
Value
Middleware Home Location
/u01/app/oracle/product/middleware
Agent Base Directory
/u01/app/oracle/product/agent
Home Name
oraemcc.mynet.com
Click to Open Full Size
Dream up a suitable password for all the accounts mentioned in the next screen. Write it down now. You will need it shortly. Also, use these values to populate this next screen, then click Next:
Field
Value
Database Host Name
oraemcc.mynet.com
Port
1521
Service/SID
emdbrepos.mynet.com
SYS Password
The SYS password you used to create the MRDB
Click to Open Full Size
Now we hit another little gotcha. Clicking Next on the previous screen attempted to make a connection to the PDB containing the Management Repository. However, when we rebooted earlier, the CDB probably came back up, but the PDB probably did not. If that was the case, you see this rather misleading error message:
Click to Open Full SIze
Let’s login to the CDB and find out what’s going on:
SQL> select name, open_mode from v$pdbs;

NAME                           OPEN_MODE
------------------------------ ----------
PDB$SEED                       READ ONLY
EMPDBREPOS                     MOUNTED

SQL> alter pluggable database EMPDBREPOS open;
Pluggable database altered.

SQL> select name, open_mode from v$pdbs;

NAME                           OPEN_MODE
------------------------------ ----------
PDB$SEED                       READ ONLY
EMPDBREPOS                     READ WRITE
Click the OK button on the error window, then click Next again. That will land you on this next screen. I’m not interested in Oracle BI Publisher, so I unchecked those options and left the Software Library Location at its default value (/u01/app/oracle/product/swlib):
Click to Open Full Size
Click Next and we end up on a summary screen. Here’s the top half:
Click to Open Full Size
Here’s the bottom half showing all the default ports:
Click to Open Full Size
Click the Install button and then wait. Your next task will be to run a root script. It took close to 2 hours to reach that stage on my system. YMMV:
Click to Open Full Size
Time passes:
Click to Open Full Size
Eventually you’ll see this window appear:
Click to Open Full Size
In a separate root shell session, run the allroot.sh script then click the OK button:
[root@oraemcc middleware]# ./allroot.sh

Starting to execute allroot.sh .........
Starting to execute /u01/app/oracle/product/middleware/root.sh ......
/etc exist
/u01/app/oracle/product/middleware
Finished product-specific root actions.
/etc exist
Finished execution of  /u01/app/oracle/product/middleware/root.sh ......

Starting to execute /u01/app/oracle/product/agent/agent_13.2.0.0.0/root.sh ......
Finished product-specific root actions.
/etc exist

Finished execution of  /u01/app/oracle/product/agent/agent_13.2.0.0.0/root.sh ......
Finally, you’ll see an installation summary screen. Click Close and you’re done!
Click to Open Full Size
All that remains is to scoot over to your OEM CC 13.2 URL and login as SYSMAN:
Click to Open Full Size
If you have any comments or questions about this post, please use the Contact form here.
Sometimes you need to do things as the root user. To gain access to the root account is a multi-step process. Here’s what I do:
Fire up Putty and login as the admin user. The password will be the same as the admin user you setup when you initially configured your NAS. In order to get a Putty session established, you will need to ensure SSH is enabled. To do that, open up Control Panel, click Terminal & SNMP and check the Enable SSH service box.
Once you’re logged in as admin, enter this command:
admin@YOURNAS:/$ sudo su -
Password: <your admin password>

root@YOURNAS:~#
Adding Entries to /etc/hosts.
One thing you’ll need root access for is adding entries to the /etc/hosts file. This is useful if you want to take advantage of hostname resolution when setting up NFS client access on your NAS. You can use the IP address of NFS clients, so it’s not strictly necessary to add entries to /etc/hosts. Note, your custom entries to /etc/hosts do survive a DiskStation Manager (DSM) upgrade. You can use vi to edit /etc/hosts.
Setting Up NFS Access from Linux.
To conserve space on your Linux servers, it’s often a good idea to store Oracle media on an NFS drive rather than directly on the server itself. Setting up NFS access is a two step process. Step one is to setup NFS permissions via the DSM. Step two is to configure an NFS share on your Linux server.
Step #1: Setup NFS Permissions using Disk Station Manager (DSM).
After creating a volume using the DSM, you’ll need to configure NFS client access to that volume.
In DSM open up Control Panel. Click on Shared Folder. Right click the relevant volume, then click Edit. Once you’re in the Edit window, click on the NFS Permissions tab. Click the Create button. This will enable you to create an NFS rule. I use these entries:
Field
Value
Hostname or IP*:
NFS client IP or hostname (from /etc/hosts)
Privilege:
Read/Write
Squash:
No mapping (allows file ownership changes)
Enable asynchronous
Check
Allow connections from non-privileged ports
Leave Unchecked
Allow users to access mounted subfolders
Check
Click OK and the NAS will process your changes. That’s the NAS side of things completed.
Step #2: Configure an NFS Share on Linux.
The second stage is to add some configuration to the Linux server.
Add a mount point directory in the root file system. Let’s call it nas (how original!):
[root@orasvr01 ~]$ cd /
[root@orasvr01 ~]$ mkdir /nas
Make the mount point directory accessible to everyone:
[root@orasvr01 ~]# chmod 777 /nas
Edit the /etc/fstab. This is where it gets a bit tricky. The following entry would be just fine to access files in the NAS from Linux:
However, things get a little more complicated when it comes to accessing Oracle files in the NAS. The My Oracle Support (MOS) document ID 359515.1 describes the NFS mount parameters needed to access certain types of files.
We’re now ready to create an Oracle RAC database. It’s mostly quite similar to creating a single instance Oracle database. The major differences come with how the various infrastructure components are administered. We’ll get to that in good time.
So far we have the +CRS ASM Diskgroup which provides storage for the Votedisk, the OCR and the GIMR database (_MGMTDB). Our own RAC database will also use ASM storage, so we’ll need to create a couple more ASM Diskgroups before we create the database.
On racnode1, login as the grid user and fire up the ASM Configuration Assistant (asmca):
[grid@racnode1 ~]$ . oraenv
ORACLE_SID = [grid] ? +ASM1
The Oracle base has been set to /u01/app/grid
Set your DISPLAY environment variable so it points back to your workstation:
Click on Create. Enter DATA for the Disk Group Name, select External for the Redundancy level and select ASMDISK02 and ASMDISK03. Then Click OK:
Click OK:
Click Create:
Enter FRA for the Disk Group Name, select External for the Redundancy level and select ASMDISK04 and ASMDISK05. Then click OK:
Click OK in the Disk Group:Creation pop-up window:
Then click Exit to close the ASM Configuration Assistant.
Et voila! Two shiny new ASM Diskgroups ready for our RAC database to use. It will be pleased.
Task #2: Create an Oracle 12c RAC Database.
A quick way to set your oracle environment correctly when no databases currently exist on the server is to edit the /etc/oratab file to include a dummy line:
[oracle@racnode1 ~]$ vi /etc/oratab

dummy:/u01/app/oracle/product/12.1.0/dbhome_1:N
Use the standard oraenv script to set your environment, then unset the ORACLE_SID:
[oracle@racnode1 ~]$ . oraenv
ORACLE_SID = [oracle] ? dummy
The Oracle base has been set to /u01/app/oracle

[oracle@racnode1 ~]$ unset ORACLE_SID
You can tell you’re pointing to the correct set of Oracle executables by using the which command:
[oracle@racnode1 database]$ which dbca
/u01/app/oracle/product/12.1.0/dbhome_1/bin/dbca
Finally, set your DISPLAY variable correctly and fire up the Database Configuration Assistant (dbca):
Select Use the Same Administrative Password for All Accounts. Enter the SYSDBA password twice then click Next:
Complete the next screen using the values shown in the screen shot, then click Next:
Create a password for the ASMSNMP ASM instance account, then click OK:
Just click Next:
On the Memory tab, select Use Automatic Memory Management and enter 2048 MB for the Memory Size, then click the Character Sets tab:
On the Character Sets tab, select Use Unicode (AL32UTF8) then click Next:
Ensure Create Database is checked, then click Next:
The Prerequisite Checks screen highlights the swap size failure which we can safely ignore. Click Next:
On the Summary screen, click Finish:
The familiar progress bar tells you how things are going:
Eventually you’ll see the Finish screen. Click Close and you’re done.
You now have an Oracle 12c RAC database up and running with 2 instances. In the next section we’ll run through a series of tests to find out if all is well.
Task #3: Test Oracle 12c GI and RAC Database.
After you build out your cluster and RAC database, it’s important that you test everything is working properly, especially when it will become a production system. Testing really falls into two categories, functionality testing and workload testing. Functionality testing focuses on finding out if the configuration behaves in the way it should. Workload testing focuses on finding out if the configuration can handle the expected workload in terms of response time and throughput.
You can view an outline test plan here. It’s a decent start at putting together a comprehensive test plan, but it does omit three key areas. It does not contain any workload testing, network failure testing or any destructive testing. Let’s get testing and see what happens!
Section #1: Check & Test Clusterware.
The first set of checks and tests focuses on Clusterware. It gets us comfortable with using the various Clusterware administration commands and helps with identifying where certain resources are located.
Test #1B. Check: Resource TARGET and STATE columns.
The crs_stat command is supposed to be deprecated, but still works in 12c.
What we’re looking for here is any line where the Target and State column values are different. The Target value is what the status should be and the State value is what the status actually is. So, a Target value of ONLINE and a State value of OFFLINE could mean one of two things. Either the resource is coming online, but hadn’t quite made it when you ran the command or that resource has a problem and cannot come online. In which case, it would be time to dive into the log files. As we can see from this output, all is well.
The 3 main services are online on all nodes. Good news.
[grid@racnode1 ~]$ crsctl check cluster -all
**************************************************************
racnode1:
CRS-4537: Cluster Ready Services is online
CRS-4529: Cluster Synchronization Services is online
CRS-4533: Event Manager is online
**************************************************************
racnode2:
CRS-4537: Cluster Ready Services is online
CRS-4529: Cluster Synchronization Services is online
CRS-4533: Event Manager is online
**************************************************************
Test #1D. Check: CRS Verification.
Similar to Test 1C, this output shows the HA services are all OK too.
[grid@racnode1 ~]$ crsctl check crs
CRS-4638: Oracle High Availability Services is online
CRS-4537: Cluster Ready Services is online
CRS-4529: Cluster Synchronization Services is online
CRS-4533: Event Manager is online

[grid@racnode2 ~]$ crsctl check crs
CRS-4638: Oracle High Availability Services is online
CRS-4537: Cluster Ready Services is online
CRS-4529: Cluster Synchronization Services is online
CRS-4533: Event Manager is online
Test #1E. Check: CTSS.
Remember we’re not using NTP for server time synchronization, so Oracle’s CTSS should be doing the work for us which it seems to be.
[grid@racnode1 ~]$ crsctl check ctss
CRS-4701: The Cluster Time Synchronization Service is in Active mode.
CRS-4702: Offset (in msec): 0

[grid@racnode2 ~]$ crsctl check ctss
CRS-4701: The Cluster Time Synchronization Service is in Active mode.
CRS-4702: Offset (in msec): 0
Test #1F. Check: DNS.
Remember we configured DNS on the OEM Cloud Control server (oraemcc.mynet.com, 200.200.10.16). It seems to be working for both RAC nodes.
[grid@racnode1 ~]$ crsctl query dns -servers
CRS-10018: the following configuration was found on the system:
CRS-10019: There are 1 domains in search order. They are: mynet.com
CRS-10022: There are 1 name servers. They are: 200.200.10.16
CRS-10020: number of retry attempts for name lookup is: 4
CRS-10021: timeout for each name lookup is: 5

[grid@racnode2 ~]$ crsctl query dns -servers
CRS-10018: the following configuration was found on the system:
CRS-10019: There are 1 domains in search order. They are: mynet.com
CRS-10022: There are 1 name servers. They are: 200.200.10.16
CRS-10020: number of retry attempts for name lookup is: 4
CRS-10021: timeout for each name lookup is: 5
Test #1G. Check: Votedisk(s).
The Votedisk seems fine, but best practice says we should have more than just one and an odd number of them. We might want to fix this later.
[grid@racnode1 ~]$ crsctl query css votedisk
## STATE   File Universal Id                File Name Disk group
-- -----   -----------------                --------- ---------
1. ONLINE  6623c2c7b3a24fc5bffd28b93c053000 (/dev/oracleasm/disks/ASMDISK01) [CRS]
Located 1 voting disk(s).
Test #1H. Check: OCR File(s).
We can have up to 5 OCR files and we currently only have one. We might want to fix that later. Also, to perform the logical corruption check, we need to run this ocrcheck command as root.
[grid@racnode1 ~]$ cat /etc/oracle/ocr.loc
#Device/file +CRS getting replaced by device +CRS/cluster1/OCRFILE/registry.255.898728137
ocrconfig_loc=+CRS/cluster1/OCRFILE/registry.255.898728137

[grid@racnode1 ~]$ ocrcheck -details
Status of Oracle Cluster Registry is as follows :
         Version                  :          4
         Total space (kbytes)     :     409568
         Used space (kbytes)      :       1588
         Available space (kbytes) :     407980
         ID                       : 1641944593
         Device/File Name         : +CRS/cluster1/OCRFILE/registry.255.898728137
                                    Device/File integrity check succeeded
                                    Device/File not configured
                                    Device/File not configured
                                    Device/File not configured
                                    Device/File not configured

         Cluster registry integrity check succeeded
         Logical corruption check bypassed due to non-privileged user
[root@racnode1 ~]# /u01/app/12.1.0/grid/bin/ocrcheck -details
Status of Oracle Cluster Registry is as follows :
         Version                  :          4
         Total space (kbytes)     :     409568
         Used space (kbytes)      :       1588
         Available space (kbytes) :     407980
         ID                       : 1641944593
         Device/File Name         : +CRS/cluster1/OCRFILE/registry.255.898728137
                                    Device/File integrity check succeeded
                                    Device/File not configured
                                    Device/File not configured
                                    Device/File not configured
                                    Device/File not configured

         Cluster registry integrity check succeeded
         Logical corruption check succeeded
Test #1I. Check: OCR Backups.
The OCR is backed up automatically every 4 hours. If the cluster has been up and running long enough you can see the backup files. Running this command on any node should produce the same output.
[grid@racnode1 ~]$ ocrconfig -showbackup
racnode1     2016/01/27 10:15:35   /u01/app/12.1.0/grid/cdata/cluster1/backup00.ocr  0
racnode1     2016/01/27 06:14:48   /u01/app/12.1.0/grid/cdata/cluster1/backup01.ocr  0
racnode1     2016/01/27 02:14:11   /u01/app/12.1.0/grid/cdata/cluster1/backup02.ocr  0
racnode1     2016/01/26 18:13:01   /u01/app/12.1.0/grid/cdata/cluster1/day.ocr  0
racnode1     2016/01/15 04:31:01   /u01/app/12.1.0/grid/cdata/cluster1/week.ocr 0
PROT-25: Manual backups for the Oracle Cluster Registry are not available
Test #1J. Check: OLR.
The OLR plays in important role in starting the cluster if the OCR is stored in ASM. Better make sure each node’s OLR is alive and well.
[grid@racnode1 ~]$ cat /etc/oracle/olr.loc
olrconfig_loc=/u01/app/12.1.0/grid/cdata/racnode1.olr
crs_home=/u01/app/12.1.0/grid

[grid@racnode1 ~]$ ocrcheck -local -config
Oracle Local Registry configuration is :
Device/File Name         : /u01/app/12.1.0/grid/cdata/racnode1.olr

[grid@racnode1 ~]$ ls -l /u01/app/12.1.0/grid/cdata/racnode1.olr
-rw------- 1 root oinstall 503484416 Feb  6 14:22 /u01/app/12.1.0/grid/cdata/racnode1.olr

[grid@racnode2 ~]$ cat /etc/oracle/olr.loc
olrconfig_loc=/u01/app/12.1.0/grid/cdata/racnode2.olr
crs_home=/u01/app/12.1.0/grid

[grid@racnode2 ~]$ ocrcheck -local -config
Oracle Local Registry configuration is :
         Device/File Name         : /u01/app/12.1.0/grid/cdata/racnode2.olr

[grid@racnode2 ~]$ ls -l /u01/app/12.1.0/grid/cdata/racnode2.olr
-rw------- 1 root oinstall 503484416 Feb  6 18:24 /u01/app/12.1.0/grid/cdata/racnode2.olr
Test #1K. Check: GPnP.
The Grid Plug ‘n’ Play profile is an XML file which also plays an important role in cluster startup. It contains important node configuration information including the storage location of some GI resources, the node’s networking configuration and so on. Make sure it’s where it ought to be and eye ball its contents to make sure they appear accurate. They should be as they’re maintained by the GPnP daemon (gpnpd.bin).
[grid@racnode1 ~]$ cd /u01/app/12.1.0/grid/gpnp/racnode1/profiles/peer
[grid@racnode1 peer]$ ls -l
-rw-r--r-- 1 grid oinstall 1908 Dec 17 22:44 profile.old
-rw-r--r-- 1 grid oinstall 1850 Dec 17 22:36 profile_orig.xml
-rw-r--r-- 1 grid oinstall 1908 Dec 17 22:44 profile.xml

[grid@racnode2 ~]$ cd /u01/app/12.1.0/grid/gpnp/racnode2/profiles/peer
[grid@racnode2 peer]$ ls -l
-rw-r--r-- 1 grid oinstall 1850 Dec 17 23:05 profile_orig.xml
-rw-r--r-- 1 grid oinstall 1908 Dec 17 23:05 profile.xml
Test #1L. Check: SCAN VIPs.
The SCAN Listeners each need a VIP on which to operate. These commands show use they’re up and running and open for business.
[grid@racnode1 ~]$ srvctl status scan
SCAN VIP scan1 is enabled
SCAN VIP scan1 is running on node racnode2
SCAN VIP scan2 is enabled
SCAN VIP scan2 is running on node racnode2
SCAN VIP scan3 is enabled
SCAN VIP scan3 is running on node racnode1

[grid@racnode1 ~]$ srvctl config scan
SCAN name: cluster1-scan.mynet.com, Network: 1
Subnet IPv4: 200.200.10.0/255.255.255.0/eth0, static
Subnet IPv6:
SCAN 0 IPv4 VIP: 200.200.10.122
SCAN VIP is enabled.
SCAN VIP is individually enabled on nodes:
SCAN VIP is individually disabled on nodes:
SCAN 1 IPv4 VIP: 200.200.10.120
SCAN VIP is enabled.
SCAN VIP is individually enabled on nodes:
SCAN VIP is individually disabled on nodes:
SCAN 2 IPv4 VIP: 200.200.10.121
SCAN VIP is enabled.
SCAN VIP is individually enabled on nodes:
SCAN VIP is individually disabled on nodes:

[grid@racnode1 ~]$ ps -ef | grep -v grep | grep SCAN
grid      7739     1  0 Jan26 ?        00:00:41 /u01/app/12.1.0/grid/bin/tnslsnr
   LISTENER_SCAN3 -no_crs_notify -inherit

[grid@racnode2 ~]$ ps -ef | grep -v grep | grep SCAN
grid     16190     1  0 Jan26 ?        00:00:43 /u01/app/12.1.0/grid/bin/tnslsnr
   LISTENER_SCAN1 -no_crs_notify -inherit
grid      7736     1  0 Jan26 ?        00:00:41 /u01/app/12.1.0/grid/bin/tnslsnr
   LISTENER_SCAN2 -no_crs_notify -inherit

[grid@racnode1 ~]$ ping 200.200.10.120
PING 200.200.10.120 (200.200.10.120) 56(84) bytes of data.
64 bytes from 192.168.0.120: icmp_seq=1 ttl=64 time=0.288 ms
64 bytes from 192.168.0.120: icmp_seq=2 ttl=64 time=0.152 ms
--- 192.168.0.120 ping statistics ---
2 packets transmitted, 2 received, 0% packet loss, time 1362ms
rtt min/avg/max/mdev = 0.152/0.220/0.288/0.068 ms

[grid@racnode1 ~]$ ping 200.200.10.121
PING 200.200.10.121 (200.200.10.121) 56(84) bytes of data.
64 bytes from 192.168.0.121: icmp_seq=1 ttl=64 time=0.072 ms
64 bytes from 192.168.0.121: icmp_seq=2 ttl=64 time=0.028 ms
--- 192.168.0.121 ping statistics ---
2 packets transmitted, 2 received, 0% packet loss, time 1311ms
rtt min/avg/max/mdev = 0.028/0.050/0.072/0.022 ms

[grid@racnode1 ~]$ ping 200.200.10.122
PING 200.200.10.122 (200.200.10.122) 56(84) bytes of data.
64 bytes from 192.168.0.122: icmp_seq=1 ttl=64 time=0.310 ms
64 bytes from 192.168.0.122: icmp_seq=2 ttl=64 time=0.186 ms
--- 192.168.0.122 ping statistics ---
2 packets transmitted, 2 received, 0% packet loss, time 1314ms
rtt min/avg/max/mdev = 0.186/0.248/0.310/0.062 ms
Test #1M. Check: Node VIPs.
To avoid a lengthy TCP timeout in the event of a node failure, its VIP needs to failover to a surviving node. For it to do that, it needs to be enabled and pingable.
[grid@racnode1 ~]$ srvctl status vip -node racnode1
VIP racnode1-vip.mynet.com is enabled
VIP racnode1-vip.mynet.com is running on node: racnode1

[grid@racnode1 ~]$ srvctl status vip -node racnode2
VIP racnode2-vip.mynet.com is enabled
VIP racnode2-vip.mynet.com is running on node: racnode2

[grid@racnode1 ~]$ ping racnode1-vip.mynet.com
PING racnode1-vip.mynet.com (200.200.10.111) 56(84) bytes of data.
64 bytes from racnode1-vip.mynet.com (200.200.10.111): icmp_seq=1 ttl=64 time=0.024 ms
64 bytes from racnode1-vip.mynet.com (200.200.10.111): icmp_seq=2 ttl=64 time=0.031 ms
64 bytes from racnode1-vip.mynet.com (200.200.10.111): icmp_seq=3 ttl=64 time=0.026 ms
--- racnode1-vip.mynet.com ping statistics ---
3 packets transmitted, 3 received, 0% packet loss, time 2441ms
rtt min/avg/max/mdev = 0.024/0.027/0.031/0.003 ms

[grid@racnode1 ~]$ ping racnode2-vip.mynet.com
PING racnode2-vip.mynet.com (200.200.10.112) 56(84) bytes of data.
64 bytes from racnode2-vip.mynet.com (200.200.10.112): icmp_seq=1 ttl=64 time=0.308 ms
64 bytes from racnode2-vip.mynet.com (200.200.10.112): icmp_seq=2 ttl=64 time=0.174 ms
64 bytes from racnode2-vip.mynet.com (200.200.10.112): icmp_seq=3 ttl=64 time=0.163 ms
--- racnode2-vip.mynet.com ping statistics ---
3 packets transmitted, 3 received, 0% packet loss, time 2513ms
rtt min/avg/max/mdev = 0.163/0.215/0.308/0.065 ms
Test #1N. Check: Nodeapps.
Nodeapps comprise a node’s VIP, network and ONS daemon. Check to see if they’re all up and running.
[grid@racnode1 ~]$ srvctl status nodeapps
VIP racnode1-vip.mynet.com is enabled
VIP racnode1-vip.mynet.com is running on node: racnode1
VIP racnode2-vip.mynet.com is enabled
VIP racnode2-vip.mynet.com is running on node: racnode2
Network is enabled
Network is running on node: racnode1
Network is running on node: racnode2
ONS is enabled
ONS daemon is running on node: racnode1
ONS daemon is running on node: racnode2
Test #1O. Check: Node Participation.
You might think you know which nodes make up your cluster, but does the cluster agree? In our case, yes it does!
[grid@racnode1 ~]$ olsnodes -n -i -s -t -a
racnode1        1       racnode1-vip.mynet.com        Active  Hub     Unpinned
racnode2        2       racnode2-vip.mynet.com        Active  Hub     Unpinned
Section #2: Check & Test ASM.
ASM has become the de facto storage standard for Oracle databases, so we’d better check the clustered version is healthy.
Test #2B. Check: ASM Instances.
Ensure the ASM instances are up, running and can accept logins.
[grid@racnode1 ~]$ srvctl status asm
ASM is running on racnode2,racnode1

[grid@racnode1 ~]$ sqlplus / as sysasm
SQL*Plus: Release 12.1.0.2.0 Production on Sat Feb 6 17:14:59 2016
Copyright (c) 1982, 2014, Oracle.  All rights reserved.
Connected to:
Oracle Database 12c Enterprise Edition Release 12.1.0.2.0 - 64bit Production
With the Real Application Clusters and Automatic Storage Management options
SQL>

[grid@racnode1 ~]$ asmcmd
ASMCMD> ls -l
State    Type    Rebal  Name
MOUNTED  EXTERN  N      CRS/
MOUNTED  EXTERN  N      DATA/
MOUNTED  EXTERN  N      FRA/
Test #2C. Check: ASM Diskgroups.
Next, check that all the ASM Diskgroups are OK.
[grid@racnode1 ~]$ echo "select name from v\$asm_diskgroup;" | sqlplus -s / as sysasm
NAME
------------------------------
FRA
DATA
CRS
[grid@racnode1 ~]$ for dg in FRA DATA CRS> do> srvctl status diskgroup -diskgroup ${dg} -detail> done
Disk Group FRA is running on racnode2,racnode1
Disk Group FRA is enabled
Disk Group DATA is running on racnode2,racnode1
Disk Group DATA is enabled
Disk Group CRS is running on racnode2,racnode1
Disk Group CRS is enabled
Test #2D. Check: ASM Diskgroup Metadata.
Check the ASM Diskgroup metadata is present and correct. No error messages means it is.
[grid@racnode1 ~]$ sqlplus / as sysasm

SQL> alter diskgroup crs check all;
Diskgroup altered.

SQL> alter diskgroup data check all;
Diskgroup altered.

[grid@racnode1 ~]$ asmcmd
ASMCMD> chkdg FRA
Diskgroup altered.
Test #2E. Check: ASM Disks.
Ensure all the ASM Disks you have configured are visible.
[grid@racnode1 ~]$ sqlplus / as sysasm

SQL> select dg.name DG,
            d.name Disk,
            decode(d.GROUP_NUMBER,
                   0,'Unallocated',
                   'In Use') State,
            d.path
     from   v$asm_disk d
            left outer join
            v$asm_diskgroup dg
            on dg.group_number = d.group_number
     order by
            dg.name,
            d.path;

DG         DISK       STATE       PATH
---------- ---------- ----------- ------------------------------
CRS        CRS_0000   In Use      /dev/oracleasm/disks/ASMDISK01
DATA       DATA_0000  In Use      /dev/oracleasm/disks/ASMDISK02
DATA       DATA_0001  In Use      /dev/oracleasm/disks/ASMDISK03
DATA       DATA_0002  In Use      /dev/oracleasm/disks/ASMDISK06
FRA        FRA_0000   In Use      /dev/oracleasm/disks/ASMDISK04
FRA        FRA_0001   In Use      /dev/oracleasm/disks/ASMDISK05
                      Unallocated /dev/oracleasm/disks/ASMDISK07
                      Unallocated /dev/oracleasm/disks/ASMDISK08
                      Unallocated /dev/oracleasm/disks/ASMDISK09
                      Unallocated /dev/oracleasm/disks/ASMDISK10

ASMCMD> lsdsk --discovery
Path
/dev/oracleasm/disks/ASMDISK01
/dev/oracleasm/disks/ASMDISK02
/dev/oracleasm/disks/ASMDISK03
/dev/oracleasm/disks/ASMDISK04
/dev/oracleasm/disks/ASMDISK05
/dev/oracleasm/disks/ASMDISK06
/dev/oracleasm/disks/ASMDISK07
/dev/oracleasm/disks/ASMDISK08
/dev/oracleasm/disks/ASMDISK09
/dev/oracleasm/disks/ASMDISK10
Test #2F. Check: ASM Clients.
Verify what is connected to each ASM instance.
[grid@racnode1 ~]$ sqlplus / as sysasm

SQL> select dg.NAME,
            c.INSTANCE_NAME,
            c.DB_NAME,
            c.CLUSTER_NAME,
            c.STATUS
     from   v$asm_client c,
            v$asm_diskgroup dg
     where  c.GROUP_NUMBER = dg.GROUP_NUMBER
     order by
            c.DB_NAME;

NAME       INSTANCE_N  DB_NAME  CLUSTER_NAME STATUS
---------- ----------  -------- ------------ ------------
DATA       +ASM1       +ASM     cluster1     CONNECTED
CRS        +ASM1       +ASM     cluster1     CONNECTED
FRA        RAC1DB1     RAC1DB   cluster1     CONNECTED
DATA       RAC1DB1     RAC1DB   cluster1     CONNECTED
CRS        -MGMTDB     _mgmtdb  cluster1     CONNECTED
[grid@racnode2 ~]$ sqlplus / as sysasm

NAME       INSTANCE_N  DB_NAME  CLUSTER_NAME STATUS
---------- ----------  -------- ------------ ------------
CRS        +ASM2       +ASM     cluster1     CONNECTED
DATA       +ASM2       +ASM     cluster1     CONNECTED
DATA       RAC1DB2     RAC1DB   cluster1     CONNECTED
FRA        RAC1DB2     RAC1DB   cluster1     CONNECTED
Section #3: Check & Test Databases & Instances.
Test #3C. Check: User RAC Database & Instance.
Confirm where the database instances are running.
[oracle@racnode1 ~]$ srvctl status database -d RAC1DB
Instance RAC1DB1 is running on node racnode1
Instance RAC1DB2 is running on node racnode2
Test #3D. Check: User RAC Database DBVERIFY.
For the sake of brevity, we’ll run the DBVERIFY executable (dbv) for only one datafile.
[oracle@racnode1 ~]$ sqlplus / as sysdba

SQL> select name from v$datafile;

NAME
--------------------------------------------------------------------------------
+DATA/RAC1DB/DATAFILE/system.258.898779945
+DATA/RAC1DB/DATAFILE/sysaux.257.898779761
+DATA/RAC1DB/DATAFILE/undotbs1.260.898780207
+DATA/RAC1DB/DATAFILE/undotbs2.265.898783783
+DATA/RAC1DB/DATAFILE/users.259.898780201

[oracle@racnode1 scripts]$ cat dbv_parfile.txt
FILE='+DATA/RAC1DB/DATAFILE/users.259.898780201'
LOGFILE='users_datafile.out'
FEEDBACK=10
USERID=system/<removed>

[oracle@racnode1 scripts]$ dbv parfile=dbv_parfile.txt
DBVERIFY: Release 12.1.0.2.0 - Production on Mon Feb 15 11:54:52 2016
Copyright (c) 1982, 2014, Oracle and/or its affiliates.  All rights reserved.
[oracle@racnode1 scripts]$ cat users_datafile.out
DBVERIFY: Release 12.1.0.2.0 - Production on Mon Feb 15 11:54:52 2016
Copyright (c) 1982, 2014, Oracle and/or its affiliates.  All rights reserved.

DBVERIFY - Verification starting : FILE = +DATA/RAC1DB/DATAFILE/users.259.898780201
DBVERIFY - Verification complete

Total Pages Examined         : 640
Total Pages Processed (Data) : 30
Total Pages Failing   (Data) : 0
Total Pages Processed (Index): 5
Total Pages Failing   (Index): 0
Total Pages Processed (Other): 588
Total Pages Processed (Seg)  : 0
Total Pages Failing   (Seg)  : 0
Total Pages Empty            : 17
Total Pages Marked Corrupt   : 0
Total Pages Influx           : 0
Total Pages Encrypted        : 0
Highest block SCN            : 0 (0.0)
SQL> select instance_name from v$instance;
select instance_name from v$instance
*
ERROR at line 1:
ORA-25408: can not safely replay call
SQL> /

INSTANCE_NAME
----------------
RAC1DB2
Section #4: Test System & Cluster.
Test #4C. Test: Cluster Restart.
[root@racnode1 ~]# cd /u01/app/12.1.0/grid/bin
[root@racnode1 ~]# ./crsctl stop cluster -all
The output from this command is quite verbose, but it can be viewed here.
[root@racnode1 bin]# ./crsctl check cluster -all
**************************************************************
racnode1:
CRS-4535: Cannot communicate with Cluster Ready Services
CRS-4530: Communications failure contacting Cluster Synchronization Services daemon
CRS-4534: Cannot communicate with Event Manager
**************************************************************
racnode2:
CRS-4535: Cannot communicate with Cluster Ready Services
CRS-4530: Communications failure contacting Cluster Synchronization Services daemon
CRS-4534: Cannot communicate with Event Manager
**************************************************************

[grid@racnode2 ~]$ crsctl status resource -t
CRS-4535: Cannot communicate with Cluster Ready Services
CRS-4000: Command Status failed, or completed with errors.

[root@racnode1 bin]# ./crsctl start cluster -all
The output from the start cluster command is also a little verbose. It can be viewed here.
Note, despite the cluster having been shutdown and re-started, the instance RAC1DB1 on racnode1 remained shutdown. This is because that instance was shutdown in Test 3J. Re-starting the cluster does NOT automatically re-start cluster resources which had been previously shutdown. This is expected behavior.
The HTML version is very useful because some of the references it contains are hyperlinks to Oracle’s technical support documentation. How convenient is that?
Note, running the cluvfy command with the -html option will overwrite any existing cvucheckreport.html file.
An example of this command’s output can be seen here. Looks like a couple of things could do with some attention.
Test #5C. Check: Run ORAchk.
ORAchk is a utility provided by Oracle Support which analyzes your operating system setup, Oracle software installation(s) and configurations and compares them with Oracle best practices, recommendations and available patches. The objective is to identify known problem areas before they cause disruption to database services. ORAchk can only be downloaded via MOS, Doc ID 1268927.2. As the oracle software installation user (usually oracle), you unzip the ORAchk zip file, then run the orachk command with the required parameters. For example:
[oracle@racnode1 ORAchk]$ ./orachk -a -o verbose
The great thing about ORAchk is it only analyzes the things it needs to or you want it to. It’s output is saved to a time stamped directory, the main component being a large HTML report file. When opened in a browser, the report shows an overall System Health Score out of 100. For each component checked, the report provides individual test feedback in the form of a Pass, Fail, Warning or Info message. You can view the details of each test which provides recommendations and even links to technical support documentation which show how to fix the problem. In some cases, the details contain actual SQL code which will fix the problem.
The not so great thing about ORAchk is that it is very fussy and as a result does not always generate correct or accurate results. For example, some perfectly valid unalias commands in the .bash_profile of the grid user caused ORAchk to fail multiple tests and even time out running others. Code timing out is especially problematic to the extent there are two environment variables you can set to allow a longer timeout periods. These are documented in the User Guide. The values I have used which (mostly) worked are:
RAT_ROOT_TIMEOUT=800
RAT_TIMEOUT=280
Suffice it to say, ORAchk isn’t perfect but is still worth trying. Just make sure you verify its results.
Task #4: Common Administration Tasks.
This task will see us perform a few corrective actions based upon the output of the health checks and ORAchk. We’ll also complete some admin which includes some of the things you’d typically do to a cluster and RAC database. We having fun yet? 🙂
ORAchk highlighted our RAC database is not running in archivelog mode. So let’s fix that.
Task #4.1a: Review Parameters.
The normal parameters used to control the archiving of the Online Redo Logs have no effect when using ASM and a Fast Recovery Area. The parameters which do matter are these:
SQL> show parameter db_recovery_file_dest

NAME                                 TYPE        VALUE
------------------------------------ ----------- ------------------------------
db_recovery_file_dest                string      +FRA
db_recovery_file_dest_size           big integer 4785M
The parameter db_recovery_file_dest effectively trumps the traditional log_archive_dest_1 parameter and ensures the archived Online Redo Logs are stored in the Fast Recovery Area. In our case, that happens to be implemented as an ASM Diskgroup called +FRA. Also, the traditional parameter log_archive_format, which defaults to %t_%s_%r.dbf, has no effect since the archived Online Redo Log file names will follow the OMF standard naming convention.
[oracle@racnode1 ~]$ . oraenv
ORACLE_SID = [RAC1DB1] ?
The Oracle base remains unchanged with value /u01/app/oracle

[oracle@racnode1 ~]$ sqlplus / as sysdba
SQL*Plus: Release 12.1.0.2.0 Production on Tue Feb 16 21:02:46 2016
Copyright (c) 1982, 2014, Oracle.  All rights reserved.

Connected to an idle instance.

SQL> startup mount
ORACLE instance started.

Total System Global Area 2147483648 bytes
Fixed Size                  2926472 bytes
Variable Size            1275070584 bytes
Database Buffers          855638016 bytes
Redo Buffers               13848576 bytes
Database mounted.
Task #4.1d: Enable Archiving & Shutdown the Instance.
SQL> alter database archivelog;
Database altered.

SQL> shutdown immediate
ORA-01109: database not open

Database dismounted.
ORACLE instance shut down.
SQL> exit
SQL> archive log list
Database log mode              Archive Mode
Automatic archival             Enabled
Archive destination            USE_DB_RECOVERY_FILE_DEST
Oldest online log sequence     316
Next log sequence to archive   317
Current log sequence           317

SQL> alter system switch logfile;
System altered.

SQL> select name from v$archived_log;

NAME
--------------------------------------------------------------------------------
+FRA/RAC1DB/ARCHIVELOG/2016_02_16/thread_1_seq_317.261.903993279
From racnode2 (Thread #2 – RAC1DB2):
SQL> archive log list
Database log mode              Archive Mode
Automatic archival             Enabled
Archive destination            USE_DB_RECOVERY_FILE_DEST
Oldest online log sequence     265
Next log sequence to archive   265
Current log sequence           266

SQL> alter system switch logfile;
System altered.

SQL> select name from v$archived_log;

NAME
--------------------------------------------------------------------------------
+FRA/RAC1DB/ARCHIVELOG/2016_02_16/thread_1_seq_317.261.903993279
+FRA/RAC1DB/ARCHIVELOG/2016_02_16/thread_2_seq_265.262.903993427
We can also see the archived Online Redo Logs via ASMCMD:
ASMCMD> pwd
+FRA/RAC1DB/ARCHIVELOG/2016_02_16

ASMCMD> ls -l
Type        Redund  Striped  Time             Sys  Name
ARCHIVELOG  UNPROT  COARSE   FEB 16 21:00:00  Y    thread_1_seq_317.261.903993279
ARCHIVELOG  UNPROT  COARSE   FEB 16 21:00:00  Y    thread_2_seq_265.262.903993427
Task #4.2: Add an Additional OCR File.
We can have up to 5 OCR files and the fact Oracle allows for that suggests we ought to have more than just one. So let’s fix that.
Task #4.2a: Review Current OCR Configuration.
[grid@racnode2 ~]$ ocrcheck
Status of Oracle Cluster Registry is as follows :
         Version                  :          4
         Total space (kbytes)     :     409568
         Used space (kbytes)      :       1588
         Available space (kbytes) :     407980
         ID                       : 1641944593
         Device/File Name         :       +CRS
                                    Device/File integrity check succeeded
                                    Device/File not configured
                                    Device/File not configured
                                    Device/File not configured
                                    Device/File not configured
         Cluster registry integrity check succeeded
         Logical corruption check bypassed due to non-privileged user
So, we know we have just one OCR file located in the +CRS ASM Diskgroup. Let’s take a look at that file using ASMCMD:
ASMCMD> pwd
+crs/cluster1/OCRFILE

ASMCMD> ls -l
Type     Redund  Striped  Time             Sys  Name
OCRFILE  UNPROT  COARSE   FEB 16 22:00:00  Y    REGISTRY.255.898728137
Task #4.2b: Add an OCR Location.
I created an additional ASM Diskgroup called CRS2. The ocrconfig command must be run as root.
[root@racnode1 ~]# . oraenv
ORACLE_SID = [root] ? +ASM1
The Oracle base has been set to /u01/app/grid

[root@racnode1 ~]# ocrconfig -add +CRS2
Note, initial attempts to run this command repeatedly generated PROT-16 and PROC-23 errors. CRS was running fine on both nodes, the CRS log file contained no errors and the ASM instance alert log did not tell me anything of interest. A reboot of both nodes made this problem go away. Go figure. YMMV.
Task #4.2c: Review Updated OCR Configuration.
[grid@racnode1 ~]$ ocrcheck
Status of Oracle Cluster Registry is as follows :
         Version                  :          4
         Total space (kbytes)     :     409568
         Used space (kbytes)      :       1604
         Available space (kbytes) :     407964
         ID                       : 1641944593
         Device/File Name         :       +CRS
                                    Device/File integrity check succeeded
         Device/File Name         :      +CRS2
                                    Device/File integrity check succeeded
                                    Device/File not configured
                                    Device/File not configured
                                    Device/File not configured
         Cluster registry integrity check succeeded
         Logical corruption check bypassed due to non-privileged user

[grid@racnode1 ~]$ cat /etc/oracle/ocr.loc
#Device/file  getting replaced by device +CRS2/cluster1/OCRFILE/REGISTRY.255.904309547
ocrconfig_loc=+CRS/cluster1/OCRFILE/registry.255.898728137
ocrmirrorconfig_loc=+CRS2/cluster1/OCRFILE/REGISTRY.255.904309547

ASMCMD> pwd
+crs2/cluster1/OCRFILE

ASMCMD> ls -l
Type     Redund  Striped  Time             Sys  Name
OCRFILE  UNPROT  COARSE   FEB 20 14:00:00  Y    REGISTRY.255.904309547
Task #4.3: Add an Additional Votedisk.
Oracle best practice dictates we should have an odd number of Votedisks. Yes, I know 1 is an odd number but we should probably have more than one. Let’s fix that.
Task #4.3a: Review Current Votedisk Configuration.
[grid@racnode2 ~]$ crsctl query css votedisk
##  STATE    File Universal Id                File Name Disk group
--  -----    -----------------                --------- ---------
 1. ONLINE   6623c2c7b3a24fc5bffd28b93c053000 (/dev/oracleasm/disks/ASMDISK01) [CRS]
Located 1 voting disk(s).
Note, there is currently only ONE Votedisk because it resides in the +CRS ASM Diskgroup which is configured with external redundancy and a single ASM Disk. Hence, only ONE Votedisk.
Task #4.3b: Add Additional Votedisks.
Since we’re using ASM to store the Votedisk, we can’t just add more Votedisks to other ASM Diskgroups. It doesn’t work that way. Instead,the Votedisk redundancy (i.e. the number of Votedisks you have) is dependent upon the redundancy level of the ASM Diskgroup where the Votedisk(s) are stored. However, there is a mismatch between ASM Diskgroup redundancy and Oracle Clusterware Votedisk redundancy.
Redundancy Level
Minimum # of ASM Disks
# of Clusterware Votedisk Files
External
1
1
Normal
2
3
High
3
5
What this means is, if you create an ASM Diskgroup with NORMAL redundancy and 2 ASM Disks, trying to create Votedisks in that ASM Diskgroup would fail. This is because NORMAL redundancy for Votedisks would need 3 ASM Disks, not 2. Using a NORMAL redundancy ASM Diskgroup with 3 ASM Disks could contain Votedisks as all 3 disks would be used to store Votedisks.
To further make the point, I created a 4 disk NORMAL redundancy ASM Diskgroup called DATA2:
SQL> select dg.name, dg.type Redundancy, d.name, d.pathfrom v$asm_disk d, v$asm_diskgroup dgwhere dg.group_number = d.group_numberand dg.name = 'DATA2'order by d.name;
NAME REDUNDANCY NAME PATH
---------- ---------- ---------- ------------------------------
DATA2 NORMAL DATA2_0000 /dev/oracleasm/disks/ASMDISK08
DATA2 NORMAL DATA2_0001 /dev/oracleasm/disks/ASMDISK09
DATA2 NORMAL DATA2_0002 /dev/oracleasm/disks/ASMDISK10
DATA2 NORMAL DATA2_0003 /dev/oracleasm/disks/ASMDISK06
Now we’ll move the Votedisk from the +CRS ASM Diskgroup to the +DATA2 ASM Diskgroup:
[grid@racnode2 ~]$ crsctl replace votedisk +DATA2
Successful addition of voting disk fd93674940d24f72bfcf07b3e1ac6d14.
Successful addition of voting disk fc9912809b3f4f3fbf64add0b80b34e4.
Successful addition of voting disk 5e840512f2904f41bfbc5dd468b4051b.
Successful deletion of voting disk 6623c2c7b3a24fc5bffd28b93c053000.
Successfully replaced voting disk group with +DATA2.
CRS-4266: Voting file(s) successfully replaced
As you can see, the NORMAL redundancy setting of the ASM Diskgroup created 3 Votedisks:
[grid@racnode2 ~]$ crsctl query css votedisk
##  STATE    File Universal Id                File Name Disk group
--  -----    -----------------                --------- ---------
 1. ONLINE   fd93674940d24f72bfcf07b3e1ac6d14 (/dev/oracleasm/disks/ASMDISK08) [DATA2]
 2. ONLINE   fc9912809b3f4f3fbf64add0b80b34e4 (/dev/oracleasm/disks/ASMDISK09) [DATA2]
 3. ONLINE   5e840512f2904f41bfbc5dd468b4051b (/dev/oracleasm/disks/ASMDISK10) [DATA2]
Located 3 voting disk(s).
Note, only 3 of the 4 ASM Disks in the +DATA2 ASM Diskgroup are used for Votedisks.
Task #4.4: Implement oswatcher.
ORAchk highlighted our RAC nodes are not running oswatcher. Let’s fix that.
The oswatcher utility available via Oracle Support, Doc ID 301137.1. It captures and analyzes performance data from the underlying operating system. The capture aspect is documented in MOS Doc ID 1531223.1 and the analyze aspect is documented in MOS Doc ID 461053.1.
Task #4.4a: Download.
Within MOS, navigate to Doc ID 301137.1, then click the OSWatcher Download link. This will take you to the OSWatcher Download section of the document. There you’ll see another link called:
Click here to download OSWatcher for Solaris, Linux and HP-UX. (AIX users see link below)
Click that link and you’ll be prompted to download a file called oswbb733.tar (where the 733 means version 7.3.3). Once this file is downloaded, copy it to an appropriate location on ALL the nodes in your cluster.
Task #4.4b: Install.
Installing OSWatcher is simply a case of untarring the tar file, then changing the file permissions:
[oracle@racnode1 ~]$ cd ./media/oswatcher

[oracle@racnode1 OSWatcher]$ tar -xvf oswbb733.tar

[oracle@racnode1 oswatcher]$ ls -l
drwxr-xr-x 4 oracle oinstall    4096 Feb 27  2015 oswbb
-rw-r--r-- 1 oracle oinstall 6318080 Feb 21 15:10 oswbb733.tar

[oracle@racnode1 oswatcher]$ cd oswbb
[oracle@racnode1 oswbb]$ chmod 744 *
[oracle@racnode1 oswbb]$ ls -l
-rwxr--r-- 1 oracle oinstall     67 Jan 15  2014 call_du.sh
-rwxr--r-- 1 oracle oinstall     68 Oct  7  2013 call_sar.sh
-rwxr--r-- 1 oracle oinstall     71 Jan  7  2014 call_uptime.sh
drwxr--r-- 4 oracle oinstall   4096 Sep  8  2014 docs
-rwxr--r-- 1 oracle oinstall    626 Jan 15  2014 Example_extras.txt
-rwxr--r-- 1 oracle oinstall   1864 Oct  7  2013 Exampleprivate.net
-rwxr--r-- 1 oracle oinstall    772 May  8  2014 ifconfigsub.sh
-rwxr--r-- 1 oracle oinstall    743 Oct  7  2013 iosub.sh
-rwxr--r-- 1 oracle oinstall   1486 Jan  8  2014 ltop.sh
-rwxr--r-- 1 oracle oinstall    542 Oct  7  2013 mpsub.sh
-rwxr--r-- 1 oracle oinstall    740 Oct  7  2013 nfssub.sh
-rwxr--r-- 1 oracle oinstall   5062 Sep 17  2014 OSWatcherFM.sh
-rwxr--r-- 1 oracle oinstall  35108 Feb 27  2015 OSWatcher.sh
-rwxr--r-- 1 oracle oinstall 233897 Feb 27  2015 oswbba.jar
-rwxr--r-- 1 oracle oinstall    414 Oct  7  2013 oswib.sh
-rwxr--r-- 1 oracle oinstall    435 Jan  8  2014 oswnet.sh
-rwxr--r-- 1 oracle oinstall    825 Oct  7  2013 oswrds.sh
-rwxr--r-- 1 oracle oinstall    524 Oct  7  2013 oswsub.sh
-rwxr--r-- 1 oracle oinstall   1445 Oct 17  2013 psmemsub.sh
drwxr--r-- 2 oracle oinstall   4096 May  2  2014 src
-rwxr--r-- 1 oracle oinstall   2574 Feb 26  2015 startOSWbb.sh
-rwxr--r-- 1 oracle oinstall    558 Apr 17  2014 stopOSWbb.sh
-rwxr--r-- 1 oracle oinstall    746 Nov  6  2013 tarupfiles.sh
-rwxr--r-- 1 oracle oinstall   4219 Nov  6  2013 tar_up_partial_archive.sh
-rwxr--r-- 1 oracle oinstall    545 Feb 23  2015 vmsub.sh
-rwxr--r-- 1 oracle oinstall   1486 Feb 26  2015 xtop.sh
User guides and README files are in the docs subdirectory.
Task #4.4c: Configure.
OSWatcher basically runs a series of OS monitoring commands at a predetermined frequency, stores the output of those commands for a predetermined amount of time in a predetermined location.
The defaults are a frequency of 30 seconds with output data kept for the last 48 hours in an archive directory where you untarred the software. These can all be customized.
In addition, Oracle Support recommends you use OSWatcher to monitor Grid Infrastructure’s private interconnect networks. This is done by creating a special file called private.net with the appropriate entries:
[oracle@racnode1 oswbb]$ cat private.net
######################################################################
#Linux Example
######################################################################
echo "zzz ***"`date`
traceroute -r -F racnode1-priv
traceroute -r -F racnode2-priv
######################################################################
# DO NOT DELETE THE FOLLOWING LINE!!!!!!!!!!!!!!!!!!!!!
######################################################################
rm locks/lock.file
Task #4.4d: Run OSWatcher.
The script which starts OSWatcher is called startOSWbb.sh. It can take up to 4 parameters:
Parameter Position
Meaning
1
Sample Frequency (Seconds)
2
Archive History (Hours)
3
OS Compression Utility to Use
4
Archive Directory Path
For example, to capture stats once per minute, keep those stats for 12 hours, use gzip to compress the archive data and store the archive data in /nas1/OSWATCHER/racnode1, use this command:
[oracle@racnode1 oswbb]$ ./startOSWbb.sh 60 12 gzip /nas1/OSWATCHER/racnode1
Info...Zip option IS specified.
Info...OSW will use gzip to compress files.

Testing for discovery of OS Utilities...
VMSTAT found on your system.
IOSTAT found on your system.
MPSTAT found on your system.
IFCONFIG found on your system.
NETSTAT found on your system.
TOP found on your system.
Warning... /proc/slabinfo not found on your system.

Testing for discovery of OS CPU COUNT
oswbb is looking for the CPU COUNT on your system
CPU COUNT will be used by oswbba to automatically look for cpu problems

CPU COUNT found on your system.
CPU COUNT = 1

Discovery completed.

Starting OSWatcher v7.3.3  on Sun Feb 21 17:32:10 CST 2016
With SnapshotInterval = 60
With ArchiveInterval = 12

OSWatcher - Written by Carl Davis, Center of Expertise,
Oracle Corporation
For questions on install/usage please go to MOS (Note:301137.1)
If you need further assistance or have comments or enhancement
requests you can email me Carl.Davis@Oracle.com

Data is stored in directory: /nas1/OSWATCHER/racnode1

Starting Data Collection...
Once OSWatcher is underway, it will echo heartbeat information to your screen at the frequency you specified (in our case every 60 seconds):
oswbb heartbeat:Sun Feb 21 17:40:16 CST 2016
It’s OK to log out of the session which initiated OSWatcher. The processes continue to run in the background:
Analyzing the OSWatcher data might be a topic of a future update. You can’t have everything all in one go.
Task #4.5: Check I/O Calibration.
The RAC Database Health Check reported this failure:
Verification Check       : FILESYSTEMIO_OPTIONS
Verification Description : Checks FILESYSTEMIO_OPTIONS parameter
Verification Result      : WARNING
Verification Summary     : Check for FILESYSTEMIO_OPTIONS failed
Additional Details       : FILESYSTEMIO_OPTIONS=setall supports both direct I/O and
                           asynchronus I/O which helps to achieve optimal performance
                           with database data files

Database(Instance) Status  Expected Value                 Actual Value
---------------------------------------------------------------------------------------
rac1db             FAILED  filesystemio_options = SETALL  filesystemio_options = none
We know our RAC database is using ASM for its storage which should optimize I/O for us. One of the prerequisites of running Oracle’s I/O Calibration is to ensure asynchronous I/O is enabled for all the database datafiles, so let’s check that now:
Asynchronous I/O seems to be in play. We know all these files are in the +DATA ASM Diskgroup, which contains 2 ASM Disks:
SQL> select dg.name DG,
             d.name Disk,
             decode(d.GROUP_NUMBER,
                    0,'Unallocated',
                    'In Use') State,
             d.path
      from   v$asm_disk d left outer join v$asm_diskgroup dg
      on     dg.group_number = d.group_number
      order by
             dg.name,
             d.path;

DG         DISK         STATE       PATH
---------- ------------ ----------- ------------------------------
CRS        CRS_0000     In Use      /dev/oracleasm/disks/ASMDISK01
CRS2       CRS2_0000    In Use      /dev/oracleasm/disks/ASMDISK07
DATA       DATA_0000    In Use      /dev/oracleasm/disks/ASMDISK02
DATA       DATA_0001    In Use      /dev/oracleasm/disks/ASMDISK03
DATA2      DATA2_0003   In Use      /dev/oracleasm/disks/ASMDISK06
DATA2      DATA2_0000   In Use      /dev/oracleasm/disks/ASMDISK08
DATA2      DATA2_0001   In Use      /dev/oracleasm/disks/ASMDISK09
DATA2      DATA2_0002   In Use      /dev/oracleasm/disks/ASMDISK10
FRA        FRA_0000     In Use      /dev/oracleasm/disks/ASMDISK04
FRA        FRA_0001     In Use      /dev/oracleasm/disks/ASMDISK05
I/O calibration is discussed in the Oracle Database Performance Tuning Guide and can be reviewed here. Let’s run the calibration code multiple times to see what results we get with FILESYSTEMIO_OPTIONS set to NONE and SETALL. Here’s the calibration code:
Having run the code multiple times with FILESYSTEMIO_OPTIONS set to NONE, let’s change it to SETALL. It’s not a dynamic parameter so we’ll need to bounce the database:
SQL> show parameter filesystemio_options
NAME                                 TYPE        VALUE
------------------------------------ ----------- ------------------------------
filesystemio_options                 string      none

SQL> alter system set filesystemio_options = SETALL scope=spfile;
System altered.

[oracle@racnode1 racnode1]$ srvctl stop database -d RAC1DB
[oracle@racnode1 racnode1]$ srvctl start database -d RAC1DB
[oracle@racnode1 racnode1]$ srvctl status database -d RAC1DB
Instance RAC1DB1 is running on node racnode1
Instance RAC1DB2 is running on node racnode2

SQL> show parameter filesystemio_options
NAME                                 TYPE        VALUE
------------------------------------ ----------- ------------------------------
filesystemio_options                 string      SETALL
These are the results averaged for multiple runs of the code:
FILESYSTEMIO_OPTIONS
Max IOPS
Latency
Max MBPS
NONE
9,631
9.67
105.67
SETALL
9,796
8
105.67
As you can see, the Max IOPS improved slightly with SETALL which also performed with slightly lower latency. That said, the two sets of results are so close that it makes little difference. However, things didn’t get worse by setting FILESYSTEMIO_OPTIONS to SETALL, so let’s call that a win. Sort of.
Task #4.6: Apply a Patch (22191349).
ORAchk recommended applying the Grid Infrastructure Patch Set Update 12.1.0.2.160119 (JAN2016). There are multiple steps involved, so let’s get started.
Note, this is a rolling patch. It can be applied to a running system. Clusterware will be shutdown and patched as you apply the patch one node at a time.
Task #4.6a: Update opatch.
To apply this patch, the opatch utility must be version 12.1.0.1.7 or later. So let’s check the version in the GI and database $ORACLE_HOME directories:
[grid@racnode1 OPatch]$ ./opatch version
OPatch Version: 12.1.0.1.3
OPatch succeeded.

[oracle@racnode1 OPatch]$ ./opatch version
OPatch Version: 12.1.0.1.3
OPatch succeeded.
We need to update opatch which is done by downloading the latest version from MOS, patch #6880880.
We’ll update the GI and database $ORACLE_HOME directories on racnode1 first, taking a backup of the original OPatch directories as we go.
Check the new opatch version then remove the zip file:
[grid@racnode1 OPatch]$ ./opatch version
OPatch Version: 12.1.0.1.10
OPatch succeeded.

[grid@racnode1 OPatch]$ cd ..
[grid@racnode1 grid]$ ls -l *.zip
-rw-r--r-- 1 grid oinstall 52774823 Feb 29 11:48 p6880880_121010_Linux-x86-64.zip

[grid@racnode1 grid]$ rm -f p6880880_121010_Linux-x86-64.zip
Note, don’t forget to change the GI $ORACLE_HOME permissions back to 755.
Now update opatch in the database $ORACLE_HOME:
[oracle@racnode1 dbhome_1]$ mv OPatch OPatch_12.1.0.1.3
[oracle@racnode1 dbhome_1]$ cp /nas1/PATCHES/6880880/p6880880_121010_Linux-x86-64.zip .
[oracle@racnode1 dbhome_1]$ unzip p6880880_121010_Linux-x86-64.zip
[oracle@racnode1 dbhome_1]$ cd OPatch

[oracle@racnode1 OPatch]$ ./opatch version
OPatch Version: 12.1.0.1.10
OPatch succeeded.

[oracle@racnode1 dbhome_1]$ cd ..
[oracle@racnode1 dbhome_1]$ ls -l *.zip
-rw-r--r-- 1 oracle oinstall 52774823 Feb 29 11:59 p6880880_121010_Linux-x86-64.zip

[oracle@racnode1 dbhome_1]$ rm -f p6880880_121010_Linux-x86-64.zip
Now repeat the same tasks for the GI and database $ORACLE_HOME directories on racnode2.
Task #4.6b: Create an Oracle Configuration Manager (OCM) Response File.
You must have an OCM response file with file permissions of 775.
[grid@racnode1 bin]$ pwd
/u01/app/12.1.0/grid/OPatch/ocm/bin

[grid@racnode1 bin]$ ./emocmrsp -no_banner -output /u01/app/12.1.0/grid/OPatch/ocm/ocm.rsp
Provide your email address to be informed of security issues, install and
initiate Oracle Configuration Manager. Easier for you if you use your My
Oracle Support Email address/User Name.
Visit http://www.oracle.com/support/policies.html for details.
Email address/User Name:
You have not provided an email address for notification of security issues.
Do you wish to remain uninformed of security issues ([Y]es, [N]o) [N]: Y
The OCM configuration response file (/u01/app/12.1.0/grid/OPatch/ocm/ocm.rsp) was
successfully created.

[grid@racnode1 bin]$ cd ..
[grid@racnode1 ocm]$ chmod 775 ocm.rsp
[grid@racnode1 ocm]$ ls -l
drwxr-x--- 2 grid oinstall     4096 Nov 13 14:15 bin
drwxr-x--- 2 grid oinstall     4096 Nov 13 14:15 doc
drwxr-x--- 2 grid oinstall     4096 Nov 13 14:15 lib
-rw-r----- 1 grid oinstall     638 Nov 13 14:15 ocm_platforms.txt
-rwxrwxr-x 1 grid oinstall     621 Feb 29 12:44 ocm.rsp
-rwxr-x--- 1 grid oinstall 42560960 Nov 13 14:15 ocm.zip
Repeat this step for the GI $ORACLE_HOME on racnode2.
Task #4.6c: Check the $ORACLE_HOME Inventories.
On racnode1, we need to check the GI and database $ORACLE_HOME inventories.
Again, the output is quite verbose, but it can be viewed here.
Checking the inventories tells us there are no interim patches applied to either the GI or database $ORACLE_HOME directories.
Task #4.6d: Unzip the Patch.
The patch needs to be unzipped and accessible to all nodes in the cluster. It makes it easier that way. Fortunately I have some NAS storage which is mounted on both RAC nodes.
[grid@racnode1 grid]$ cd /nas1/PATCHES/22191349/grid
[grid@racnode1 grid]$ unzip p22191349_121020_Linux-x86-64.zip
Task #4.6e: Check For One-Off Patch Conflicts.
We already know that neither $ORACLE_HOME directories contain any patches at this point, so there can’t be any conflicts by definition. Still, we’ll run the conflict check anyway which must be done as the root user:
[root@racnode1 grid]# pwd
/nas1/PATCHES/22191349/grid

[root@racnode1 grid]# export PATH=$PATH:/u01/app/12.1.0/grid/OPatch
[root@racnode1 grid]# which opatchauto
/u01/app/12.1.0/grid/OPatch/opatchauto

[root@racnode1 grid]# /u01/app/12.1.0/grid/OPatch/opatchauto apply /nas1/PATCHES/22191349/grid/22191349 -analyze -ocmrf /u01/app/12.1.0/grid/OPatch/ocm/ocm.rsp
OPatch Automation Tool
Copyright (c)2014, Oracle Corporation. All rights reserved.
OPatchauto Version : 12.1.0.1.10
OUI Version        : 12.1.0.2.0
Running from       : /u01/app/12.1.0/grid
opatchauto log file: /u01/app/12.1.0/grid/cfgtoollogs/opatchauto/22191349/
opatch_gi_2016-02-29_14-02-15_analyze.log

NOTE: opatchauto is running in ANALYZE mode. There will be no change to your system.

OCM RSP file has been ignored in analyze mode.

Parameter Validation: Successful
Configuration Validation: Successful

Patch Location: /nas1/PATCHES/22191349/grid/22191349
Grid Infrastructure Patch(es): 21436941 21948341 21948344 21948354
DB Patch(es): 21948344 21948354

Patch Validation: Successful
Grid Infrastructure home: /u01/app/12.1.0/grid
DB home(s): /u01/app/oracle/product/12.1.0/dbhome_1

Analyzing patch(es) on "/u01/app/oracle/product/12.1.0/dbhome_1" ...
Patch "/nas1/PATCHES/22191349/grid/22191349/21948344" successfully analyzed on
 "/u01/app/oracle/product/12.1.0/dbhome_1" for apply.
Patch "/nas1/PATCHES/22191349/grid/22191349/21948354" successfully analyzed on
 "/u01/app/oracle/product/12.1.0/dbhome_1" for apply.
Analyzing patch(es) on "/u01/app/12.1.0/grid" ...
Patch "/nas1/PATCHES/22191349/grid/22191349/21436941" successfully analyzed on
 "/u01/app/12.1.0/grid" for apply.
Patch "/nas1/PATCHES/22191349/grid/22191349/21948341" successfully analyzed on
 "/u01/app/12.1.0/grid" for apply.
Patch "/nas1/PATCHES/22191349/grid/22191349/21948344" successfully analyzed on
 "/u01/app/12.1.0/grid" for apply.
Patch "/nas1/PATCHES/22191349/grid/22191349/21948354" successfully analyzed on
 "/u01/app/12.1.0/grid" for apply.

SQL changes, if any, are analyzed successfully on the following database(s): RAC1DB

Apply Summary:
Following patch(es) are successfully analyzed:
GI Home: /u01/app/12.1.0/grid: 21436941,21948341,21948344,21948354
DB Home: /u01/app/oracle/product/12.1.0/dbhome_1: 21948344,21948354

opatchauto succeeded.
As we suspected, no conflicts so we can proceed and apply the patch.
Task #4.6f: Apply the Patch.
There are some options for applying the patch. We’ll choose the ‘non-shared GI and database $ORACLE_HOME and ACFS is not configured’ option. Each node has to be patched separately on a running system, i.e. the cluster is up. Let’s patch racnode1 first and enjoy the nightmare together. 🙂
The patch is applied by the root user using this command template:
This had the effect of installing patches 21948344 and 21948354 into the database $ORACLE_HOME, but it failed to install any patches into the GI $ORACLE_HOME. The reason was there was insufficient disk space. The patch log file contained these messages:
...
[Feb 29, 2016 2:27:40 PM]   Running prerequisite checks...
[Feb 29, 2016 2:27:41 PM]   Space Needed : 8180.049MB
[Feb 29, 2016 2:27:41 PM]   Space Usable : 7786.043MB
[Feb 29, 2016 2:27:41 PM]   Required amount of space(8180.049MB) is not available.
[Feb 29, 2016 2:27:41 PM]   Prerequisite check "CheckSystemSpace" failed.
                            The details are:
                            Required amount of space(8180.049MB) is not available.
...
The /u01 file system did not have the 8 GB of free disk it needed. It would have been nice if the patch conflict command had told me this. Thanks Oracle! As is customary in patch README files, the command to rollback the patch is also documented. However, attempts to rollback the patch also failed because Clusterware wasn’t running and my attempts to re-start it on racnode1 repeatedly failed. A node reboot solved that problem and I tried to rollback the patch for a second time. That failed as well. This time the rollback command reported these errors in the log file:
COMMAND EXECUTION FAILURE :
Using configuration parameter file: /u01/app/12.1.0/grid/OPatch/opatchautotemp_racnode1/
patchwork/crs/install/crsconfig_params
Oracle Clusterware active version on the cluster is [12.1.0.2.0]. The cluster upgrade
state is [ROLLING PATCH]. The cluster active patch level is [0].
PROC-28: Oracle Cluster Registry already in current version
CRS-1153: There was an error setting Oracle Clusterware to rolling patch mode.
CRS-4000: Command Start failed, or completed with errors.
2016/02/29 16:01:23 CLSRSC-430: Failed to start rolling patch mode

ERROR:
Died at /u01/app/12.1.0/grid/OPatch/opatchautotemp_racnode1/patchwork/crs/
install/crspatch.pm line 776.
Clusterware was already in ‘rolling patch mode’, so you’d think trying to set it to that mode wouldn’t be a problem, right? Wrong! Unfortunately, this is an unpublished pub. Fortunately, Oracle already knows about this and has a workaround documented in MOS, Doc ID 1943498.1. It boils down to running this command:
[root@racnode1 ~]# crsctl stop rollingpatch
This command appears to switch Clusterware back into NORMAL mode, so it can be switched into ROLLING PATCH mode when you attempt to rollback the patch or apply it. The log file also contains this rather useful tidbit of information:
--------------After fixing the cause of failure you have two options shown below:
Run 'opatchauto resume'
or
Manually run the commands listed below
---------------------------------------------------------------------------------
...
I wasn’t about to trust ‘opatchauto resume’, so I opted for running the 17 fully documented commands in sequential order. Some needed to be run as root, some as oracle and some as grid. Unbelievably, they all worked! We can see the patches which were applied by running opatch lsinventory commands:
Note, opatch stores patch rollback information and files in a sub-directory within each $ORACLE_HOME called .patch_storage. This has the potential to consume a large quantity of disk space and thus reduce the free space available to the filesystem which contains the Oracle code installations. Running out of disk space in this filesystem is bad news. You should NOT just delete/archive the .patch_storage directory, so Oracle recommends one of 3 courses of action in the event disk space becomes an issue:
Increase the size of the filesystem. (I know – genius right? ?)
Use symbolic links and relocate .patch_storage some place else. (This is what I did – worked fine)
Run the command: opatch util cleanup. (Documented in MOS Doc ID 550522.1)
So, with the $ORACLE_HOME directories patched on racnode1, it’s time to attempt applying the patch on racnode2. Yes, I did check I had more than 8 GB of free space in the /u01 filesystem before I started. Thanks for asking. When applying the patch actually works as intended, it looks like this:
[root@racnode2 ~]# . oraenv
ORACLE_SID = [+ASM2] ?
The Oracle base remains unchanged with value /u01/app/grid

[root@racnode2 trace]# export PATH=$PATH:/u01/app/12.1.0/grid/OPatch
[root@racnode2 trace]# which opatchauto
/u01/app/12.1.0/grid/OPatch/opatchauto

[root@racnode2 ~]# /u01/app/12.1.0/grid/OPatch/opatchauto apply /nas1/PATCHES/22191349/grid/22191349 -ocmrf /u01/app/12.1.0/grid/OPatch/ocm/ocm.rsp

OPatch Automation Tool
Copyright (c)2014, Oracle Corporation. All rights reserved.
OPatchauto Version  : 12.1.0.1.10
OUI Version         : 12.1.0.2.0
Running from        : /u01/app/12.1.0/grid
opatchauto log file : /u01/app/12.1.0/grid/cfgtoollogs/opatchauto/22191349/
                       opatch_gi_2016-03-01_13-17-42_deploy.log

Parameter Validation: Successful
Configuration Validation: Successful

Patch Location: /nas1/PATCHES/22191349/grid/22191349
Grid Infrastructure Patch(es): 21436941 21948341 21948344 21948354
DB Patch(es): 21948344 21948354

Patch Validation: Successful

Grid Infrastructure home: /u01/app/12.1.0/grid
DB home(s): /u01/app/oracle/product/12.1.0/dbhome_1

Performing prepatch operations on CRS Home... Successful

Applying patch(es) to "/u01/app/oracle/product/12.1.0/dbhome_1" ...
Patch "/nas1/PATCHES/22191349/grid/22191349/21948344" successfully applied
 to "/u01/app/oracle/product/12.1.0/dbhome_1".
Patch "/nas1/PATCHES/22191349/grid/22191349/21948354" successfully applied
 to "/u01/app/oracle/product/12.1.0/dbhome_1".

Applying patch(es) to "/u01/app/12.1.0/grid" ...
Patch "/nas1/PATCHES/22191349/grid/22191349/21436941" successfully applied
 to "/u01/app/12.1.0/grid".
Patch "/nas1/PATCHES/22191349/grid/22191349/21948341" successfully applied
 to "/u01/app/12.1.0/grid".
Patch "/nas1/PATCHES/22191349/grid/22191349/21948344" successfully applied
 to "/u01/app/12.1.0/grid".
Patch "/nas1/PATCHES/22191349/grid/22191349/21948354" successfully applied
 to "/u01/app/12.1.0/grid".

Performing postpatch operations on CRS Home... Successful

SQL changes, if any, are applied successfully on the following database(s): RAC1DB

Apply Summary:
Following patch(es) are successfully installed:
GI Home: /u01/app/12.1.0/grid: 21436941,21948341,21948344,21948354
DB Home: /u01/app/oracle/product/12.1.0/dbhome_1: 21948344,21948354

opatchauto succeeded.
Again, running the opatch lsinventory command in each $ORACLE_HOME will verify the patches have been applied.
Task #4.6g: Run datapatch.
The final step involves running a script called datapatch which is located in the OPatch directory under $ORACLE_HOME. The documentation says for a RAC environment, run this from only one node. We’re left to assume we do this after all the nodes have been patched. There are instructions for both a “Standalone DB” and “Single/Multitenant (CDB/PDB) DB”. We know our user RAC database is not a CDB, but the GIMR database (_MGMTDB) is. Since the GI $ORACLE_HOME was patched and that codeset runs the _MGMTDB database, again we have to assume we need to run the datapatch script for that database as well. It would be nice if Oracle’s documentation made that clear.
The RAC1DB instances are already up and running, so we’ll dive straight in and run the datapatch script from racnode1:
[oracle@racnode1 OPatch]$ pwd
/u01/app/oracle/product/12.1.0/dbhome_1/OPatch

[oracle@racnode1 OPatch]$ ./datapatch -verbose
SQL Patching tool version 12.1.0.2.0 on Wed Mar 2 10:16:57 2016
Copyright (c) 2015, Oracle. All rights reserved.

Log file for this invocation: /u01/app/oracle/cfgtoollogs/sqlpatch/
  sqlpatch_2324_2016_03_02_10_16_57/sqlpatch_invocation.log

Connecting to database...OK
Bootstrapping registry and package to current versions...done
Determining current state...done

Current state of SQL patches:
Bundle series PSU:
ID 160119 in the binary registry and ID 160119 in the SQL registry

Adding patches to installation queue and performing prereq checks...
Installation queue:
Nothing to roll back
Nothing to apply

SQL Patching tool complete on Wed Mar 2 10:19:11 2016
Finally, we need to verify everything worked:
SQL> select patch_id, action, status from dba_registry_sqlpatch;

PATCH_ID  ACTION          STATUS
--------- --------------- ---------------
21948354  APPLY           SUCCESS
Next, we’ll run the datapatch script in the _MGMTDB database. The script requires that all pluggable databases be open, so let’s double check that before we run the script:
[grid@racnode1 ~]$ . oraenv
ORACLE_SID = [-MGMTDB] ?
The Oracle base remains unchanged with value /u01/app/grid

[grid@racnode1 ~]$ sqlplus / as sysdba

SQL> select name, open_mode from v$pdbs;

NAME                           OPEN_MODE
------------------------------ ----------
PDB$SEED                       READ ONLY
CLUSTER1                       READ WRITE

[grid@racnode1 ~]$ cd $ORACLE_HOME/OPatch
[grid@racnode1 OPatch]$ pwd
/u01/app/12.1.0/grid/OPatch

[grid@racnode1 OPatch]$ ./datapatch -verbose
SQL Patching tool version 12.1.0.2.0 on Wed Mar 2 10:48:36 2016
Copyright (c) 2015, Oracle. All rights reserved.
Log file for this invocation: /u01/app/grid/cfgtoollogs/sqlpatch/
  sqlpatch_14626_2016_03_02_10_48_36/sqlpatch_invocation.log

Connecting to database...OK

Note: Datapatch will only apply or rollback SQL fixes for PDBs
      that are in an open state, no patches will be applied to closed PDBs.
      Please refer to Note: Datapatch: Database 12c Post Patch SQL Automation
      (Doc ID 1585822.1)

Bootstrapping registry and package to current versions...done
Determining current state...done

Current state of SQL patches:
Bundle series PSU:
ID 160119 in the binary registry and ID 160119 in PDB CDB$ROOT, ID 160119
in PDB PDB$SEED, ID 160119 in PDB CLUSTER1

Adding patches to installation queue and performing prereq checks...

Installation queue:

For the following PDBs: CDB$ROOT PDB$SEED CLUSTER1
   Nothing to roll back
   Nothing to apply

SQL Patching tool complete on Wed Mar 2 10:50:57 2016
Finally, we need to verify everything worked:
SQL> select patch_id, action, status from dba_registry_sqlpatch;

PATCH_ID  ACTION          STATUS
--------  --------------- ---------------
21948354  APPLY           SUCCESS
During the writing of Part 11, the January 2016 PSUs were released by Oracle. These are cumulative and bundle together many patches which were released previously. As always, we read the README file which comes with the patch very carefully to see what we’re getting into.
Note, this is a non-rolling patch and requires downtime to apply it.
The January 2016 PSU contains these patches:
Patch #
Description
Applicable Homes
21948354
DB PSU 12.1.0.2.160119
Both DB Homes and Grid Home
21948344
OCW PSU 12.1.0.2.160119
Both DB Homes and Grid Home
22139226
OJVM 12.1.0.2.160119
Only DB Homes
21948341
ACFS PSU 12.1.0.2.160119
Only Grid Home
21436941
DBWLM PSU 12.1.0.2.5
Only Grid Home
Since we’ve already applied Patch #22191349, we can check to see if there’s any overlap. These are the results of running opatch lsinventory for the GI and database $ORACLE_HOME directories:
Patch #
Applied to Homes
21948354
DB & GI
21948344
DB & GI
21948341
GI
21436941
GI
So there is a significant overlap with only Patch #22139226 adding anything new. We could apply just that one patch or we could test the application of the whole patch to make sure it’s smart enough to skip already applied patches and apply just the one we want (#22139226). So let’s do that. We’ll follow the same approach as before, even though we know some of the ground work has already been done.
Task #4.7a: Update opatch.
We must use opatch version 12.1.0.1.7 or later. We already have version 12.1.0.1.10.
Task #4.7b: Create an Oracle Configuration Manager (OCM) Response File.
Since things have changed, we’ll go ahead and re-generate the ocm.rsp file. Just for fun, I ran the diff command to compare the old ocm.rsp file and the new one and it reported they were different. So we’ll use a new one just to be on the safe side.
[grid@racnode1 bin]$ pwd
/u01/app/12.1.0/grid/OPatch/ocm/bin

[grid@racnode1 bin]$ ./emocmrsp -no_banner -output /u01/app/12.1.0/grid/OPatch/ocm/ocm.rsp
Provide your email address to be informed of security issues, install and
initiate Oracle Configuration Manager. Easier for you if you use your My
Oracle Support Email address/User Name.
Visit http://www.oracle.com/support/policies.html for details.
Email address/User Name: <just press Enter here>

You have not provided an email address for notification of security issues.
Do you wish to remain uninformed of security issues ([Y]es, [N]o) [N]:  Y
The OCM configuration response file (/u01/app/12.1.0/grid/OPatch/ocm/ocm.rsp) was
successfully created.

[grid@racnode1 bin]$ cd ..
[grid@racnode1 ocm]$ chmod 775 ocm.rsp
Repeat this step on racnode2.
Task #4.7c: Check the $ORACLE_HOME Inventories.
As before, the point of this step is to generate documentation of what the inventories looked like before the patch was applied. The documentation also says if this command fails, you should contact Oracle Support so presumably a successful run must mean the inventories are healthy.
Task #4.7d: Unzip the Patch.
[grid@racnode1 ~]$ cd /nas1/PATCHES/22191676/grid
[grid@racnode1 grid]$ unzip p22191676_121020_Linux-x86-64.zip
Task #4.7e: Check For One-Off Patch Conflicts.
This is where the patch software should detect the presence of the existing patches and report that they’ll be skipped. Thus leaving only Patch #22191349 to be applied to the database $ORACLE_HOME. Here’s the command to check for conflicts:
So what did this command report? Well, the main opatchauto log file reported this:
...
The following patch(es) are duplicate patches with patches installed in the
Oracle Home.
 [ 21948354]
You have already installed same patch(es) with same UPI(s) or same version(s).
These patch(es) will be skipped.

Opatchauto skipped installing the above patch in /u01/app/12.1.0/grid
...
The GI $ORACLE_HOME log file (referenced in the main opatchauto log file) reported this:
...
The following patch(es) are duplicate patches with patches installed in the
Oracle Home.
[ 21436941 21948341 21948344]
You have already installed same patch(es) with same UPI(s) or same version(s).
These patch(es) will be skipped.
...
So, for the GI $ORACLE_HOME, Patches #21948354, #21948344, #21948341 and #21436941 will all be skipped. This is correct!
The main opatchauto log file also reported this:
...
The following patch(es) are duplicate patches with patches installed in the
Oracle Home.
 [ 21948354]
You have already installed same patch(es) with same UPI(s) or same version(s).
These patch(es) will be skipped.

Opatchauto skipped installing the above patch in
 /u01/app/oracle/product/12.1.0/dbhome_1
...
The database $ORACLE_HOME log file (referenced in the main opatchauto log file) reported this:
...
Patches to apply -> [ 21948344 22139226  ]
Duplicate patches to filter -> [ 21948344  ]
The following patches are duplicate and are skipped:
[ 21948344  ]
OPatch found that the following patches are not required.
All of the constituents of the composite patch [ 21948354 ] are already installed
in the Oracle Home.
...
So, for the database $ORACLE_HOME, Patches #21948354 and 21948344 will be skipped leaving Patch #22139226 to be applied. Again, this is correct!
Task #4.7f: Apply the Patch.
Since we know there are no patches to apply to the GI $ORACLE_HOME, we can choose the option to only apply the patch to the database $ORACLE_HOME. The command template for that is:
Since we’ll be using the opatchauto command from the database $ORACLE_HOME, we should probably generate an OCM response file there:
[oracle@racnode1 bin]$ pwd
/u01/app/oracle/product/12.1.0/dbhome_1/OPatch/ocm/bin

[oracle@racnode1 bin]$ ./emocmrsp -no_banner -output /u01/app/oracle/product/12.1.0/dbhome_1/OPatch/ocm/ocm.rsp
Provide your email address to be informed of security issues, install and
initiate Oracle Configuration Manager. Easier for you if you use your My
Oracle Support Email address/User Name.
Visit http://www.oracle.com/support/policies.html for details.
Email address/User Name: <just press Enter here>

You have not provided an email address for notification of security issues.
Do you wish to remain uninformed of security issues ([Y]es, [N]o) [N]:  Y
The OCM configuration response file (/u01/app/oracle/product/12.1.0/dbhome_1/
 OPatch/ocm/ocm.rsp) was successfully created.

[oracle@racnode1 bin]$ cd ..
[oracle@racnode1 ocm]$ chmod 775 ocm.rsp
First, we need to stop the RAC database:
[oracle@racnode1 ~]$ . oraenv
ORACLE_SID = [RAC1DB1] ?
The Oracle base remains unchanged with value /u01/app/oracle

[oracle@racnode1 ~]$ srvctl stop database -d RAC1DB
Next, stop Clusterware on the remote node (racnode2):
[root@racnode2 ~]# . oraenv
ORACLE_SID = [+ASM2] ?
The Oracle base remains unchanged with value /u01/app/grid

[root@racnode2 ~]# crsctl stop crs
Next, ensure Clusterware is still running on the local node (racnode1):
[root@racnode1 ~]# . oraenv
ORACLE_SID = [+ASM1] ?
The Oracle base remains unchanged with value /u01/app/grid

[root@racnode1 ~]# crsctl check crs
CRS-4638: Oracle High Availability Services is online
CRS-4537: Cluster Ready Services is online
CRS-4529: Cluster Synchronization Services is online
CRS-4533: Event Manager is online
Next, run the opatchauto command according to the template referenced earlier:
The screen output can be viewed here. Overall, it says Patch #22139226 was applied, but that some SQL was not run because the RAC database was down. The good news is the SQL commands/scripts which were not executed are documented in the log file. All they do is query the existence of the SPFILE, startup an instance in upgrade mode, set CLUSTER_DATABASE=FALSE, run the datapatch script (in the $ORACLE_HOME/OPatch directory), then set CLUSTER_DATABASE=TRUE. We’ll apply the patch to racnode2, then run these SQL commands/scripts.
Following the same sequence of steps for racnode2, first generate a new OCM response file:
[oracle@racnode2 bin]$ pwd
/u01/app/oracle/product/12.1.0/dbhome_1/OPatch/ocm/bin

[oracle@racnode2 bin]$ ./emocmrsp -no_banner -output /u01/app/oracle/product/12.1.0/dbhome_1/OPatch/ocm/ocm.rsp
Provide your email address to be informed of security issues, install and
initiate Oracle Configuration Manager. Easier for you if you use your My
Oracle Support Email address/User Name.
Visit http://www.oracle.com/support/policies.html for details.
Email address/User Name: <just press Enter here>

You have not provided an email address for notification of security issues.
Do you wish to remain uninformed of security issues ([Y]es, [N]o) [N]:  Y
The OCM configuration response file (/u01/app/oracle/product/12.1.0/dbhome_1/
  OPatch/ocm/ocm.rsp) was successfully created.

[oracle@racnode2 bin]$ cd ..
[oracle@racnode2 ocm]$ chmod 775 ocm.rsp
Next, re-start Clusterware on racnode2:
[root@racnode2 22191676]# . oraenv
ORACLE_SID = [+ASM2] ?
The Oracle base remains unchanged with value /u01/app/grid
[root@racnode2 22191676]# crsctl start crs
After a few moments, check the Clusterware software stack has re-started:
[root@racnode2 22191676]# crsctl check crs
CRS-4638: Oracle High Availability Services is online
CRS-4537: Cluster Ready Services is online
CRS-4529: Cluster Synchronization Services is online
CRS-4533: Event Manager is online
Next, shutdown Clusterware on the remote node (racnode1):
[root@racnode1 ~]# . oraenv
ORACLE_SID = [RAC1DB1] ? +ASM1
The Oracle base has been changed from /u01/app/oracle to /u01/app/grid

[root@racnode1 ~]# crsctl stop crs
Next, set your environment and run the opatchauto command:
[root@racnode2 ~]# . oraenv
ORACLE_SID = [root] ? RAC1DB2
The Oracle base has been set to /u01/app/oracle

[root@racnode2 ~]# export PATH=$PATH:$ORACLE_HOME/OPatch
[root@racnode2 ~]# which opatchauto
/u01/app/oracle/product/12.1.0/dbhome_1/OPatch/opatchauto
The screen output was the same as the opatchauto run on racnode1 and Patch #22139226 was successfully applied. Now we’ll run the SQL commands which were missed due to the RAC database not being up and running.
The first SQL script just checks for the existence of an SPFILE, so we’ll skip that.
The second SQL script alters the CLUSTER_DATABASE parameter FALSE in the SPFILE:
[oracle@racnode2 ~]$ srvctl start instance -d RAC1DB -n racnode2
[oracle@racnode2 ~]$ sqlplus / as sysdba
SQL> @/u01/app/oracle/product/12.1.0/dbhome_1/cfgtoollogs/oplan/dataPatchfileForSetClusterFalse.sql
System altered.
The third SQL script starts up the instance in upgrade mode:
[oracle@racnode2 ~]$ srvctl stop instance -d RAC1DB -n racnode2
[oracle@racnode2 ~]$ sqlplus / as sysdba
Connected to an idle instance.
SQL> @/u01/app/oracle/product/12.1.0/dbhome_1/cfgtoollogs/oplan/dataPatchfileForStartupUpgrade.sql
ORACLE instance started.

Total System Global Area 2147483648 bytes
Fixed Size                  2926472 bytes
Variable Size            1207961720 bytes
Database Buffers          922746880 bytes
Redo Buffers               13848576 bytes
Database mounted.
Database opened.
The fourth script runs the datapatch script:
[oracle@racnode2 ~]$ /bin/bash -c 'ORACLE_HOME=/u01/app/oracle/product/12.1.0/dbhome_1 ORACLE_SID=RAC1DB2 /u01/app/oracle/product/12.1.0/dbhome_1/OPatch/datapatch'
SQL Patching tool version 12.1.0.2.0 on Thu Mar 3 19:30:35 2016
Copyright (c) 2015, Oracle. All rights reserved.
Connecting to database...OK
Determining current state...done
Adding patches to installation queue and performing prereq checks...done
Installation queue:
Nothing to roll back
The following patches will be applied:
22139226 (Database PSU 12.1.0.2.160119, Oracle JavaVM Component (Jan2016))
Installing patches...
Patch installation complete. Total patches installed: 1
Validating logfiles...done
SQL Patching tool complete on Thu Mar 3 19:34:52 2016
The fifth SQL script alters the CLUSTER_DATABASE parameter TRUE in the SPFILE and shuts down the instance:
[oracle@racnode2 ~]$ sqlplus / as sysdba
SQL> @/u01/app/oracle/product/12.1.0/dbhome_1/cfgtoollogs/oplan/dataPatchfileForSetClusterTrue.sql
System altered.
Database closed.
Database dismounted.
ORACLE instance shut down.
We can now re-start the Clusterware on racnode1:
[root@racnode1 ~]# crsctl start crs
CRS-4123: Oracle High Availability Services has been started.
After waiting for a few moments, we can check the status of CRS:
[root@racnode1 ~]# crsctl check crs
CRS-4638: Oracle High Availability Services is online
CRS-4537: Cluster Ready Services is online
CRS-4529: Cluster Synchronization Services is online
CRS-4533: Event Manager is online
Finally, we can re-start the RAC database:
[oracle@racnode2 ~]$ srvctl start database -d RAC1DB
[oracle@racnode2 ~]$ srvctl status database -d RAC1DB
Instance RAC1DB1 is running on node racnode1
Instance RAC1DB2 is running on node racnode2
Note:
Always read and understand the patch README file before doing anything else.
The README file will not always tell you exactly what to do. Sometimes you have to use common sense and your DBA gene to figure stuff out.
Always test applying a patch to a sandbox or test system for 3 main reasons:
To develop your own procedure so running it in production becomes a mechanical process with little to no thinking required.
To verify that it actually works.
To determine how long it takes so you can schedule an appropriate production outage if necessary.
Task #4.8: Add a Node to the Cluster.
We have a 2 node RAC cluster called cluster1 comprised of servers racnode1 and racnode2. Now let’s expand that cluster to 3 nodes by adding racnode3. After starting up racnode3 using Oracle VM Manager and connecting to the console, there are multiple steps to prepare racnode3 to join the cluster. This mostly involves changes to the OS, networking and shared storage.
Task #4.8a: Install the Cloud Control Management Agent.
Let’s get this out of the way first. Installation instructions for the Management Agent can be found here.
Task #4.8b: Fix the Networking.
Remember that racnode3 is a clone of racnode1, so it’s networking will be identical to racnode1. We need to change that so racnode3 has its own networking setup. An example of how to do that is documented here.
Task #4.8c: Remove IPv6.
If you’re not using IPv6 addressing, its presence on the vNICs will only confuse matters. So it’s best to remove it. Instructions on how to do that can be found here.
Task #4.8d: Fix the Hostname.
When racnode3 powers up, you’ll notice it’s called racnode1. We need to change its identity to racnode3. The procedure to do that is documented here.
Task #4.8e: Edit /etc/hosts.
On racnode3, update the /etc/hosts file so it’s identical to the other RAC nodes. You know it makes sense. A copy of this file can be found here. We will be configuring shared storage on the Openfiler server a little later, so in preparation for that add this entry to the /etc/hosts file on openfiler:
200.200.20.13 racnode3-storage
Task #4.8f: Edit /etc/resolv.conf.
Copy the /etc/resolv.conf file from either of the other 2 RAC nodes. It should contain just these entries:
# Generated by NetworkManager
search mynet.com
nameserver 200.200.10.16
Task #4.8g: Edit /etc/security/limits.conf.
Ensure this file has these entries:
####################################
# for oracle user
####################################
oracle soft nofile 8192
oracle hard nofile 65536
oracle soft nproc 2048
oracle hard nproc 16384
oracle soft stack 10240
oracle hard stack 32768
oracle soft core unlimited
oracle hard core unlimited
oracle hard memlock 5500631
####################################
# for grid user
####################################
grid soft nofile 8192
grid hard nofile 65536
grid soft nproc 2048
grid hard nproc 16384
grid soft stack 10240
grid hard stack 32768
grid soft core unlimited
grid hard core unlimited
Task #4.8h: Rename /etc/ntp.conf.
We’re using Oracle’s Cluster Time Synchronization Service rather than NTP to keep time within the cluster. However, the mere presence of this file can cause problems, so we need to rename it. Here are the steps to do that:
[root@racnode3 ~]# ls -l /etc/ntp.conf
-rw-r--r--. 1 root root 1770 Oct 26 10:38 /etc/ntp.conf
[root@racnode3 ~]# service ntpd status
ntpd is stopped
[root@racnode3 ~]# chkconfig ntpd off
[root@racnode3 ~]# mv /etc/ntp.conf /etc/ntp.conf.ORIG
Task #4.8i: Configure User Equivalency.
User equivalency or passwordless SSH needs to be setup for the racnode3 users oracle and grid. Instructions for configuring SSH can be found here.
Task #4.8j: Configure Shared Storage Within Openfiler.
First, we need to add racnode3-storage to the Network Access Configuration section. Open up the Openfiler management console, click on System, then add the entry for racnode3-storage using these values:
Name
Network/Host
Netmask
Type
racnode3-storage
200.200.20.13
255.255.255.255
Share
The screen should look similar to this:
Next, Click Volumes. The screen should change to this:
Then click iSCSI Targets over on the right hand side. The screen should change to this:
The following procedure should be repeated for iSCSI targets iqn.2006-01.com.openfiler:c1vg-vol01 through iqn.2006-01.com.openfiler:c1vg-vol10.
Use the Select iSCSI Target pull down menu to select the iqn.2006-01.com.openfiler:c1vg-vol01 (it should already be selected by default), then click the Change button. Click on Network ACL and use the Access pull down menu to select Allow for racnode3-storage. The screen should look similar to this:
Click the Update button, then click on Target Configuration and select the next iSCS target.
Task #4.8k: Configure Shared Storage at the OS Level.
First, verify the iSCSI client rpm is installed, then configure the iSCSI client to start on boot up of the node:
[root@racnode3 ~]# rpm -qa | grep iscsi
iscsi-initiator-utils-6.2.0.873-14.0.1.el6.x86_64
[root@racnode3 ~]# chkconfig iscsid on
[root@racnode3 ~]# chkconfig iscsi on
Next, discover the iSCSI Targets coming from the openfiler server:
[root@racnode3 ~]# oracleasm configure -i
Configuring the Oracle ASM library driver.
This will configure the on-boot properties of the Oracle ASM library
driver. The following questions will determine whether the driver is
loaded on boot and what permissions it will have. The current values
will be shown in brackets ('[]'). Hitting <ENTER> without typing an
answer will keep that current value. Ctrl-C will abort.
Default user to own the driver interface []: grid
Default group to own the driver interface []: asmadmin
Start Oracle ASM library driver on boot (y/n) [n]: y
Scan for Oracle ASM disks on boot (y/n) [y]: y
Writing Oracle ASM library driver configuration: done
Next, initialize Oracle ASM:
[root@racnode1 ~]# oracleasm init
Creating /dev/oracleasm mount point: /dev/oracleasm
Loading module "oracleasm": oracleasm
Configuring "oracleasm" to use device physical block size
Mounting ASMlib driver filesystem: /dev/oracleasm
Finally, instantiate the ASM Disks:
[root@racnode3 ~]# oracleasm scandisks
Reloading disk partitions: done
Cleaning any stale ASM disks...
Scanning system for ASM disks...
Instantiating disk "ASMDISK01"
Instantiating disk "ASMDISK02"
Instantiating disk "ASMDISK03"
Instantiating disk "ASMDISK04"
Instantiating disk "ASMDISK05"
Instantiating disk "ASMDISK06"
Instantiating disk "ASMDISK07"
Instantiating disk "ASMDISK08"
Instantiating disk "ASMDISK09"
Instantiating disk "ASMDISK10"
Task #4.8m: Run the cluvfy Utility.
As the grid user, run the following cluvfy utility command from the original software installation node (racnode1):
[grid@racnode3 ~]$ olsnodes -n -i -s -t -a
racnode1 1 racnode1-vip.mynet.com Active Hub Unpinned
racnode2 2 racnode2-vip.mynet.com Active Hub Unpinned
racnode3 3 racnode3-vip.mynet.com Active Hub Unpinned
Next, check CRS is up and running:
[grid@racnode3 ~]$ crsctl check crs
CRS-4638: Oracle High Availability Services is online
CRS-4537: Cluster Ready Services is online
CRS-4529: Cluster Synchronization Services is online
CRS-4533: Event Manager is online
Next, check the status of the SCAN VIPs:
[grid@racnode3 ~]$ srvctl status scan
SCAN VIP scan1 is enabled
SCAN VIP scan1 is running on node racnode1
SCAN VIP scan2 is enabled
SCAN VIP scan2 is running on node racnode3
SCAN VIP scan3 is enabled
SCAN VIP scan3 is running on node racnode2
Next, check the status of the nodeapps:
[grid@racnode3 ~]$ srvctl status nodeapps
VIP racnode1-vip.mynet.com is enabled
VIP racnode1-vip.mynet.com is running on node: racnode1
VIP racnode2-vip.mynet.com is enabled
VIP racnode2-vip.mynet.com is running on node: racnode2
VIP racnode3-vip.mynet.com is enabled
VIP racnode3-vip.mynet.com is running on node: racnode3
Network is enabled
Network is running on node: racnode1
Network is running on node: racnode2
Network is running on node: racnode3
ONS is enabled
ONS daemon is running on node: racnode1
ONS daemon is running on node: racnode2
ONS daemon is running on node: racnode3
Finally, check the status of ASM:
[grid@racnode3 ~]$ srvctl status asm
ASM is running on racnode2,racnode3,racnode1
Task #4.8o: Run the Database addnode.sh
With racnode3 now officially a member of the cluster, we now need to make it a database server. This is done in two stages. The first is to clone the database software using an existing cluster node, followed by adding a RAC database instance to racnode3.
Note, a non-domain qualified hostname is sufficient, i.e. racnode3 rather than racnode3.mynet.com.
The addnode script invokes a database installer GUI. Click the checkbox for racnode3:
Click Next:
As usual, it’s complaining about swap space which we know we can ignore. Click the Ignore All checkbox, then click Next:
Click Yes:
On the Summary screen, click Install:
The database $ORACLE_HOME on racnode1 is cloned to racnode3:
Towards the end of the cloning process, you’ll be asked to run a root.sh script on racnode3:
[root@racnode3 dbhome_1]# pwd
/u01/app/oracle/product/12.1.0/dbhome_1
[root@racnode3 dbhome_1]# ./root.sh
Performing root user operation.
The following environment variables are set as:
ORACLE_OWNER= oracle
ORACLE_HOME= /u01/app/oracle/product/12.1.0/dbhome_1
Enter the full pathname of the local bin directory: [/usr/local/bin]:
The contents of "dbhome" have not changed. No need to overwrite.
The contents of "oraenv" have not changed. No need to overwrite.
The contents of "coraenv" have not changed. No need to overwrite.
Entries will be added to the /etc/oratab file as needed by
Database Configuration Assistant when a database is created
Finished running generic part of root script.
Now product-specific root actions will be performed.
Once the root.sh script completes, return to the GUI, click OK to confirm the completion of the root.sh script, then click Close:
Task #4.8p: Run the Database Configuration Assistant (dbca).
All that’s happened is the Oracle database software has been installed onto racnode3. To extend the RAC database to a third instance, we need to run the Database Configuration Assistant from a node where an instance is already up and running, e.g. racnode1:
[oracle@racnode1 ~]$ . oraenv
ORACLE_SID = [RAC1DB1] ?
The Oracle base remains unchanged with value /u01/app/oracle
[oracle@racnode1 ~]$ which dbca
/u01/app/oracle/product/12.1.0/dbhome_1/bin/dbca
[oracle@racnode1 ~]$ dbca
Select Instance Management, then click Next:
Select Add an Instance, then click Next:
Select RAC1DB, then click Next:
Click Next:
Accept the default instance name of RAC1DB3 and click Next:
On the Summary screen, click Finish:
The GUI does its thing:
Finally, click Close:
We should now have a new instance up and running on racnode3. Let’s find out:
After adding a RAC1DB3 entry to the local /etc/oratab file:
[oracle@racnode3 dbhome_1]$ . oraenv
ORACLE_SID = [oracle] ? RAC1DB3
The Oracle base has been set to /u01/app/oracle
[oracle@racnode3 dbhome_1]$ sqlplus / as sysdba
SQL> select instance_name from v$instance;
INSTANCE_NAME
----------------
RAC1DB3
We know we’re using ASM, but we had no direct control over where the new instance’s files were created. So let’s make sure they exist in the correct place:
SQL> select lf.member from v$logfile lf where lf.group# in ( select l.group# from v$log l where l.thread# = 3 );
MEMBER
--------------------------------------------------------------------------------
+DATA/RAC1DB/ONLINELOG/group_6.270.905859405
+FRA/RAC1DB/ONLINELOG/group_6.481.905859405
+DATA/RAC1DB/ONLINELOG/group_5.271.905859405
+FRA/RAC1DB/ONLINELOG/group_5.482.905859407
SQL> select file_name from dba_data_files where tablespace_name = 'UNDOTBS3';
FILE_NAME
--------------------------------------------------------------------------------
+DATA/RAC1DB/DATAFILE/undotbs3.269.905859401
Finally, let’s make sure the cluster agrees the RAC1DB3 instance is part of our setup:
[oracle@racnode3 ~]$ srvctl status database -d RAC1DB
Instance RAC1DB1 is running on node racnode1
Instance RAC1DB2 is running on node racnode2
Instance RAC1DB3 is running on node racnode3
And for those of you who are paranoid like myself, let’s just see the process running:
Note, before we dive into deleting the node we just added, there are a few items worth mentioning so we’re all on the same page:
Our RAC database is admin-managed and we will be removing the instance and the Oracle Database software. The procedure is different for a policy-managed database.
Before removing an instance, ensure any services associated with that instance are relocated to other instances.
Ensure the services are configured such that the deleted instance is neither a preferred nor available instance.
Task #4.9a: Run the Database Configuration Assistant (dbca).
From a node other than the one which runs the instance you wish to delete, fire up dbca:
[oracle@racnode1 ~]$ . oraenv
ORACLE_SID = [RAC1DB1] ?
The Oracle base remains unchanged with value /u01/app/oracle
[oracle@racnode1 ~]$ dbca
Select Instance Management, then click Next:
Select Delete an Instance, then click Next:
Select RAC1DB, then click Next:
Select RAC1DB3, then click Next:
Click Finish:
Click OK to proceed:
The familiar progress bar tracks progress, then rather bizarrely a dialog box appears with a red cross, the digit 1 and an OK button. Clicking the OK button closes the dbca. Question is, did the removal of the RAC1DB3 instance succeed? Let’s find out:
SQL> select tablespace_name from dba_tablespaces where tablespace_name like 'UNDO%';
TABLESPACE_NAME
------------------------------
UNDOTBS1
UNDOTBS2
Looks like the instance RAC1DB3 has been deleted.
The Oracle Database software is still installed and the racnode3 node is still part of the cluster:
[oracle@racnode3 dbhome_1]$ pwd
/u01/app/oracle/product/12.1.0/dbhome_1
[grid@racnode3 ~]$ olsnodes -n -i -s -t -a
racnode1 1 racnode1-vip.mynet.com Active Hub Unpinned
racnode2 2 racnode2-vip.mynet.com Active Hub Unpinned
racnode3 3 racnode3-vip.mynet.com Active Hub Unpinned
Task #4.9b: Deinstall the Oracle Database Software.
To update the Oracle Inventory on racnode3, run this:
[oracle@racnode3 bin]$ pwd
/u01/app/oracle/product/12.1.0/dbhome_1/oui/bin
[oracle@racnode3 bin]$ ./runInstaller -updateNodeList ORACLE_HOME=/u01/app/oracle/product/12.1.0/dbhome_1 "CLUSTER_NODES={racnode3}" -local
Starting Oracle Universal Installer...
Checking swap space: must be greater than 500 MB. Actual 4044 MB Passed
The inventory pointer is located at /etc/oraInst.loc
'UpdateNodeList' was successful.
To delete the database $ORACLE_HOME on racnode3, run this:
The output is quite verbose and can be viewed here. There was one failure. The script could not delete the directory /u01/app/oracle because another session was in that directory. Lesson learned! Apart from that, the Oracle Database software was completely removed from racnode3.
Finally, update the Oracle Inventories on the remaining nodes by running this:
[oracle@racnode1 bin]$ pwd
/u01/app/oracle/product/12.1.0/dbhome_1/oui/bin
[oracle@racnode1 bin]$ ./runInstaller -updateNodeList ORACLE_HOME=/u01/app/oracle/product/12.1.0/dbhome_1 "CLUSTER_NODES={racnode1,racnode2}" LOCAL_NODE=racnode1
Starting Oracle Universal Installer...
Checking swap space: must be greater than 500 MB. Actual 4032 MB Passed
The inventory pointer is located at /etc/oraInst.loc
'UpdateNodeList' was successful.
The Oracle Database software installation has been deleted, but racnode3 is still seen as part of the cluster:
[oracle@racnode3 oracle]$ pwd
/u01/app/oracle
[oracle@racnode3 oracle]$ ls -la
drwxrwxr-x 2 oracle oinstall 4096 Mar 7 21:09 .
drwxr-xr-x 6 root oinstall 4096 Mar 4 10:59 ..
[grid@racnode1 ~]$ olsnodes -n -i -s -t -a
racnode1 1 racnode1-vip.mynet.com Active Hub Unpinned
racnode2 2 racnode2-vip.mynet.com Active Hub Unpinned
racnode3 3 racnode3-vip.mynet.com Active Hub Unpinned
Task #4.9c: Deinstall the Oracle Grid Infrastructure Software.
To update the Oracle Inventory on racnode3, run this:
[grid@racnode3 bin]$ pwd
/u01/app/12.1.0/grid/oui/bin
[grid@racnode3 bin]$ ./runInstaller -updateNodeList ORACLE_HOME=/u01/app/12.1.0/grid "CLUSTER_NODES={racnode3}" CRS=TRUE -silent -local
Starting Oracle Universal Installer...
Checking swap space: must be greater than 500 MB. Actual 4044 MB Passed
The inventory pointer is located at /etc/oraInst.loc
'UpdateNodeList' was successful.
To delete the GI $ORACLE_HOME on racnode3, run the following command.
Note, this will shutdown Clusterware and ASM on racnode3 and relocate the LISTENER_SCANn to another node.
The output is quite verbose and can be viewed here. In addition, part way through a generated script needs to be run as the root user. Its output can be viewed here.
To update the Oracle Inventories of the remaining nodes, run these commands:
[grid@racnode1 bin]$ pwd
/u01/app/12.1.0/grid/oui/bin
[grid@racnode1 bin]$ ./runInstaller -updateNodeList ORACLE_HOME=/u01/app/12.1.0/grid "CLUSTER_NODES={racnode1,racnode2}" CRS=TRUE -silent
Starting Oracle Universal Installer...
Checking swap space: must be greater than 500 MB. Actual 4028 MB Passed
The inventory pointer is located at /etc/oraInst.loc
'UpdateNodeList' was successful.
[oracle@racnode1 bin]$ pwd
/u01/app/oracle/product/12.1.0/dbhome_1/oui/bin
[oracle@racnode1 bin]$ ./runInstaller -updateNodeList ORACLE_HOME=/u01/app/oracle/product/12.1.0/dbhome_1 "CLUSTER_NODES={racnode1,racnode2}"
Starting Oracle Universal Installer...
Checking swap space: must be greater than 500 MB. Actual 4028 MB Passed
The inventory pointer is located at /etc/oraInst.loc
'UpdateNodeList' was successful.
[root@racnode1 ~]# crsctl delete node -n racnode3
CRS-4661: Node racnode3 successfully deleted.
Finally, let’s verify racnode3 is no longer part of the cluster:
[grid@racnode1 ~]$ cluvfy stage -post nodedel -n racnode3 -verbose
Performing post-checks for node removal
Checking CRS integrity...
The Oracle Clusterware is healthy on node "racnode1"
CRS integrity check passed
Clusterware version consistency passed.
Result: Node removal check passed
Post-check for node removal was successful.
[grid@racnode1 ~]$ olsnodes -n -i -s -t -a
racnode1 1 racnode1-vip.mynet.com Active Hub Unpinned
racnode2 2 racnode2-vip.mynet.com Active Hub Unpinned
So there it is, racnode3 successfully removed from the cluster.
That about wraps it up for Part 11. In Part 12 we tackle Oracle Recovery Manager. You never know, you might want to back something up and restore it again. See you next time.
If you have any comments or questions about this post, please use the Contact form here.
When starting up VMs from OVM Manager, you may encounter this error:
Error: Device 1 (vif) could not be connected. Hotplug scripts not working
Note, the Device could be 0, 2, etc. depending upon the number of vNICs you have configured.
What’s happening is the vNICs are not being initialized by the Hotplug scripts within the specified time limit. It could also be the side effect of a Xen memory leak which is a known bug. If the VM can be started without any vNICs, then you’ll know you have this issue. Here are 3 things you can try if you’re in this situation.
Solution #1: Add the vNICs one at a time.
RACNODE2_VM has an ID of 0004fb00000600000703eab3e0c76af5.
We know from creating the VM storage repositories earlier, that the VM_Filesystems_Repo has an ID of 0004fb000003000059416081b6e25e36. If we log onto the Oracle VM server itself, we can locate this VM’s configuration file called vm.cfg:
[root@ovmsvr]# cd /
[root@ovmsvr]# cd OVS
[root@ovmsvr]# cd Repositories
[root@ovmsvr]# cd 0004fb000003000059416081b6e25e36
[root@ovmsvr]# cd VirtualMachines
[root@ovmsvr]# cd 0004fb00000600000703eab3e0c76af5
[root@ovmsvr]# pwd
/OVS/Repositories/0004fb000003000059416081b6e25e36/VirtualMachines/
0004fb00000600000703eab3e0c76af5
[root@ovmsvr]# ls -l
total 0
-rw------- 1 root root 981 Dec 17 22:03 vm.cfg
The vm.cfg file contains the VM configuration data. The first line in vm.cfg specifies the vNIC MAC addresses. For example:
Make a copy of this line and comment it out so you have a record of what it looked like originally. Then edit the original line, removing all but the first mac and bridge pair. Then start the VM. If that works, stop the VM, edit this line to include the first 2 mac and bridge pairs, then start the VM again. If that works, try starting the VM with this line containing all 3 mac and bridge pairs (i.e. as the line looked originally). This has worked for me, but not always.
Solution #2: Restart the ovs-agent service.
The problem may be caused by a memory leak which is a known bug. This is documented on MOS, Doc ID 2077214.1. What that note effectively tells you to do is restart the ovs-agent service:
[root@ovmsvr ~]# service ovs-agent restart
Stopping Oracle VM Agent: [ OK ]
Starting Oracle VM Agent: [ OK ]
This is a quick and easy workaround and has worked for me.
Solution #3: Edit and re-start.
The problem could be the value of DEVICE_CREATE_TIMEOUT which defaults to 100. According to MOS, Doc ID 1089604.1, this timeout value can be increased. Thus giving the Hotplug scripts more time to complete their tasks. This is done by editing this file, /etc/xen/xend-config.sxp.
Find this line:
#(device-create-timeout 100)
and change it to this:
(device-create-timeout 150)
I have had some success with this solution, but VMs have refused to start after making this change. I got around that by using solution #2.
Note, to make this change effective restart of the OVM Server, which takes ALL your VMs down!
Error Logging Into Oracle VM Manager:
If you’ve not logged into OVM Manager for a while, you may find it’s taken an extended vacation. This can take the form of having to wait a really long time after you’ve entered your username and password, then it throws an “unexpected” error with this accompanying text:
java.lang.NullPointerException
I know, right? How unusual for Java to have had a problem. I mean it’s so rock solid and stable!
Now, you’re probably wanting to log in because you have something to do and don’t have a week to trawl through countless log files trying to find out why Java has had a hissy fit. So the quickest and simplest way to get logged into OVM Manager after seeing this error is to stop and re-start it:
[root@ovmmgr ~]# service ovmm stop
Stopping Oracle VM Manager [ OK ]
[root@ovmmgr ~]# service ovmm start
Starting Oracle VM Manager [ OK ]
Once OVM Manager is up and running, trying logging in again.
VM Stuck on ‘Stopping’:
Every now and then stopping a VM puts the VM into a ‘Stopping’ state in OVM Manager and that’s where it stays. Aborting the stop or restart and trying again has no effect other than to wind you up. Brilliant! Fortunately there’s a back door method to kick the VM to death, then resurrect it safely. For this you will need the ID for the VM. This can be obtained via OVM Manager.
Click the arrowhead to the left of the VM name. This opens up the Configuration tab. Make a note of the long VM ID string.
Next, log into the OVM server as root and locate the directory where the VM configuration file is located (vm.cfg). The path will be something like this:
Next, run two xm commands. One to destroy the VM (it doesn’t actually destroy it – rather it destroys the processes running the VM) and the other to create the VM using its configuration file: Here’s an example (where the string ending in 8f4 is the ID of the VM):
After building and configuring the hardware infrastructure, it’s time to install some Oracle software. If all the prior tasks have been completed successfully, the software installations should be easy. In Part 10, we’ll install the OEM Management Agent, Oracle 12c Grid Infrastructure and the database software.
Task #1: Install the OEM Cloud Control Management Agent.
To avoid the hassle of adding targets manually to Cloud Control later, we’ll install the Management Agent now so it’ll just pick up targets as they materialize. Just 4 steps should do it.
Task #1a: Create a Management Agent Software Directory.
We need to create a base directory for the Management Agent software. It’s required that the base directory and all its parent directories are owned by the installing user (oracle). Therefore, we can’t install the Management Agent into /u01/app/oracle because /u01/app is owned by the grid user. So, on both racnode1 and racnode2, create a directory for the Management Agent software installation using these commands:
Since the Management Agent software will be the first Oracle software installed on the RAC server nodes, there won’t be a pre-existing Oracle Inventory it can write to. That causes a problem when Cloud Control tries to deploy the Management Agent. To get around that, do this:
A fully documented /etc/hosts file can be viewed here.
Task 1d: Use Cloud Control.
For this walkthrough we’ll use racnode2 as the example. You could deploy Management Agents to both racnode servers at the same time or install them one at a time. Your call.
Log into Cloud Control, click on Setup ⇒ Add Target ⇒ Add Targets Manually:
Click Add Host:
Click on the Add menu, choose Manually then enter hostname (racnode2.mynet.com) and platform (Linux x86-64):
Click Next, then use these values to populate the screen:
Field
Value
Installation Base Directory
/u01/oracle/agent
Instance Directory
/u01/oracle/agent/agent_inst
In addition, create a new Named Credential for the oracle OS user then click OK:
With all the fields populated, the screen should look similar to this:
Click Next:
Click Deploy Agent:
The deploy proceeds until it starts whining about running a root script. This can be ignored for now. Click the Continue menu then choose Continue, All hosts:
Now you can run the root.sh script as specified on the screen (/u01/oracle/agent/core/12.1.0.5.0/root.sh):
Then click the Done button and you’re done. Management Agent Deployed!
You can check all is well with the Management Agent by running these commands as the oracle user:
[oracle@racnode2 ~]$ cd /u01/oracle/agent/agent_inst/bin
[oracle@racnode2 bin]$ ./emctl status agent
Oracle Enterprise Manager Cloud Control 12c Release 5
Copyright (c) 1996, 2015 Oracle Corporation. All rights reserved.
---------------------------------------------------------------
Agent Version : 12.1.0.5.0
OMS Version : 12.1.0.5.0
Protocol Version : 12.1.0.1.0
Agent Home : /u01/oracle/agent/agent_inst
Agent Log Directory : /u01/oracle/agent/agent_inst/sysman/log
Agent Binaries : /u01/oracle/agent/core/12.1.0.5.0
Agent Process ID : 4519
Parent Process ID : 4258
Agent URL : https://racnode2.mynet.com:3872/emd/main/
Local Agent URL in NAT : https://racnode2.mynet.com:3872/emd/main/
Repository URL : https://oraemcc.mynet.com:4903/empbs/upload
Started at : 2016-01-26 13:55:19
Started by user : oracle
Operating System : Linux version 3.8.13-118.2.2.el6uek.x86_64 (amd64)
Last Reload : (none)
Last successful upload : 2016-02-02 21:50:25
Last attempted upload : 2016-02-02 21:50:25
Total Megabytes of XML files uploaded so far : 8.58
Number of XML files pending upload : 0
Size of XML files pending upload(MB) : 0
Available disk space on upload filesystem : 32.51%
Collection Status : Collections enabled
Heartbeat Status : Ok
Last attempted heartbeat to OMS : 2016-02-02 21:52:44
Last successful heartbeat to OMS : 2016-02-02 21:52:44
Next scheduled heartbeat to OMS : 2016-02-02 21:53:44
---------------------------------------------------------------
Agent is Running and Ready
Task #2: Run the Grid Infrastructure Installer.
With the Grid Infrastructure software copied to racnode1 and unzipped, ensure your DISPLAY environment variable is set to the IP address or hostname of your workstation:
Note, the Grid Infrastructure software is installed by the grid user.
Test this is working by running an X Windows program, making sure the display opens on your workstation. Most people tend to use xclock as do I from time to time. I prefer xeyes though because it’s funnier:
[grid@racnode1 grid]$ xeyes
With the display set correctly, invoke the Grid Infrastructure installer:
[grid@racnode1 grid]$ ./runInstaller
Select Install and Configure Oracle Grid Infrastructure for a Cluster, then click Next:
Select Configure a Standard cluster, then click Next:
Select Advanced Installation, then click Next:
Use these values to populate the next screen, then click Next:
Field
Value
Cluster Name
cluster1
SCAN Name
cluster1-scan.mynet.com
SCAN Port
1521
Configure GNS
Uncheck this box
Use these values to populate the next screen, then click SSH connectivity:
Public Hostname
Virtual Hostname
racnode1.mynet.com
racnode1-vip.mynet.com
racnode2.mynet.com
racnode2-vip.mynet.com
After clicking SSH connectivity, enter the OS password of the grid user, then click Setup. Let the installer re-do the SSH setup. It uses RSA keys. Again, let Oracle take care of this. If the installation goes wrong due to a user equivalency problem, it won’t be your fault! Once SSH is re-configured, click Next.
Use these values to populate the next screen, then click Next:
Interface Name
Subnet
Use for
eth0
200.200.10.0
Public
eth1
200.200.20.0
Do Not Use
eth2
200.200.30.0
Private
Note, although we are using eth1 to access shared storage, Oracle Grid Infrastructure has no business on this network so it must be flagged as “Do Not Use”.
Select Use Standard ASM for storage, then click Next:
Click the Change Discovery Path button:
Change the Disk Discovery Path to /dev/oracleasm/disks/* then click OK:
Use these values to populate the next screen, then click Next:
Field
Value
Disk group name
CRS
Redundancy
External
Disk Path
Check /dev/oracleasm/disks/ASMDISK01
Click Use same password for these accounts, enter a password for SYSASM twice, then click Next:
Select Do not use Intelligent Platform Management Interface (IPMI):
Click the check box to Register with Enterprise Manager (EM) Cloud Control. Use these values to populate the screen, then click Next:
The 3 OS groups should be pre-populated with these values. Click Next:
OS Group
OS Group Name
Oracle ASM Administrator (OSASM) Group
asmadmin
Oracle ASM DBA (OSDBA for ASM) Group
asmdba
Oracle ASM Operator (OSOPER for ASM) Group (Optional)
asmoper
Use these values to populate the next screen, then click Next:
Field
Value
Oracle base
/u01/app/grid
Software location
/u01/app/12.1.0/grid
Make sure the Automatically run configuration scripts check box is unchecked. We’ll be running root scripts as the root user from the command line later. Click Next:
This next screen shows the results of the prerequisite checks. As you can see, the swap space issue came up which we know we can ignore. The screen also shows a Device Checks for ASM failure. What this boils down to is the installer’s inability to detect shared storage on both the RAC nodes.
Here is the full text of the failure:
Device Checks for ASM - This is a prerequisite check to verify that the specified
devices meet the requirements for ASM.
Check Failed on Nodes: [racnode2, racnode1]
Verification result of failed node: racnode2
Expected Value : cvuqdisk-1.0.9-1
Actual Value : cvuqdisk-1.0.9-1
Details:
-
PRVF-9802 : Attempt to get 'udev' information from node "racnode2" failed No UDEV rule
found for device(s) specified - Cause: An attempt to read the ''udev'' permission or
rule file failed, or the permission or rule file did not contain any rules for the
specified device or devices.
- Action: Make sure that the ''udev'' permission or rule directory is created, the
''udev'' permission or rule file is available and accessible by the user running the
check and that the permission or rule file contains the correct ''udev'' rule for the
device or devices being checked.
Back to Top
Verification result of failed node: racnode1
Expected Value : cvuqdisk-1.0.9-1
Actual Value : cvuqdisk-1.0.9-1
Details:
-
PRVF-9802 : Attempt to get 'udev' information from node "racnode1" failed No UDEV rule
found for device(s) specified - Cause: An attempt to read the ''udev'' permission or
rule file failed, or the permission or rule file did not contain any rules for the
specified device or devices.
- Action: Make sure that the ''udev'' permission or rule directory is created, the
''udev'' permission or rule file is available and accessible by the user running the
check and that the permission or rule file contains the correct ''udev'' rule for the
device or devices being checked.
What this essentially means is a check was made for the presence of the CVUQDISK package on both racnode1 and racnode2 (remember we installed that here). The installer is looking for version 1.0.9-1 and it found version 1.0.9-1, but apparently that wasn’t good enough. Further checks were made for udev rules regarding the shared disk selected earlier (ASMDISK01) and the installer couldn’t find those either. I actually tried this installation both with and without udev rules and it didn’t make any difference to the reporting of this ‘failure’. I even tried re-installing the CVUQDISK package on both nodes and that also made no difference. My thought was if this was such a significant problem we’d find out soon enough because the GI installation would fail. Hint – it doesn’t fail so ignore this ‘failure’ if you see it.
Click Yes:
On the Summary screen, click Install:
The installation thunders along:
Until a window pops up inviting you to run a root.sh script on both nodes.
Note, it is important that you run this script to completion in the order of the nodes listed, i.e. racnode1 first and racnode2 second.
The root.sh scripts take quite a while to run and their output is quite verbose. You can see what it looks like here. Once the root.sh script completes on racnode2, click OK. The installation will continue. Again, this part of the installation takes some time:
When the installation completes, you’ll see this screen:
That’s Grid Infrastructure installed. Next, install the database software.
Task #3: Run the Database Installer.
Using FileZilla or your favorite file copy utility, copy the 2 Oracle Database software zip files to racnode1 and unzip them.
Note, the database software is installed by the oracle user.
With the display setup correctly, invoke the database installer:
[oracle@racnode1 database]$ ./runInstaller
Uncheck the I wish to receive security updates via My Oracle Support option, then click Next:
Choose to remain uninformed by clicking Yes:
Select the Install database software only option, then click Next:
Select the Oracle Real Application Clusters database installation option, then click Next:
Make sure both nodes are selected. If you want the installer to re-do the SSH (user equivalency) setup, click the SSH connectivity button. When complete, click Next:
Select your preferred language:
Select Enterprise Edition, then click Next:
Use the following values to populate the next screen, then click Next:
Field
Value
Oracle base
/u01/app/oracle
Software location
/u01/app/oracle/product/12.1.0/dbhome_1
The next screen should pre-populate with the correct OS groups. If so, click Next:
OS Group Privilege
OS Group
Database Administrator (OSDBA) group
dba
Database Operator (OSOPER) group (Optional)
oper
Database Backup and Recovery (OSBACKUPDBA) group
backupdba
Data Guard administrative (OSDGDBA) group
dgdba
Encryption Key Management administrative (OSKMDBA) group
kmdba
As with the Grid Infrastructure installation, the installer complains about swap space. We can safely ignore this prerequisite check failure by checking Ignore All and clicking Next:
Click Yes:
On the Summary screen, click Install:
The familiar progress bar screen appears:
After a short while, this window appears inviting you to run the root.sh script on racnode1 and racnode2. Always run the root.sh script to completion in the order the nodes are listed. When complete, click OK:
The root.sh script output looks like this:
[root@racnode1 ~] cd /u01/app/oracle/product/12.1.0/dbhome_1
[root@racnode1 dbhome_1]# ./root.sh
Performing root user operation.
The following environment variables are set as:
ORACLE_OWNER= oracle
ORACLE_HOME= /u01/app/oracle/product/12.1.0/dbhome_1
Enter the full pathname of the local bin directory: [/usr/local/bin]:
The contents of "dbhome" have not changed. No need to overwrite.
The contents of "oraenv" have not changed. No need to overwrite.
The contents of "coraenv" have not changed. No need to overwrite.
Entries will be added to the /etc/oratab file as needed by
Database Configuration Assistant when a database is created
Finished running generic part of root script.
Now product-specific root actions will be performed.
[root@racnode2 ~] cd /u01/app/oracle/product/12.1.0/dbhome_1
[root@racnode2 dbhome_1]# ./root.sh
Performing root user operation.
The following environment variables are set as:
ORACLE_OWNER= oracle
ORACLE_HOME= /u01/app/oracle/product/12.1.0/dbhome_1
Enter the full pathname of the local bin directory: [/usr/local/bin]:
The contents of "dbhome" have not changed. No need to overwrite.
The contents of "oraenv" have not changed. No need to overwrite.
The contents of "coraenv" have not changed. No need to overwrite.
Entries will be added to the /etc/oratab file as needed by
Database Configuration Assistant when a database is created
Finished running generic part of root script.
Now product-specific root actions will be performed.
Finally, the successful completion screen is displayed:
We now have everything we need in place to create an Oracle RAC database. Obviously it’s important to test and verify that what you have installed is actually up and running correctly. We’ll run a series of tests after we create a RAC database in Part 11. See you there!
If you have any comments or questions about this post, please use the Contact form here.